How to Use SmartElex L298N Motor Driver with Onboard Arduino Uno: Examples, Pinouts, and Specs
Introduction
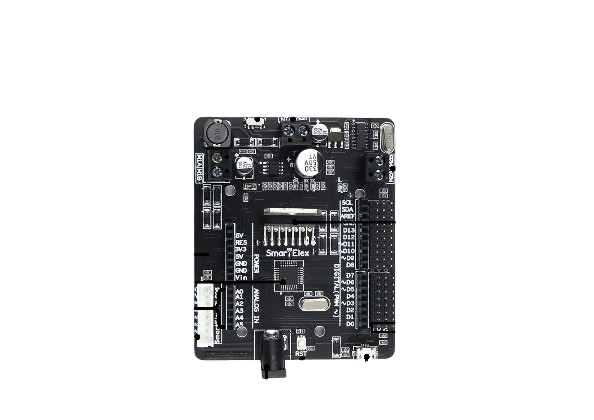
The SmartElex L298N Motor Driver with Onboard Arduino Uno is an integrated module designed to control motors with ease using the Arduino platform. This component combines the robust L298N motor driver, capable of driving two DC motors or one stepper motor, with the functionality of an Arduino Uno. It is ideal for hobbyists, educators, and engineers who require a simple and efficient way to incorporate motor control into their projects.
Explore Projects Built with SmartElex L298N Motor Driver with Onboard Arduino Uno
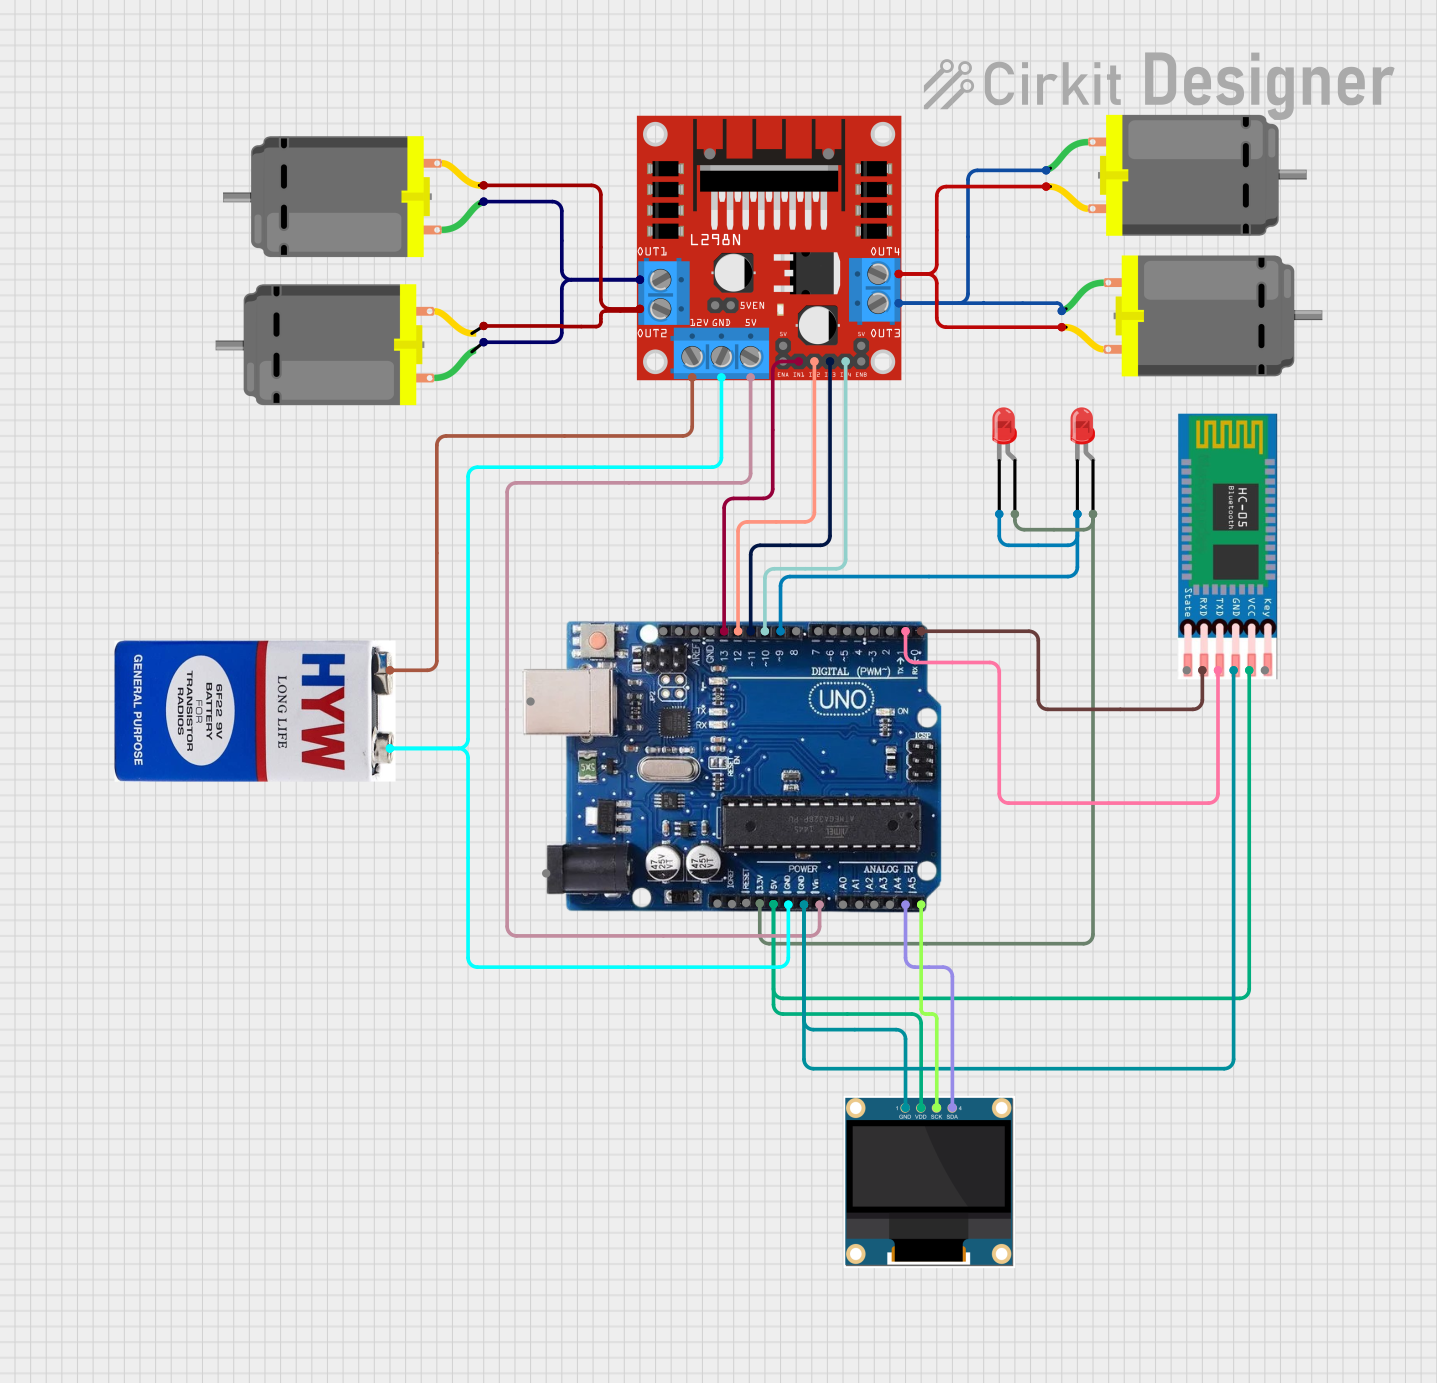
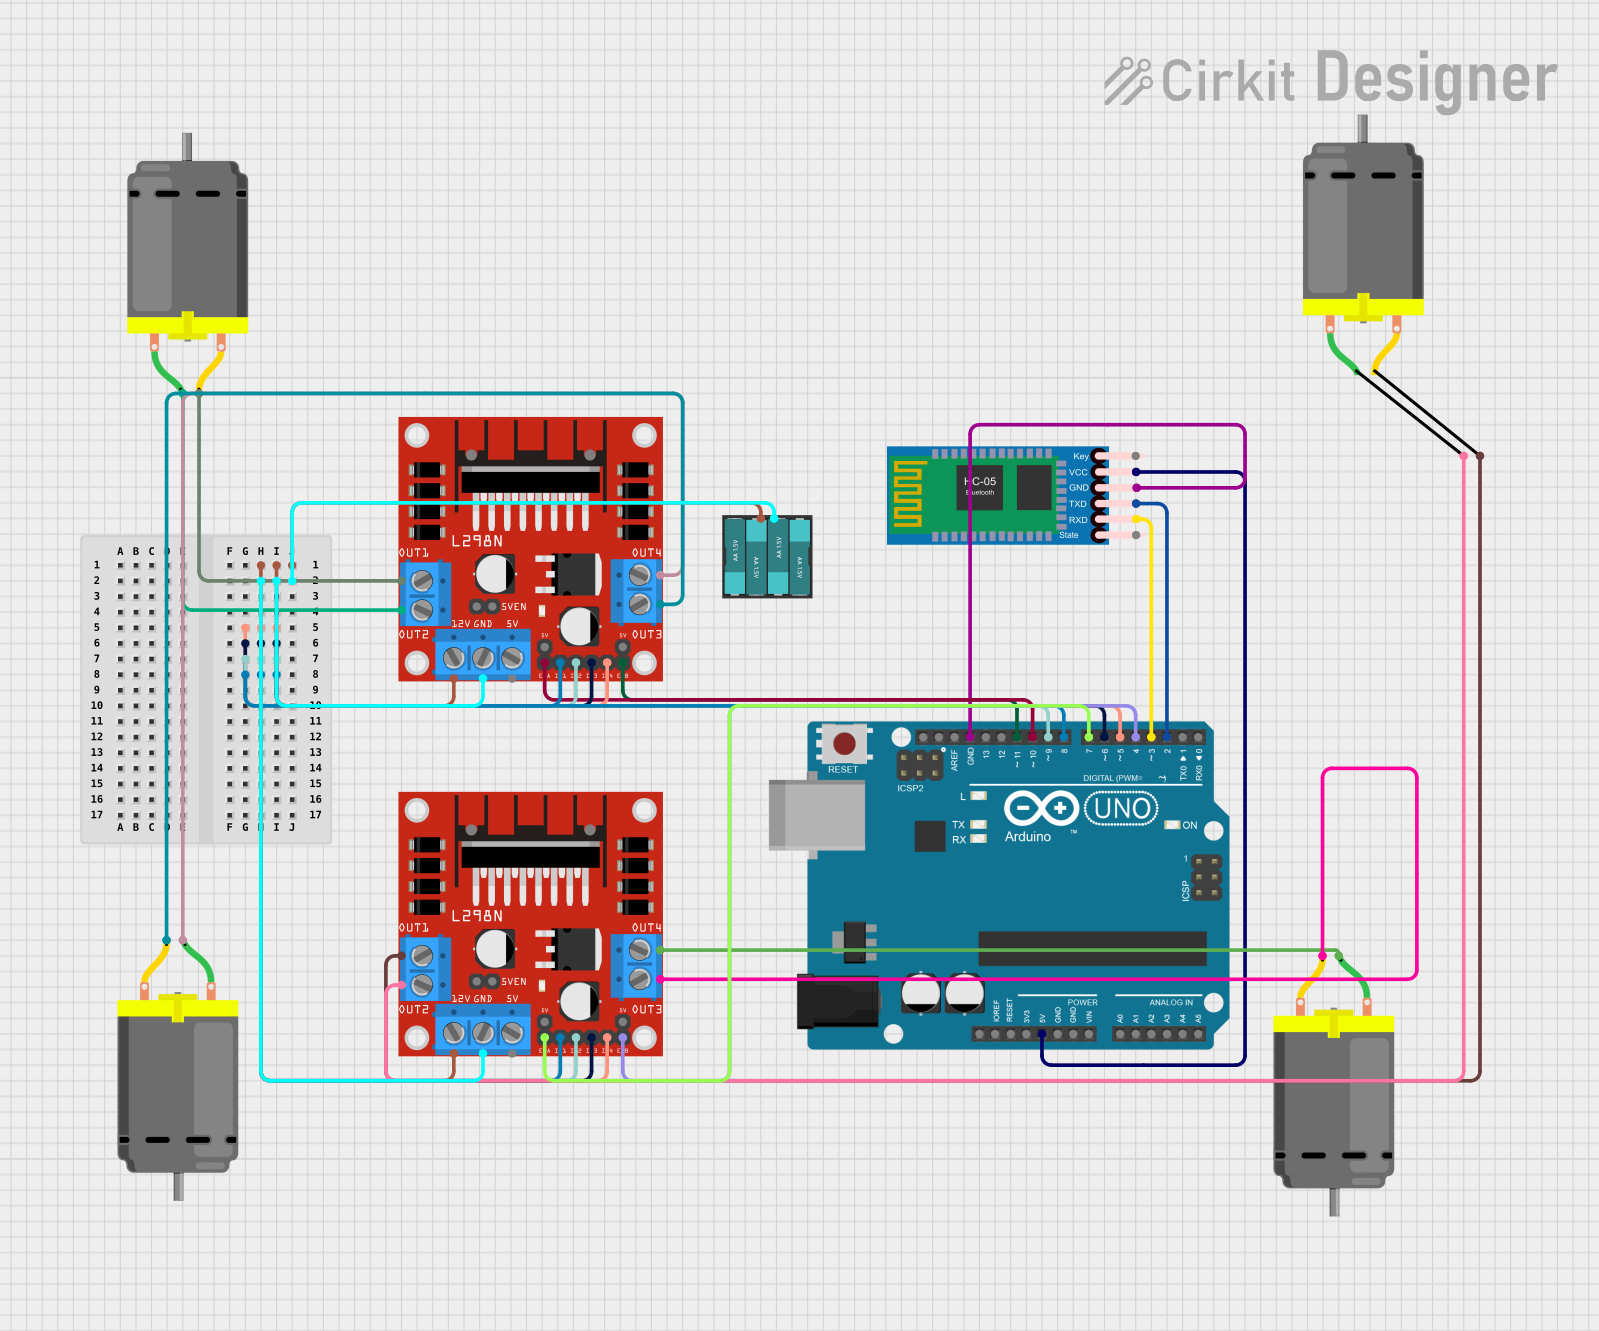
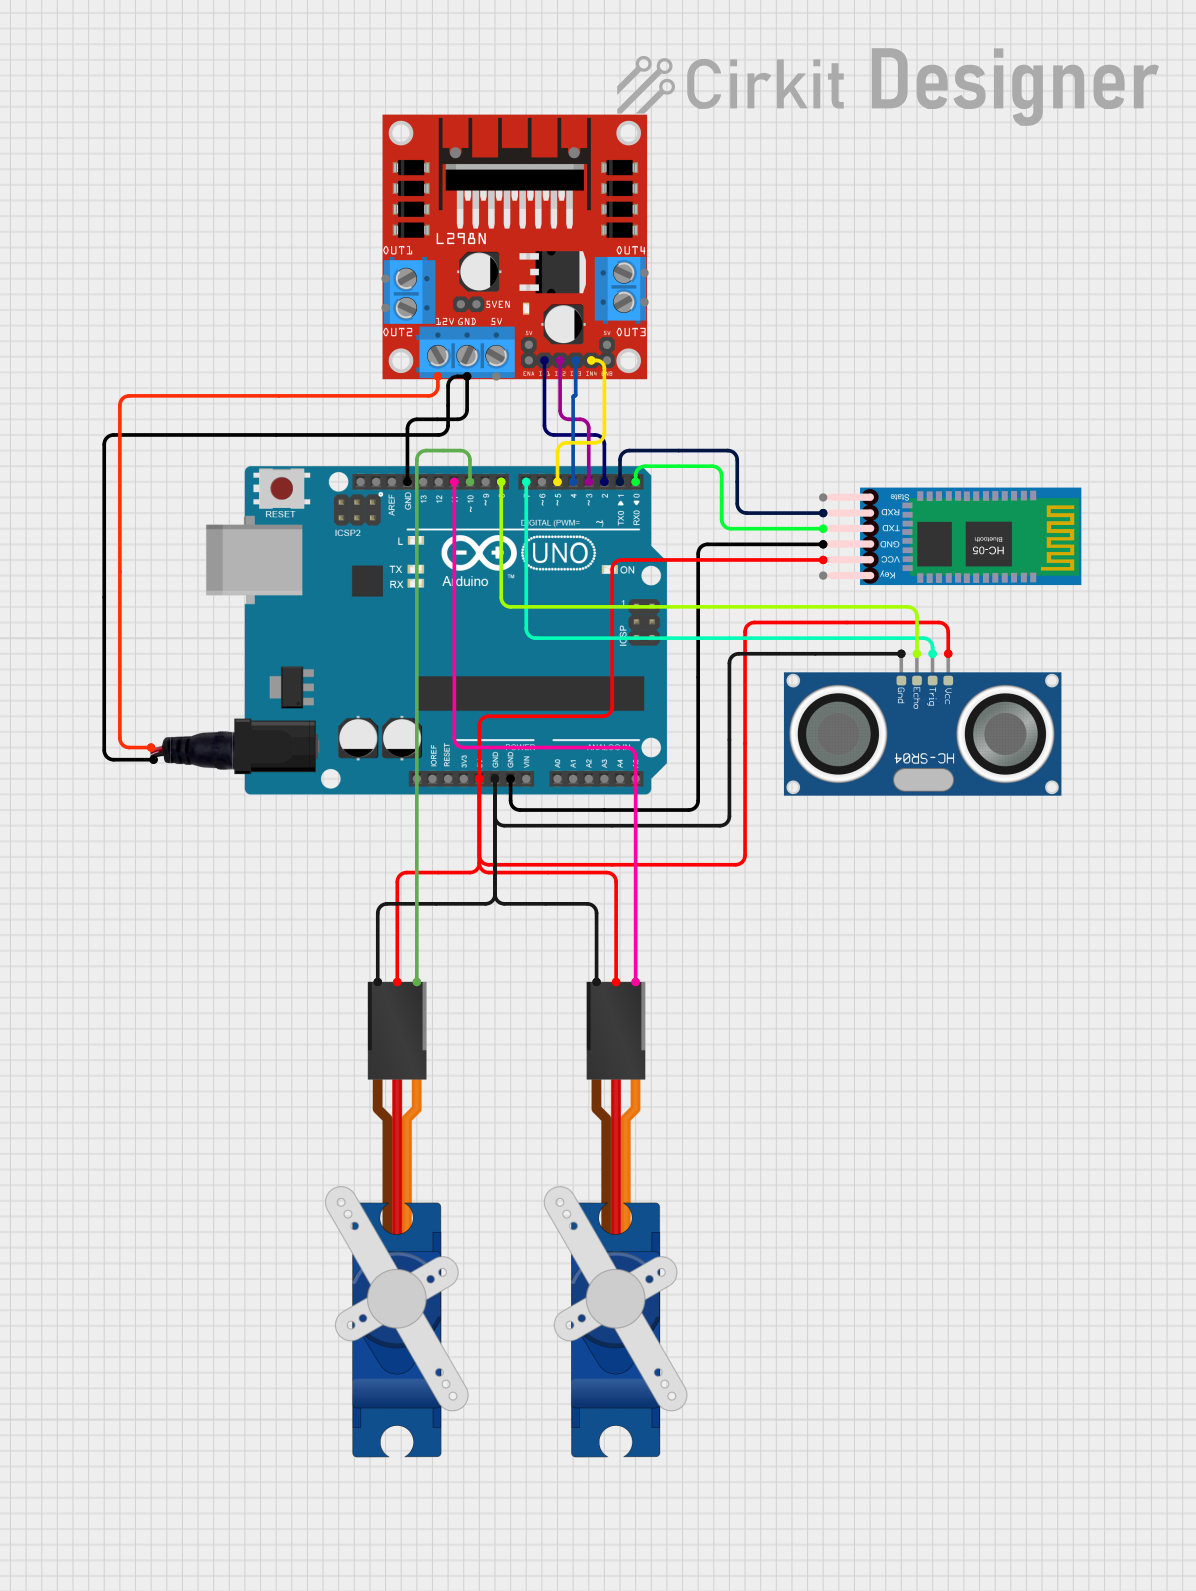
Explore Projects Built with SmartElex L298N Motor Driver with Onboard Arduino Uno
Common Applications and Use Cases
- Robotics: Driving wheels or tracks on a robot.
- Automation: Controlling conveyor belts, linear actuators, or other machinery.
- Educational Projects: Teaching motor control principles in STEM education.
- Prototyping: Rapid development of motor-driven prototypes.
Technical Specifications
Key Technical Details
- Motor Supply Voltage (Vm): 5V to 35V DC
- Logic Supply Voltage (Vss): 5V DC (from Arduino Uno)
- Peak Output Current (per channel): 2A
- Continuous Output Current (per channel): 1.2A
- Maximum Power Dissipation: 25W (Tc = 75°C)
Pin Configuration and Descriptions
| Pin Number | Pin Name | Description |
|---|---|---|
| 1 | ENA | Enable motor A |
| 2 | IN1 | Input 1 for motor A |
| 3 | IN2 | Input 2 for motor A |
| 4 | OUT1 | Output 1 for motor A |
| 5 | OUT2 | Output 2 for motor A |
| 6 | ENB | Enable motor B |
| 7 | IN3 | Input 1 for motor B |
| 8 | IN4 | Input 2 for motor B |
| 9 | OUT3 | Output 1 for motor B |
| 10 | OUT4 | Output 2 for motor B |
| 11 | +5V | 5V output (if 12V applied to Vm) |
| 12 | GND | Ground |
Usage Instructions
How to Use the Component in a Circuit
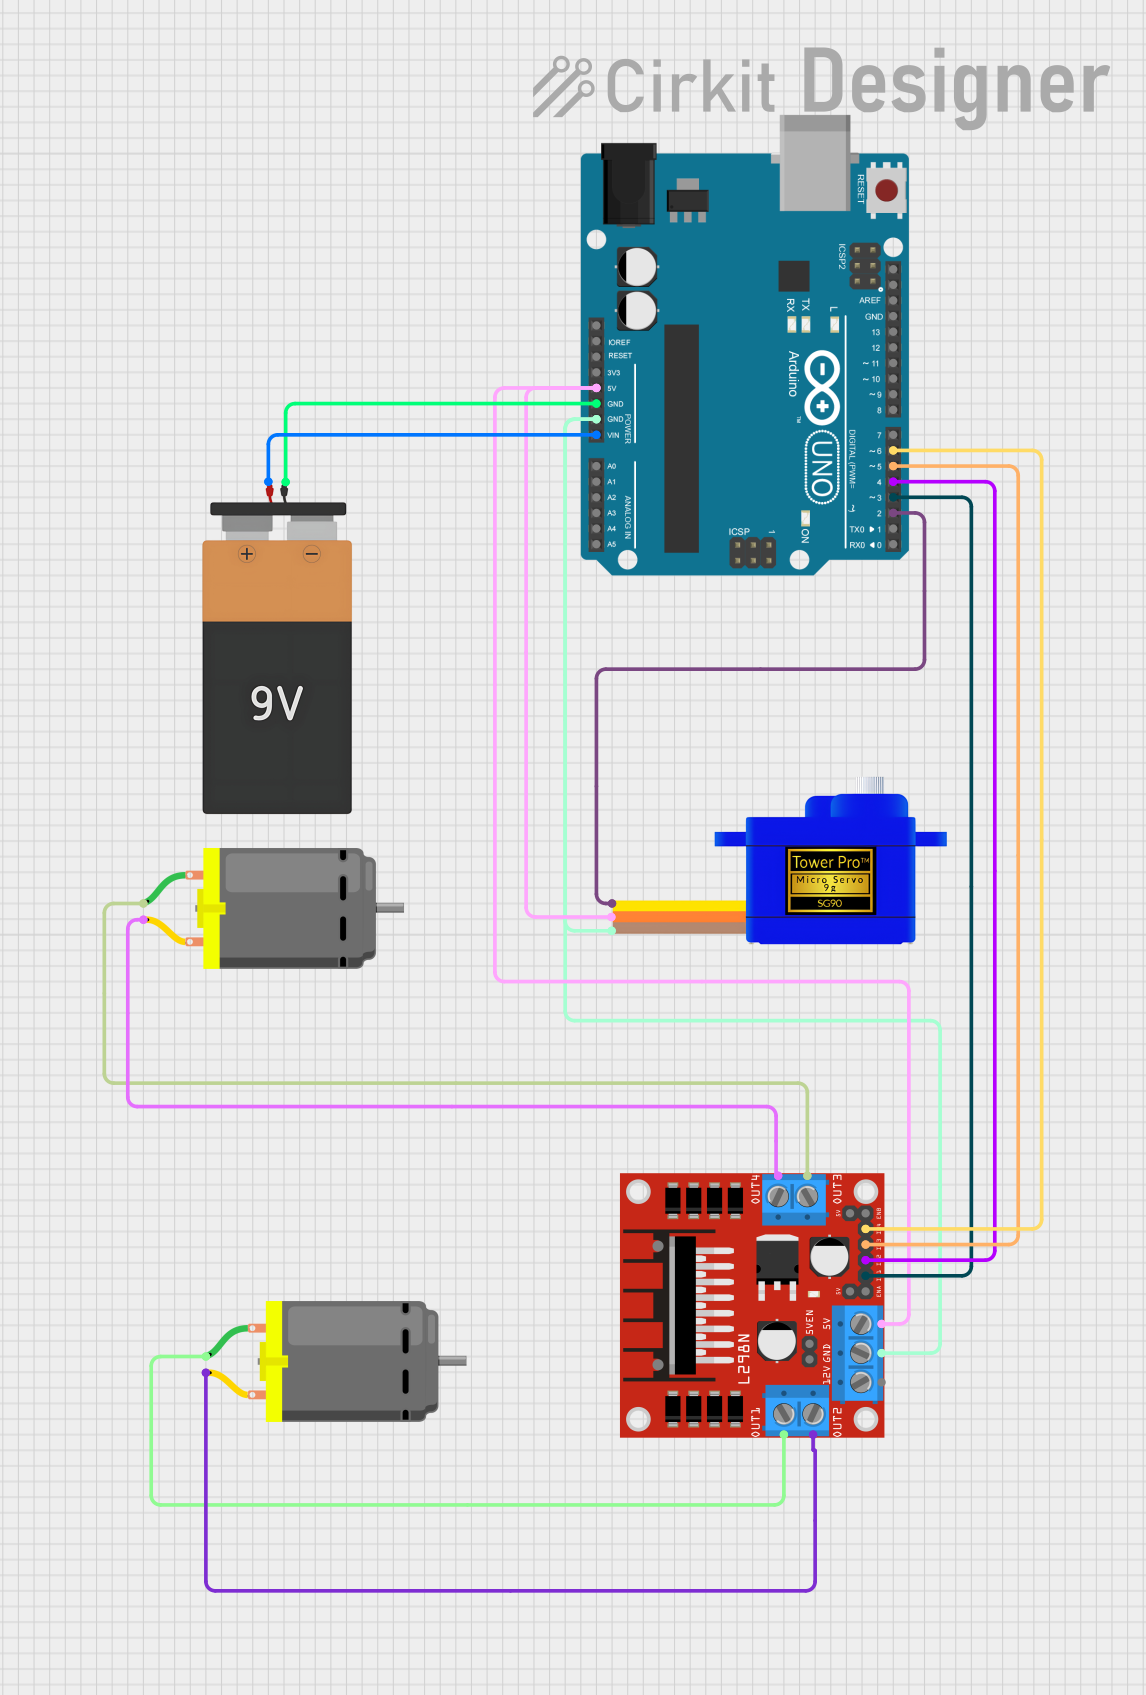
- Connect the motor(s) to the OUT1/OUT2 and OUT3/OUT4 terminals.
- Apply the motor supply voltage (Vm) to the module.
- Connect the Arduino Uno's digital output pins to the IN1, IN2, IN3, and IN4 inputs of the motor driver.
- Connect the ENA and ENB pins to PWM-capable digital outputs on the Arduino Uno if speed control is required.
- Ensure the ground (GND) of the Arduino Uno is connected to the GND of the motor driver.
Important Considerations and Best Practices
- Do not exceed the recommended voltage and current specifications.
- Use a separate power supply for the motors if they require more current than the Arduino Uno can provide.
- Always use flyback diodes when driving inductive loads to prevent back EMF damage.
- Ensure proper heat dissipation for the L298N chip if operating near maximum current ratings.
Example Code for Arduino Uno
// Define motor driver pins
#define ENA 9
#define IN1 8
#define IN2 7
#define ENB 6
#define IN3 5
#define IN4 4

void setup() {
  // Set all the motor driver pins as outputs
  pinMode(ENA, OUTPUT);
  pinMode(IN1, OUTPUT);
  pinMode(IN2, OUTPUT);
  pinMode(ENB, OUTPUT);
  pinMode(IN3, OUTPUT);
  pinMode(IN4, OUTPUT);
}

void loop() {
  // Drive motor A forward
  digitalWrite(IN1, HIGH);
  digitalWrite(IN2, LOW);
  analogWrite(ENA, 200); // PWM signal for speed control

  // Drive motor B backward
  digitalWrite(IN3, LOW);
  digitalWrite(IN4, HIGH);
  analogWrite(ENB, 200); // PWM signal for speed control

  delay(2000); // Run motors for 2 seconds

  // Stop both motors
  digitalWrite(IN1, LOW);
  digitalWrite(IN2, LOW);
  digitalWrite(IN3, LOW);
  digitalWrite(IN4, LOW);
  delay(1000); // Wait for 1 second
}
Troubleshooting and FAQs
Common Issues Users Might Face
- Motor not running: Check connections, ensure power supply is adequate, and verify that the correct pins are being used.
- Overheating: Ensure proper heat dissipation and that the current does not exceed the continuous rating.
- Inconsistent motor speed: Check if PWM signal is correctly applied and that the power supply is stable.
Solutions and Tips for Troubleshooting
- Double-check wiring against the pin configuration table.
- Use a multimeter to verify the voltage at the motor driver's input and output.
- Implement a "dead time" between switching directions to protect the driver.
FAQs
Q: Can I drive a stepper motor with this module? A: Yes, the L298N can drive a bipolar stepper motor. You will need to adjust the control signals accordingly.
Q: What is the function of the ENA and ENB pins? A: ENA and ENB are used to enable and control the speed of motors A and B, respectively, through PWM signals.
Q: Can I use this module without an external power supply? A: It depends on the current requirements of your motors. If they require more current than the Arduino Uno can supply, an external power source is necessary.
For further assistance, consult the SmartElex community forums or technical support.