How to Use SparkFun ACS723 Low Current Sensor: Examples, Pinouts, and Specs
Introduction
The SparkFun ACS723 Low Current Sensor is a compact, high-precision device designed to measure AC or DC currents up to 25A. Utilizing the Hall effect, it detects the magnetic field induced by current flow, providing a means to monitor power consumption without direct electrical contact with the conductor. This sensor is commonly used in applications such as battery monitoring, over-current protection, and load detection.
Explore Projects Built with SparkFun ACS723 Low Current Sensor


Explore Projects Built with SparkFun ACS723 Low Current Sensor
Technical Specifications
Key Technical Details
- Supply Voltage (Vcc): 4.5V to 5.5V
- Sensitivity: 400 mV/A (typical at Vcc = 5V)
- Current Range: 0 to ±25A
- Output Voltage: 0.5V to 4.5V (linearly proportional to current)
- Bandwidth: 80 kHz (typical)
- Isolation Voltage: 2.1 kV (minimum)
- Operating Temperature: -40°C to 85°C
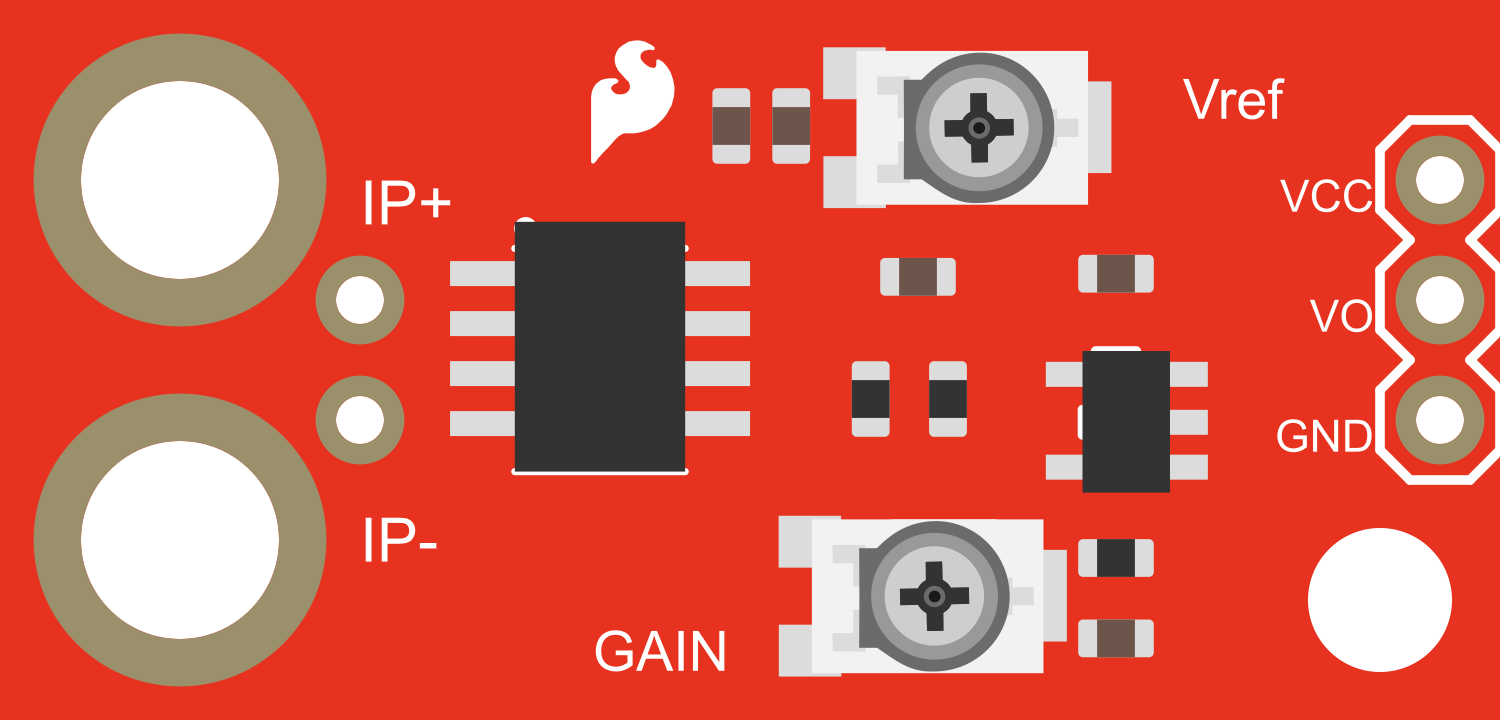
Pin Configuration and Descriptions
| Pin Number | Name | Description |
|---|---|---|
| 1 | Vcc | Power supply input (4.5V to 5.5V) |
| 2 | OUT | Analog voltage output proportional to the current |
| 3 | GND | Ground reference for power supply |
| 4 | IP+ | Current input (positive) |
| 5 | IP- | Current input (negative) |
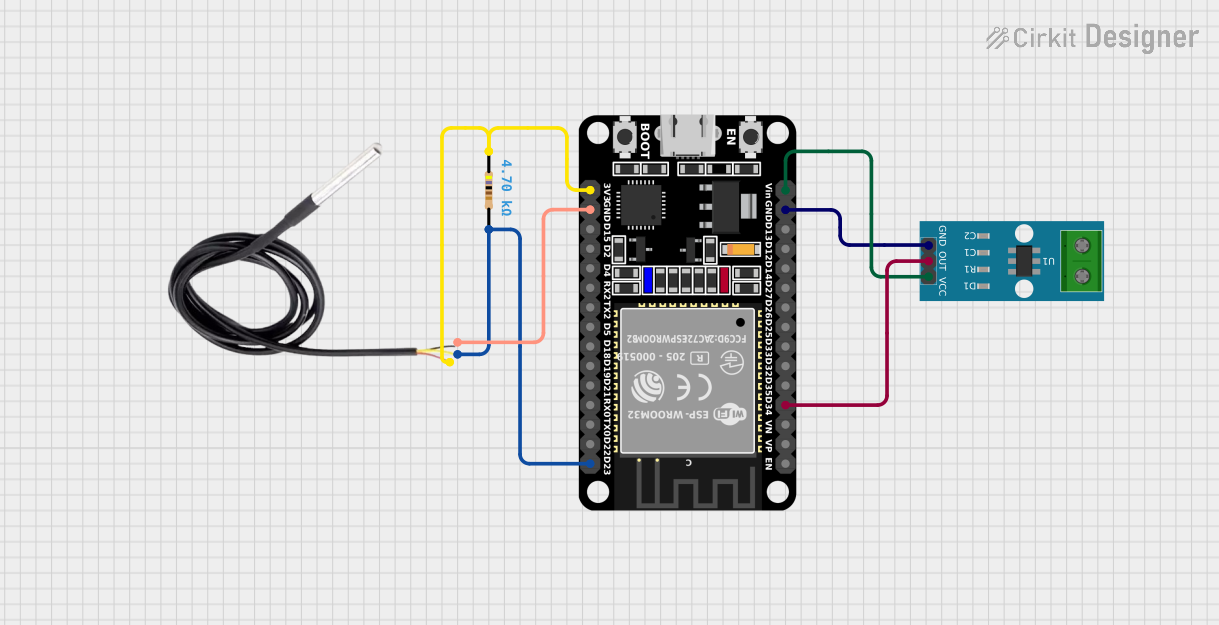
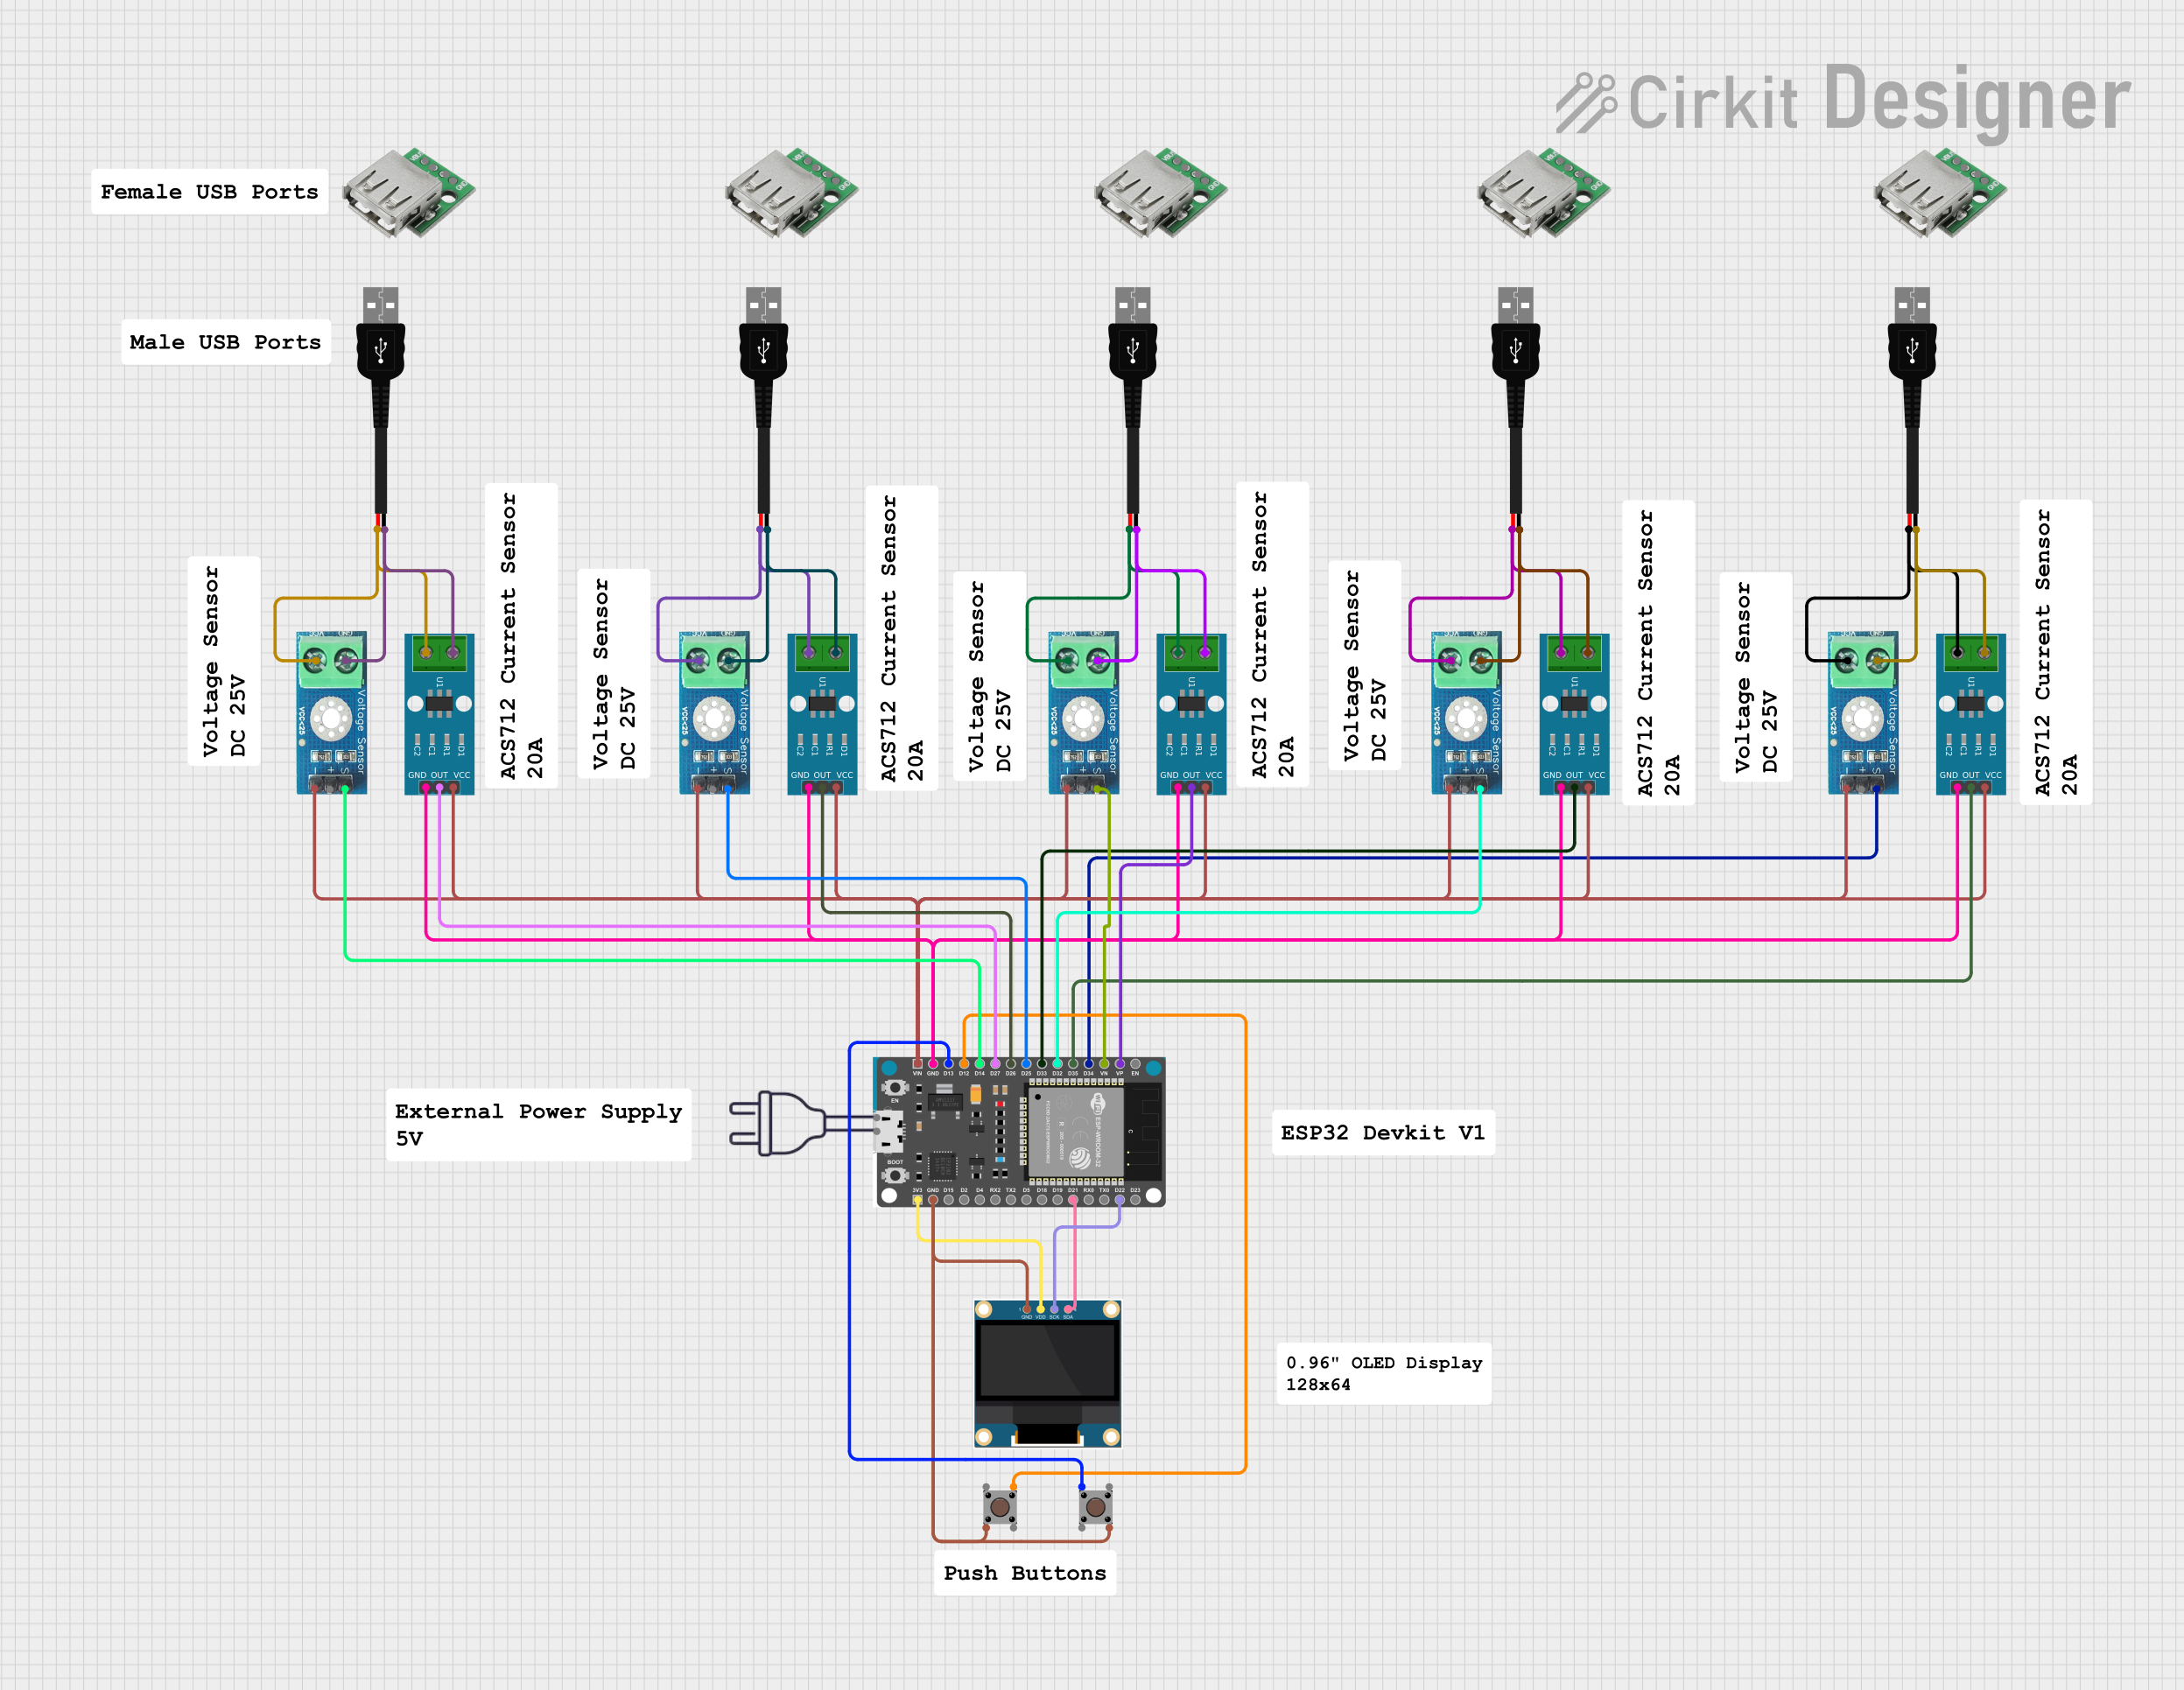
Usage Instructions
Integration into a Circuit
To use the ACS723 sensor in a circuit, follow these steps:
- Connect the Vcc pin to a 4.5V to 5.5V power supply.
- Connect the GND pin to the common ground of your system.
- Place the conductor carrying the current to be measured between the IP+ and IP- pins.
- Connect the OUT pin to an analog input on your microcontroller to read the voltage proportional to the current.
Important Considerations and Best Practices
- Ensure that the current does not exceed the maximum rating of 25A to prevent damage to the sensor.
- Avoid placing the sensor near strong magnetic fields that could interfere with the Hall effect measurement.
- Use twisted pair wires for IP+ and IP- connections to minimize the effect of external electromagnetic interference.
- Calibrate the sensor in your specific application to account for any system-induced offsets or errors.
Example Code for Arduino UNO
// SparkFun ACS723 Low Current Sensor Example Code for Arduino UNO

const int analogInPin = A0; // Analog input pin connected to ACS723 OUT pin
float sensorValue = 0;      // Variable to store the sensor value
float current = 0;          // Variable to store the current value (Amps)

void setup() {
  Serial.begin(9600); // Initialize serial communication at 9600 bits per second
}

void loop() {
  // Read the sensor value
  sensorValue = analogRead(analogInPin);

  // Convert the analog reading (which goes from 0 - 1023) to a voltage (0 - 5V)
  float voltage = sensorValue * (5.0 / 1023.0);

  // Convert the voltage to current using the sensitivity (400 mV/A)
  current = (voltage - 2.5) / 0.4; // Subtract the offset (2.5V at 0A) and divide by sensitivity

  // Print the current to the Serial Monitor
  Serial.print("Current: ");
  Serial.print(current);
  Serial.println(" A");

  // Wait for a bit to not overload the serial port
  delay(500);
}
Troubleshooting and FAQs
Common Issues
- Inaccurate Readings: Ensure that the sensor is properly calibrated and that there are no strong magnetic fields interfering with the measurement.
- No Output Voltage: Check the power supply connections and ensure that the current is flowing through the IP+ and IP- pins.
- Sensor Overheating: Make sure that the current does not exceed the maximum rating and that there is adequate ventilation around the sensor.
Solutions and Tips for Troubleshooting
- Calibration: Use a known current source to calibrate the sensor output and adjust your code accordingly.
- Shielding: Implement shielding techniques or reposition the sensor to minimize the effect of external magnetic fields.
- Connection Check: Verify all connections, including solder joints and wire integrity, for any signs of damage or poor contact.
FAQs
Q: Can the ACS723 sensor measure AC current? A: Yes, the ACS723 can measure both AC and DC currents.
Q: What is the resolution of the sensor? A: The resolution depends on the analog-to-digital converter (ADC) of the microcontroller. For a 10-bit ADC with a 5V reference, the resolution is approximately 4.88 mA per bit.
Q: How do I adjust the code for different microcontroller ADC resolutions?
A: Change the 5.0 / 1023.0 in the voltage calculation to match your microcontroller's ADC reference voltage and resolution.
Q: Is the sensor isolated from the high current path? A: Yes, the ACS723 provides galvanic isolation between the current path and the sensor's output.