How to Use Adafruit SHTC3 STEMMA QT: Examples, Pinouts, and Specs
Introduction
The Adafruit SHTC3 STEMMA QT is a high-precision digital temperature and humidity sensor that offers a convenient way to add environmental sensing to your electronics projects. Utilizing the SHTC3 sensor chip, this module provides accurate and reliable readings of ambient temperature and relative humidity. Its I2C interface facilitates easy integration with microcontrollers such as Arduino, Raspberry Pi, and others. The STEMMA QT connectors also allow for quick plug-and-play functionality without the need for soldering, making it ideal for prototyping and educational purposes.
Explore Projects Built with Adafruit SHTC3 STEMMA QT
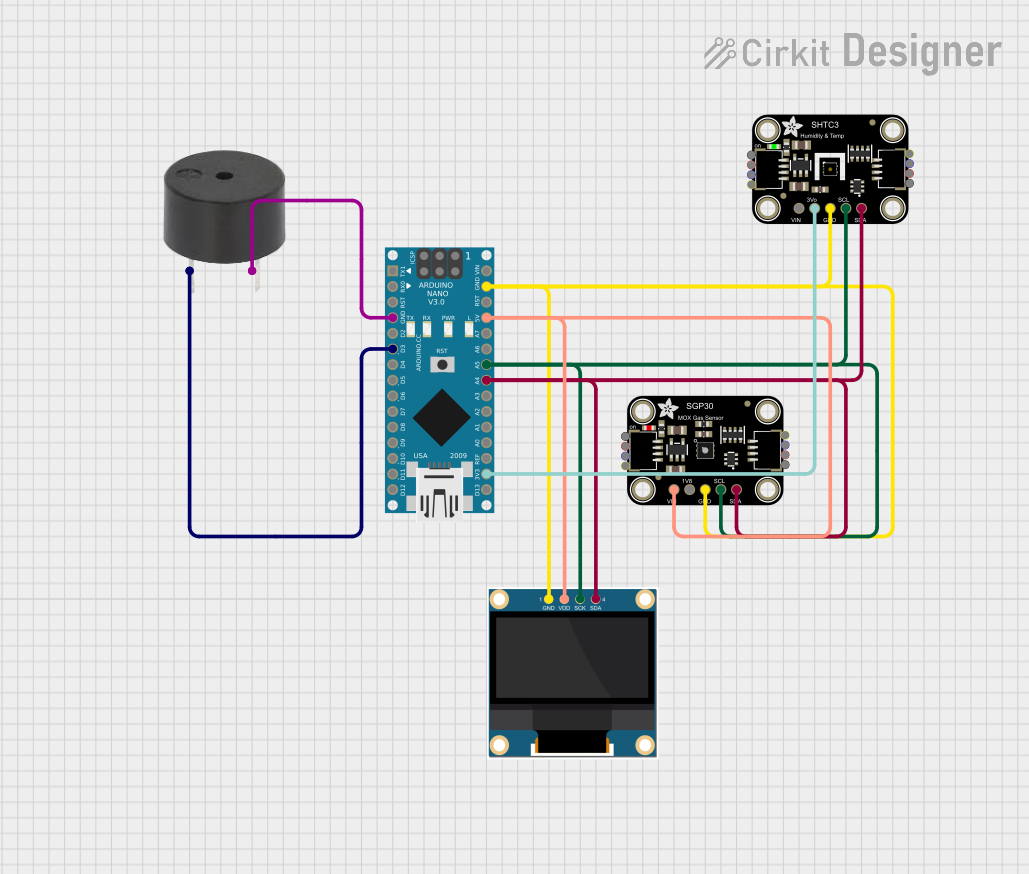

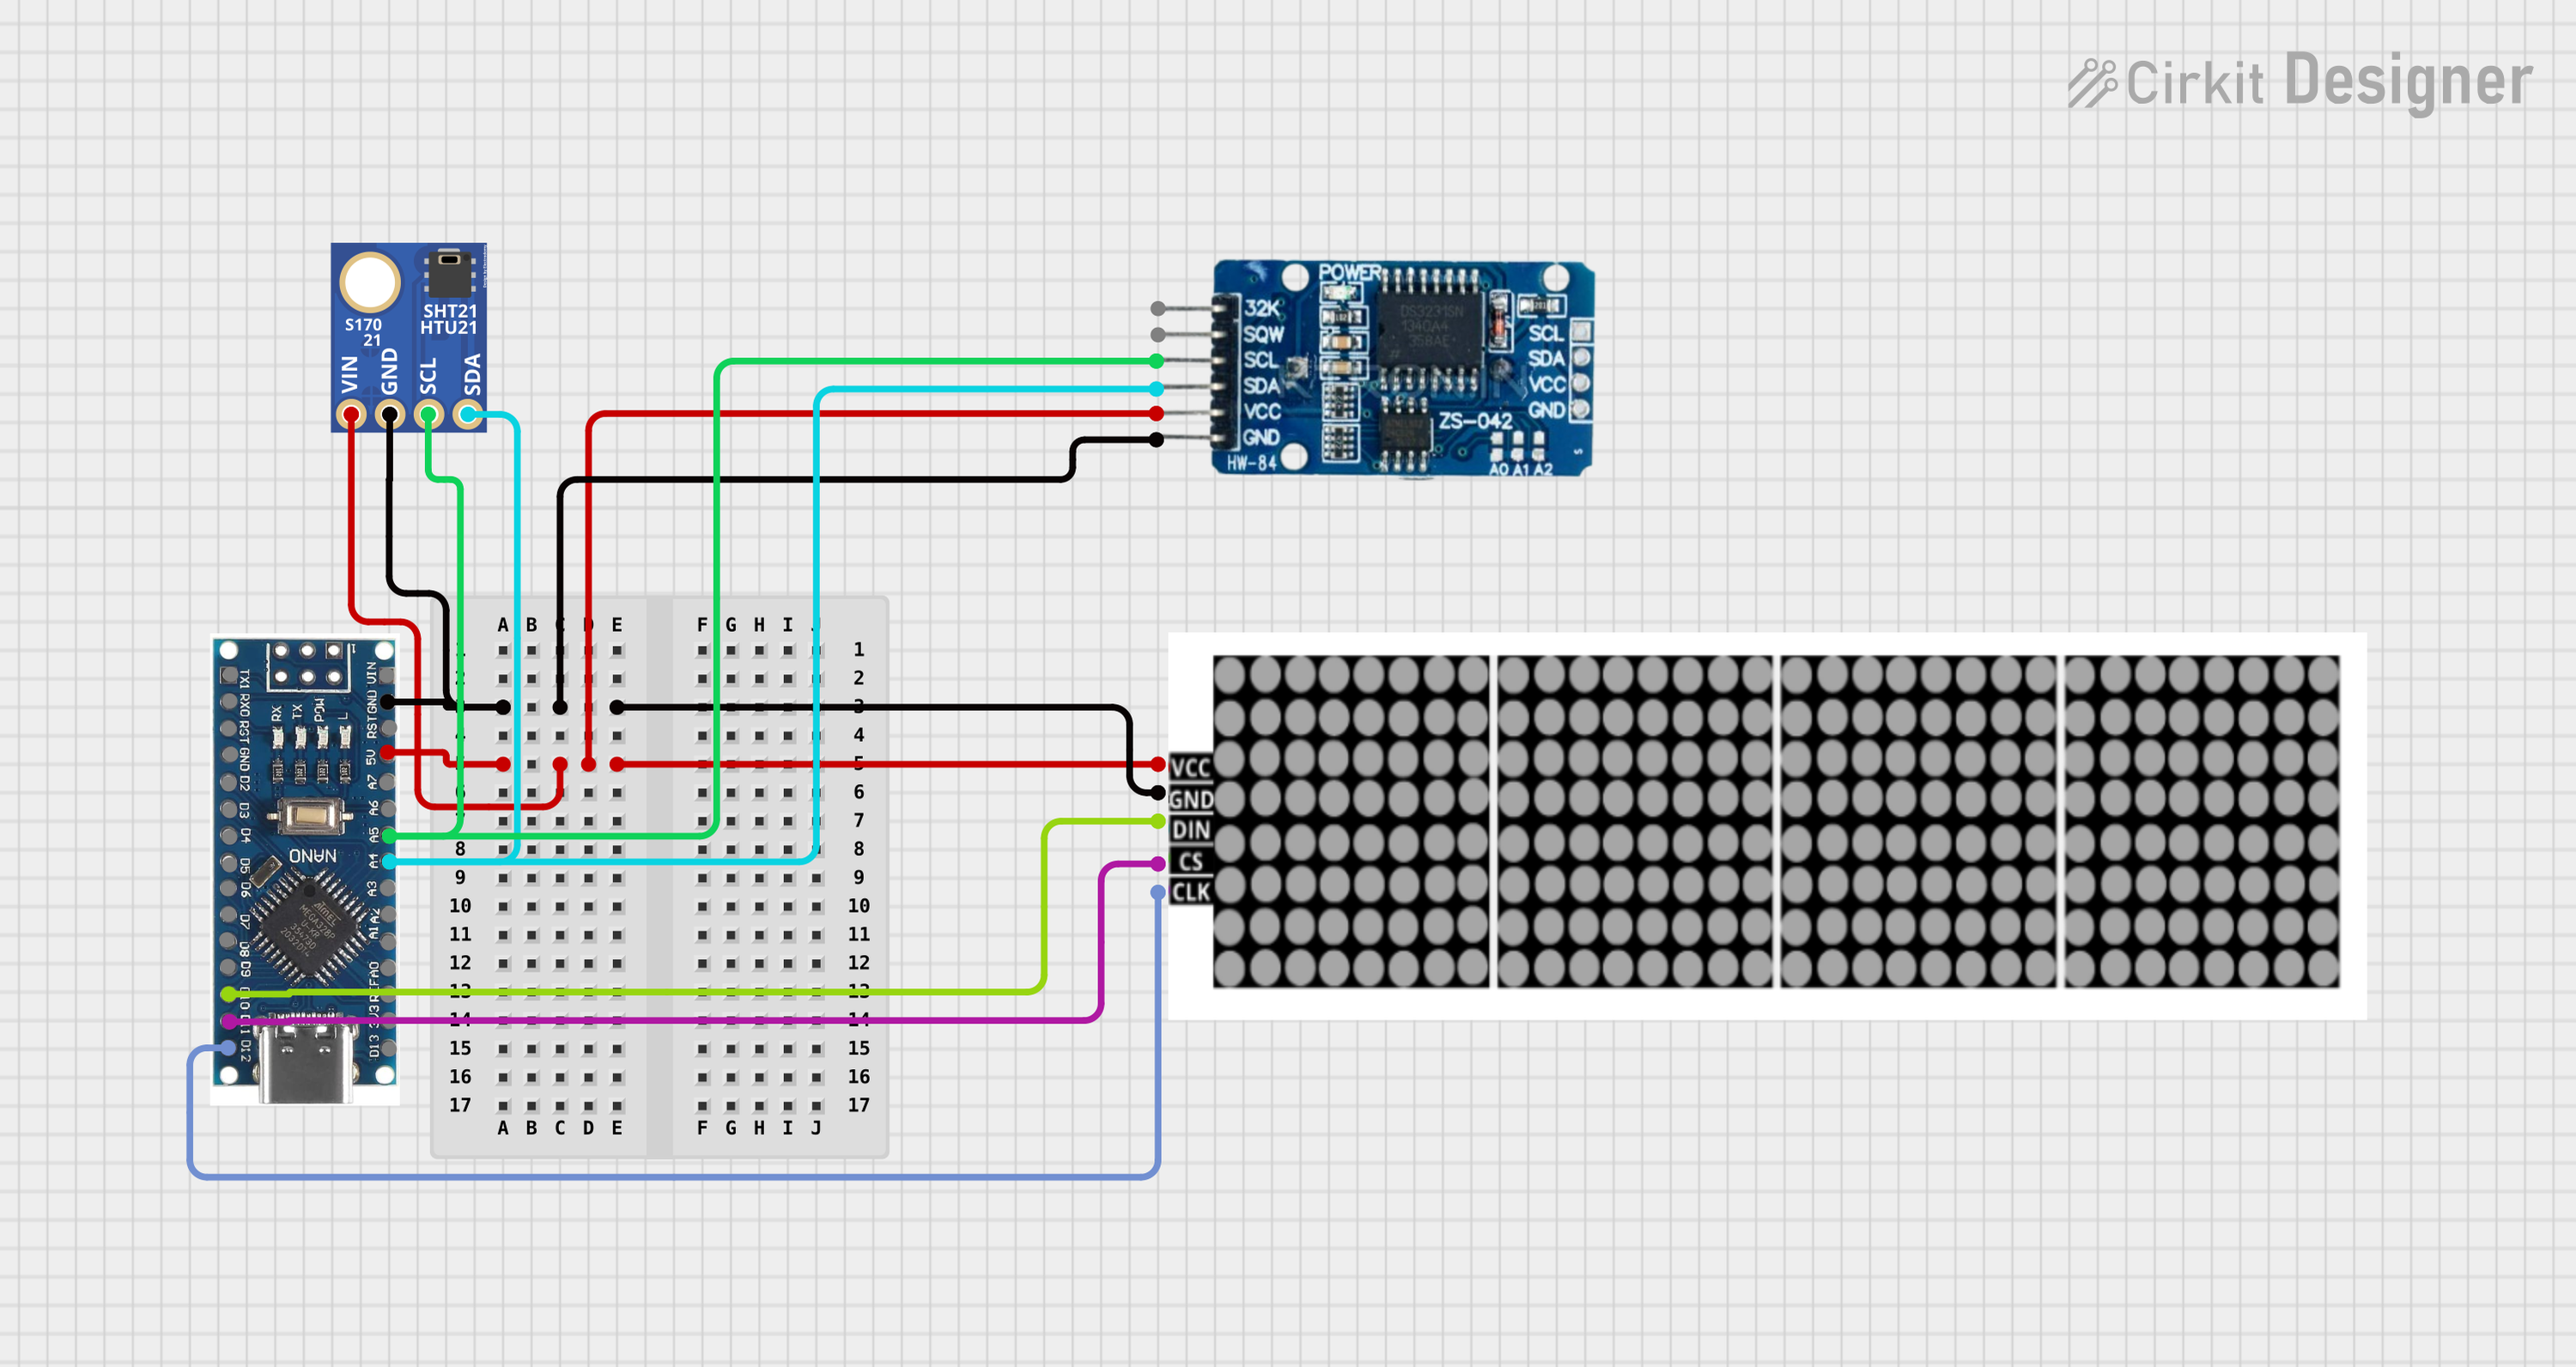

Explore Projects Built with Adafruit SHTC3 STEMMA QT
Common Applications and Use Cases
- Environmental monitoring
- Home automation systems
- Weather stations
- HVAC systems (Heating, Ventilation, and Air Conditioning)
- Wearable devices
- Data logging
Technical Specifications
Key Technical Details
- Supply Voltage: 3.3V to 5V
- Measurement Range:
- Temperature: -40°C to 125°C
- Humidity: 0% to 100% RH
- Accuracy:
- Temperature: ±0.2°C
- Humidity: ±2% RH
- Interface: I2C
- I2C Address: 0x70 (default)
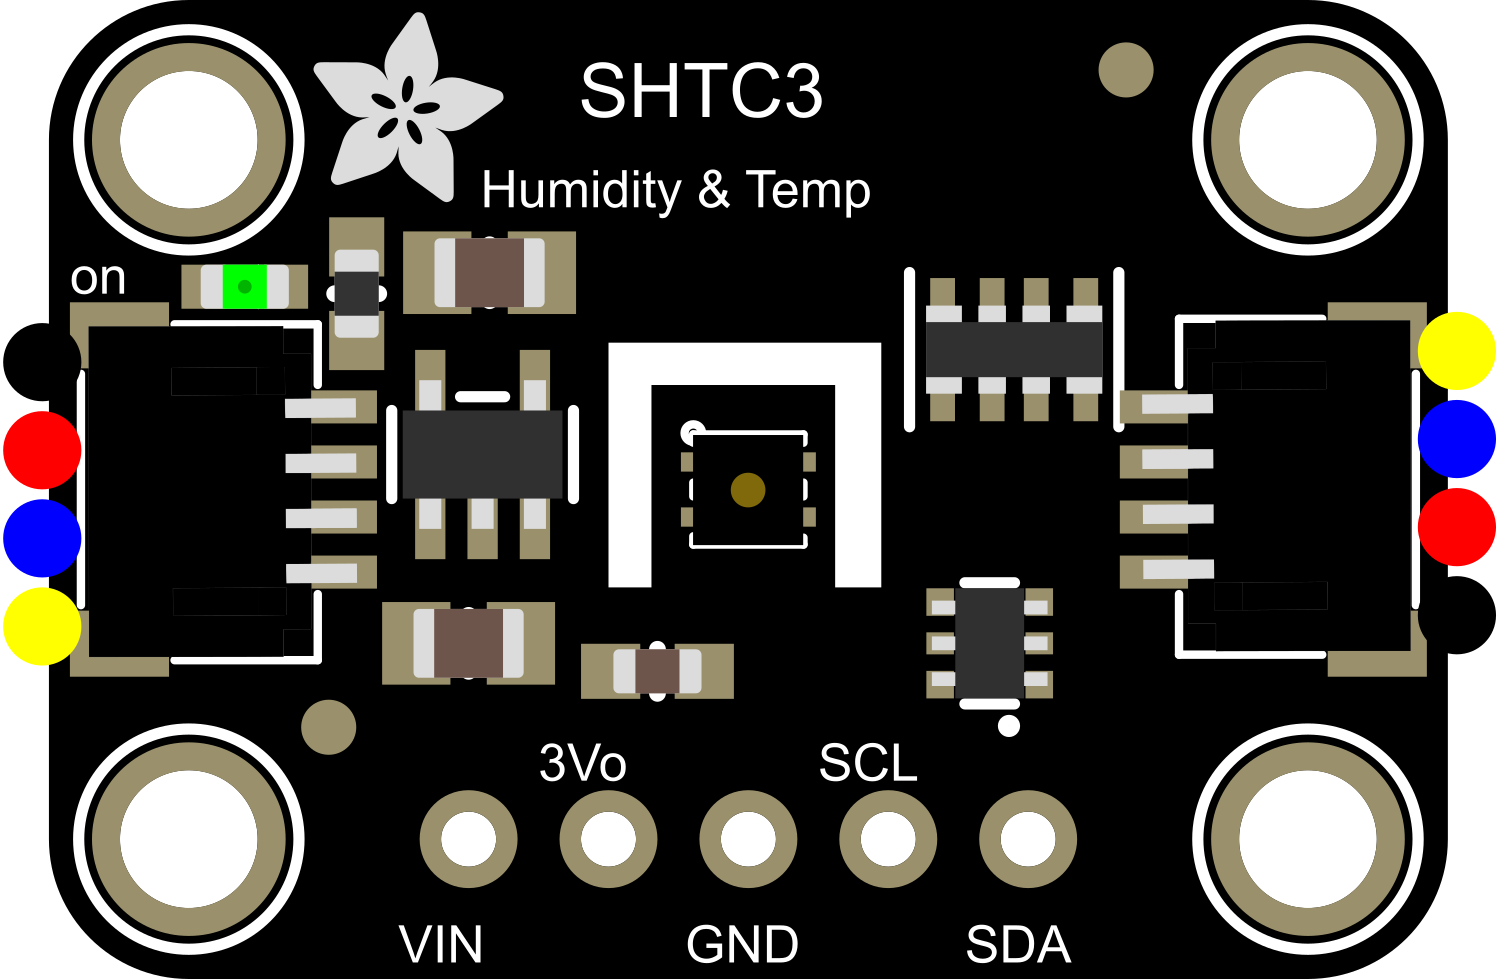
Pin Configuration and Descriptions
| Pin Number | Name | Description |
|---|---|---|
| 1 | VIN | Power supply (3.3V to 5V) |
| 2 | GND | Ground connection |
| 3 | SCL | I2C clock signal |
| 4 | SDA | I2C data signal |
| 5 | Qwiic/STEMMA QT | Connect to other Qwiic or STEMMA QT devices |
Usage Instructions
Integrating with a Circuit
- Connect the VIN pin to a 3.3V or 5V power supply.
- Connect the GND pin to the ground of your power supply.
- Connect the SCL and SDA pins to the corresponding I2C clock and data lines on your microcontroller.
- If using STEMMA QT connectors, simply plug the module into a compatible board or cable.
Important Considerations and Best Practices
- Ensure that the power supply voltage matches the specifications to avoid damaging the sensor.
- Use pull-up resistors on the I2C lines if they are not already present on your microcontroller board.
- Avoid placing the sensor in direct contact with water or other liquids.
- For accurate readings, keep the sensor away from heat sources or direct sunlight.
- Allow the sensor to acclimatize to the environment for a few minutes before taking measurements.
Example Code for Arduino UNO
#include <Wire.h>
#include <Adafruit_SHTC3.h>

Adafruit_SHTC3 shtc3 = Adafruit_SHTC3();

void setup() {
  Serial.begin(9600);
  if (!shtc3.begin()) {
    Serial.println("Couldn't find SHTC3 sensor!");
    while (1) delay(1);
  }
}

void loop() {
  sensors_event_t humidity, temp;
  shtc3.getEvent(&humidity, &temp); // Get new data

  Serial.print("Temperature: ");
  Serial.print(temp.temperature);
  Serial.println(" degrees C");

  Serial.print("Humidity: ");
  Serial.print(humidity.relative_humidity);
  Serial.println("% rH");

  delay(1000); // Wait a second between measurements
}
Troubleshooting and FAQs
Common Issues
- Sensor not detected: Ensure that the wiring is correct and that the sensor is properly powered.
- Inaccurate readings: Make sure the sensor is not exposed to direct sunlight or heat sources and has had time to acclimatize.
- I2C communication errors: Check for proper pull-up resistors and that no other device is using the same I2C address.
Solutions and Tips for Troubleshooting
- Double-check all connections and ensure they are secure.
- Use a multimeter to verify the voltage at the VIN pin.
- Scan the I2C bus with a scanner sketch to ensure the sensor is detected.
- If using long wires, consider using shielded cables to reduce interference.
FAQs
Q: Can I use multiple SHTC3 sensors on the same I2C bus? A: Yes, but you will need to ensure each sensor has a unique I2C address. The SHTC3 does not have an address select pin, so you would need to use an I2C multiplexer to use multiple SHTC3 sensors on the same bus.
Q: How long does the sensor take to provide a reading? A: The SHTC3 sensor typically provides a reading within a few milliseconds. However, it is recommended to allow the sensor to acclimatize to the environment for more accurate readings.
Q: Is the sensor waterproof? A: No, the SHTC3 sensor is not waterproof. It should be protected from liquids and high humidity that can condense on the sensor.