How to Use VARIAC DIMMER: Examples, Pinouts, and Specs
Introduction
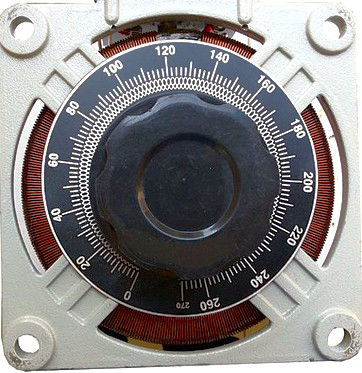
A Variac Dimmer is an adjustable transformer designed to control voltage and current in an electrical circuit. By varying the output voltage, it enables precise control over devices such as lights, motors, and other electrical equipment. Unlike standard dimmers, a Variac Dimmer provides a smooth, linear adjustment of voltage, making it ideal for applications requiring fine control.
Explore Projects Built with VARIAC DIMMER
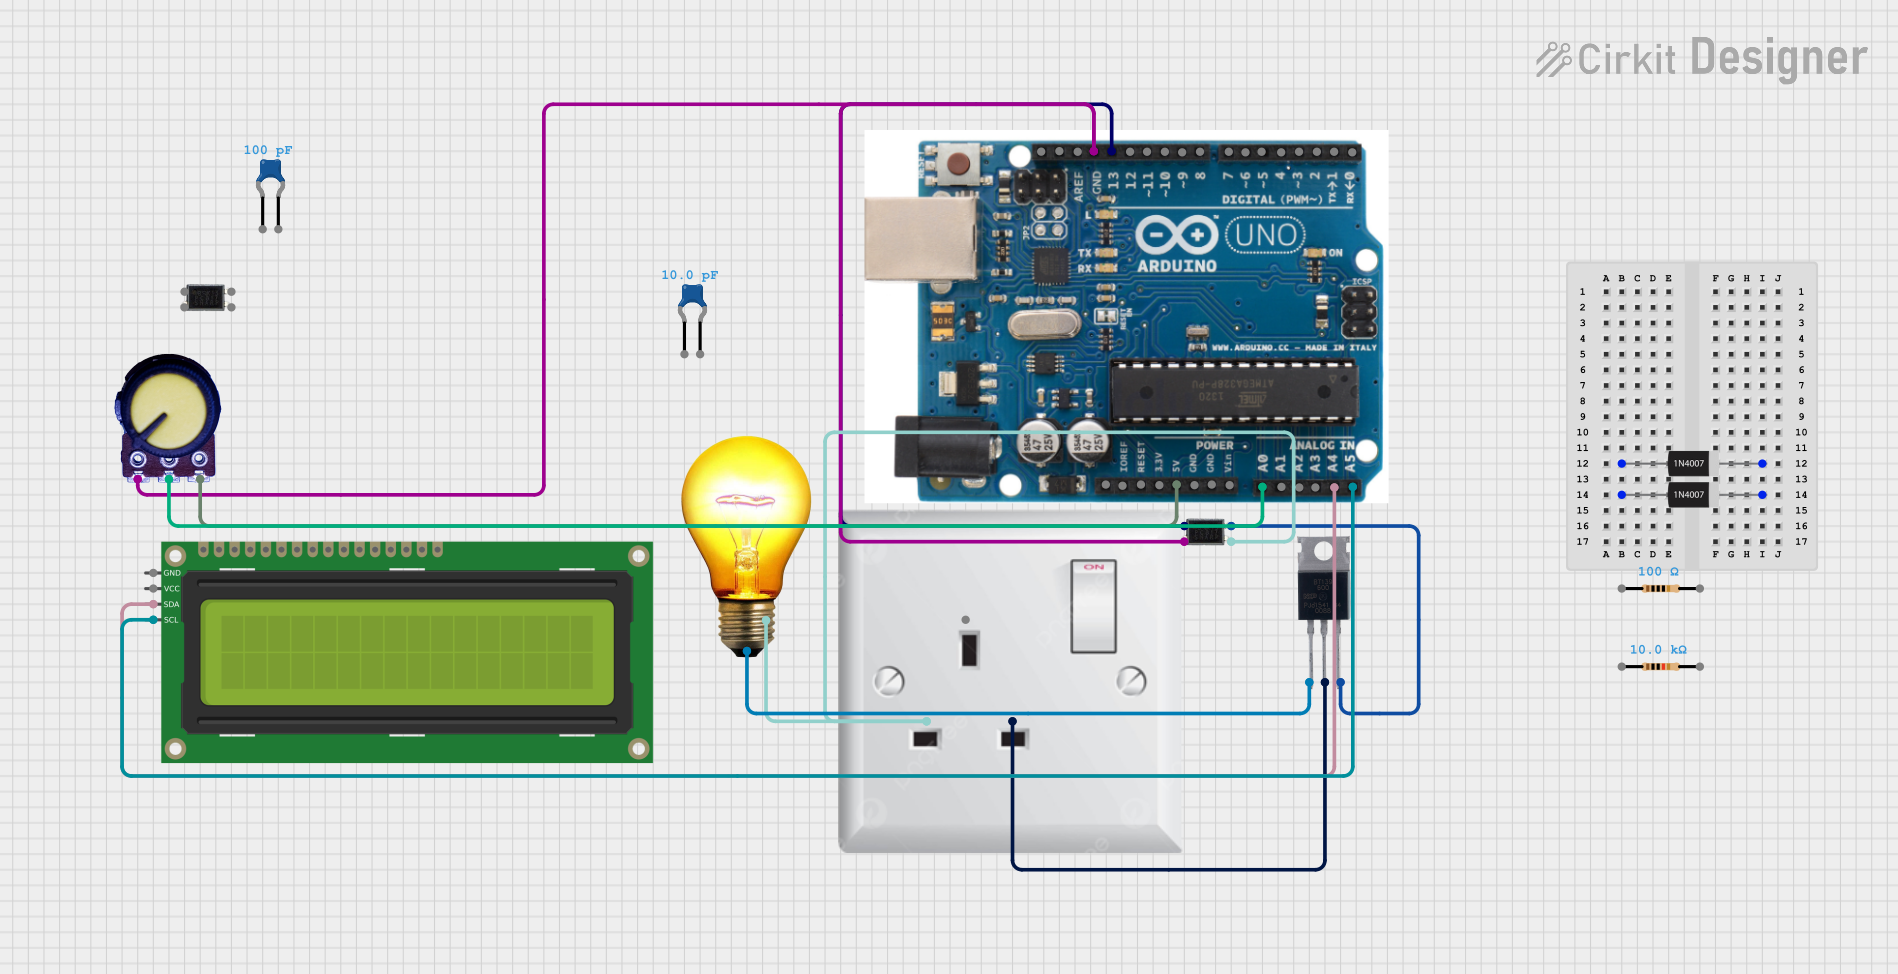
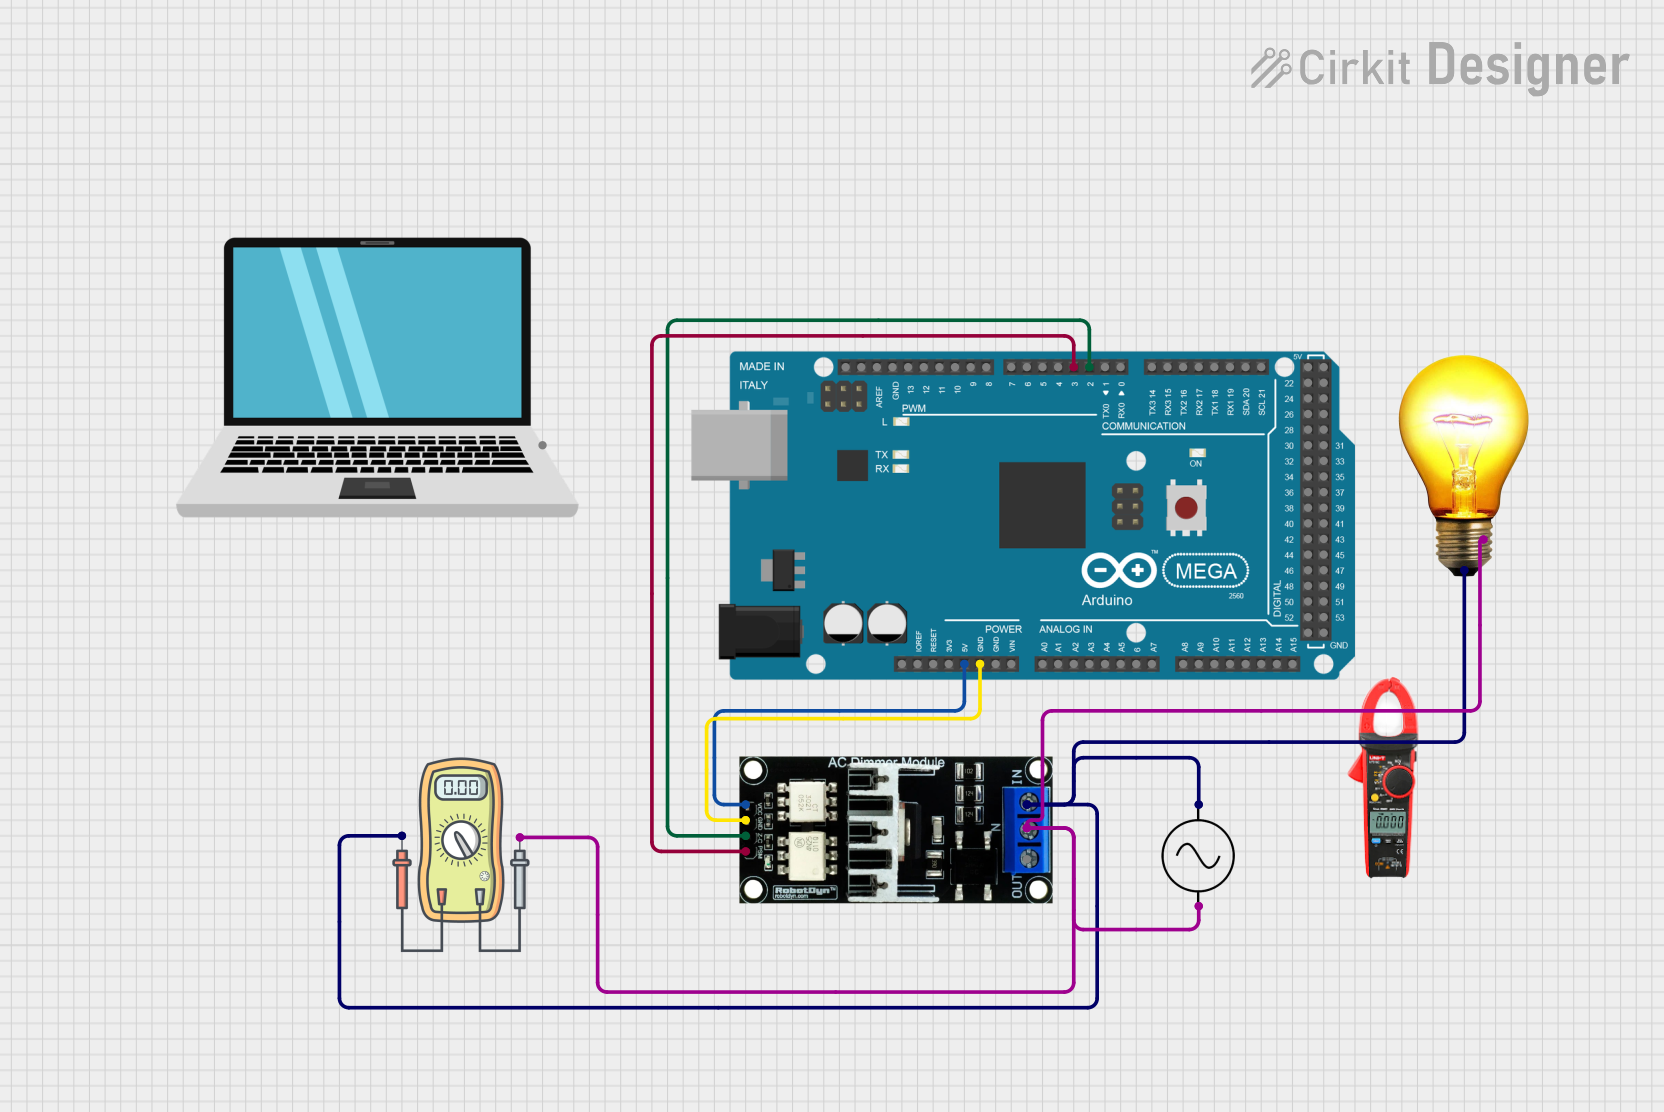
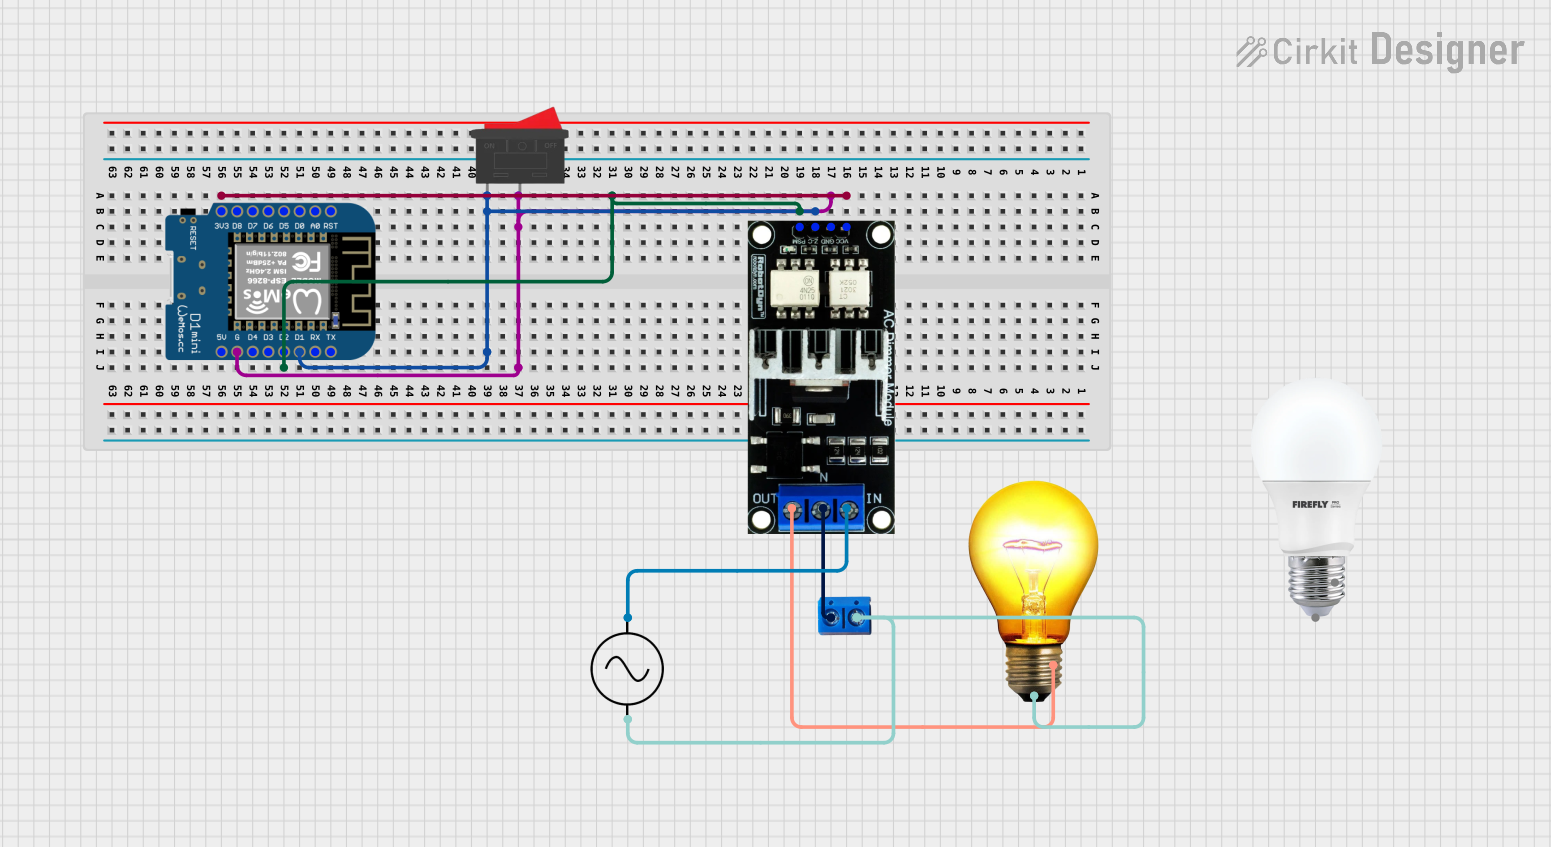

Explore Projects Built with VARIAC DIMMER
Common Applications and Use Cases
- Dimming incandescent or halogen lights
- Controlling the speed of AC motors
- Testing electrical equipment at different voltage levels
- Audio equipment voltage regulation
- Laboratory experiments requiring variable AC voltage
Technical Specifications
Below are the key technical details for a typical Variac Dimmer:
| Parameter | Value |
|---|---|
| Input Voltage | 110V AC or 220V AC (model-specific) |
| Output Voltage | 0V to Input Voltage (adjustable) |
| Maximum Current | 2A to 20A (model-specific) |
| Power Rating | 200W to 2000W (model-specific) |
| Frequency | 50Hz / 60Hz |
| Efficiency | >95% |
| Adjustment Mechanism | Rotary knob |
Pin Configuration and Descriptions
The Variac Dimmer typically has three main terminals for connection:
| Pin | Label | Description |
|---|---|---|
| 1 | Input Live (L) | Connects to the live wire of the AC input supply. |
| 2 | Input Neutral (N) | Connects to the neutral wire of the AC input supply. |
| 3 | Output Live (L) | Provides the adjustable live output voltage. Neutral is shared with input. |
Note: Always ensure proper grounding and insulation when working with AC circuits to avoid electrical hazards.
Usage Instructions
How to Use the Variac Dimmer in a Circuit
Connect the Input Terminals:
- Connect the live wire of the AC supply to the
Input Live (L)terminal. - Connect the neutral wire of the AC supply to the
Input Neutral (N)terminal.
- Connect the live wire of the AC supply to the
Connect the Output Terminals:
- Connect the device (e.g., light bulb, motor) to the
Output Live (L)terminal and the shared neutral.
- Connect the device (e.g., light bulb, motor) to the
Adjust the Voltage:
- Use the rotary knob to vary the output voltage. Turning the knob clockwise increases the voltage, while turning it counterclockwise decreases it.
Power On:
- Switch on the AC supply and observe the device's behavior as you adjust the voltage.
Important Considerations and Best Practices
- Load Compatibility: Ensure the connected load does not exceed the Variac Dimmer's power rating.
- Overcurrent Protection: Use a fuse or circuit breaker to protect the Variac Dimmer from overcurrent conditions.
- Ventilation: Operate the Variac Dimmer in a well-ventilated area to prevent overheating.
- Safety Precautions: Avoid touching live terminals and ensure proper insulation to prevent electric shock.
- AC-Only Use: The Variac Dimmer is designed for AC circuits and should not be used with DC loads.
Example: Controlling a Light Bulb with Arduino UNO
While the Variac Dimmer is not directly controlled by microcontrollers like Arduino, you can use a relay module to switch the Variac Dimmer on or off. Below is an example code for controlling a relay connected to an Arduino UNO:
// Arduino code to control a relay module for switching a Variac Dimmer
// Ensure the relay module is rated for AC voltage and current used by the Variac Dimmer.

const int relayPin = 7; // Pin connected to the relay module

void setup() {
  pinMode(relayPin, OUTPUT); // Set relay pin as output
  digitalWrite(relayPin, LOW); // Ensure relay is off at startup
}

void loop() {
  // Turn on the Variac Dimmer via the relay
  digitalWrite(relayPin, HIGH); // Relay ON
  delay(5000); // Keep it on for 5 seconds

  // Turn off the Variac Dimmer via the relay
  digitalWrite(relayPin, LOW); // Relay OFF
  delay(5000); // Keep it off for 5 seconds
}
Warning: The relay module must be properly rated for the AC voltage and current of the Variac Dimmer. Improper use can result in damage or hazards.
Troubleshooting and FAQs
Common Issues and Solutions
No Output Voltage:
- Cause: Input connections may be incorrect.
- Solution: Verify that the live and neutral wires are properly connected to the input terminals.
Overheating:
- Cause: Load exceeds the power rating of the Variac Dimmer.
- Solution: Reduce the load or use a higher-rated Variac Dimmer.
Voltage Fluctuations:
- Cause: Poor contact in the rotary knob or worn-out components.
- Solution: Inspect and clean the rotary knob or replace the Variac Dimmer if necessary.
Device Not Responding to Voltage Adjustment:
- Cause: Faulty wiring or damaged load.
- Solution: Check all connections and test the load with a direct AC supply.
FAQs
Q1: Can I use a Variac Dimmer with LED lights?
A1: Variac Dimmers are not ideal for LED lights unless the LEDs are specifically designed to work with variable AC voltage. Use an LED-compatible dimmer instead.
Q2: Is it safe to operate a Variac Dimmer continuously?
A2: Yes, as long as the load does not exceed the power rating and the device is well-ventilated.
Q3: Can I use a Variac Dimmer to step up voltage?
A3: No, a Variac Dimmer can only reduce voltage from the input level to 0V. It cannot increase voltage beyond the input level.
Q4: What happens if I reverse the input and output connections?
A4: Reversing the connections can damage the Variac Dimmer and connected devices. Always follow the correct wiring configuration.
By following this documentation, you can safely and effectively use a Variac Dimmer in your projects.