How to Use Embedded Thermal Printer : Examples, Pinouts, and Specs
Introduction
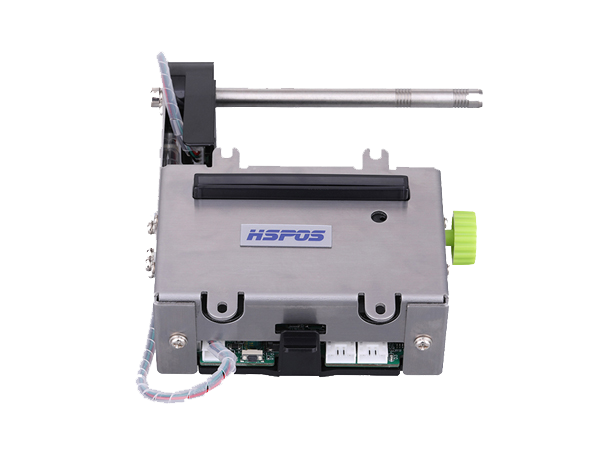
The HSPOS HS-K24 is a compact and efficient thermal printer designed for applications requiring fast and reliable printing. This device uses thermal printing technology, which eliminates the need for ink or toner by transferring heat onto specially coated thermal paper. Its small size and low power consumption make it ideal for integration into point-of-sale (POS) systems, portable devices, kiosks, and other embedded systems.
Explore Projects Built with Embedded Thermal Printer


Explore Projects Built with Embedded Thermal Printer
Common Applications
- Point-of-sale (POS) systems for printing receipts
- Portable devices for on-the-go label or ticket printing
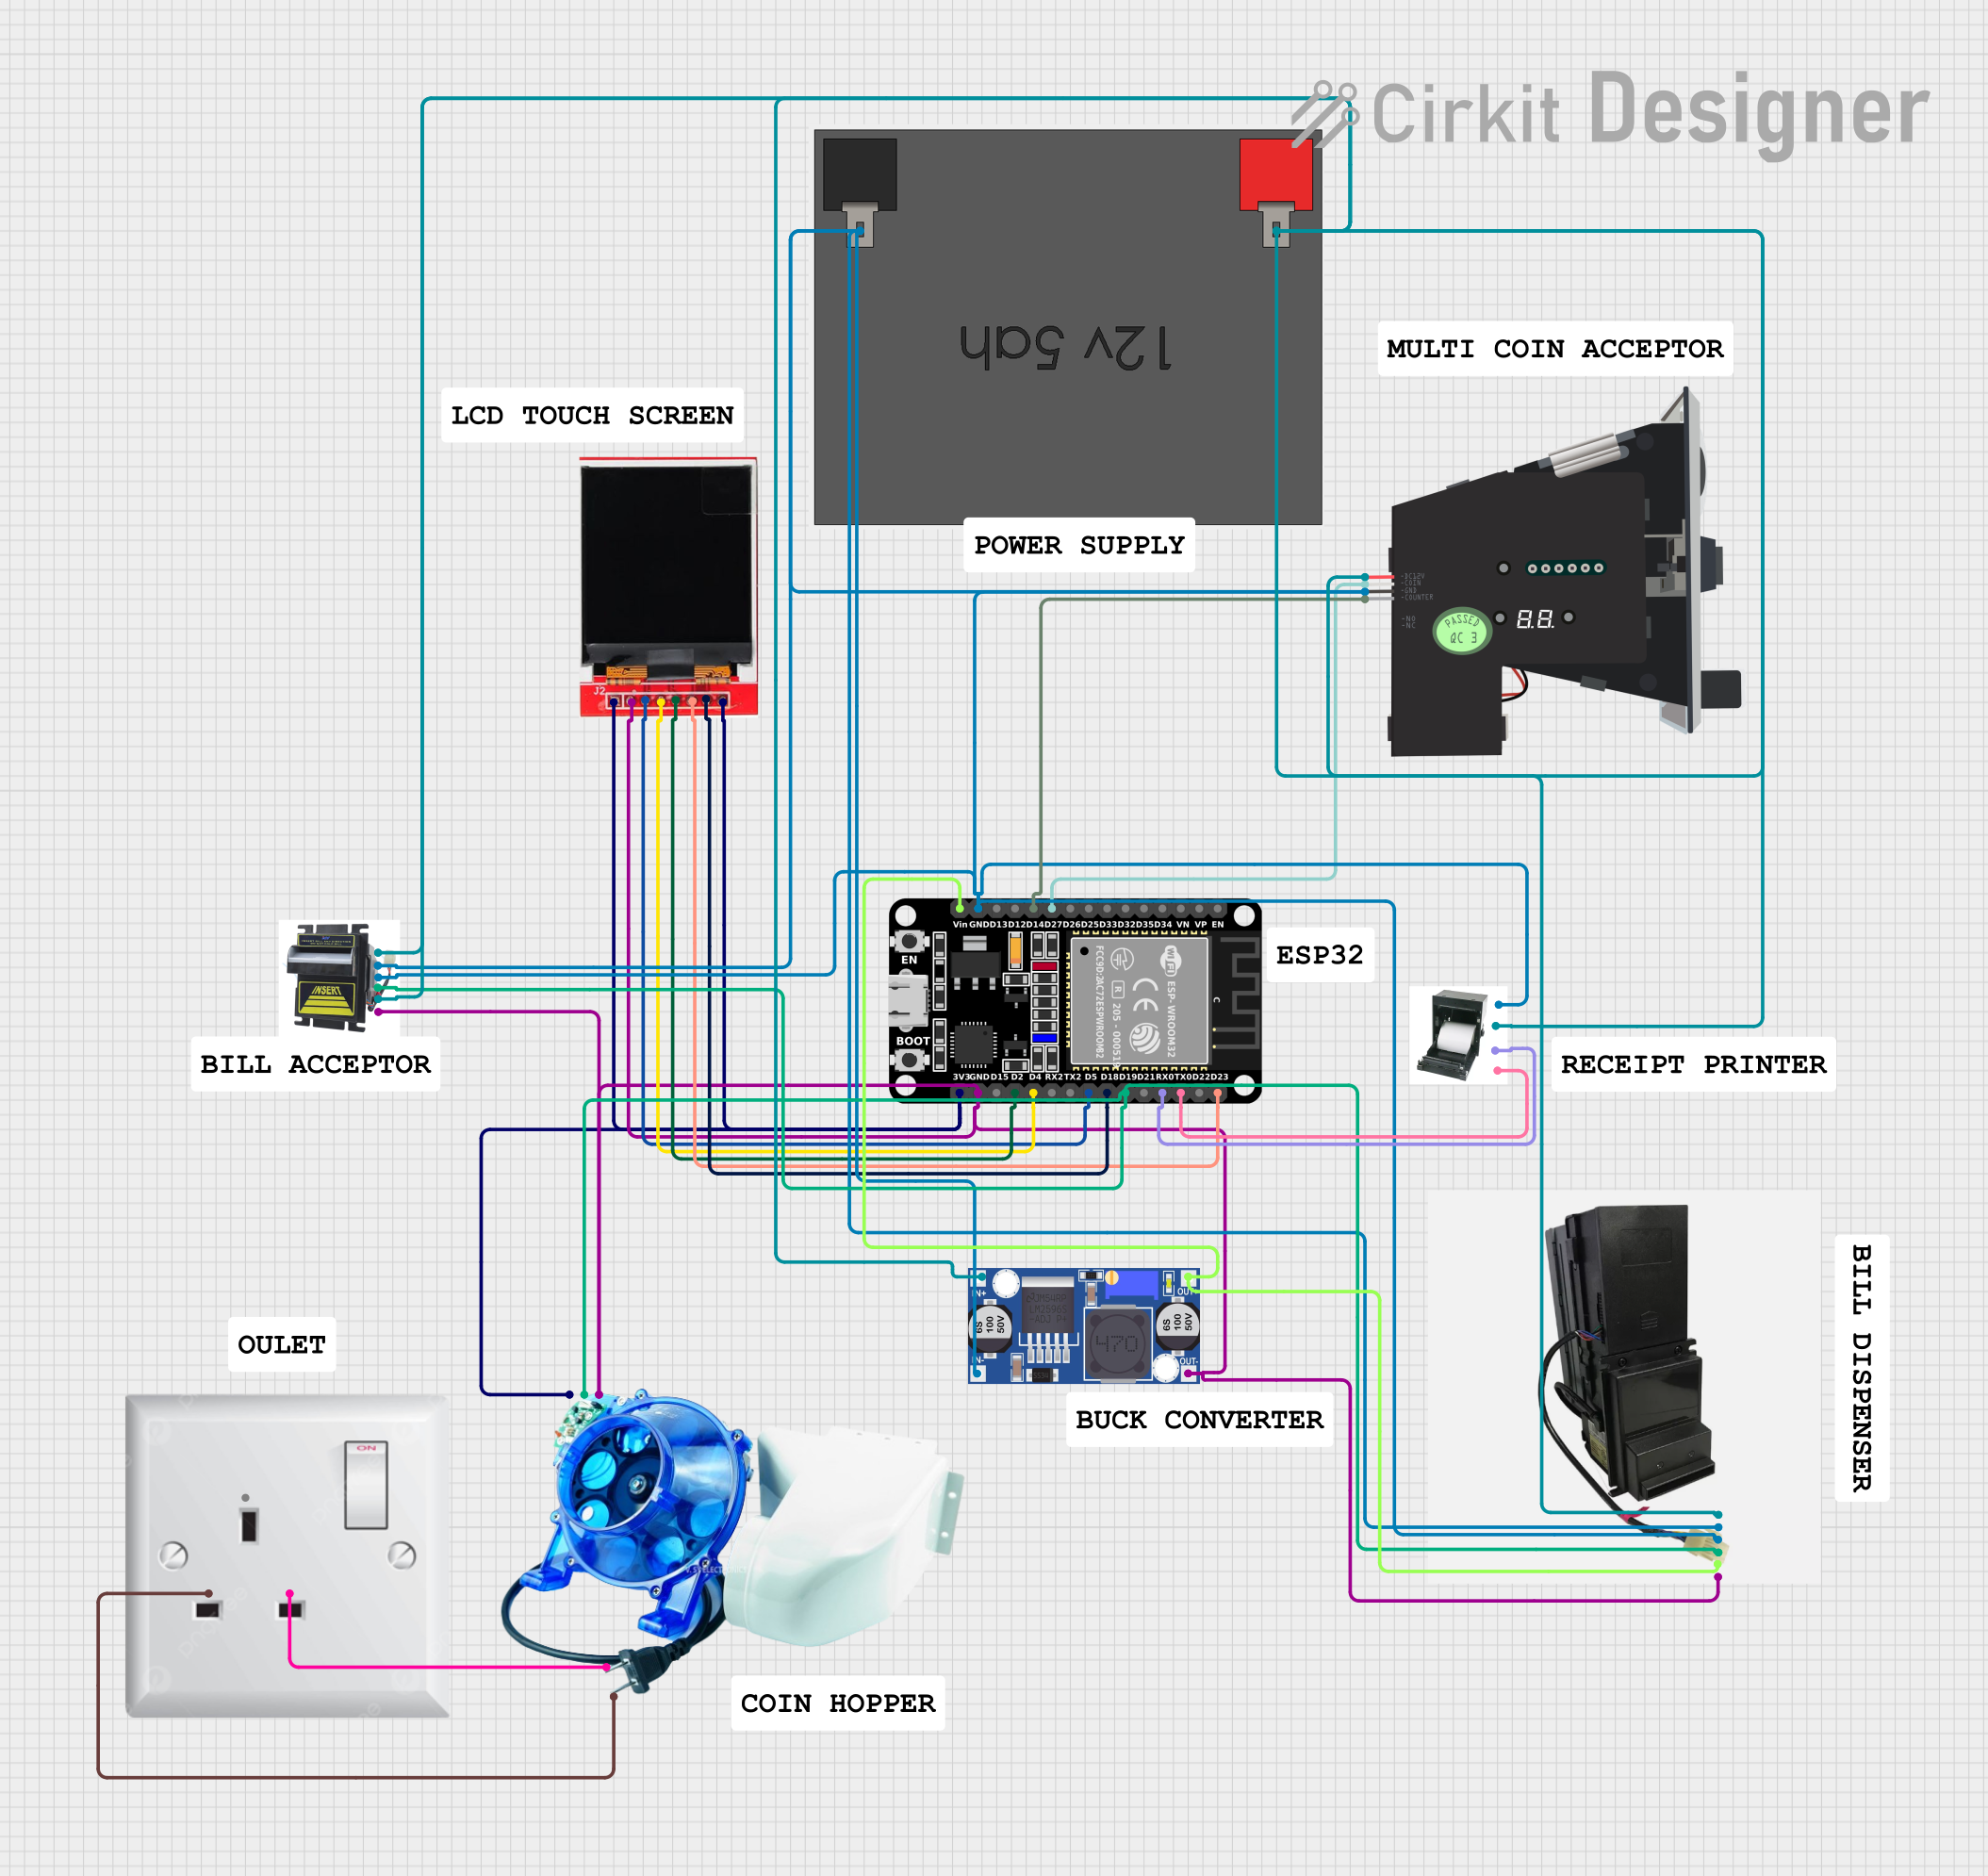
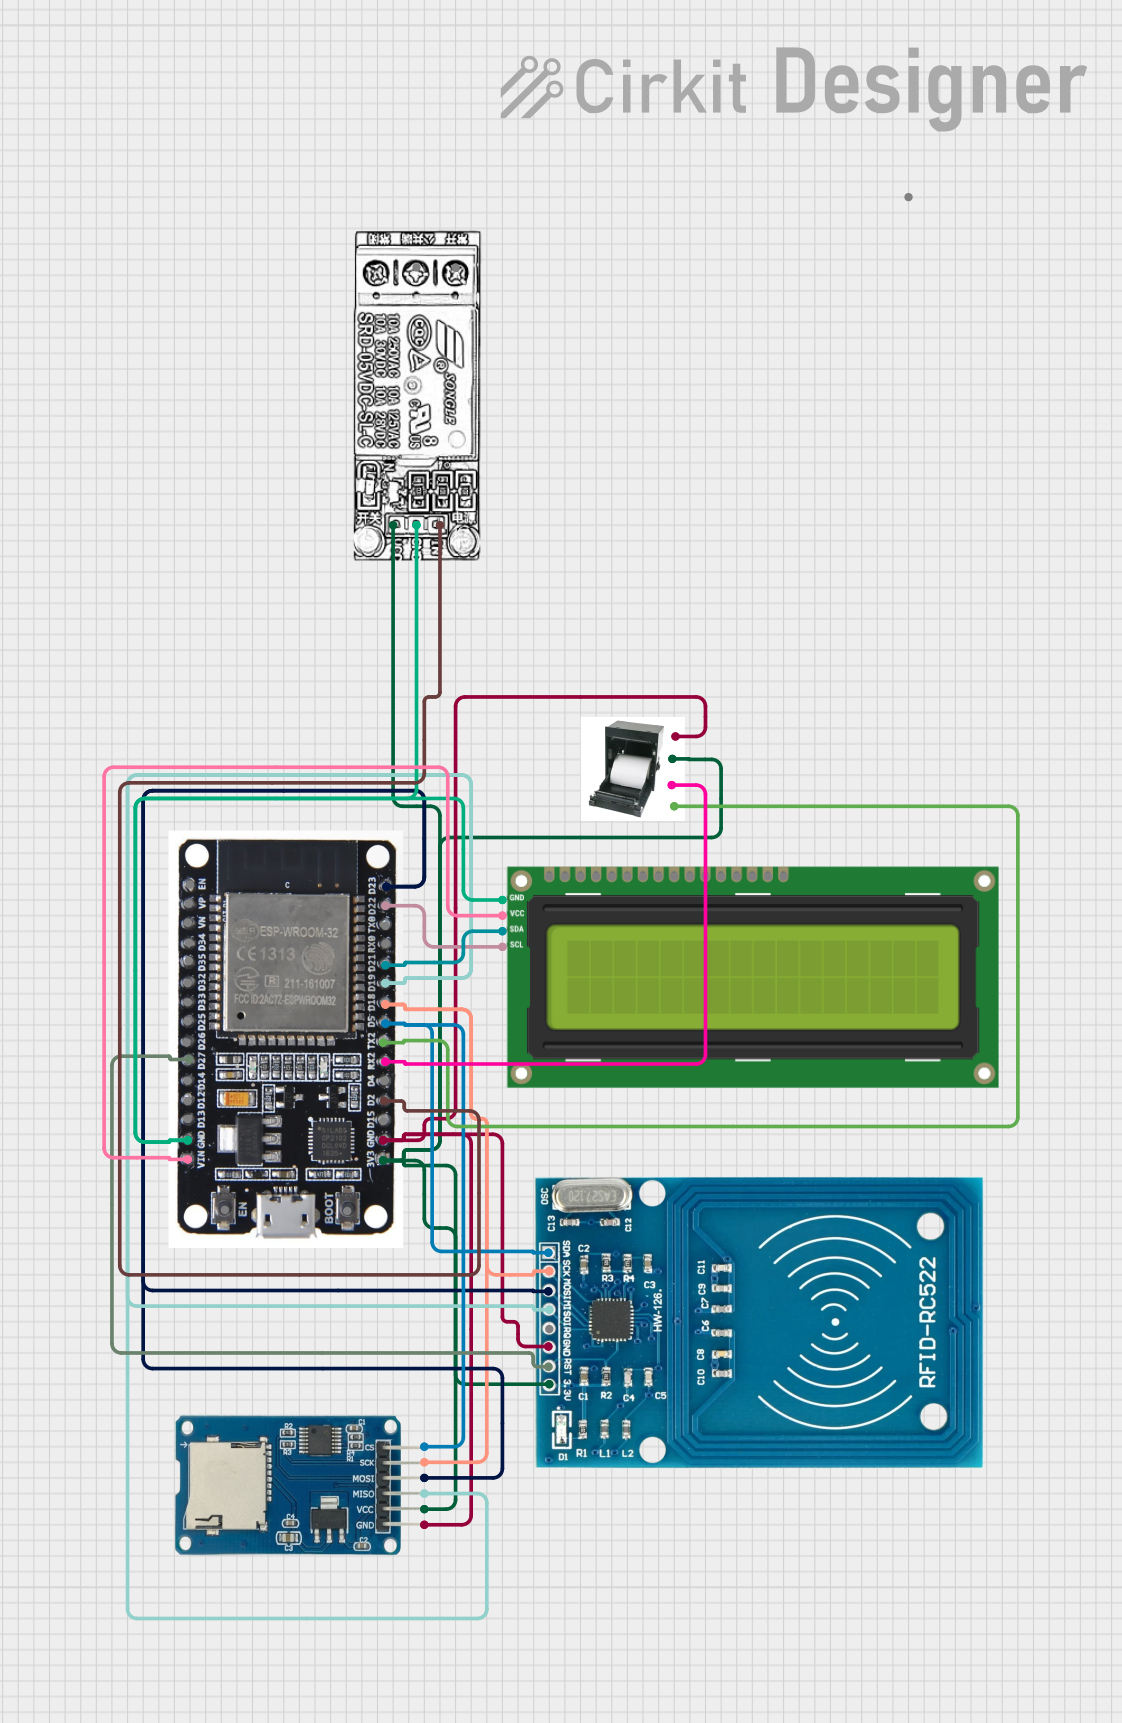
- Self-service kiosks and vending machines
- Medical devices for printing reports or labels
- Logistics and warehousing for barcode and label printing
Technical Specifications
Key Technical Details
| Parameter | Specification |
|---|---|
| Manufacturer | HSPOS |
| Model Number | HS-K24 |
| Printing Method | Direct Thermal |
| Paper Width | 58 mm |
| Printing Speed | Up to 90 mm/s |
| Resolution | 8 dots/mm (203 dpi) |
| Input Voltage | 5V DC ± 5% |
| Current Consumption | 1.5A (maximum during printing) |
| Communication Interface | UART (TTL) |
| Operating Temperature | 0°C to 50°C |
| Storage Temperature | -20°C to 60°C |
| Dimensions | 79 mm x 42 mm x 42 mm |
| Weight | Approximately 120 g |
Pin Configuration and Descriptions
The HS-K24 thermal printer has a 6-pin interface for power and communication. The pinout is as follows:
| Pin Number | Name | Description |
|---|---|---|
| 1 | VCC | Power supply input (5V DC) |
| 2 | GND | Ground |
| 3 | TXD | UART Transmit (data output from printer) |
| 4 | RXD | UART Receive (data input to printer) |
| 5 | NC | Not connected |
| 6 | Paper Out | Paper status signal (low = paper out) |
Usage Instructions
How to Use the HS-K24 in a Circuit
- Power Supply: Connect the VCC pin to a stable 5V DC power source and the GND pin to ground. Ensure the power supply can provide at least 1.5A to handle peak current during printing.
- Communication: Use the UART interface (TXD and RXD pins) to send and receive data. The default baud rate is typically 9600 bps, but refer to the datasheet for configuration options.
- Paper Loading: Insert 58 mm thermal paper into the printer. Ensure the paper is properly aligned to avoid jams.
- Status Monitoring: Use the Paper Out pin to detect when the printer is out of paper. This pin outputs a low signal when paper is not present.
Important Considerations and Best Practices
- Thermal Paper: Use high-quality thermal paper to ensure clear printing and prevent damage to the print head.
- Cooling: Avoid continuous high-speed printing for extended periods to prevent overheating.
- Baud Rate Configuration: If needed, configure the UART baud rate according to your system requirements. Refer to the manufacturer's datasheet for instructions.
- Paper Alignment: Ensure the paper is loaded correctly to avoid misfeeds or jams.
- Power Supply: Use a regulated power supply to prevent voltage fluctuations that could damage the printer.
Example: Connecting to an Arduino UNO
The HS-K24 can be easily interfaced with an Arduino UNO using the UART interface. Below is an example code snippet to send text to the printer:
#include <SoftwareSerial.h>

// Define RX and TX pins for SoftwareSerial
SoftwareSerial thermalPrinter(10, 11); // RX = Pin 10, TX = Pin 11

void setup() {
  // Initialize the serial communication with the printer
  thermalPrinter.begin(9600); // Default baud rate for HS-K24
  Serial.begin(9600); // For debugging via Serial Monitor

  // Print a test message
  thermalPrinter.println("Hello, World!");
  thermalPrinter.println("HSPOS HS-K24 Thermal Printer");
  thermalPrinter.println("----------------------------");
  thermalPrinter.println("Thank you for using our service!");
}

void loop() {
  // No actions in the loop for this example
}
Note: Ensure the RX and TX pins of the printer are connected to the TX and RX pins of the Arduino, respectively. Use a level shifter if the Arduino operates at 5V logic levels to avoid damaging the printer.
Troubleshooting and FAQs
Common Issues and Solutions
Printer Not Responding
- Cause: Incorrect wiring or power supply issues.
- Solution: Double-check the connections, ensure the power supply provides 5V DC, and verify the UART connections.
Paper Jam
- Cause: Misaligned or improperly loaded paper.
- Solution: Remove the paper, clear any obstructions, and reload the paper correctly.
Faint or No Printing
- Cause: Low-quality thermal paper or a dirty print head.
- Solution: Use high-quality thermal paper and clean the print head with a soft, lint-free cloth.
Paper Out Signal Always Low
- Cause: No paper loaded or sensor malfunction.
- Solution: Load paper and ensure the sensor is not obstructed.
Garbage Characters Printed
- Cause: Incorrect baud rate or communication settings.
- Solution: Verify the baud rate and UART settings match between the printer and the microcontroller.
FAQs
Q: Can the HS-K24 print images or barcodes?
A: Yes, the printer supports basic image and barcode printing. Refer to the command set in the datasheet for details.Q: What is the maximum paper roll diameter supported?
A: The HS-K24 supports paper rolls with a maximum diameter of 50 mm.Q: Can I use the printer with a Raspberry Pi?
A: Yes, the printer can be connected to a Raspberry Pi using the UART interface. Ensure proper voltage level shifting if required.Q: How do I change the baud rate?
A: Refer to the manufacturer's datasheet for instructions on configuring the baud rate using specific commands.
By following this documentation, you can effectively integrate and operate the HSPOS HS-K24 thermal printer in your projects.