How to Use mini mosfet slideswitch: Examples, Pinouts, and Specs
Introduction
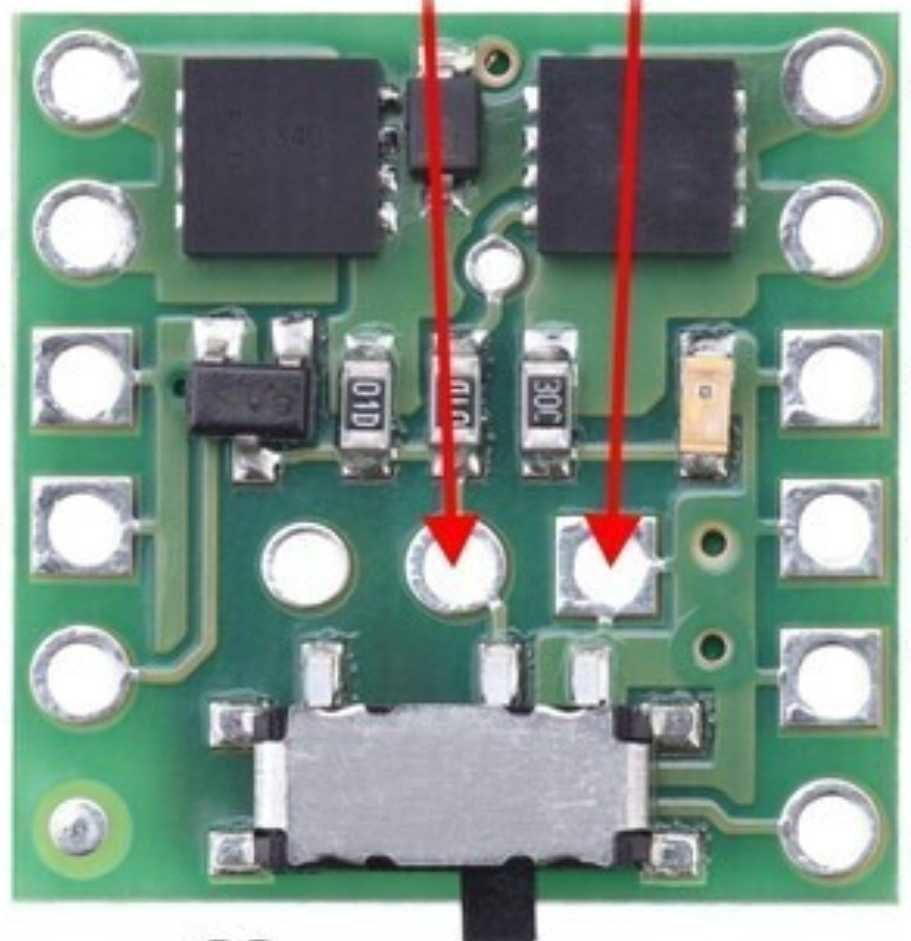
The Mini MOSFET Slide Switch (Manufacturer Part ID: 2810) by Pololu is a compact and efficient electronic switch designed for low-power switching applications. It utilizes a MOSFET (Metal-Oxide-Semiconductor Field-Effect Transistor) to control the flow of current in a circuit, offering a reliable and energy-efficient alternative to traditional mechanical switches. This component is ideal for projects requiring compact, low-power, and high-efficiency switching solutions.
Explore Projects Built with mini mosfet slideswitch
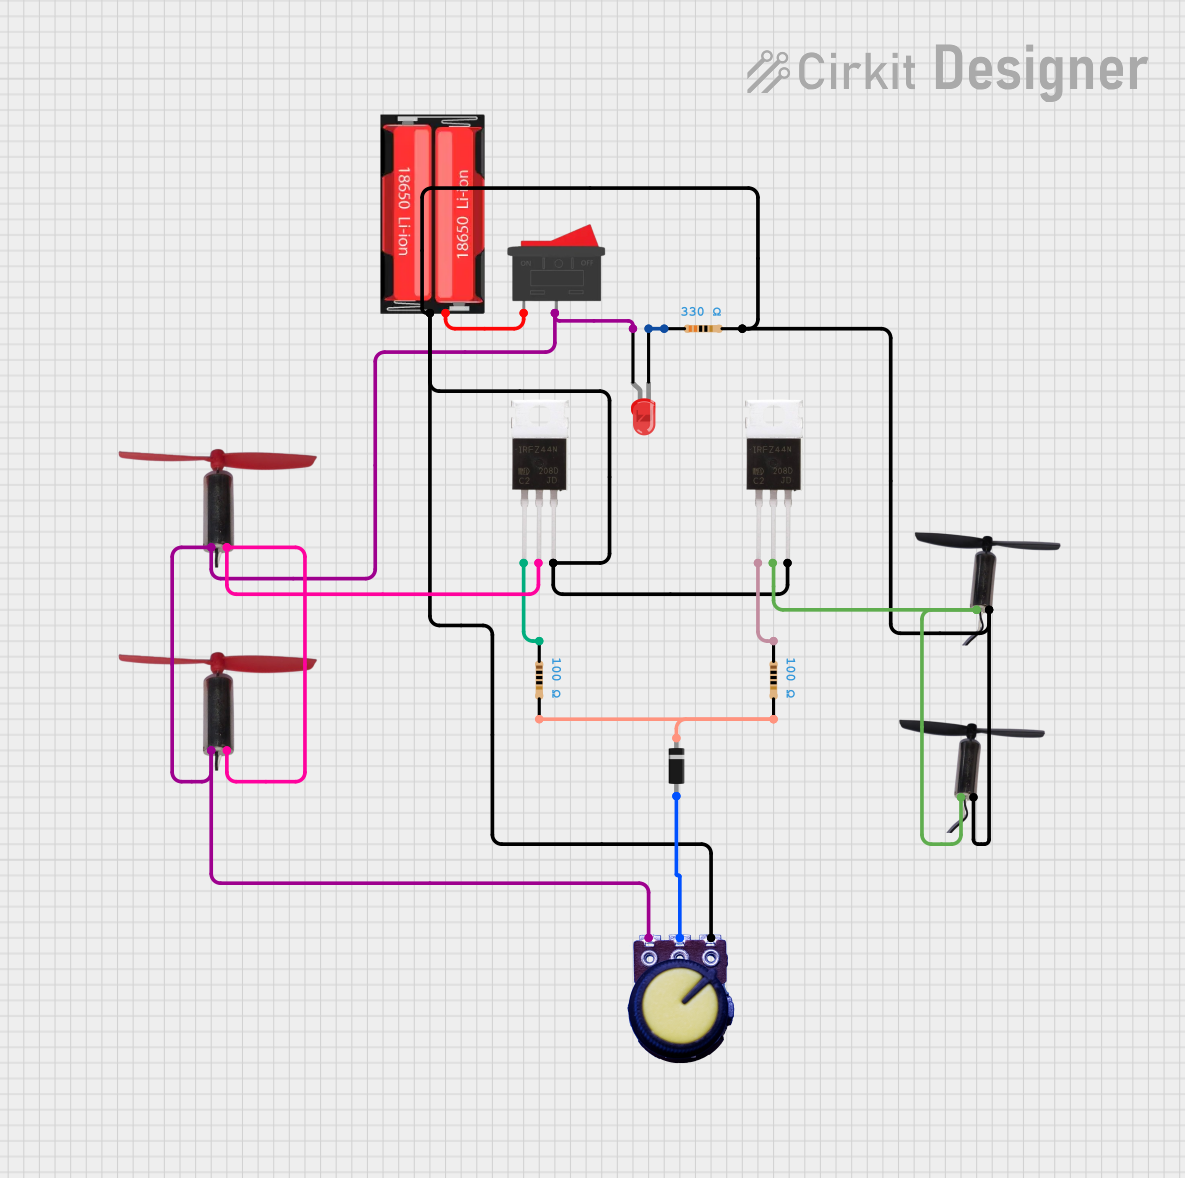
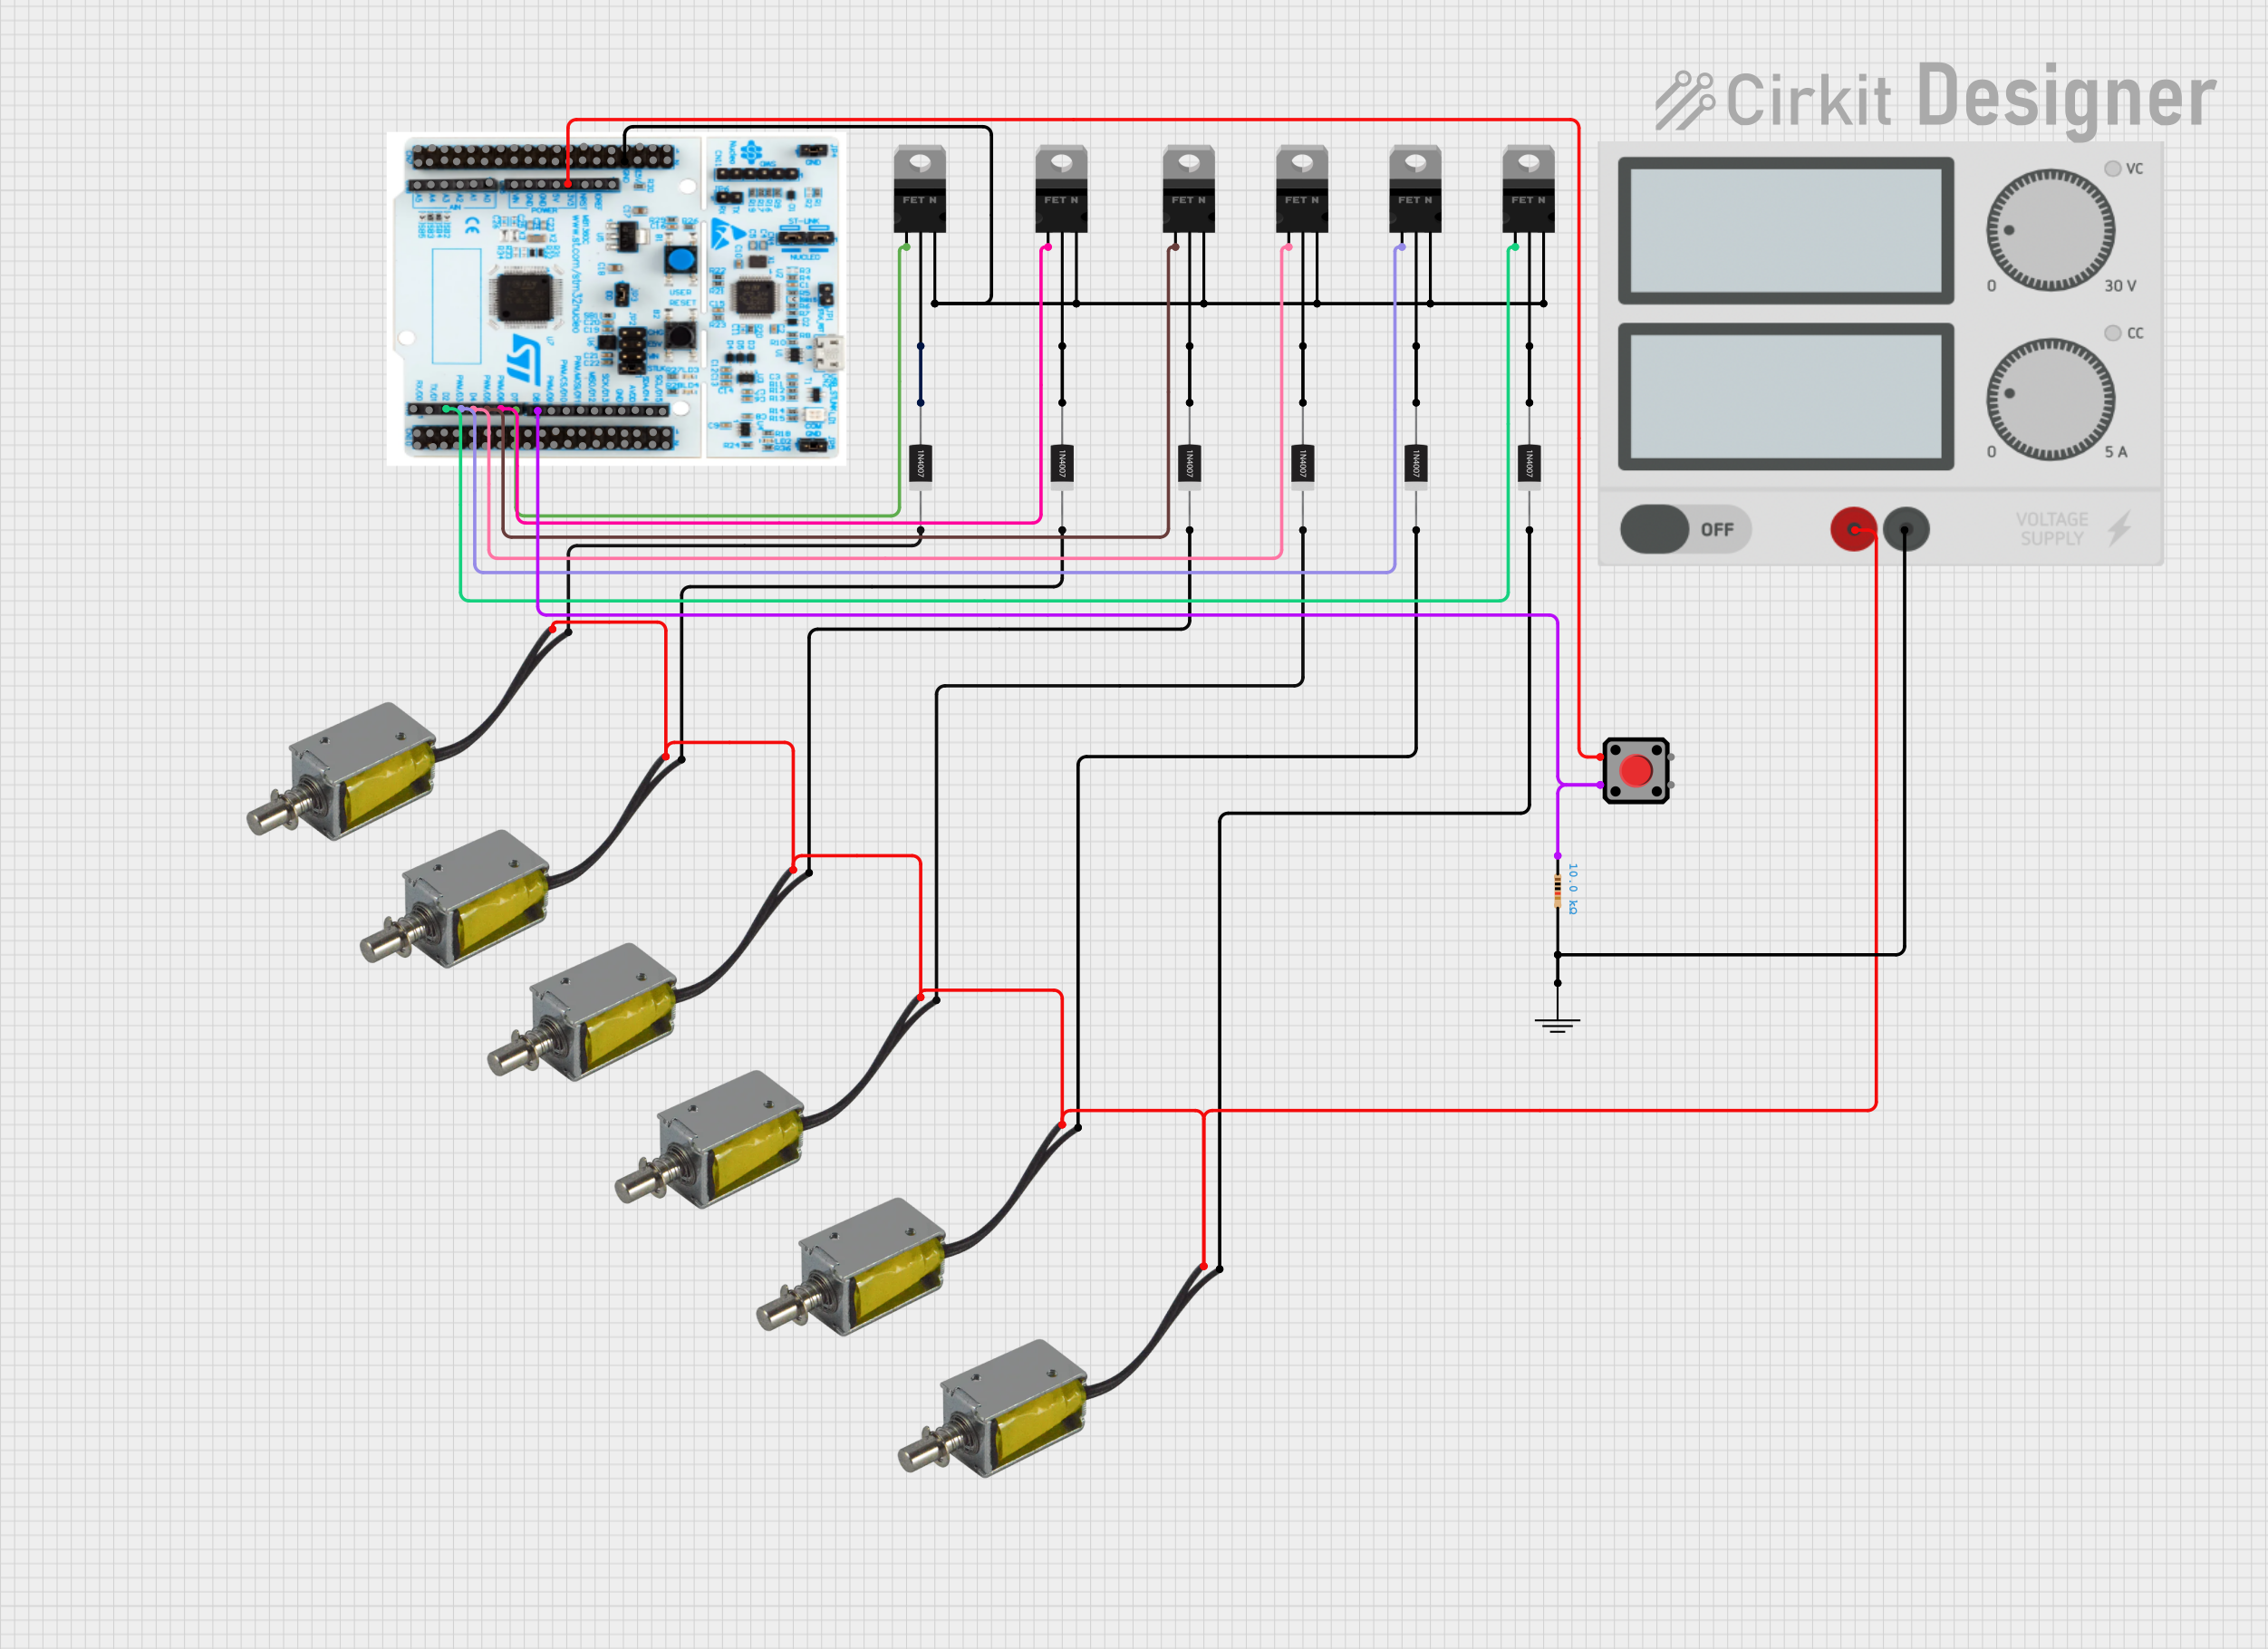

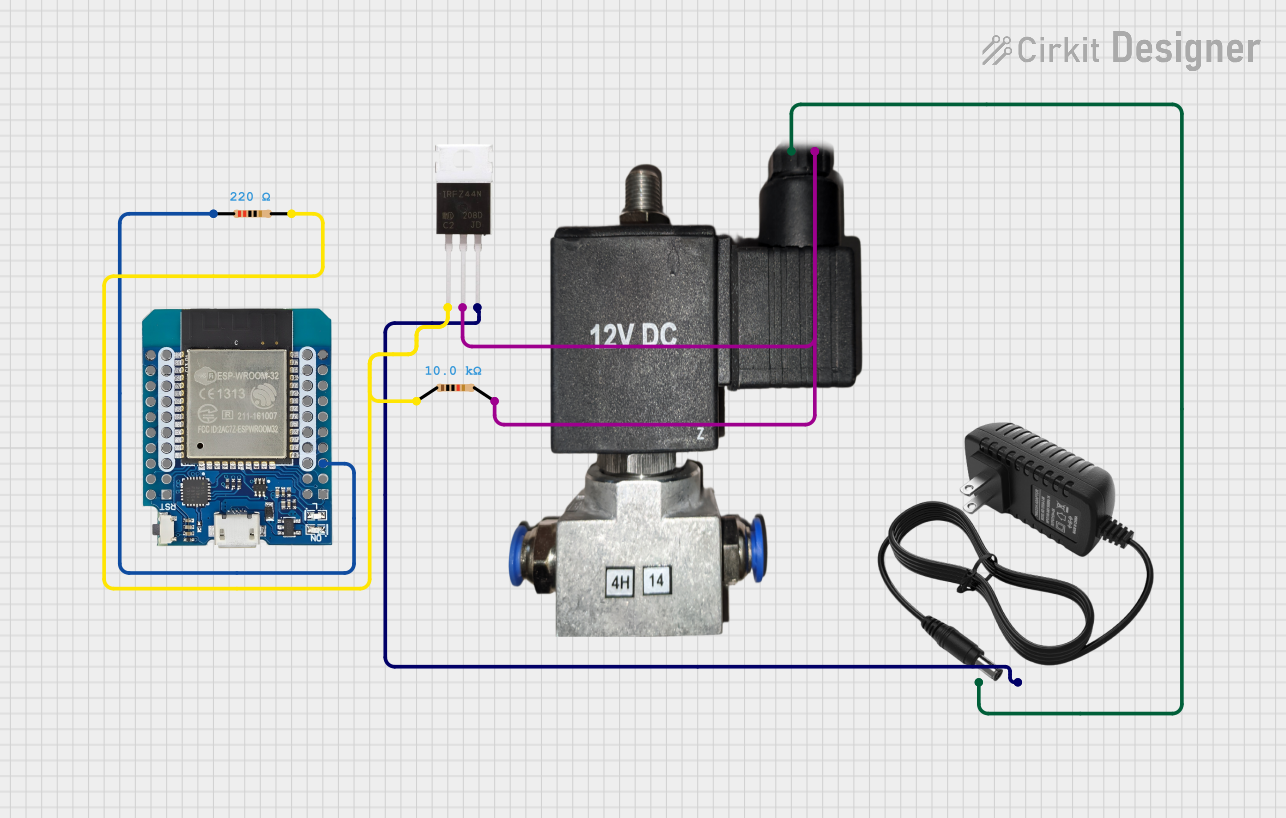
Explore Projects Built with mini mosfet slideswitch
Common Applications and Use Cases
- Power control for small electronic devices
- Battery-powered projects
- Low-power microcontroller-based systems
- Robotics and automation
- Wearable electronics
Technical Specifications
The following table outlines the key technical details of the Mini MOSFET Slide Switch:
| Parameter | Value |
|---|---|
| Manufacturer | Pololu |
| Part ID | 2810 |
| Operating Voltage | 2.5 V to 20 V |
| Maximum Continuous Current | 4 A (with sufficient cooling) |
| Control Current | < 0.01 mA (very low power consumption) |
| Dimensions | 0.4" × 0.8" × 0.1" (10 mm × 20 mm × 3 mm) |
| Weight | 0.5 g |
| On-Resistance (RDS(on)) | < 0.01 Ω (typical) |
| Operating Temperature | -40°C to +85°C |
Pin Configuration and Descriptions
The Mini MOSFET Slide Switch has three main pins for connection:
| Pin | Name | Description |
|---|---|---|
| 1 | VIN | Input voltage pin. Connect to the positive terminal of the power source. |
| 2 | VOUT | Output voltage pin. Connect to the load or circuit to be powered. |
| 3 | GND | Ground pin. Connect to the negative terminal of the power source or circuit. |
Usage Instructions
How to Use the Component in a Circuit
Connect the Power Source:
- Attach the positive terminal of your power source to the VIN pin.
- Connect the negative terminal of your power source to the GND pin.
Connect the Load:
- Attach the positive terminal of your load (e.g., motor, LED, or circuit) to the VOUT pin.
- Ensure the load's negative terminal is connected to the same ground as the power source.
Slide the Switch:
- Use the physical slide switch to toggle the MOSFET on or off.
- When the switch is in the "ON" position, current flows from VIN to VOUT, powering the load.
- In the "OFF" position, the circuit is disconnected, and no current flows.
Important Considerations and Best Practices
Cooling Requirements:
For currents above 2 A, ensure adequate cooling (e.g., heat sinks or airflow) to prevent overheating.Voltage Limits:
Do not exceed the maximum operating voltage of 20 V to avoid damaging the MOSFET.Polarity:
Double-check the polarity of your connections to prevent reverse voltage damage.Low Power Control:
The switch consumes minimal current, making it suitable for battery-powered applications.
Example: Using with an Arduino UNO
The Mini MOSFET Slide Switch can be used to control power to an Arduino UNO or other microcontroller-based circuits. Below is an example of how to integrate it into a simple LED control circuit:
Circuit Setup
- Connect the VIN pin of the switch to a 9 V battery's positive terminal.
- Connect the VOUT pin to the positive terminal of an LED (with a current-limiting resistor in series).
- Connect the GND pin to the battery's negative terminal and the LED's negative terminal.
Arduino Code Example
Although the switch operates independently of the Arduino, you can use the Arduino to monitor the state of the circuit. For example, you can use a digital input pin to detect whether the switch is on or off:
// Define the pin connected to the VOUT of the MOSFET switch
const int switchPin = 2;

void setup() {
  // Initialize the serial monitor for debugging
  Serial.begin(9600);

  // Set the switch pin as an input
  pinMode(switchPin, INPUT);
}

void loop() {
  // Read the state of the switch
  int switchState = digitalRead(switchPin);

  // Print the state to the serial monitor
  if (switchState == HIGH) {
    Serial.println("Switch is ON - Circuit is powered.");
  } else {
    Serial.println("Switch is OFF - Circuit is disconnected.");
  }

  // Add a small delay to avoid flooding the serial monitor
  delay(500);
}
Troubleshooting and FAQs
Common Issues and Solutions
Switch Does Not Power the Load:
- Cause: Incorrect wiring or loose connections.
- Solution: Double-check all connections, ensuring proper polarity and secure contacts.
MOSFET Overheating:
- Cause: Excessive current or insufficient cooling.
- Solution: Reduce the load current or add a heat sink to dissipate heat.
Load Not Receiving Power When Switch is ON:
- Cause: Faulty MOSFET or damaged component.
- Solution: Test the switch with a multimeter to verify functionality. Replace if necessary.
Arduino Fails to Detect Switch State:
- Cause: Incorrect pin configuration or wiring.
- Solution: Ensure the Arduino pin is correctly connected to the VOUT pin and configured as an input.
FAQs
Q: Can this switch handle inductive loads like motors?
A: Yes, but you should use a flyback diode across the load to protect the MOSFET from voltage spikes caused by inductive loads.
Q: Is the switch suitable for high-frequency switching?
A: No, the Mini MOSFET Slide Switch is designed for manual, low-frequency switching applications.
Q: Can I use this switch with a 3.3 V power source?
A: Yes, the switch operates with input voltages as low as 2.5 V, making it compatible with 3.3 V systems.
Q: Does the switch consume power when off?
A: No, the switch has negligible power consumption when in the "OFF" state.
This concludes the documentation for the Pololu Mini MOSFET Slide Switch (Part ID: 2810).