How to Use Soil Moisture Sensor2p: Examples, Pinouts, and Specs

Introduction
The Soil Moisture Sensor2p is a device designed to measure the volumetric water content in soil. It provides real-time data that can be used for irrigation management, plant health monitoring, and agricultural automation. This sensor is ideal for applications such as smart gardening, greenhouse automation, and environmental monitoring systems. Its simple design and ease of integration make it suitable for both hobbyists and professionals.
Explore Projects Built with Soil Moisture Sensor2p
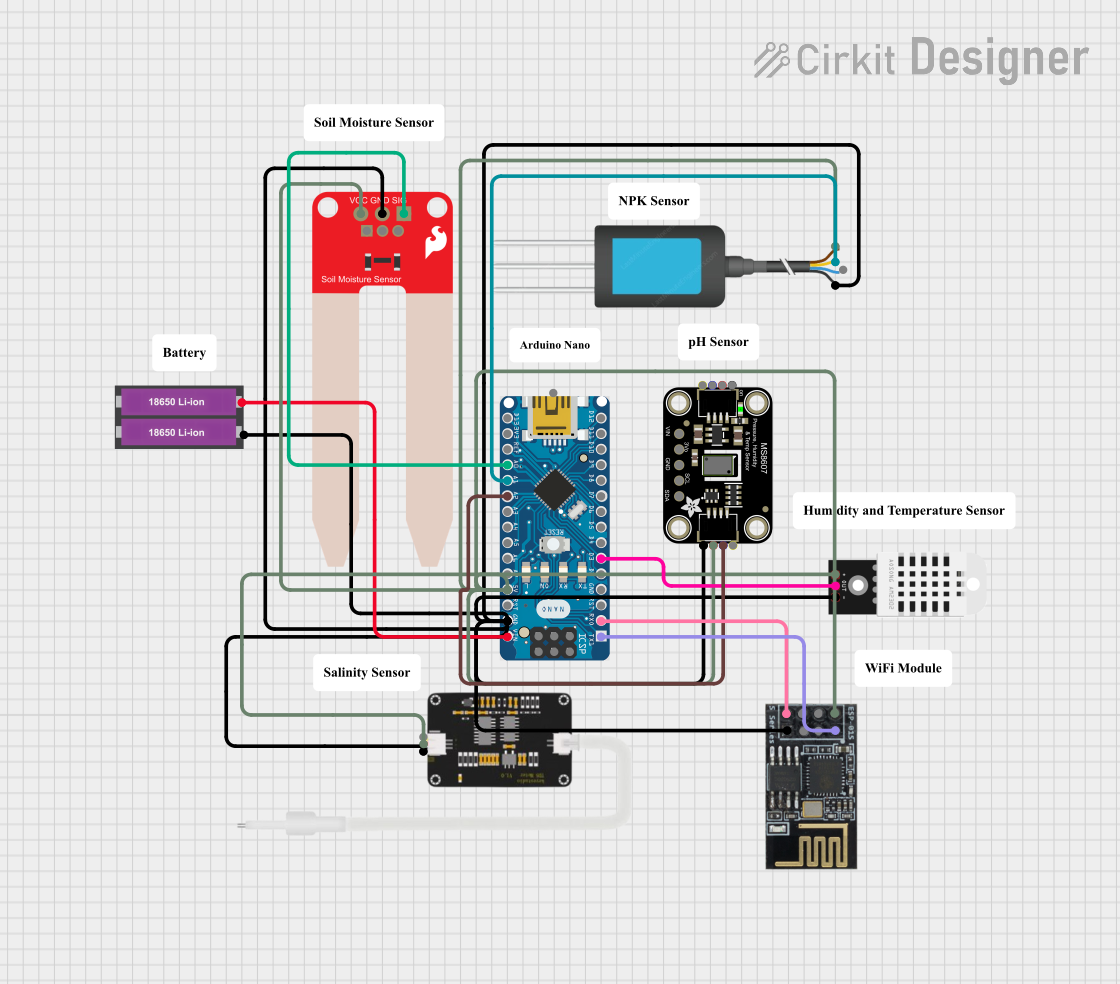
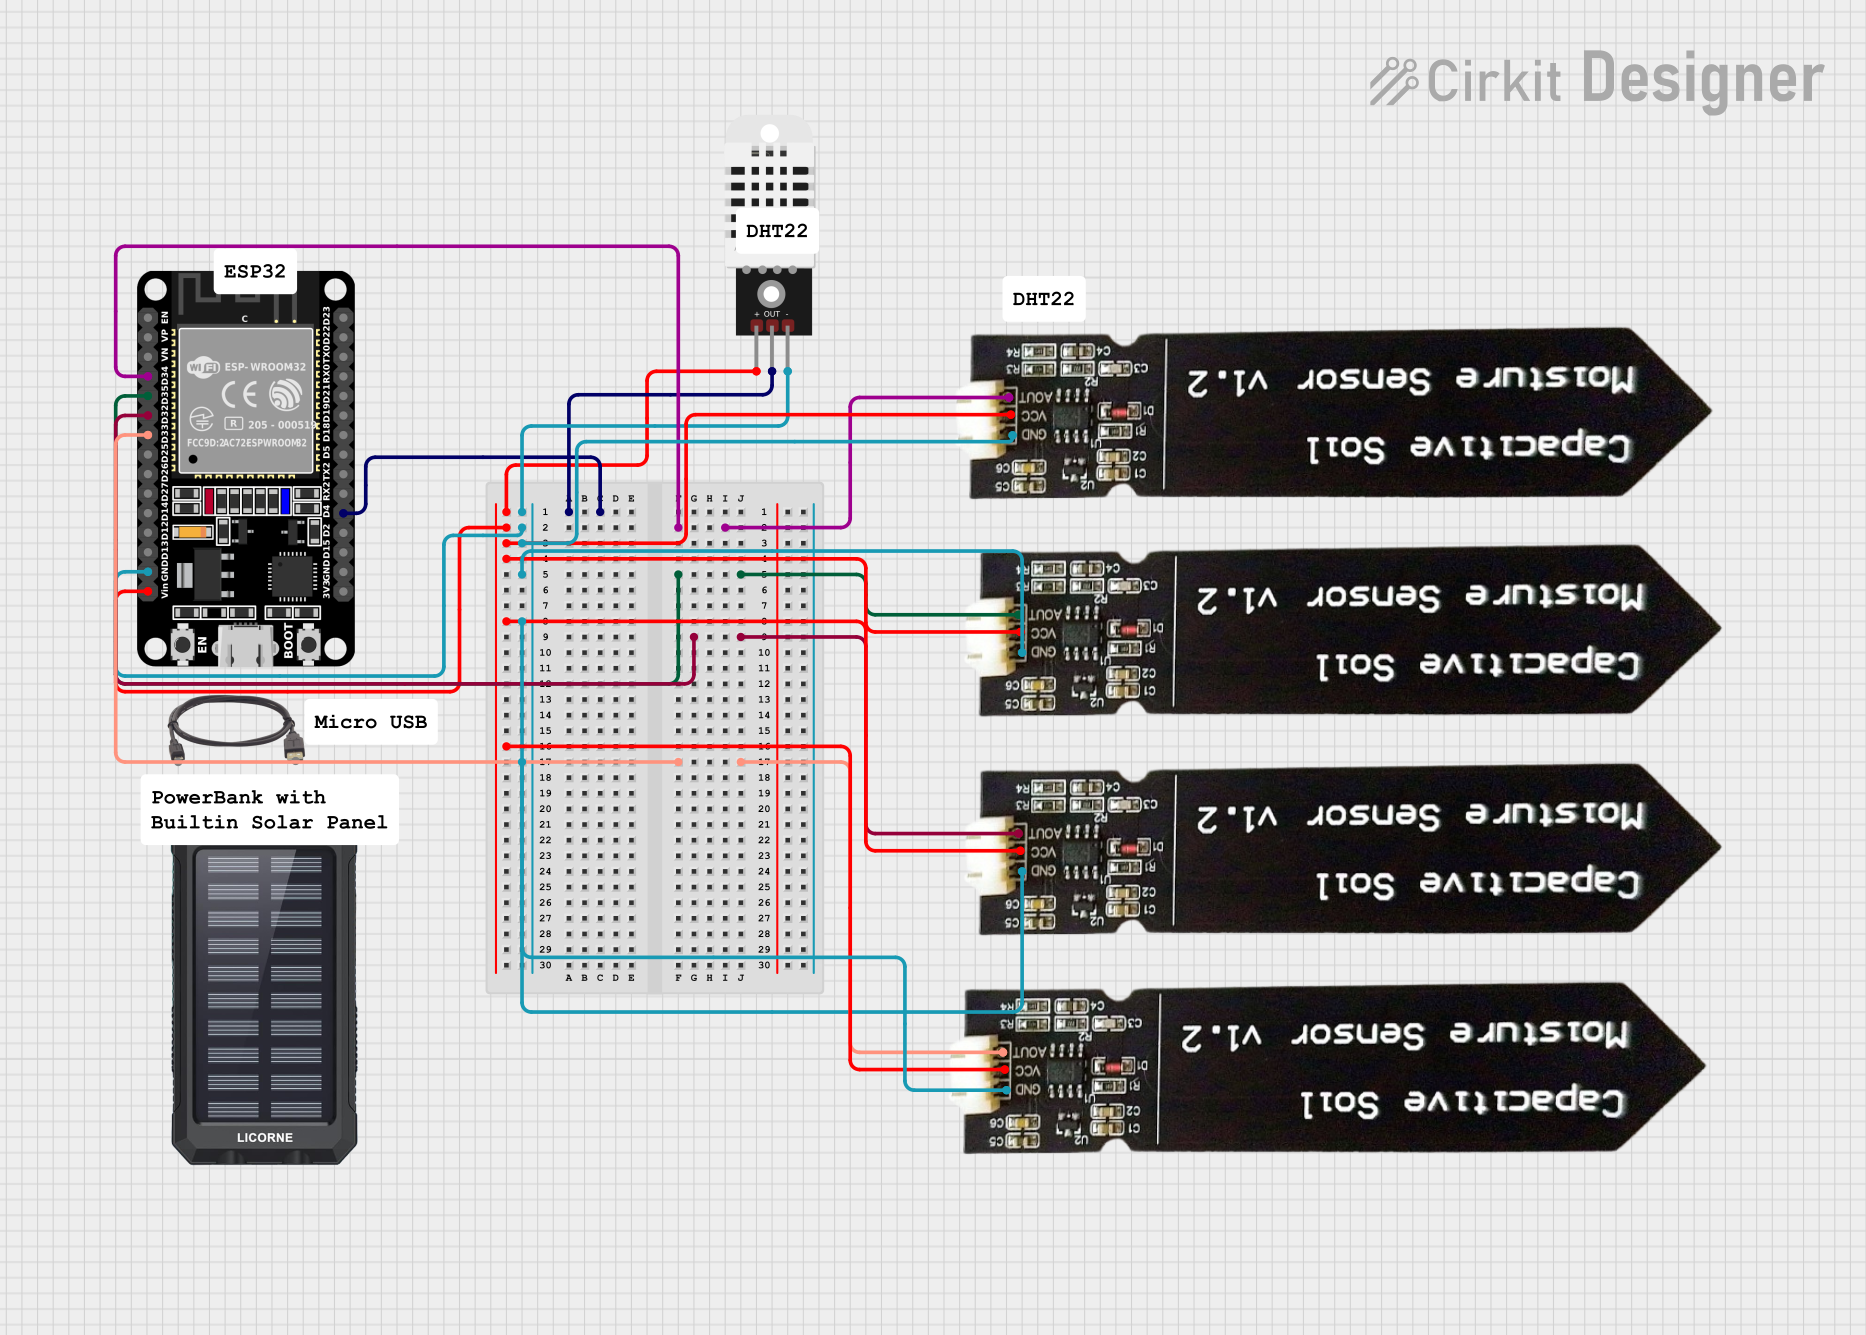
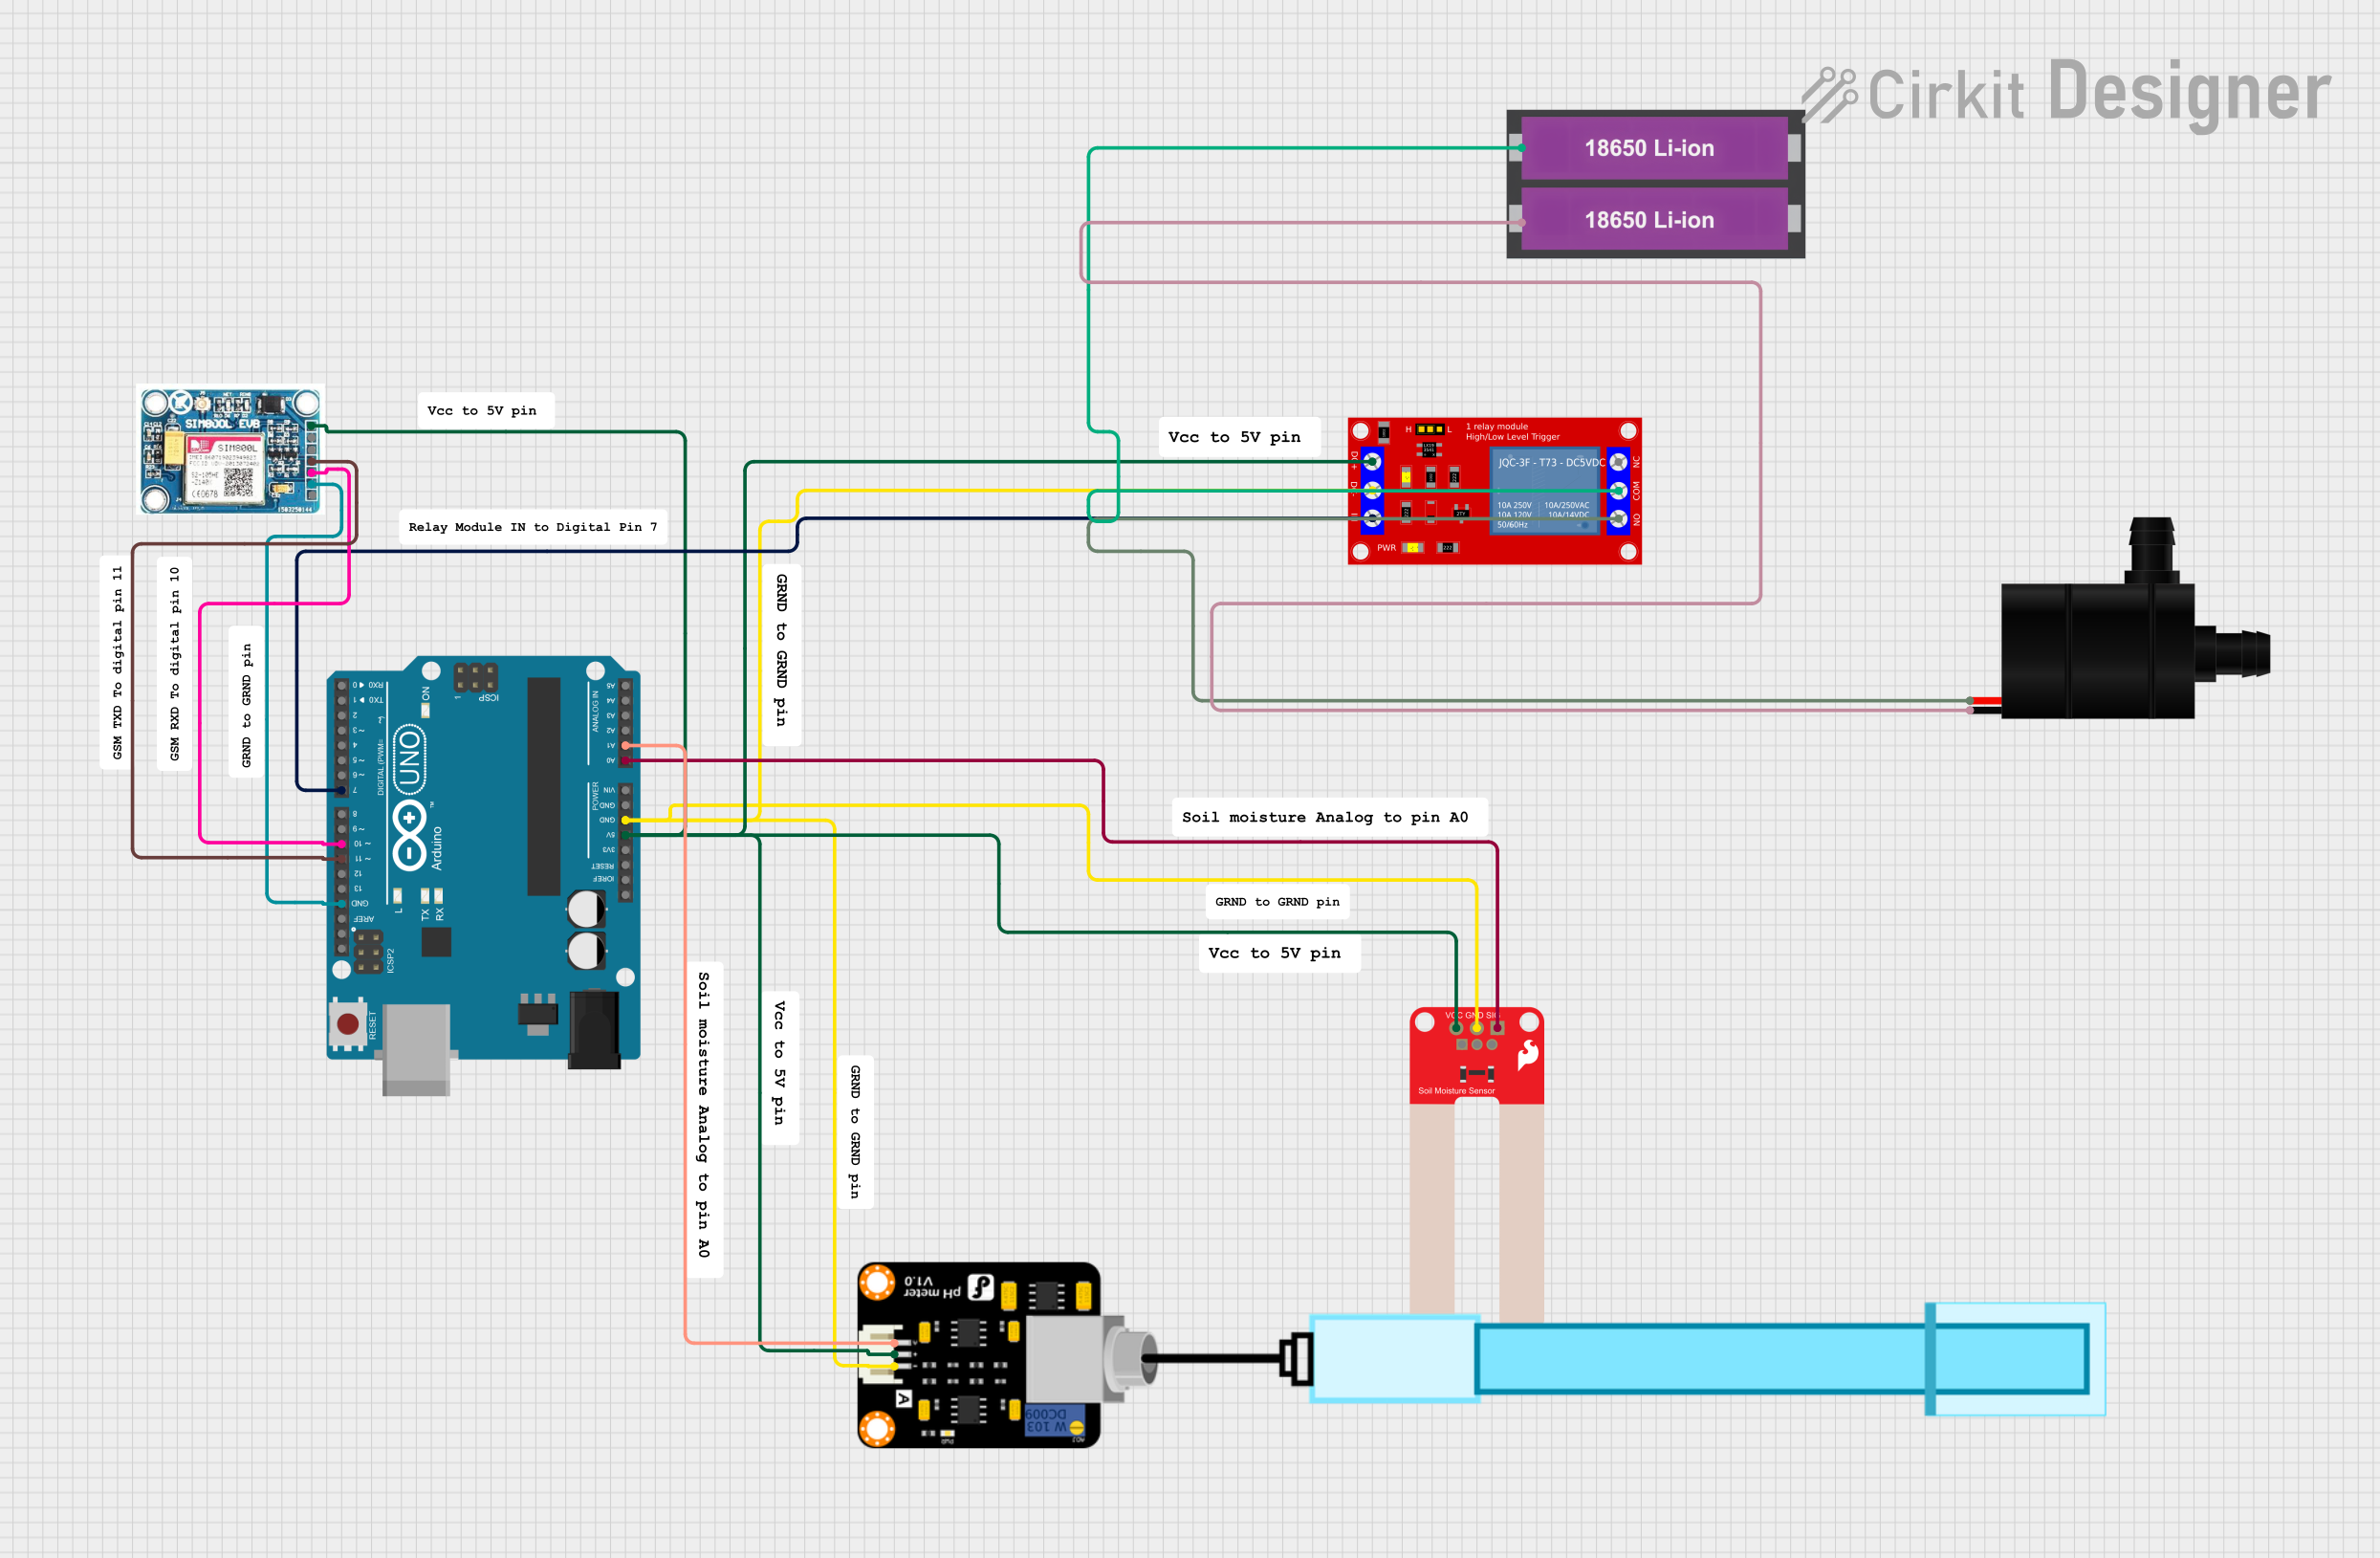
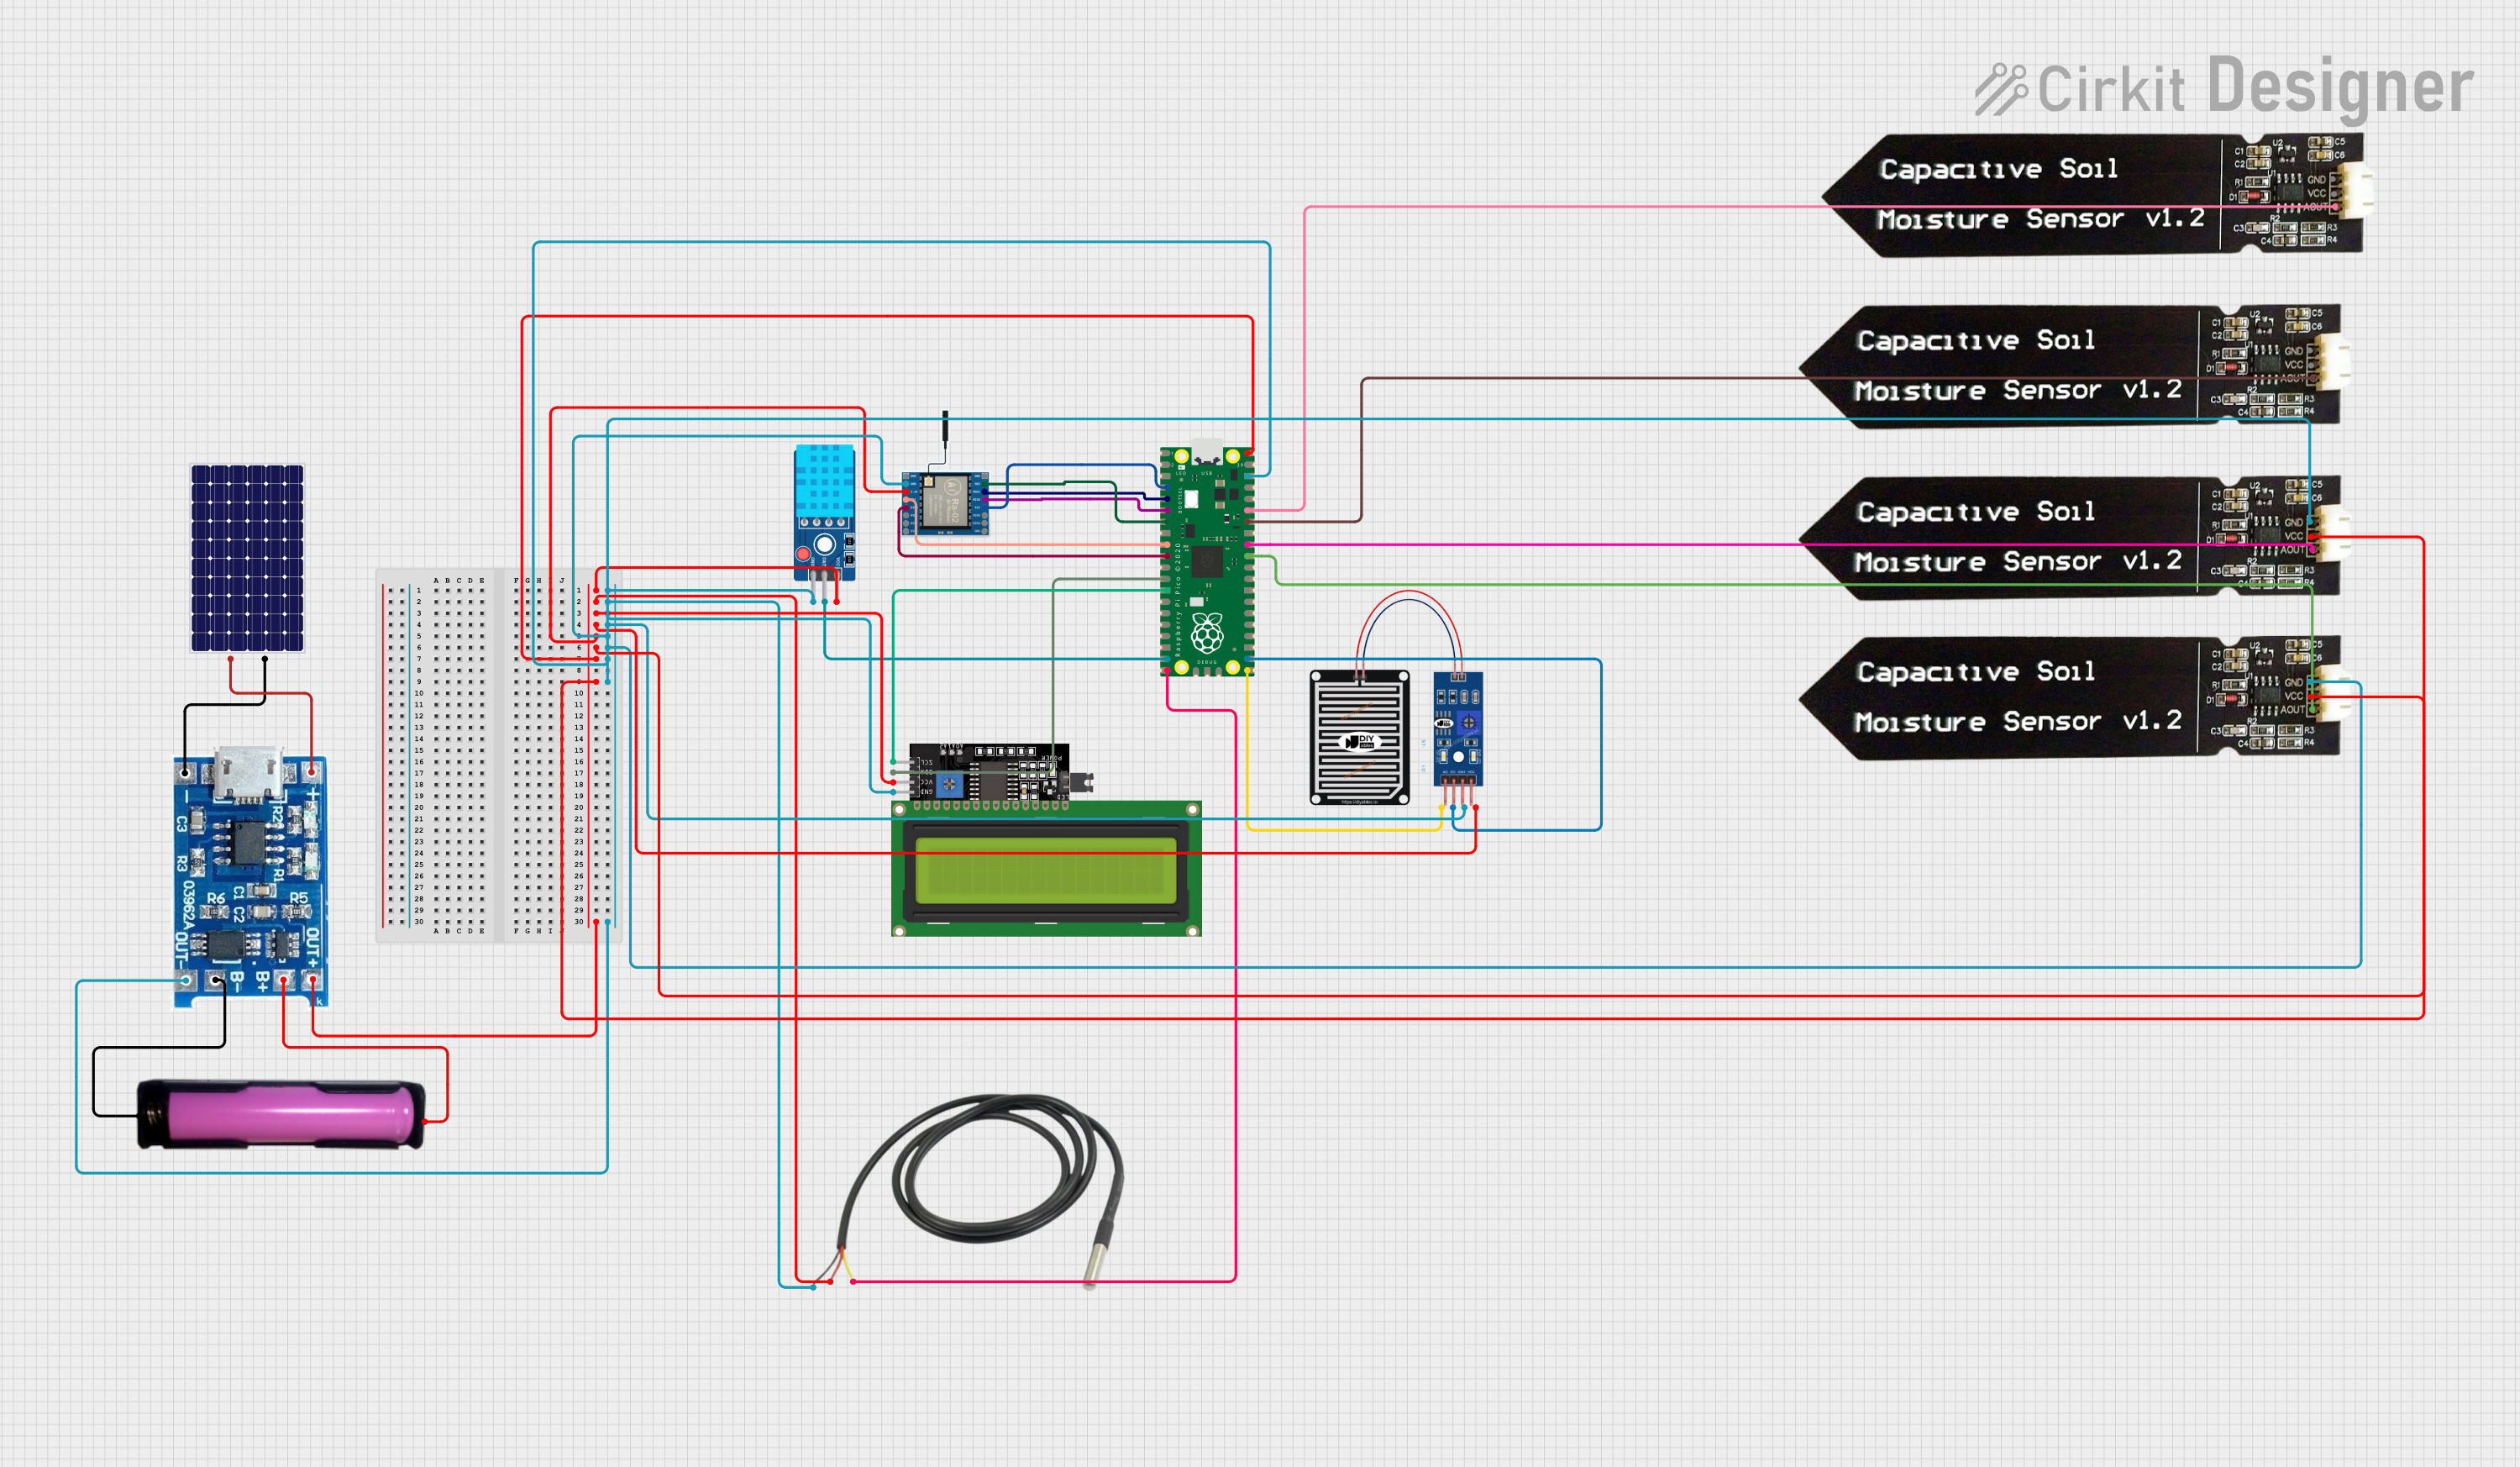
Explore Projects Built with Soil Moisture Sensor2p
Technical Specifications
- Operating Voltage: 3.3V to 5V DC
- Output Type: Analog and Digital
- Current Consumption: < 20mA
- Measurement Range: 0% (dry soil) to 100% (fully saturated soil)
- Interface: 3-pin connector (VCC, GND, OUT)
- Dimensions: 60mm x 20mm x 5mm
Pin Configuration and Descriptions
| Pin Name | Description |
|---|---|
| VCC | Power supply pin. Connect to 3.3V or 5V DC. |
| GND | Ground pin. Connect to the ground of the power supply or microcontroller. |
| OUT | Output pin. Provides an analog voltage proportional to soil moisture level. |
Usage Instructions
How to Use the Soil Moisture Sensor2p in a Circuit
Wiring the Sensor:
- Connect the VCC pin to a 3.3V or 5V power source.
- Connect the GND pin to the ground of your circuit.
- Connect the OUT pin to an analog input pin on your microcontroller (e.g., Arduino).
Placement in Soil:
- Insert the sensor probes into the soil at the desired depth. Ensure the probes are fully in contact with the soil for accurate readings.
Reading the Output:
- The sensor outputs an analog voltage that corresponds to the soil moisture level. A higher voltage indicates wetter soil, while a lower voltage indicates drier soil.
Important Considerations and Best Practices
- Avoid prolonged exposure of the sensor to water to prevent corrosion. Use corrosion-resistant probes if available.
- Calibrate the sensor for your specific soil type to improve accuracy.
- Do not power the sensor continuously for long periods. Use a microcontroller to power it only when taking measurements to extend its lifespan.
- Keep the sensor clean and free of debris for consistent readings.
Example Code for Arduino UNO
// Example code to read soil moisture levels using the Soil Moisture Sensor2p
// and display the results on the Serial Monitor.

const int sensorPin = A0; // Analog pin connected to the sensor's OUT pin
int sensorValue = 0;      // Variable to store the sensor reading

void setup() {
  Serial.begin(9600); // Initialize serial communication at 9600 baud
  pinMode(sensorPin, INPUT); // Set the sensor pin as an input
}

void loop() {
  sensorValue = analogRead(sensorPin); // Read the analog value from the sensor
  float voltage = sensorValue * (5.0 / 1023.0); // Convert to voltage (5V system)

  // Map the sensor value to a percentage (0% to 100%)
  int moisturePercent = map(sensorValue, 0, 1023, 0, 100);

  // Print the results to the Serial Monitor
  Serial.print("Soil Moisture Level: ");
  Serial.print(moisturePercent);
  Serial.println("%");

  delay(1000); // Wait for 1 second before taking the next reading
}
Troubleshooting and FAQs
Common Issues and Solutions
No Output or Incorrect Readings:
- Cause: Loose or incorrect wiring.
Solution: Double-check all connections and ensure the sensor is properly powered. - Cause: Sensor probes are not fully in contact with the soil.
Solution: Reinsert the sensor probes into the soil, ensuring good contact.
- Cause: Loose or incorrect wiring.
Fluctuating Readings:
- Cause: Soil is too loose or dry.
Solution: Compact the soil around the sensor or add water to the soil. - Cause: Electrical noise in the circuit.
Solution: Use a capacitor (e.g., 0.1µF) between the sensor's VCC and GND pins to filter noise.
- Cause: Soil is too loose or dry.
Corrosion of Probes:
- Cause: Prolonged exposure to water or high humidity.
Solution: Use corrosion-resistant probes or coat the existing probes with a protective layer.
- Cause: Prolonged exposure to water or high humidity.
FAQs
Q: Can this sensor be used in hydroponics?
A: No, this sensor is designed for soil-based applications and may not provide accurate readings in water or nutrient solutions.Q: How do I calibrate the sensor?
A: Measure the sensor's output in dry soil and fully saturated soil. Use these values to map the sensor's readings to a percentage scale.Q: Can I use this sensor with a 3.3V microcontroller?
A: Yes, the sensor operates at both 3.3V and 5V, making it compatible with most microcontrollers.
By following this documentation, you can effectively integrate the Soil Moisture Sensor2p into your projects and ensure reliable performance.