How to Use BMP390L: Examples, Pinouts, and Specs
Introduction
The BMP390L is a digital barometric pressure sensor designed for high-precision measurements of atmospheric pressure and temperature. It is a compact, low-power device that communicates via I2C or SPI interfaces, making it ideal for integration into a wide range of applications. The sensor is commonly used in weather stations, altimeters, and IoT devices for altitude tracking and environmental monitoring. Its high accuracy and low noise make it suitable for both consumer and industrial applications.
Explore Projects Built with BMP390L
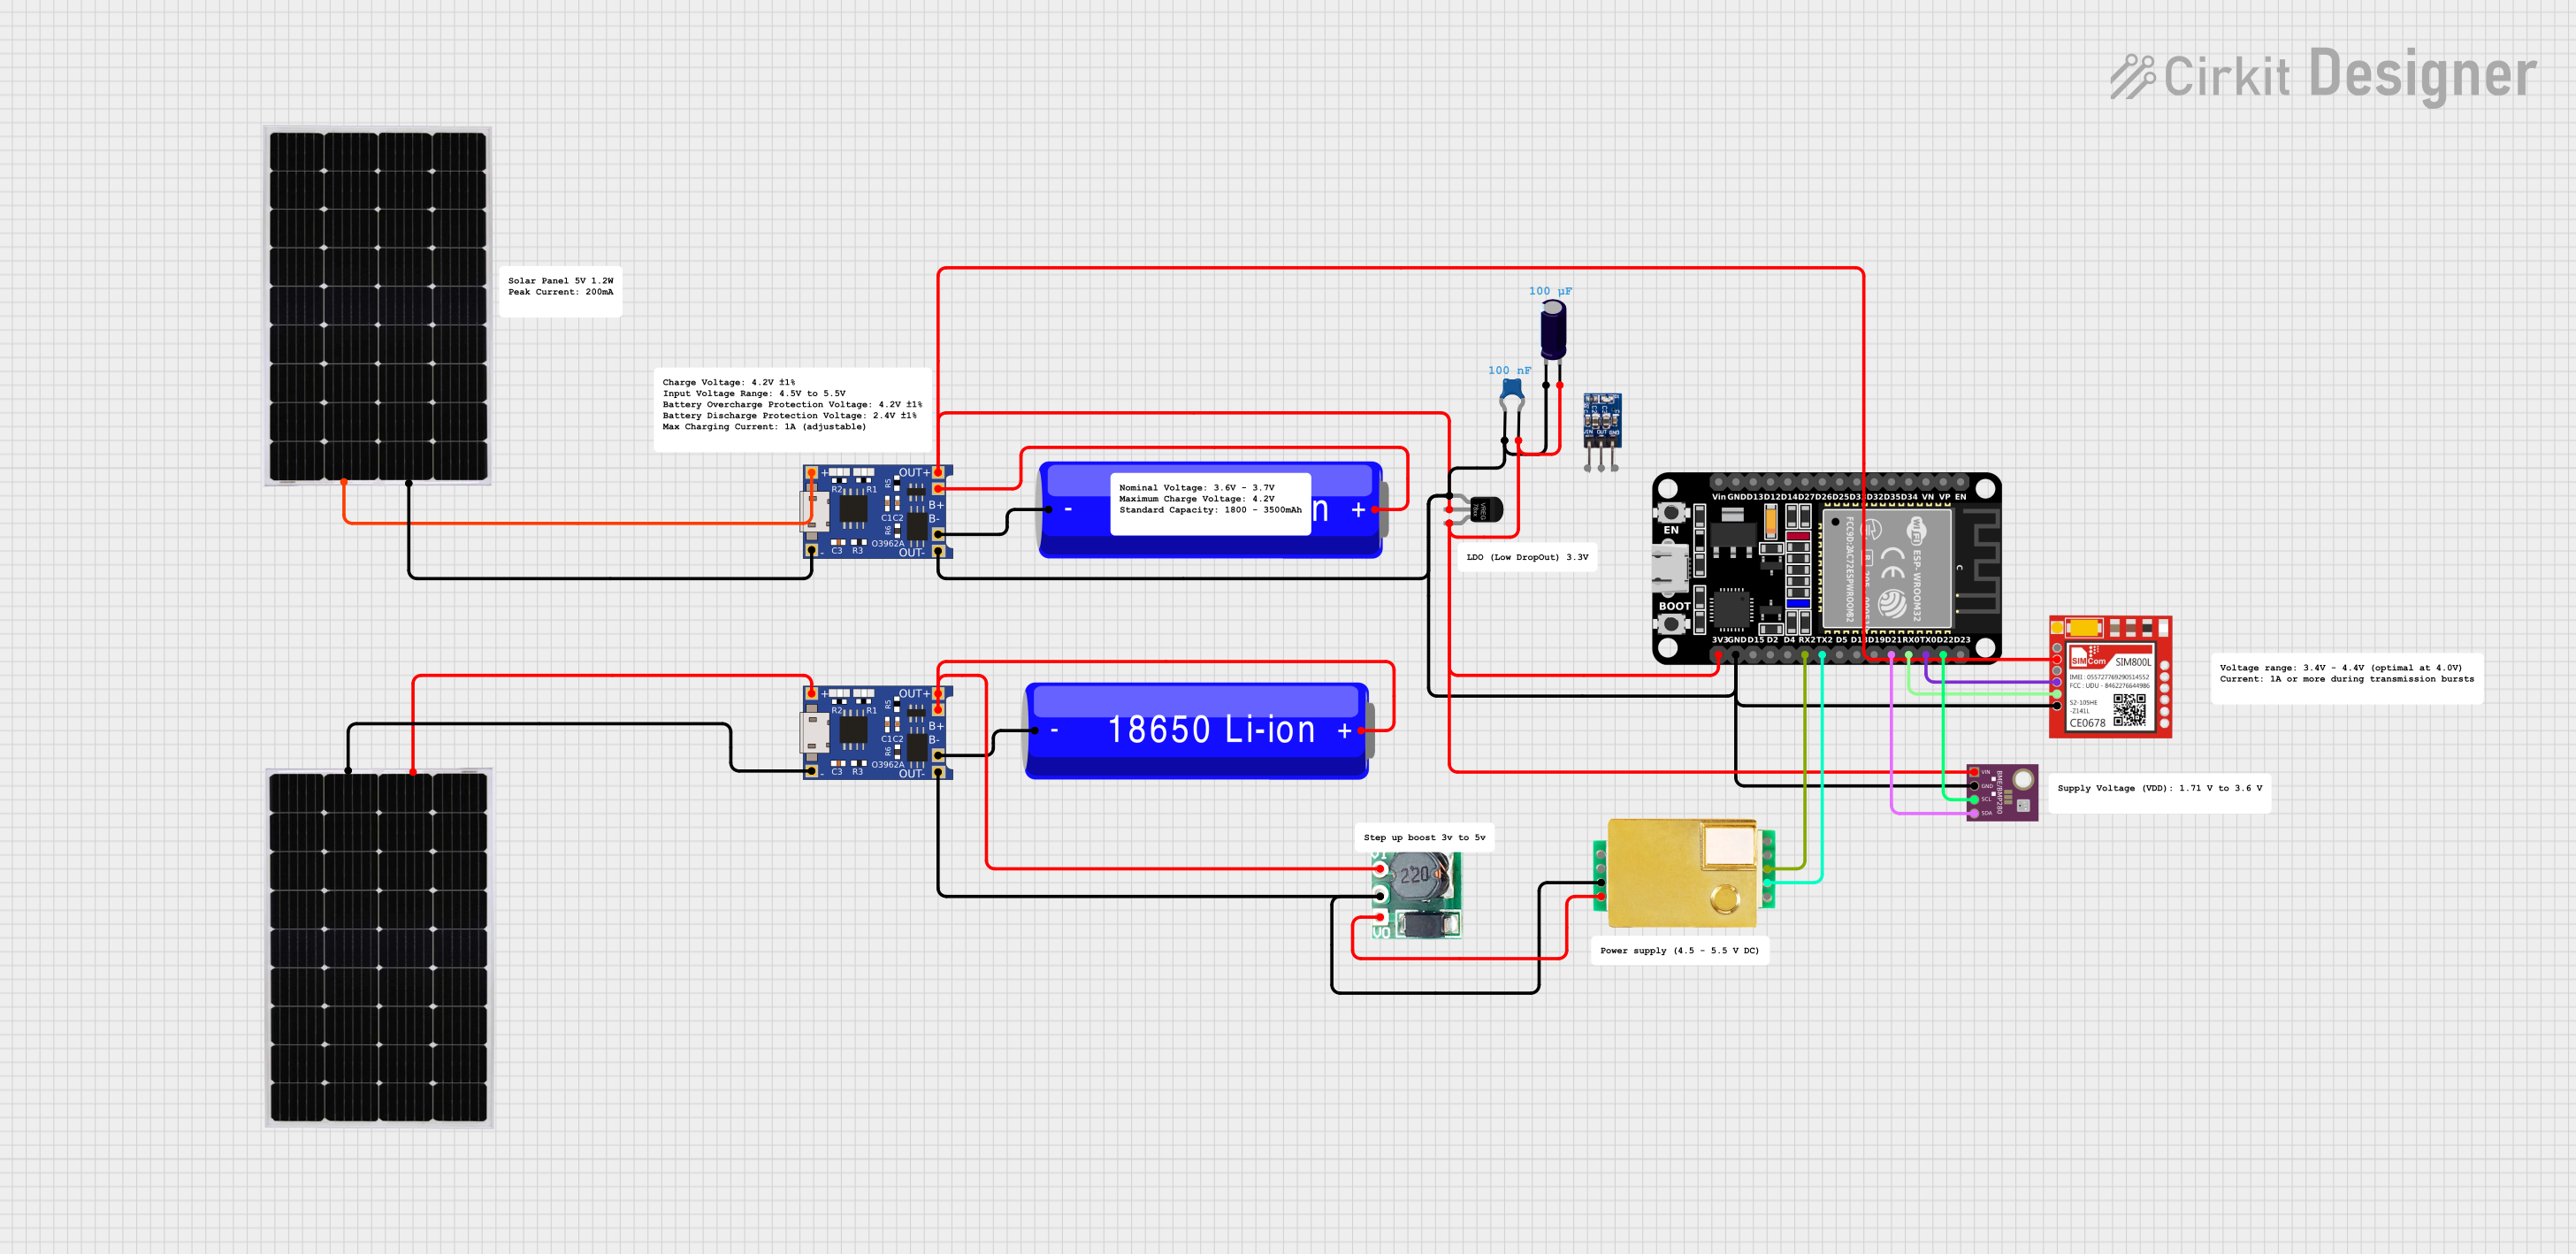
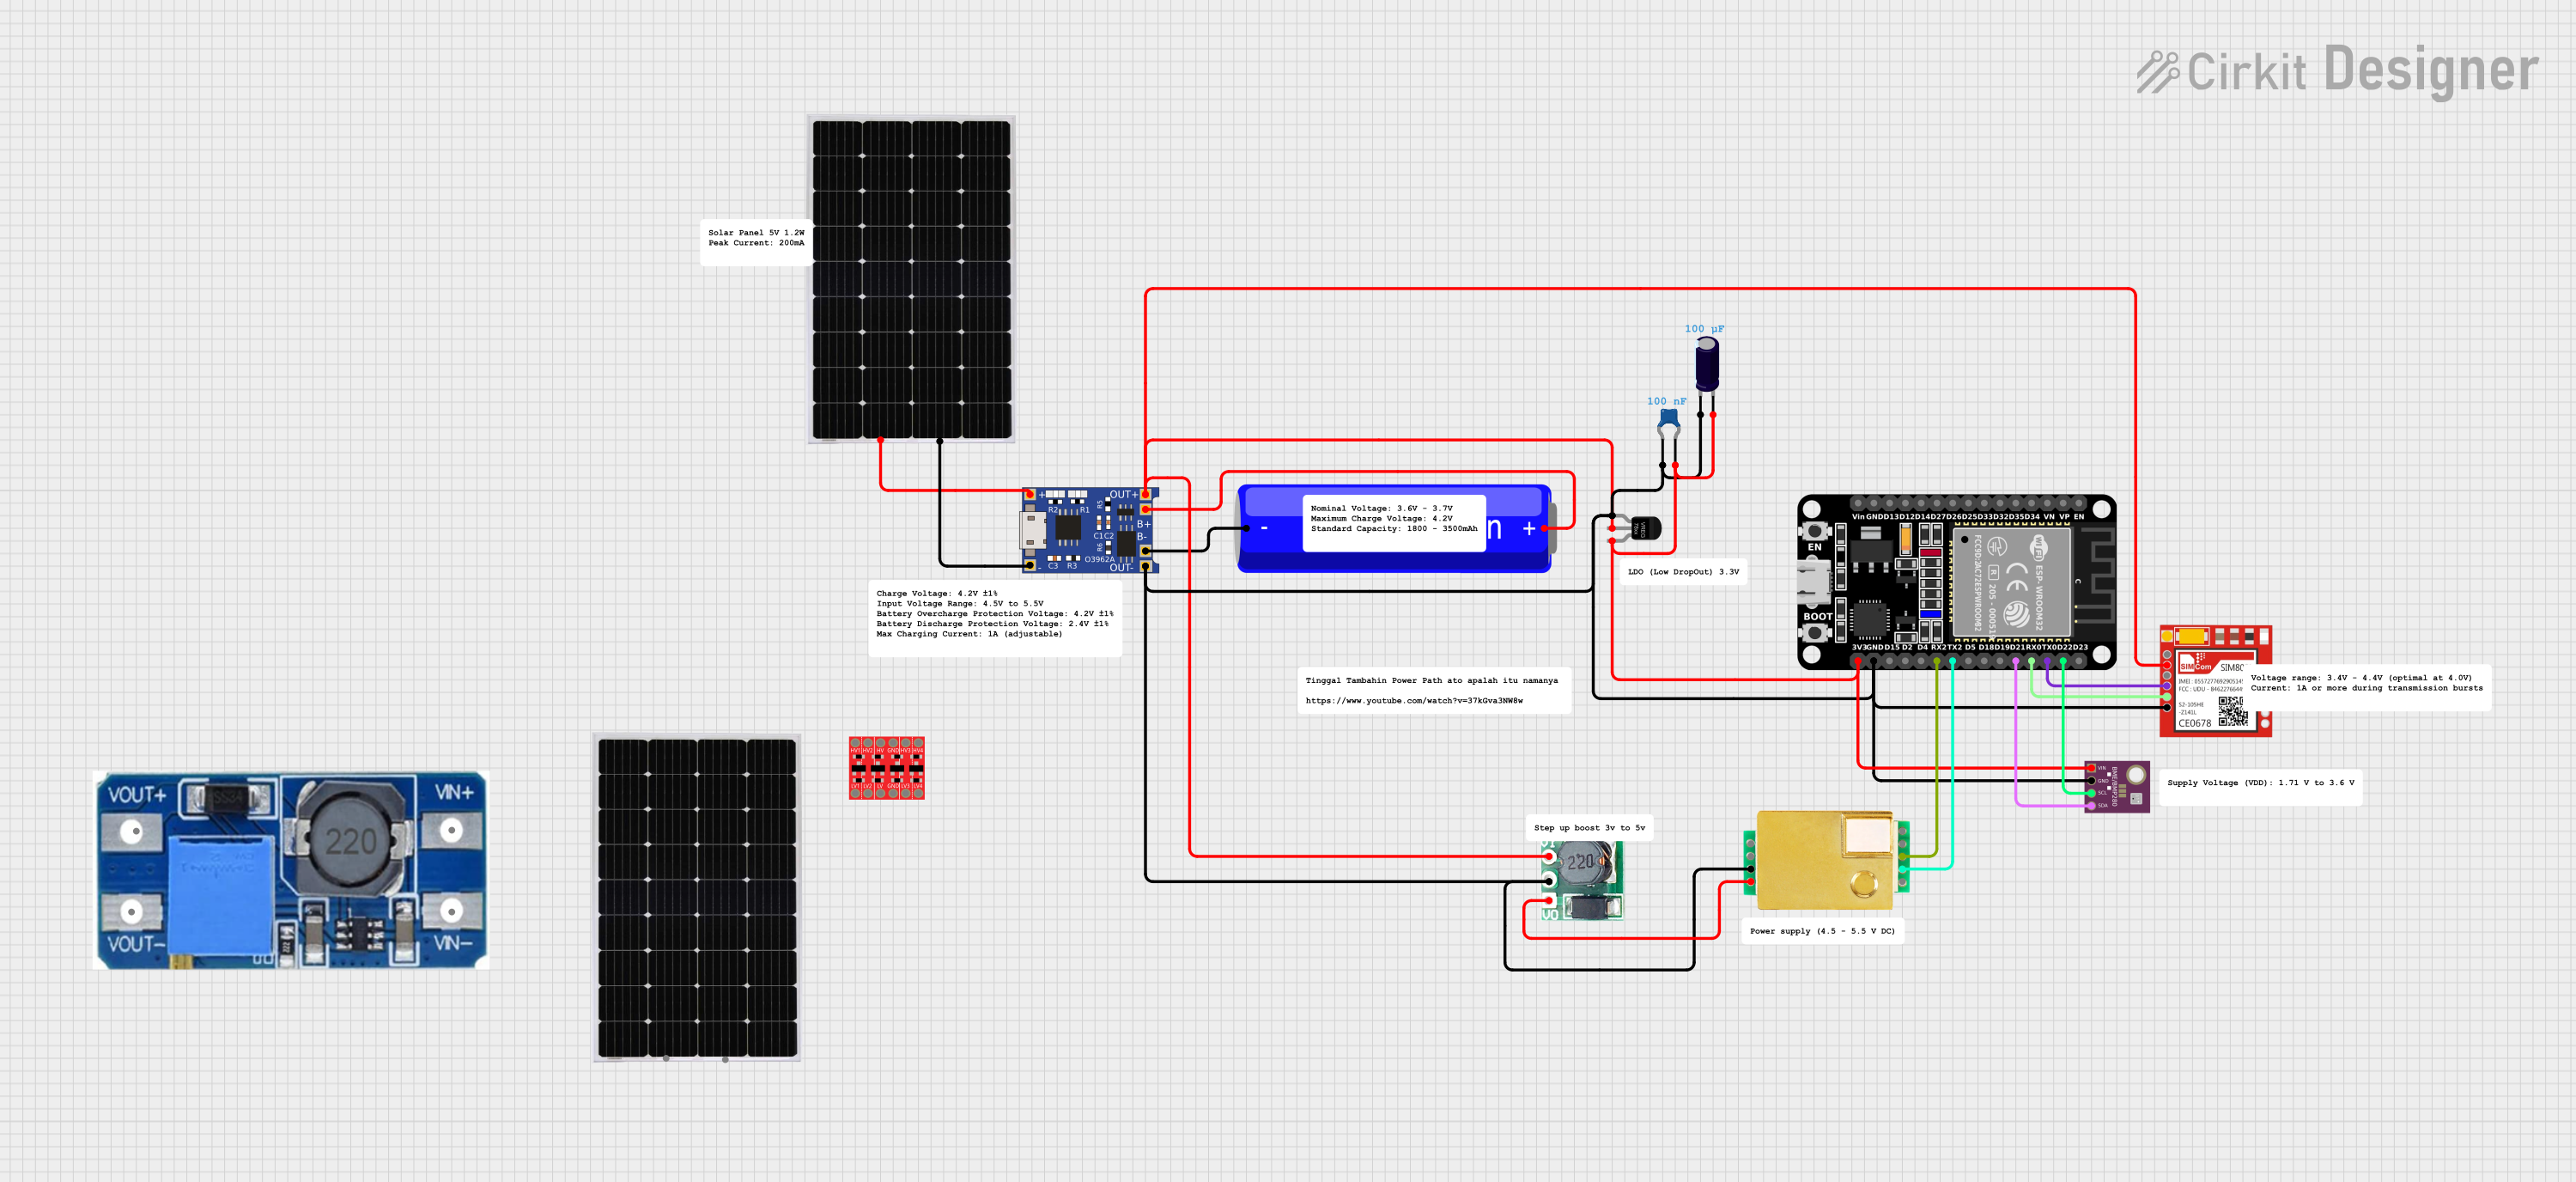
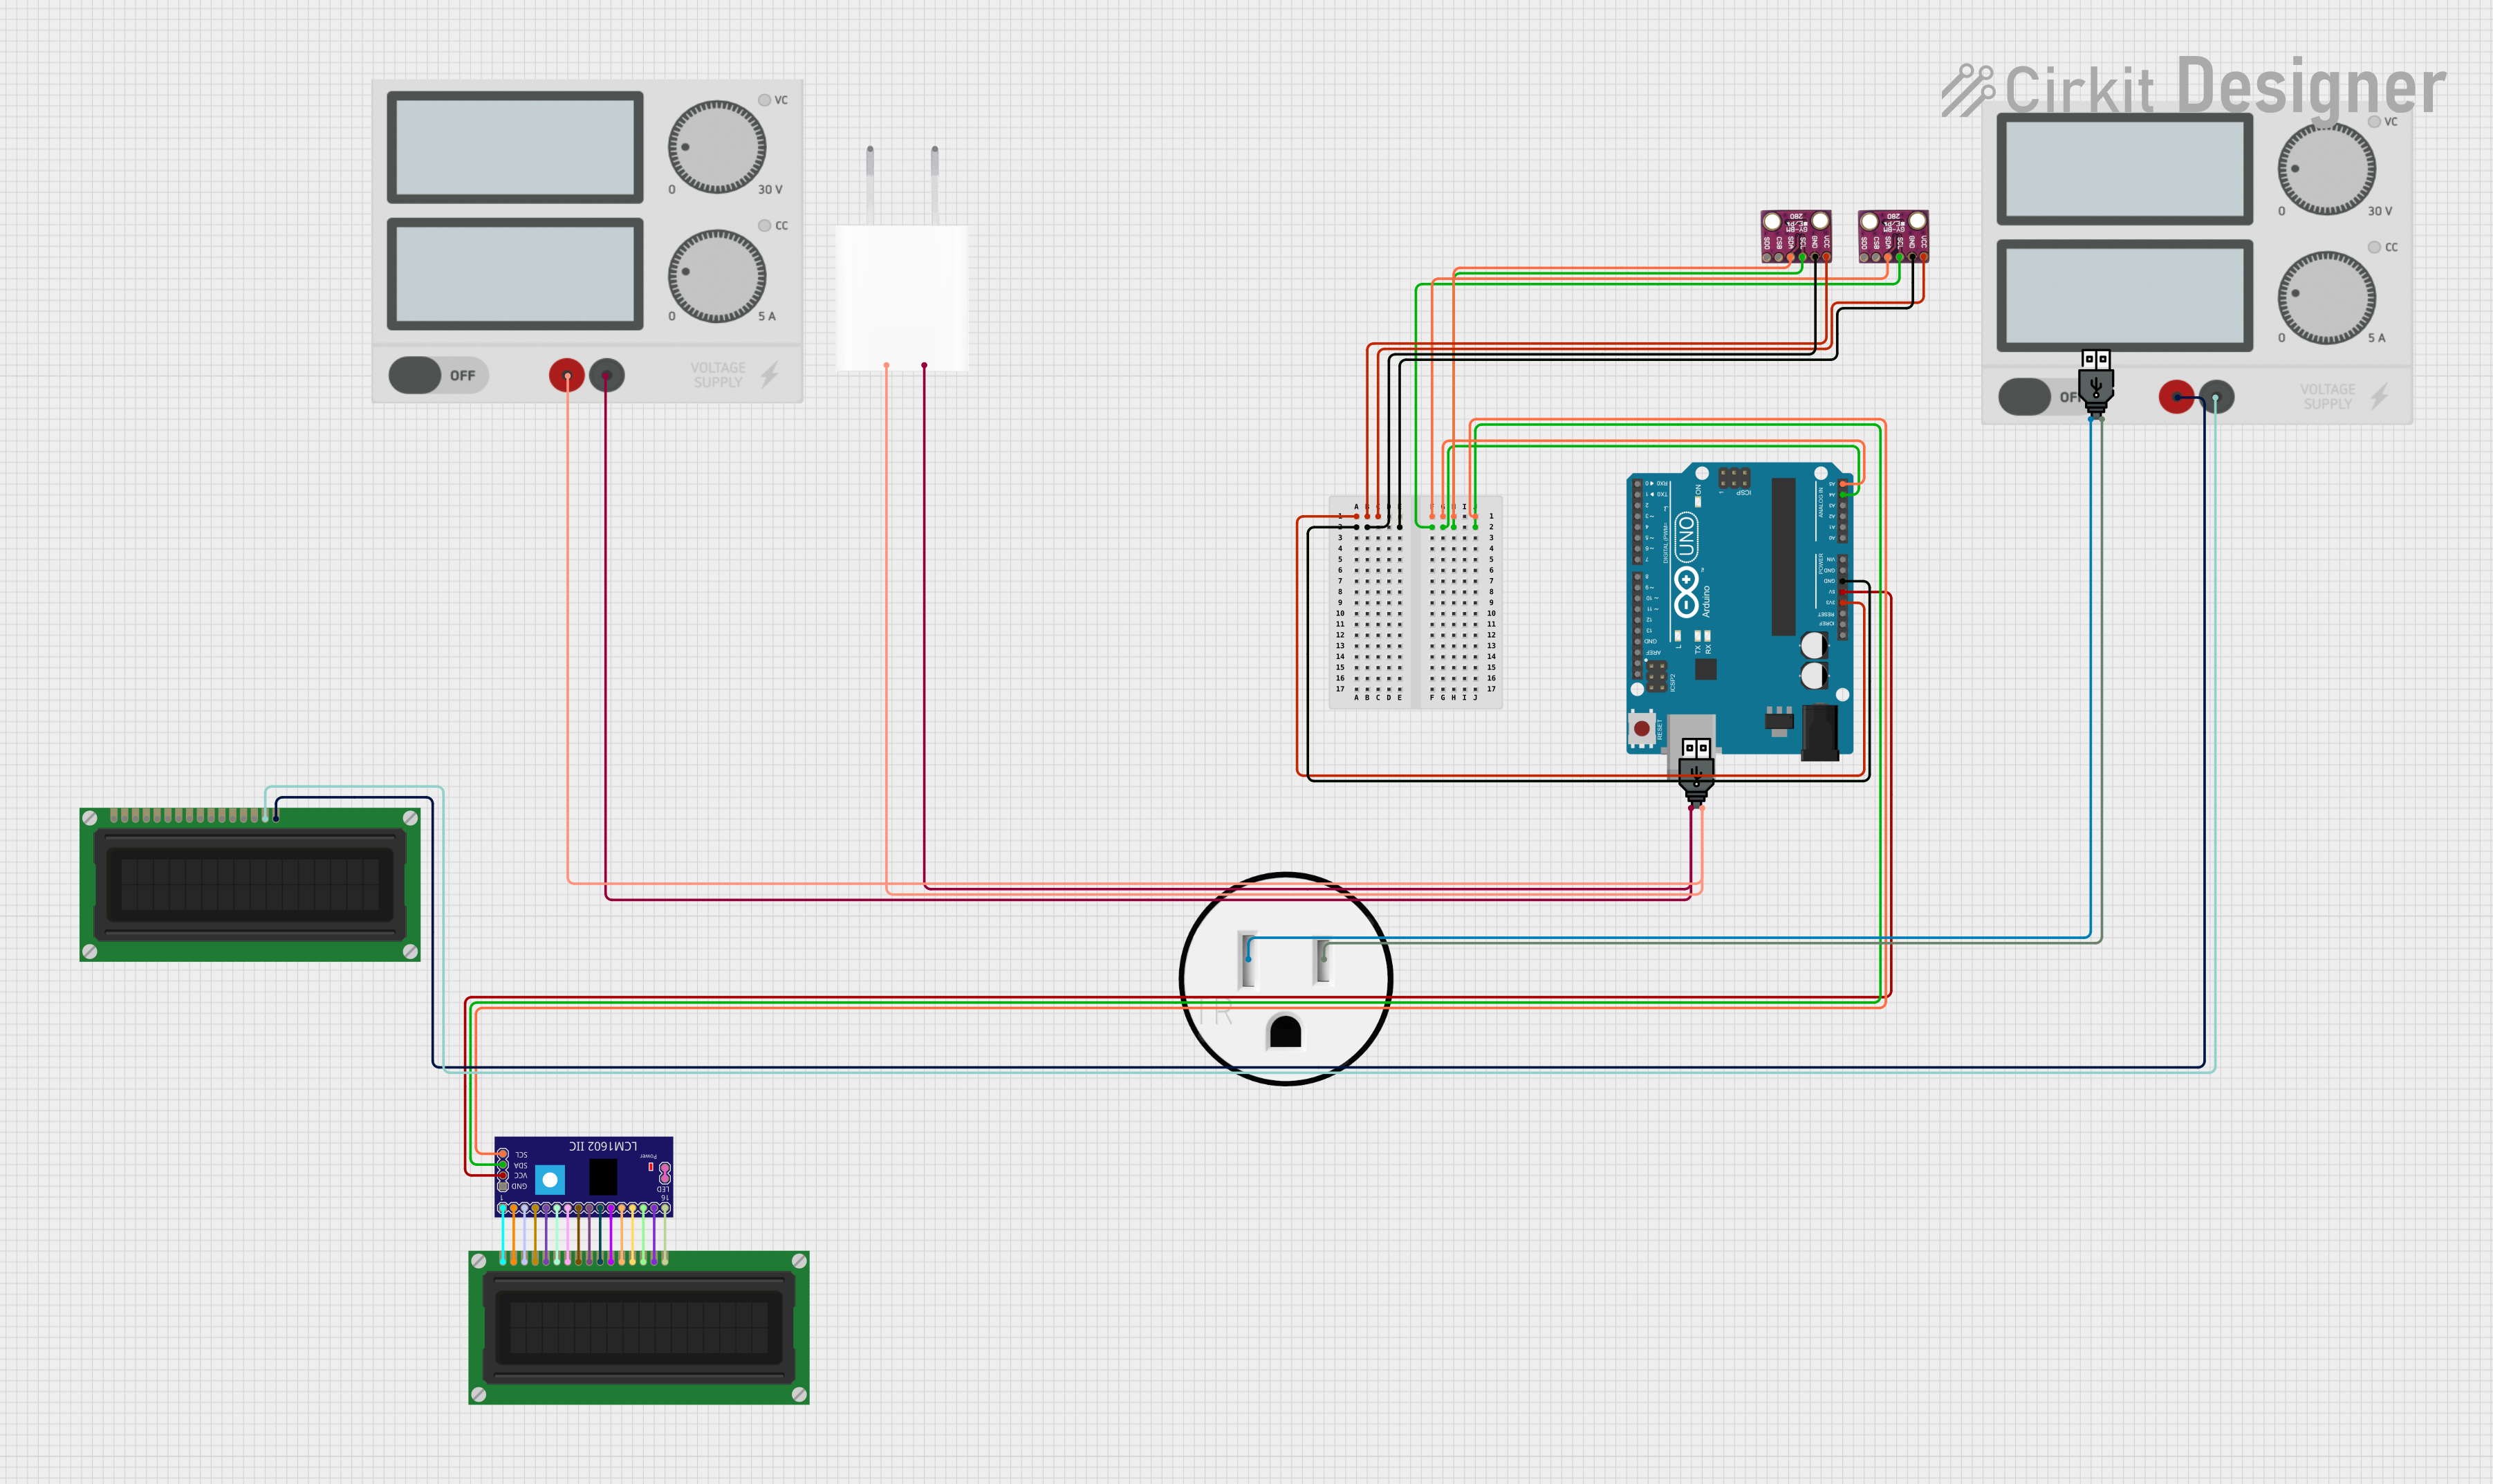
Explore Projects Built with BMP390L
Technical Specifications
The BMP390L offers robust performance and flexibility for various use cases. Below are its key technical details:
Key Specifications
| Parameter | Value |
|---|---|
| Operating Voltage | 1.7V to 3.6V |
| Current Consumption | 3.2 µA (low-power mode) |
| Pressure Range | 300 hPa to 1250 hPa |
| Temperature Range | -40°C to +85°C |
| Pressure Accuracy | ±0.03 hPa (typical) |
| Temperature Accuracy | ±0.5°C |
| Communication Interface | I2C (up to 3.4 MHz) / SPI |
| Package Size | 2.0 mm × 2.0 mm × 0.75 mm |
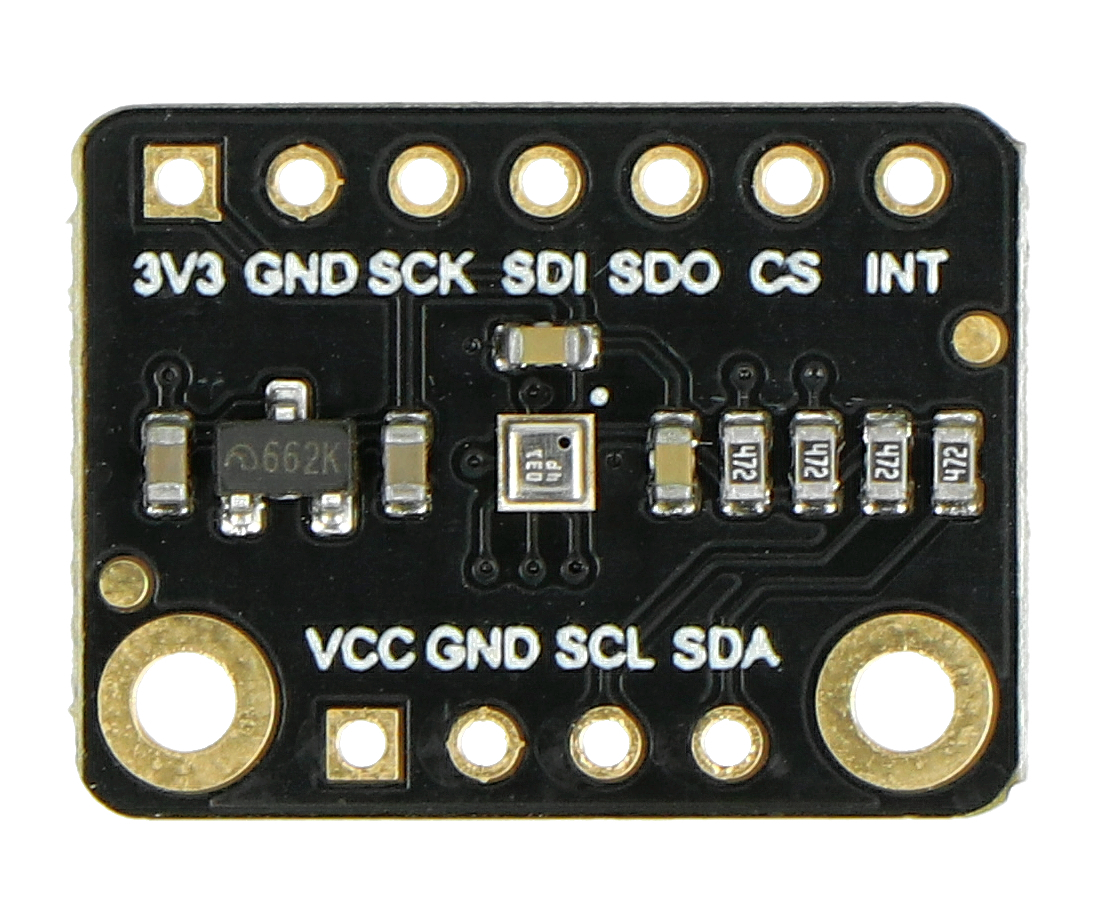
Pin Configuration
The BMP390L comes in a small LGA package with the following pinout:
| Pin Number | Pin Name | Description |
|---|---|---|
| 1 | VDD | Power supply (1.7V to 3.6V) |
| 2 | GND | Ground |
| 3 | SCL/SPC | I2C clock / SPI clock |
| 4 | SDA/SDI | I2C data / SPI data input |
| 5 | SDO | SPI data output / I2C address selection |
| 6 | CSB | Chip select for SPI (active low) |
Usage Instructions
The BMP390L can be easily integrated into a circuit using either the I2C or SPI interface. Below are the steps and considerations for using the sensor:
Circuit Connection
- Power Supply: Connect the VDD pin to a 1.7V to 3.6V power source and the GND pin to ground.
- I2C Interface:
- Connect the SCL pin to the I2C clock line and the SDA pin to the I2C data line.
- Use a pull-up resistor (typically 4.7 kΩ) on both the SCL and SDA lines.
- The SDO pin can be used to set the I2C address (connect to GND for 0x76 or VDD for 0x77).
- SPI Interface:
- Connect the SPC pin to the SPI clock line, SDI to the SPI data input, and SDO to the SPI data output.
- Use the CSB pin to enable the sensor (active low).
Sample Code for Arduino UNO (I2C)
Below is an example of how to interface the BMP390L with an Arduino UNO using the I2C interface:
#include <Wire.h>
#include <Adafruit_Sensor.h>
#include <Adafruit_BMP3XX.h>

// Create an instance of the BMP3XX sensor
Adafruit_BMP3XX bmp;

void setup() {
  Serial.begin(9600);
  while (!Serial); // Wait for Serial Monitor to open

  // Initialize I2C communication
  if (!bmp.begin_I2C(0x76)) { // Use 0x77 if SDO is connected to VDD
    Serial.println("Could not find a valid BMP390L sensor, check wiring!");
    while (1);
  }

  // Configure the sensor
  bmp.setTemperatureOversampling(BMP3_OVERSAMPLING_8X);
  bmp.setPressureOversampling(BMP3_OVERSAMPLING_4X);
  bmp.setIIRFilterCoeff(BMP3_IIR_FILTER_COEFF_3);
  bmp.setOutputDataRate(BMP3_ODR_50_HZ);
}

void loop() {
  // Read temperature and pressure
  if (!bmp.performReading()) {
    Serial.println("Failed to perform reading!");
    return;
  }

  // Print the results
  Serial.print("Temperature = ");
  Serial.print(bmp.temperature);
  Serial.println(" °C");

  Serial.print("Pressure = ");
  Serial.print(bmp.pressure / 100.0); // Convert Pa to hPa
  Serial.println(" hPa");

  delay(1000); // Wait 1 second before the next reading
}
Best Practices
- Use decoupling capacitors (e.g., 0.1 µF) near the VDD pin to reduce noise.
- Ensure proper pull-up resistors are used for the I2C lines.
- Avoid exposing the sensor to extreme environmental conditions beyond its specified range.
Troubleshooting and FAQs
Common Issues
Sensor Not Detected:
- Ensure the I2C or SPI connections are correct.
- Verify the I2C address (0x76 or 0x77) matches the configuration in your code.
- Check for proper pull-up resistors on the I2C lines.
Inaccurate Readings:
- Ensure the sensor is not exposed to rapid temperature changes or vibrations.
- Verify the oversampling and filter settings in the code.
No Output on Serial Monitor:
- Confirm the correct baud rate (9600) is set in the Serial Monitor.
- Check the wiring and ensure the sensor is powered.
FAQs
Q: Can the BMP390L measure altitude directly?
A: The BMP390L provides pressure readings, which can be converted to altitude using the barometric formula. Many libraries, such as Adafruit's BMP3XX library, include functions for altitude calculation.
Q: What is the maximum cable length for I2C communication?
A: The maximum cable length depends on the pull-up resistor values and the I2C clock speed. For standard setups, keep the cable length under 1 meter to avoid signal degradation.
Q: Can the BMP390L operate in high-humidity environments?
A: While the BMP390L is designed for environmental monitoring, prolonged exposure to high humidity may affect its performance. Consider using a protective enclosure in such conditions.