How to Use 220 fan: Examples, Pinouts, and Specs

Introduction
A 220V fan is an electric fan designed to operate on a 220-volt power supply. It is commonly used for cooling and ventilation purposes in a wide range of applications, including industrial equipment, home appliances, and electronic enclosures. These fans are essential for maintaining optimal operating temperatures and ensuring the longevity of electronic components by preventing overheating.
Explore Projects Built with 220 fan
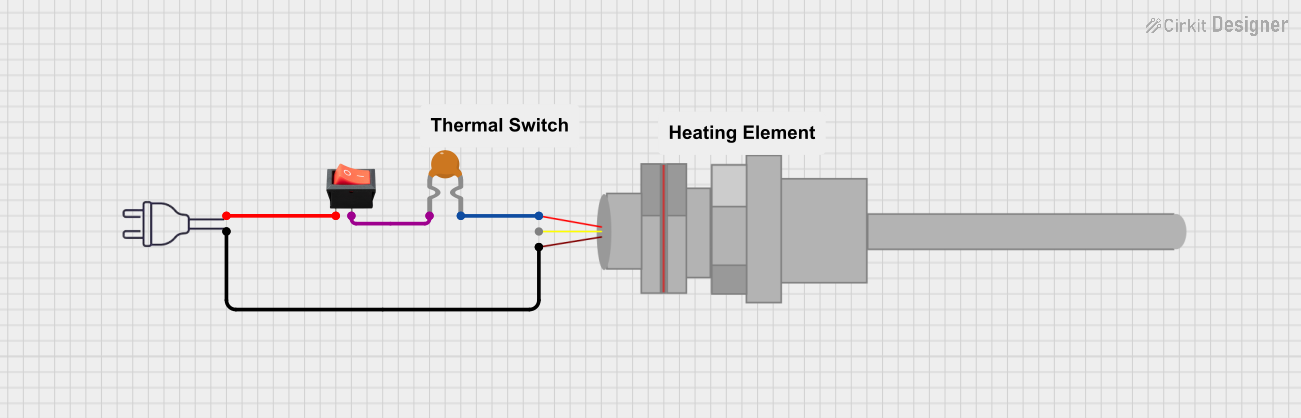

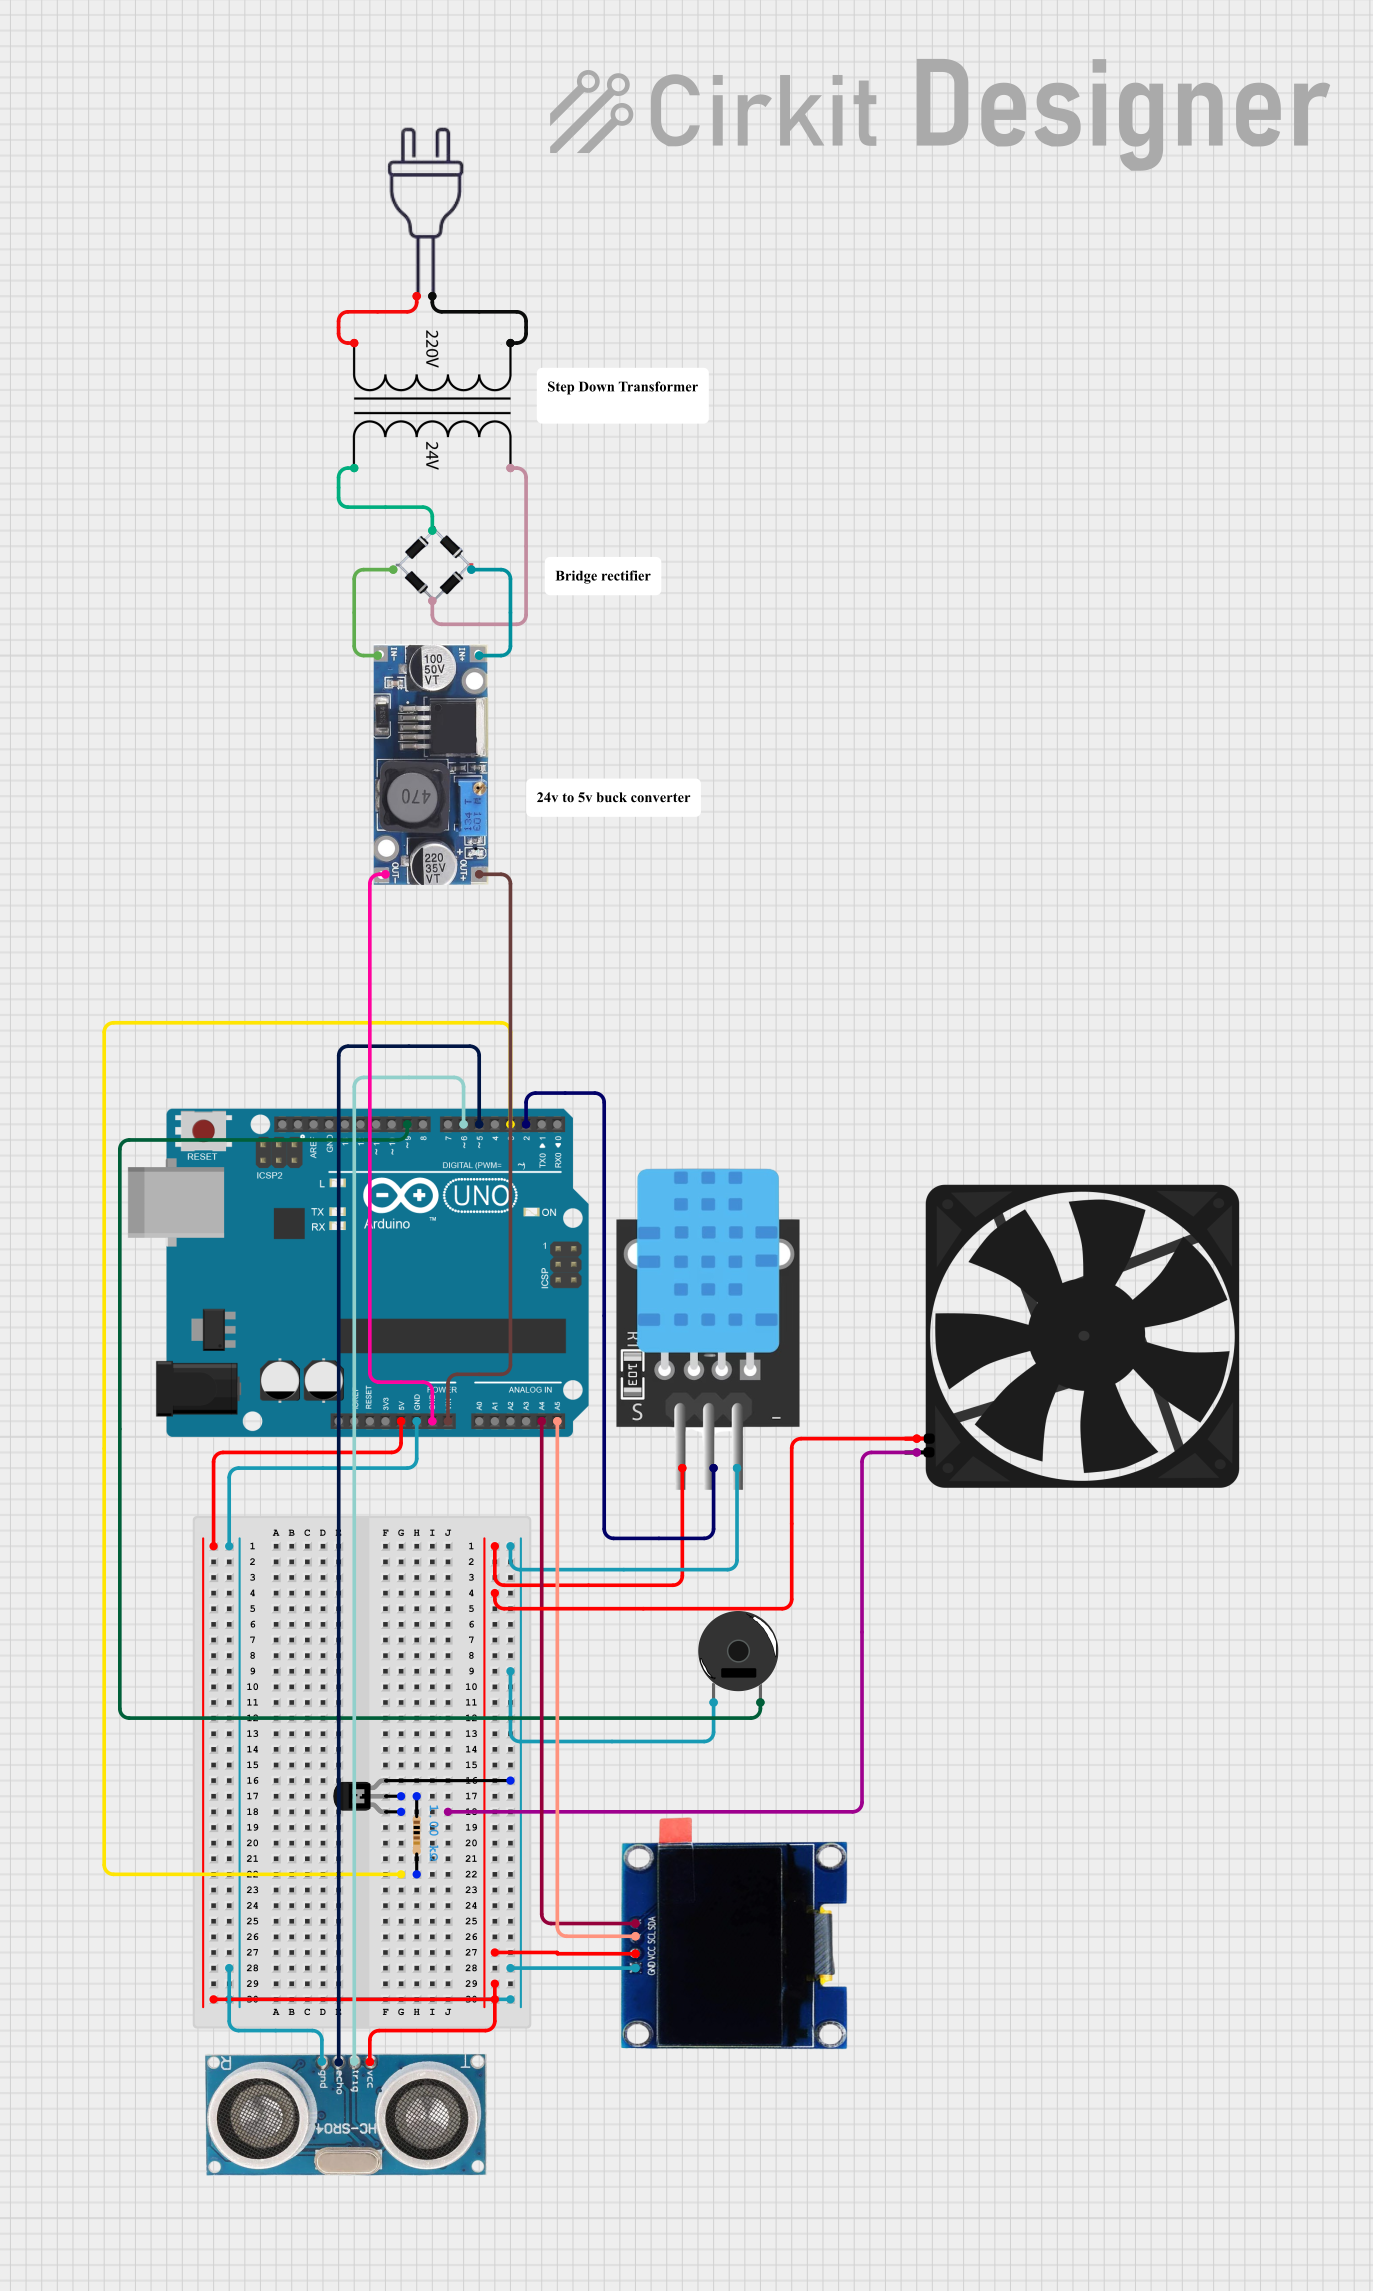
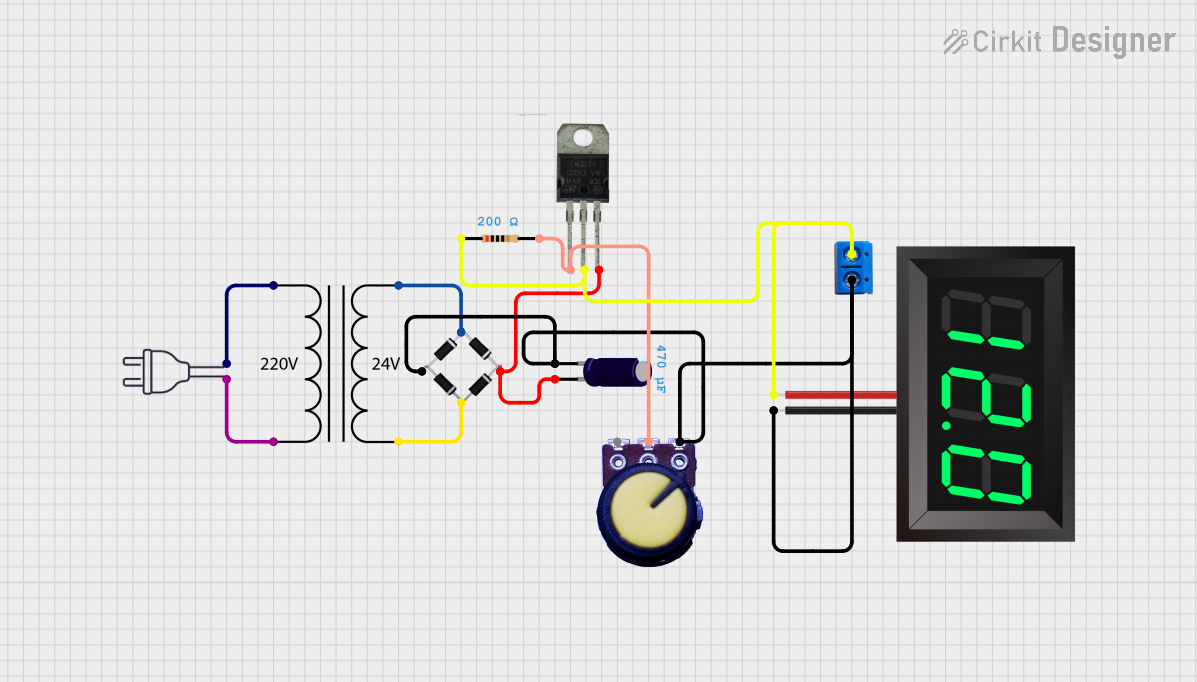
Explore Projects Built with 220 fan
Common Applications and Use Cases
- Cooling electronic devices such as power supplies, amplifiers, and computers.
- Ventilation in industrial machinery and control panels.
- Air circulation in HVAC systems and household appliances.
- Heat dissipation in 3D printers and other high-power devices.
Technical Specifications
Below are the key technical details for a typical 220V fan. Note that specifications may vary depending on the manufacturer and model.
General Specifications
| Parameter | Value |
|---|---|
| Operating Voltage | 220V AC |
| Frequency | 50/60 Hz |
| Power Consumption | 10W to 50W (varies by model) |
| Airflow | 20 CFM to 200 CFM (varies) |
| Noise Level | 25 dB to 50 dB (varies) |
| Operating Temperature | -10°C to 70°C |
| Dimensions | Common sizes: 80mm, 120mm, 150mm |
Pin Configuration and Descriptions
A 220V fan typically has two wires for connection. The table below describes the wiring:
| Wire Color | Function | Description |
|---|---|---|
| Black | Live (L) | Connects to the live terminal of the AC supply. |
| White/Blue | Neutral (N) | Connects to the neutral terminal of the AC supply. |
| Green | Ground (optional) | For grounding, if provided by the fan. |
Note: Always refer to the manufacturer's datasheet for specific wiring details.
Usage Instructions
How to Use the 220V Fan in a Circuit
- Safety First: Ensure the power supply is turned off before making any connections. Use insulated tools and wear protective gear when working with high-voltage components.
- Wiring:
- Connect the black wire (Live) to the live terminal of the 220V AC power source.
- Connect the white or blue wire (Neutral) to the neutral terminal of the power source.
- If a ground wire is provided, connect it to the ground terminal for safety.
- Mounting:
- Secure the fan in place using screws or brackets. Ensure proper airflow direction by checking the fan's markings (usually an arrow indicating airflow direction).
- Testing:
- After wiring and mounting, turn on the power supply and verify that the fan operates correctly.
Important Considerations and Best Practices
- Voltage Compatibility: Ensure the fan is rated for 220V AC. Using it with an incorrect voltage can damage the fan or pose safety risks.
- Airflow Direction: Install the fan in the correct orientation to achieve the desired airflow.
- Noise Levels: Choose a fan with an appropriate noise level for your application.
- Overcurrent Protection: Use a fuse or circuit breaker to protect the fan and circuit from overcurrent conditions.
- Maintenance: Periodically clean the fan blades and housing to prevent dust buildup, which can reduce efficiency and increase noise.
Example: Controlling a 220V Fan with a Relay and Arduino UNO
To control a 220V fan using an Arduino UNO, you can use a relay module to safely switch the high-voltage AC supply. Below is an example circuit and code:
Circuit Diagram
- Connect the relay module's control pin to an Arduino digital pin (e.g., pin 7).
- Connect the fan's live wire to the relay's Normally Open (NO) terminal.
- Connect the fan's neutral wire directly to the AC neutral terminal.
- Connect the relay's Common (COM) terminal to the AC live terminal.
Arduino Code
// Define the relay control pin
const int relayPin = 7;

void setup() {
  pinMode(relayPin, OUTPUT); // Set the relay pin as an output
  digitalWrite(relayPin, LOW); // Ensure the relay is off initially
}

void loop() {
  digitalWrite(relayPin, HIGH); // Turn the fan ON
  delay(5000); // Keep the fan ON for 5 seconds
  digitalWrite(relayPin, LOW); // Turn the fan OFF
  delay(5000); // Keep the fan OFF for 5 seconds
}
Important Notes:
- Use a relay module rated for 220V AC and ensure it can handle the fan's current.
- Never connect the fan directly to the Arduino, as it cannot handle high-voltage AC.
Troubleshooting and FAQs
Common Issues and Solutions
| Issue | Possible Cause | Solution |
|---|---|---|
| Fan does not turn on | Incorrect wiring or no power | Verify wiring and ensure power is supplied. |
| Fan is noisy | Dust buildup or mechanical issue | Clean the fan and check for obstructions. |
| Fan overheats | Insufficient airflow or overvoltage | Ensure proper ventilation and check voltage. |
| Fan vibrates excessively | Loose mounting or imbalance | Tighten screws and check for blade damage. |
FAQs
Q: Can I use a 220V fan with a 110V power supply?
A: No, a 220V fan is designed specifically for 220V AC. Using it with a lower voltage will result in insufficient performance or failure to operate.
Q: How do I determine the airflow direction of the fan?
A: Most fans have an arrow on the housing indicating the airflow direction. If not, observe the fan blades' rotation to determine the airflow.
Q: Is it safe to control a 220V fan with an Arduino?
A: Yes, but only if you use a relay module or other isolation device to safely switch the high-voltage AC supply.
Q: How often should I clean the fan?
A: Cleaning frequency depends on the environment. In dusty conditions, clean the fan every 1-2 months. In cleaner environments, cleaning every 6 months is sufficient.
By following this documentation, you can safely and effectively use a 220V fan in your projects. Always prioritize safety when working with high-voltage components.