How to Use Adafruit TSL2591 High Dynamic Range Digital Light Sensor: Examples, Pinouts, and Specs
Introduction
The Adafruit TSL2591 is a sophisticated digital light sensor that offers high dynamic range detection of ambient light intensity. It is capable of measuring illuminance from deep dark (188 µLux) to bright sunlight (88,000 Lux) with an extended range. This sensor is ideal for applications that require precise light measurements, such as screen brightness adjustments in smartphones, industrial lighting systems, and environmental monitoring.
Explore Projects Built with Adafruit TSL2591 High Dynamic Range Digital Light Sensor
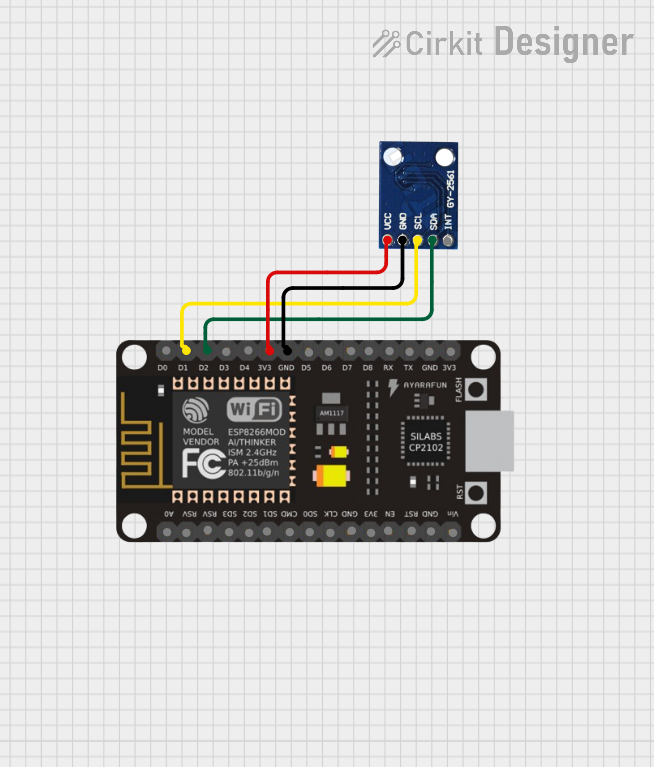
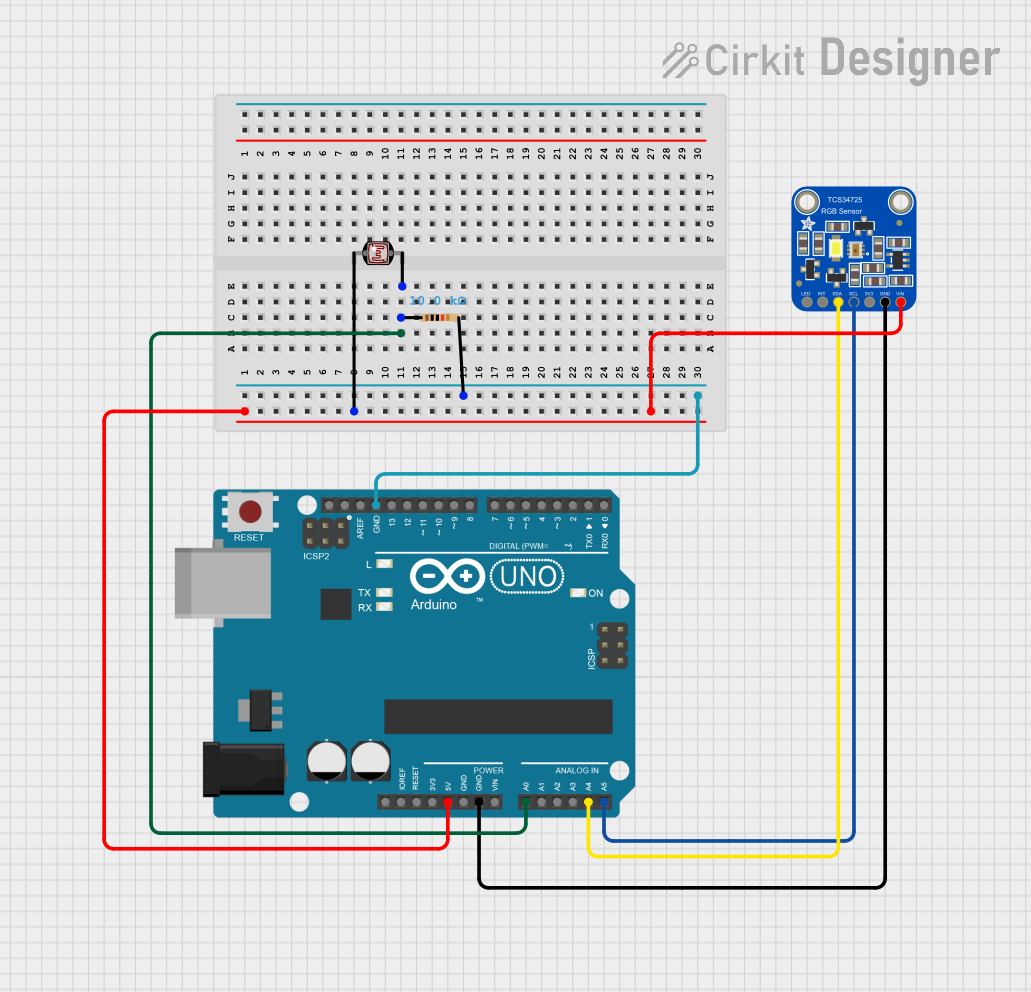
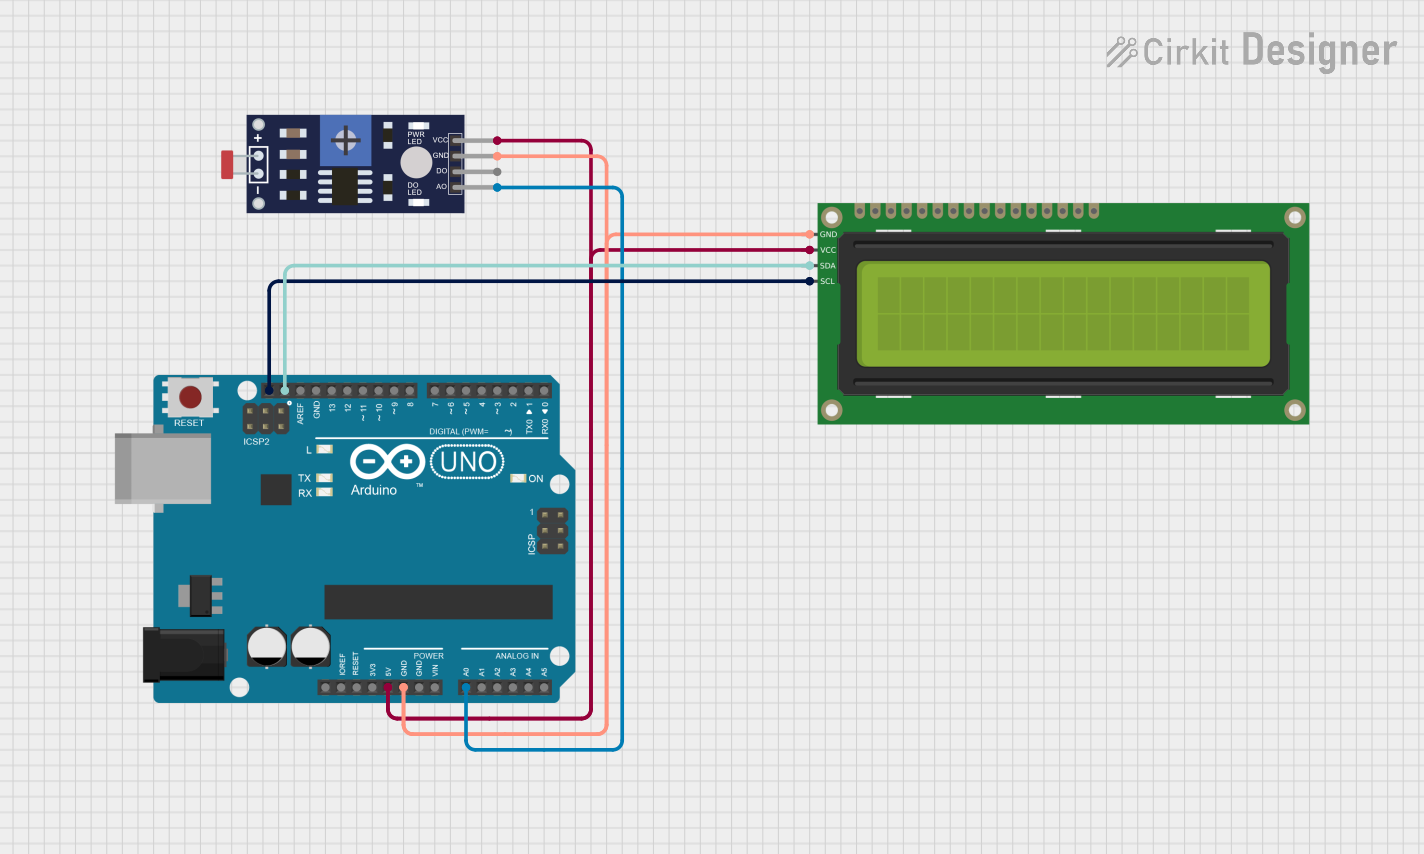
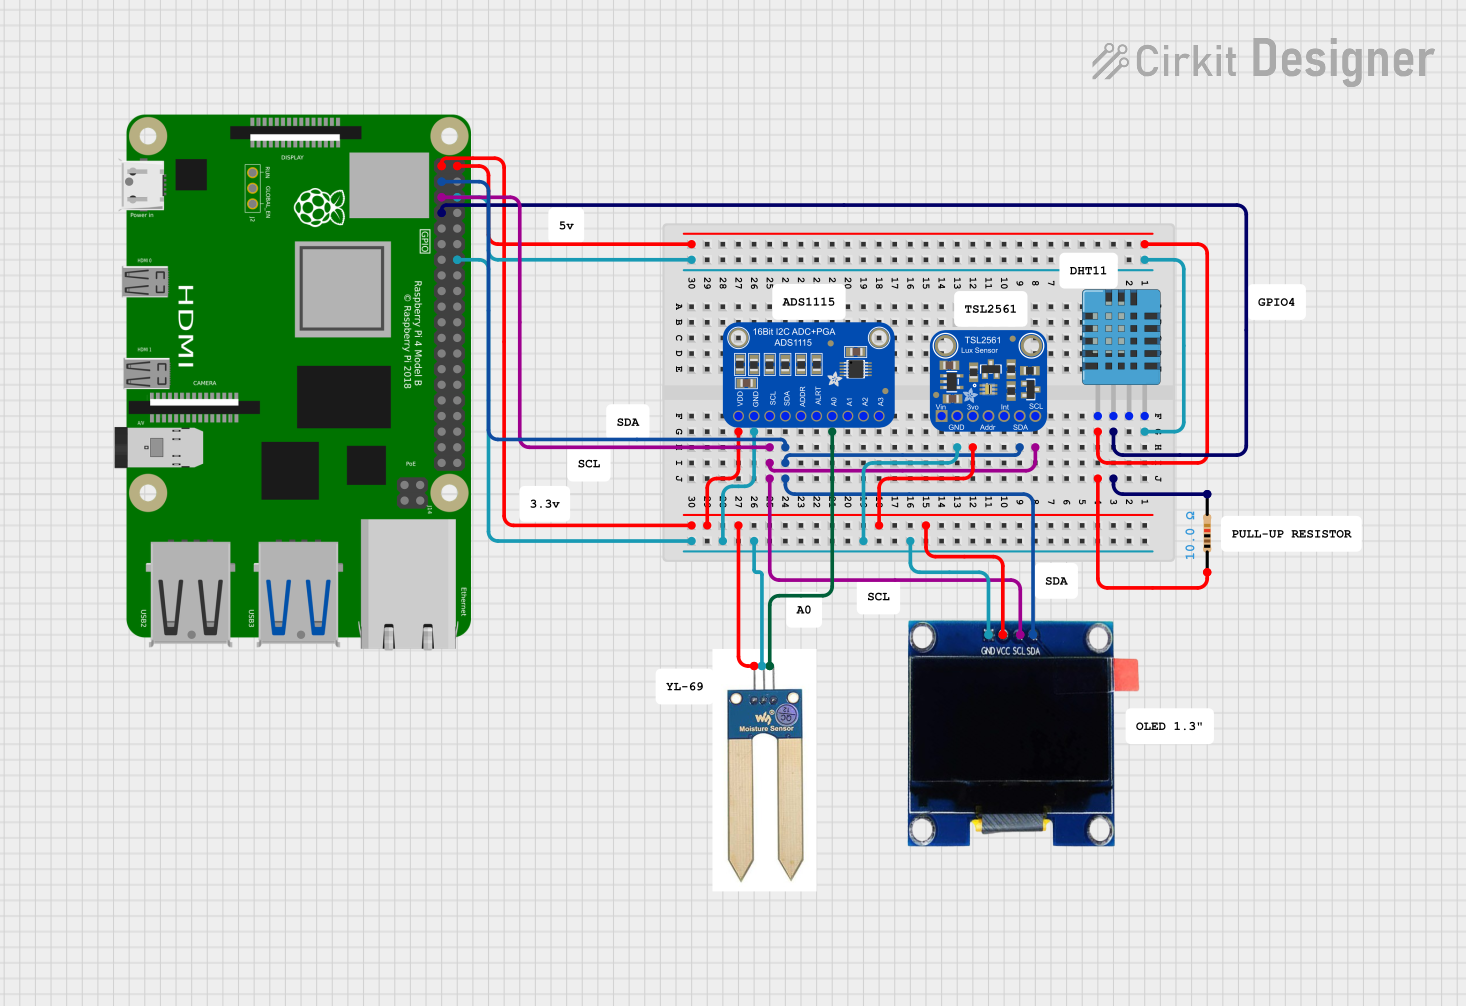
Explore Projects Built with Adafruit TSL2591 High Dynamic Range Digital Light Sensor
Common Applications and Use Cases
- Ambient light sensing for display backlight control
- Industrial lighting automation
- Environmental monitoring in smart homes and buildings
- Light data logging for scientific analysis
Technical Specifications
Key Technical Details
- Dynamic Range: 600M:1
- Maximum Lux: 88,000 Lux
- Minimum Lux: 188 µLux
- Communication: I2C interface
- Supply Voltage: 3.3V to 5V
- Operating Temperature: -30°C to 80°C
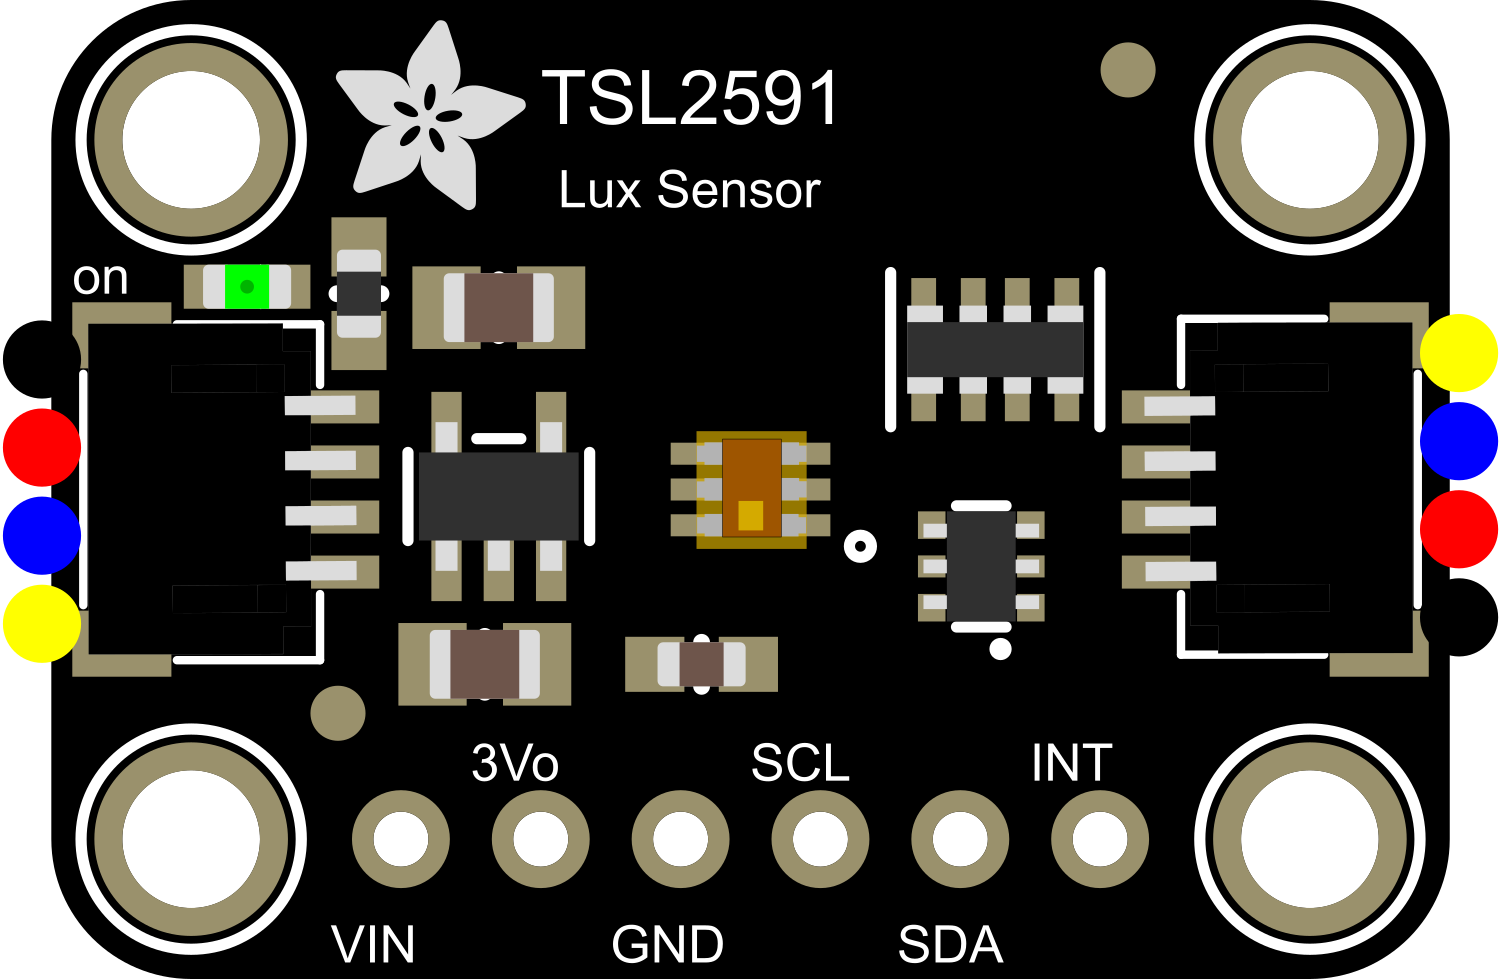
Pin Configuration and Descriptions
| Pin Number | Name | Description |
|---|---|---|
| 1 | VIN | Supply voltage (3.3V to 5V) |
| 2 | GND | Ground connection |
| 3 | SCL | I2C clock line |
| 4 | SDA | I2C data line |
| 5 | INT | Interrupt output (active low) |
Usage Instructions
How to Use the Component in a Circuit
- Power Supply: Connect the VIN pin to a 3.3V or 5V power supply, and the GND pin to the ground.
- I2C Communication: Connect the SCL and SDA pins to the I2C clock and data lines on your microcontroller.
- Interrupts (Optional): The INT pin can be connected to a digital input on your microcontroller if you wish to use the interrupt feature.
Important Considerations and Best Practices
- Ensure that the power supply is within the specified voltage range to prevent damage.
- Use pull-up resistors on the I2C lines if they are not provided on the microcontroller board.
- Avoid exposing the sensor to direct sunlight or strong artificial light sources that could exceed its maximum rating.
- When placing the sensor in an enclosure, ensure that the light inlet is not obstructed and that the material does not significantly filter out light.
Example Code for Arduino UNO
#include <Wire.h>
#include <Adafruit_Sensor.h>
#include <Adafruit_TSL2591.h>

// Create the TSL2591 sensor object
Adafruit_TSL2591 tsl = Adafruit_TSL2591(2591);

void setup() {
  Serial.begin(9600);
  // Initialize the sensor
  if (tsl.begin()) {
    Serial.println("Started sensor successfully.");
  } else {
    Serial.println("No sensor found. Check your wiring.");
    while (1);
  }

  // Set the gain and integration time
  tsl.setGain(TSL2591_GAIN_MED);      // Medium gain
  tsl.setTiming(TSL2591_INTEGRATIONTIME_300MS);  // 300ms integration time

  // Uncomment to enable the interrupt feature on the sensor
  // tsl.registerInterrupt(500, 10000);
}

void loop() {
  // Read the visible + IR diode from the sensor
  uint32_t lumens = tsl.getFullLuminosity();
  // Calculate the actual lux value
  uint16_t lux = tsl.calculateLux(lumens >> 16, lumens & 0xFFFF);

  // Print the results to the Serial Monitor
  Serial.print("Lux: ");
  Serial.println(lux);

  delay(1000); // Wait for 1 second before the next reading
}
Troubleshooting and FAQs
Common Issues Users Might Face
- Sensor Not Responding: Ensure that the wiring is correct and that the sensor is properly powered.
- Inaccurate Readings: Check if the sensor is facing the light source directly and that there are no obstructions.
- I2C Communication Errors: Verify that the pull-up resistors are in place and that there are no short circuits on the I2C lines.
Solutions and Tips for Troubleshooting
- Double-check the connections and solder joints.
- Make sure that the I2C address of the sensor does not conflict with other devices on the bus.
- Reset the sensor and microcontroller to clear any temporary issues.
- Use the
Serial.println()function to debug and track down where the issue might be occurring in your code.
FAQs
Q: Can the TSL2591 sensor measure UV light? A: No, the TSL2591 is designed to measure visible and infrared light, not ultraviolet light.
Q: Is it necessary to calibrate the sensor? A: The TSL2591 comes factory-calibrated, but for critical applications, you may perform additional calibration against a known light source.
Q: How can I change the I2C address of the sensor? A: The TSL2591 has a fixed I2C address and cannot be changed. If you need to connect multiple sensors, you will need an I2C multiplexer.
Q: What is the purpose of the INT pin? A: The INT pin can be used to trigger an interrupt on the microcontroller when certain light thresholds are reached, reducing the need for constant polling of the sensor.
This documentation provides a comprehensive guide to the Adafruit TSL2591 High Dynamic Range Digital Light Sensor, ensuring users can effectively integrate and utilize this component in their projects.