Cirkit Designer Logo
Cirkit Designer
Your all-in-one circuit design IDE
Home / 
Component Documentation

How to Use Servo Motor 9G: Examples, Pinouts, and Specs

Image of Servo Motor 9G
Cirkit Designer LogoDesign with Servo Motor 9G in Cirkit Designer

Introduction

The Servo Motor 9G is a compact and lightweight actuator capable of precise rotational positioning. It is widely used in robotics, remote-controlled vehicles, and various DIY electronics projects. The servo is designed to operate on a 5V power supply and can be easily interfaced with microcontrollers such as the Arduino UNO for accurate angle control.

Explore Projects Built with Servo Motor 9G

Use Cirkit Designer to design, explore, and prototype these projects online. Some projects support real-time simulation. Click "Open Project" to start designing instantly!
Arduino UNO Battery-Powered Servo Motor Controller
Image of Fire Fighting Robot car: A project utilizing Servo Motor 9G in a practical application
This circuit uses an Arduino UNO to control a 9G servo motor, powered by a 9V battery. The Arduino runs a program that allows the servo motor to move between two positions based on user input received via the serial monitor.
Cirkit Designer LogoOpen Project in Cirkit Designer
Arduino Nano Controlled Micro Servo Sweeper
Image of servo: A project utilizing Servo Motor 9G in a practical application
This circuit consists of two Arduino Nano microcontrollers and a Micro Servo 9G. One Arduino Nano controls the servo motor connected to its D6 pin, sweeping it back and forth between 0 and 180 degrees. The second Arduino Nano is present but not actively used in this configuration.
Cirkit Designer LogoOpen Project in Cirkit Designer
Arduino Nano Controlled Robotic Arm with Multiple Micro Servos
Image of Nova: A project utilizing Servo Motor 9G in a practical application
This circuit consists of an Arduino Nano microcontroller connected to three Micro servo 9G motors. The Arduino Nano controls the servos via its digital pins D2, D3, and D4, while providing power and ground connections to the servos.
Cirkit Designer LogoOpen Project in Cirkit Designer
Arduino UNO Controlled Micro Servo Motor with Dynamic Positioning
Image of SERVO CLOCK PROGRAMM: A project utilizing Servo Motor 9G in a practical application
This circuit uses an Arduino UNO to control a micro servo motor. The Arduino provides power and ground to the servo and sends PWM signals from pin D9 to control the servo's position, moving it between various angles as specified in the provided code.
Cirkit Designer LogoOpen Project in Cirkit Designer

Explore Projects Built with Servo Motor 9G

Use Cirkit Designer to design, explore, and prototype these projects online. Some projects support real-time simulation. Click "Open Project" to start designing instantly!
Image of Fire Fighting Robot car: A project utilizing Servo Motor 9G in a practical application
Arduino UNO Battery-Powered Servo Motor Controller
This circuit uses an Arduino UNO to control a 9G servo motor, powered by a 9V battery. The Arduino runs a program that allows the servo motor to move between two positions based on user input received via the serial monitor.
Cirkit Designer LogoOpen Project in Cirkit Designer
Image of servo: A project utilizing Servo Motor 9G in a practical application
Arduino Nano Controlled Micro Servo Sweeper
This circuit consists of two Arduino Nano microcontrollers and a Micro Servo 9G. One Arduino Nano controls the servo motor connected to its D6 pin, sweeping it back and forth between 0 and 180 degrees. The second Arduino Nano is present but not actively used in this configuration.
Cirkit Designer LogoOpen Project in Cirkit Designer
Image of Nova: A project utilizing Servo Motor 9G in a practical application
Arduino Nano Controlled Robotic Arm with Multiple Micro Servos
This circuit consists of an Arduino Nano microcontroller connected to three Micro servo 9G motors. The Arduino Nano controls the servos via its digital pins D2, D3, and D4, while providing power and ground connections to the servos.
Cirkit Designer LogoOpen Project in Cirkit Designer
Image of SERVO CLOCK PROGRAMM: A project utilizing Servo Motor 9G in a practical application
Arduino UNO Controlled Micro Servo Motor with Dynamic Positioning
This circuit uses an Arduino UNO to control a micro servo motor. The Arduino provides power and ground to the servo and sends PWM signals from pin D9 to control the servo's position, moving it between various angles as specified in the provided code.
Cirkit Designer LogoOpen Project in Cirkit Designer

Common Applications

  • Robotics arms and linkages
  • Steering mechanisms for RC cars and boats
  • Camera pan/tilt systems
  • Animatronics

Technical Specifications

Key Technical Details

  • Operating Voltage: 4.8V to 6V
  • Stall Torque: 1.8 kg-cm at 4.8V, 2.2 kg-cm at 6V
  • Operating Speed: 0.12 sec/60° at 4.8V, 0.10 sec/60° at 6V
  • Temperature Range: -30°C to +60°C
  • Weight: Approximately 9g
  • Dimensions: 22.2 x 11.8 x 31 mm (LxWxH)

Pin Configuration and Descriptions

Pin Number Color Description
1 Brown Ground (GND)
2 Red Power Supply (VCC)
3 Orange Control Signal (PWM)

Usage Instructions

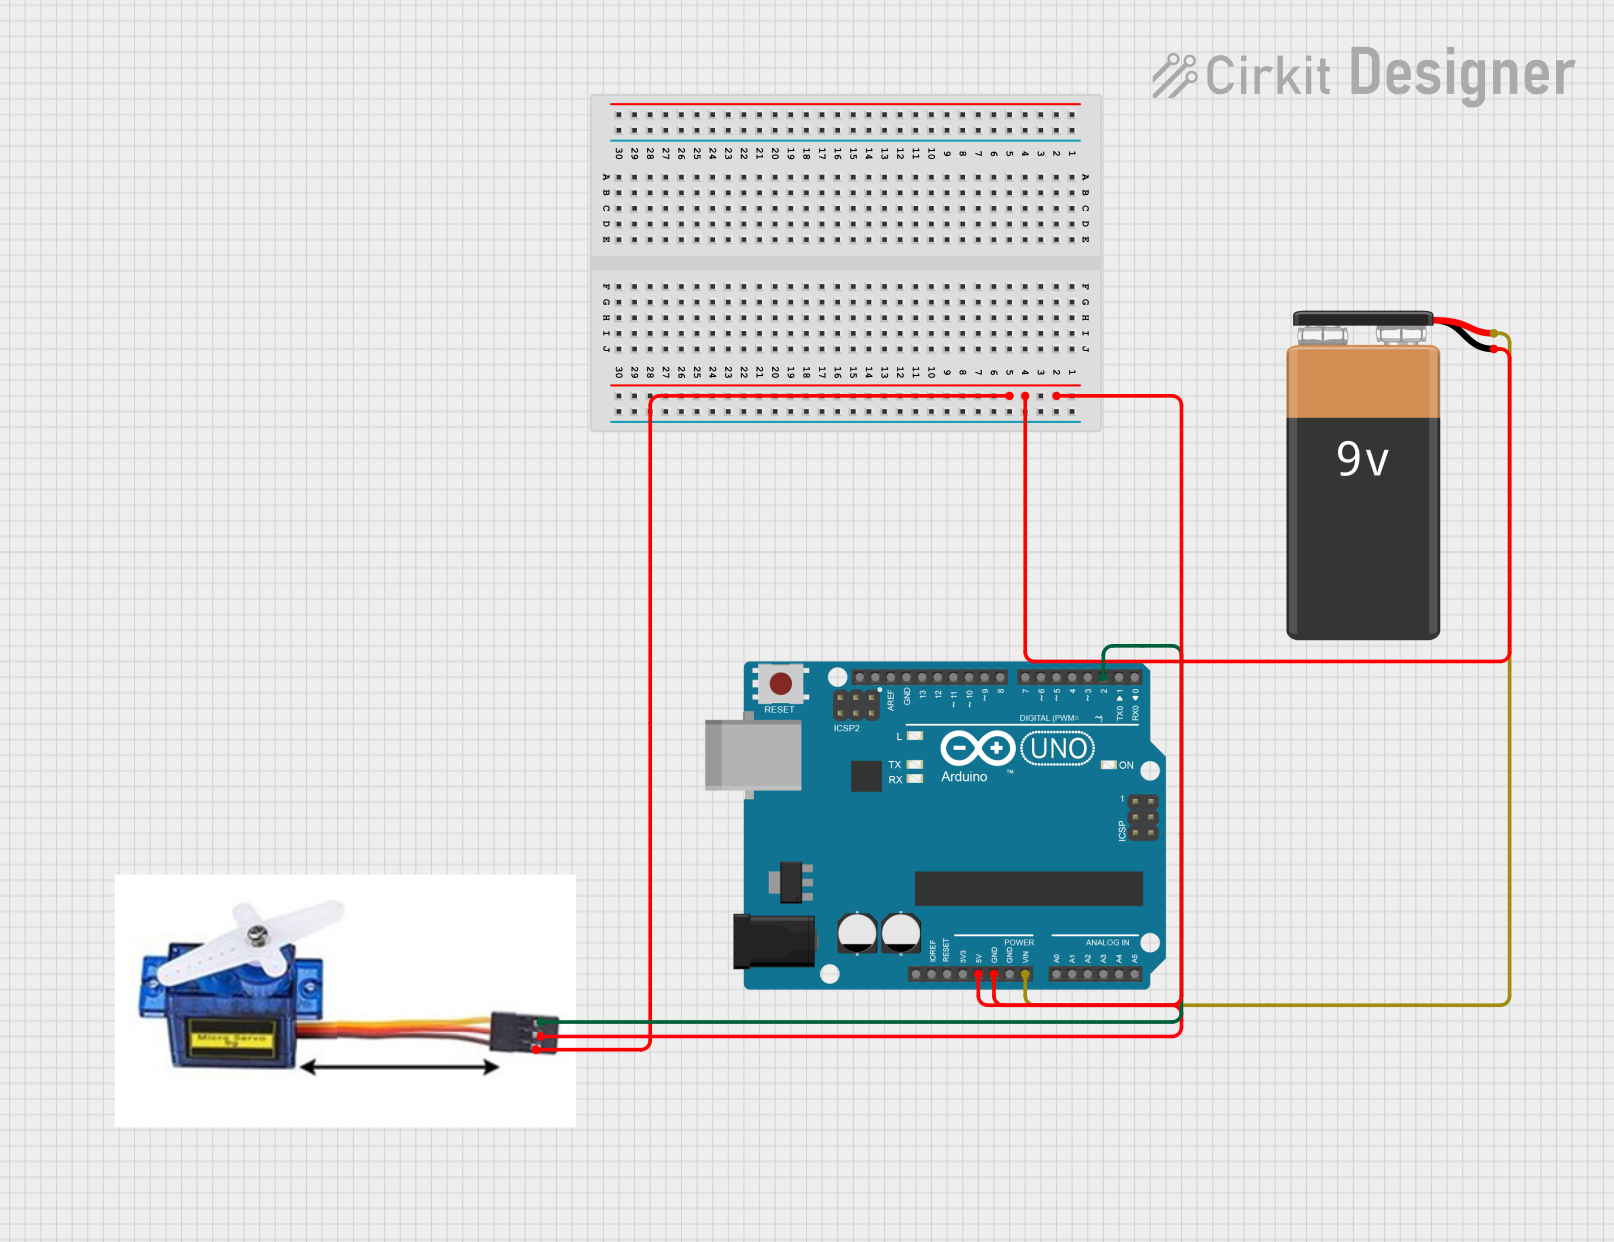
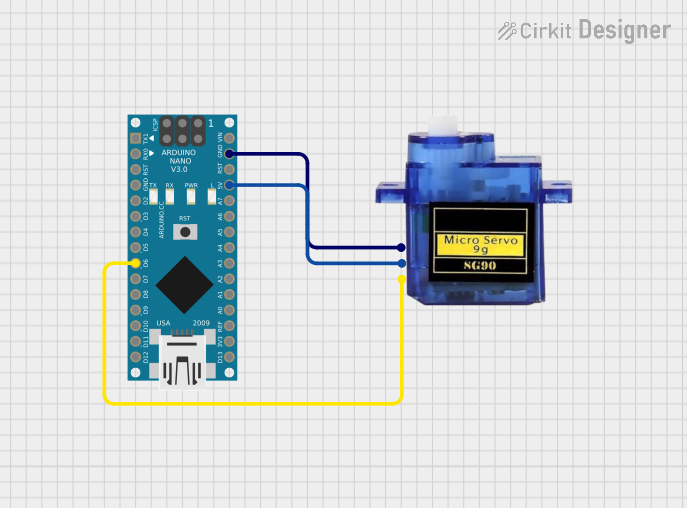
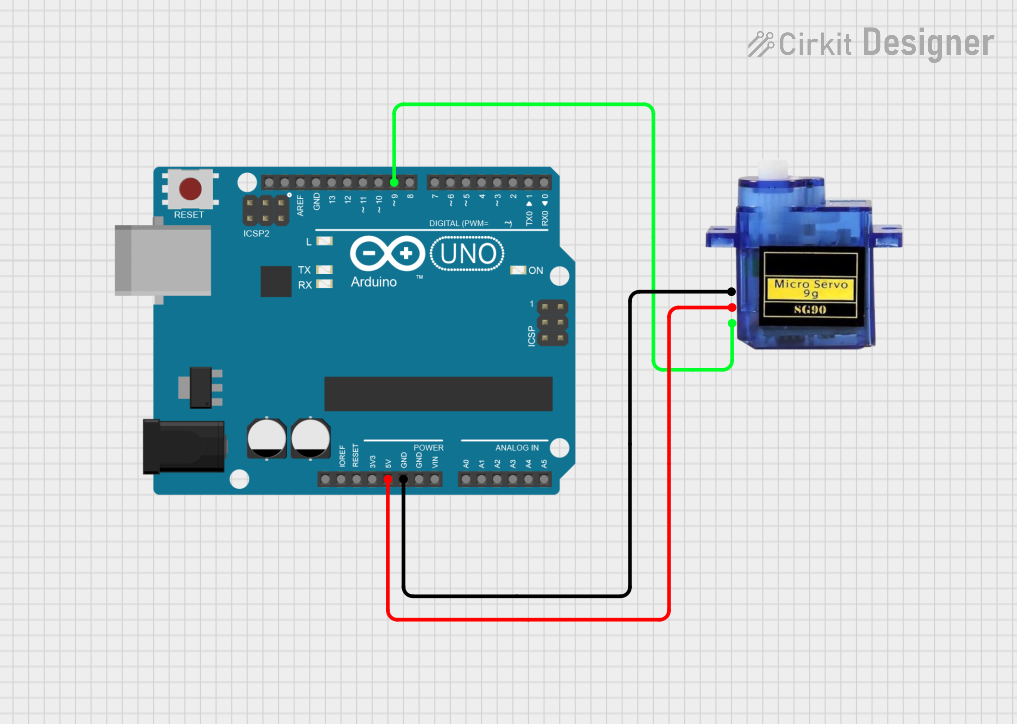
Interfacing with Arduino UNO

  1. Power Connections:

    • Connect the brown wire of the servo to one of the GND pins on the Arduino.
    • Connect the red wire to the 5V output pin on the Arduino.
  2. Signal Connection:

    • Connect the orange wire to a digital pin on the Arduino capable of PWM (e.g., pin 9).
  3. Programming the Servo:

    • Use the Servo library included with the Arduino IDE to control the servo motor.

Example Code

#include <Servo.h>

Servo myservo;  // Create servo object to control the Servo Motor 9G

void setup() {
  myservo.attach(9);  // Attaches the servo on pin 9 to the servo object
}

void loop() {
  myservo.write(90);  // Sets the servo position to 90°
  delay(1000);        // Wait for 1 second
  myservo.write(0);   // Sets the servo position to 0°
  delay(1000);        // Wait for 1 second
}

Important Considerations and Best Practices

  • Do not exceed the recommended voltage as it may damage the servo.
  • Ensure that the power supply can deliver sufficient current for the servo's operation.
  • Avoid mechanical blockage or excessive load on the servo's shaft to prevent damage.
  • Use a decoupling capacitor (e.g., 100 µF) across the power lines close to the servo to reduce electrical noise.

Troubleshooting and FAQs

Common Issues

  • Servo not responding: Check connections, ensure proper power supply, and verify that the control signal is correctly programmed.
  • Erratic movements: This may be due to electrical noise. Use a decoupling capacitor and keep power and signal wires away from high-current cables.
  • Insufficient torque: Ensure the servo is not overloaded and that the power supply is adequate.

FAQs

Q: Can I control the Servo Motor 9G with a battery? A: Yes, as long as the battery voltage is within the operating range of 4.8V to 6V.

Q: How can I reverse the direction of the servo? A: You can reverse the direction by modifying the control signal in software, using myservo.write(180 - angle); where angle is the desired position.

Q: What is the maximum angle the Servo Motor 9G can rotate? A: The servo typically has a range of motion of approximately 180 degrees.

Q: Can I use the Servo Motor 9G for continuous rotation? A: No, the Servo Motor 9G is designed for precise positioning, not continuous rotation. You would need a modified or a different type of servo for continuous rotation.

For further assistance, consult the community forums or contact the manufacturer's support.