Cirkit Designer
Your all-in-one circuit design IDE
Home /
Component Documentation
How to Use YL-83 Sonda: Examples, Pinouts, and Specs
Introduction
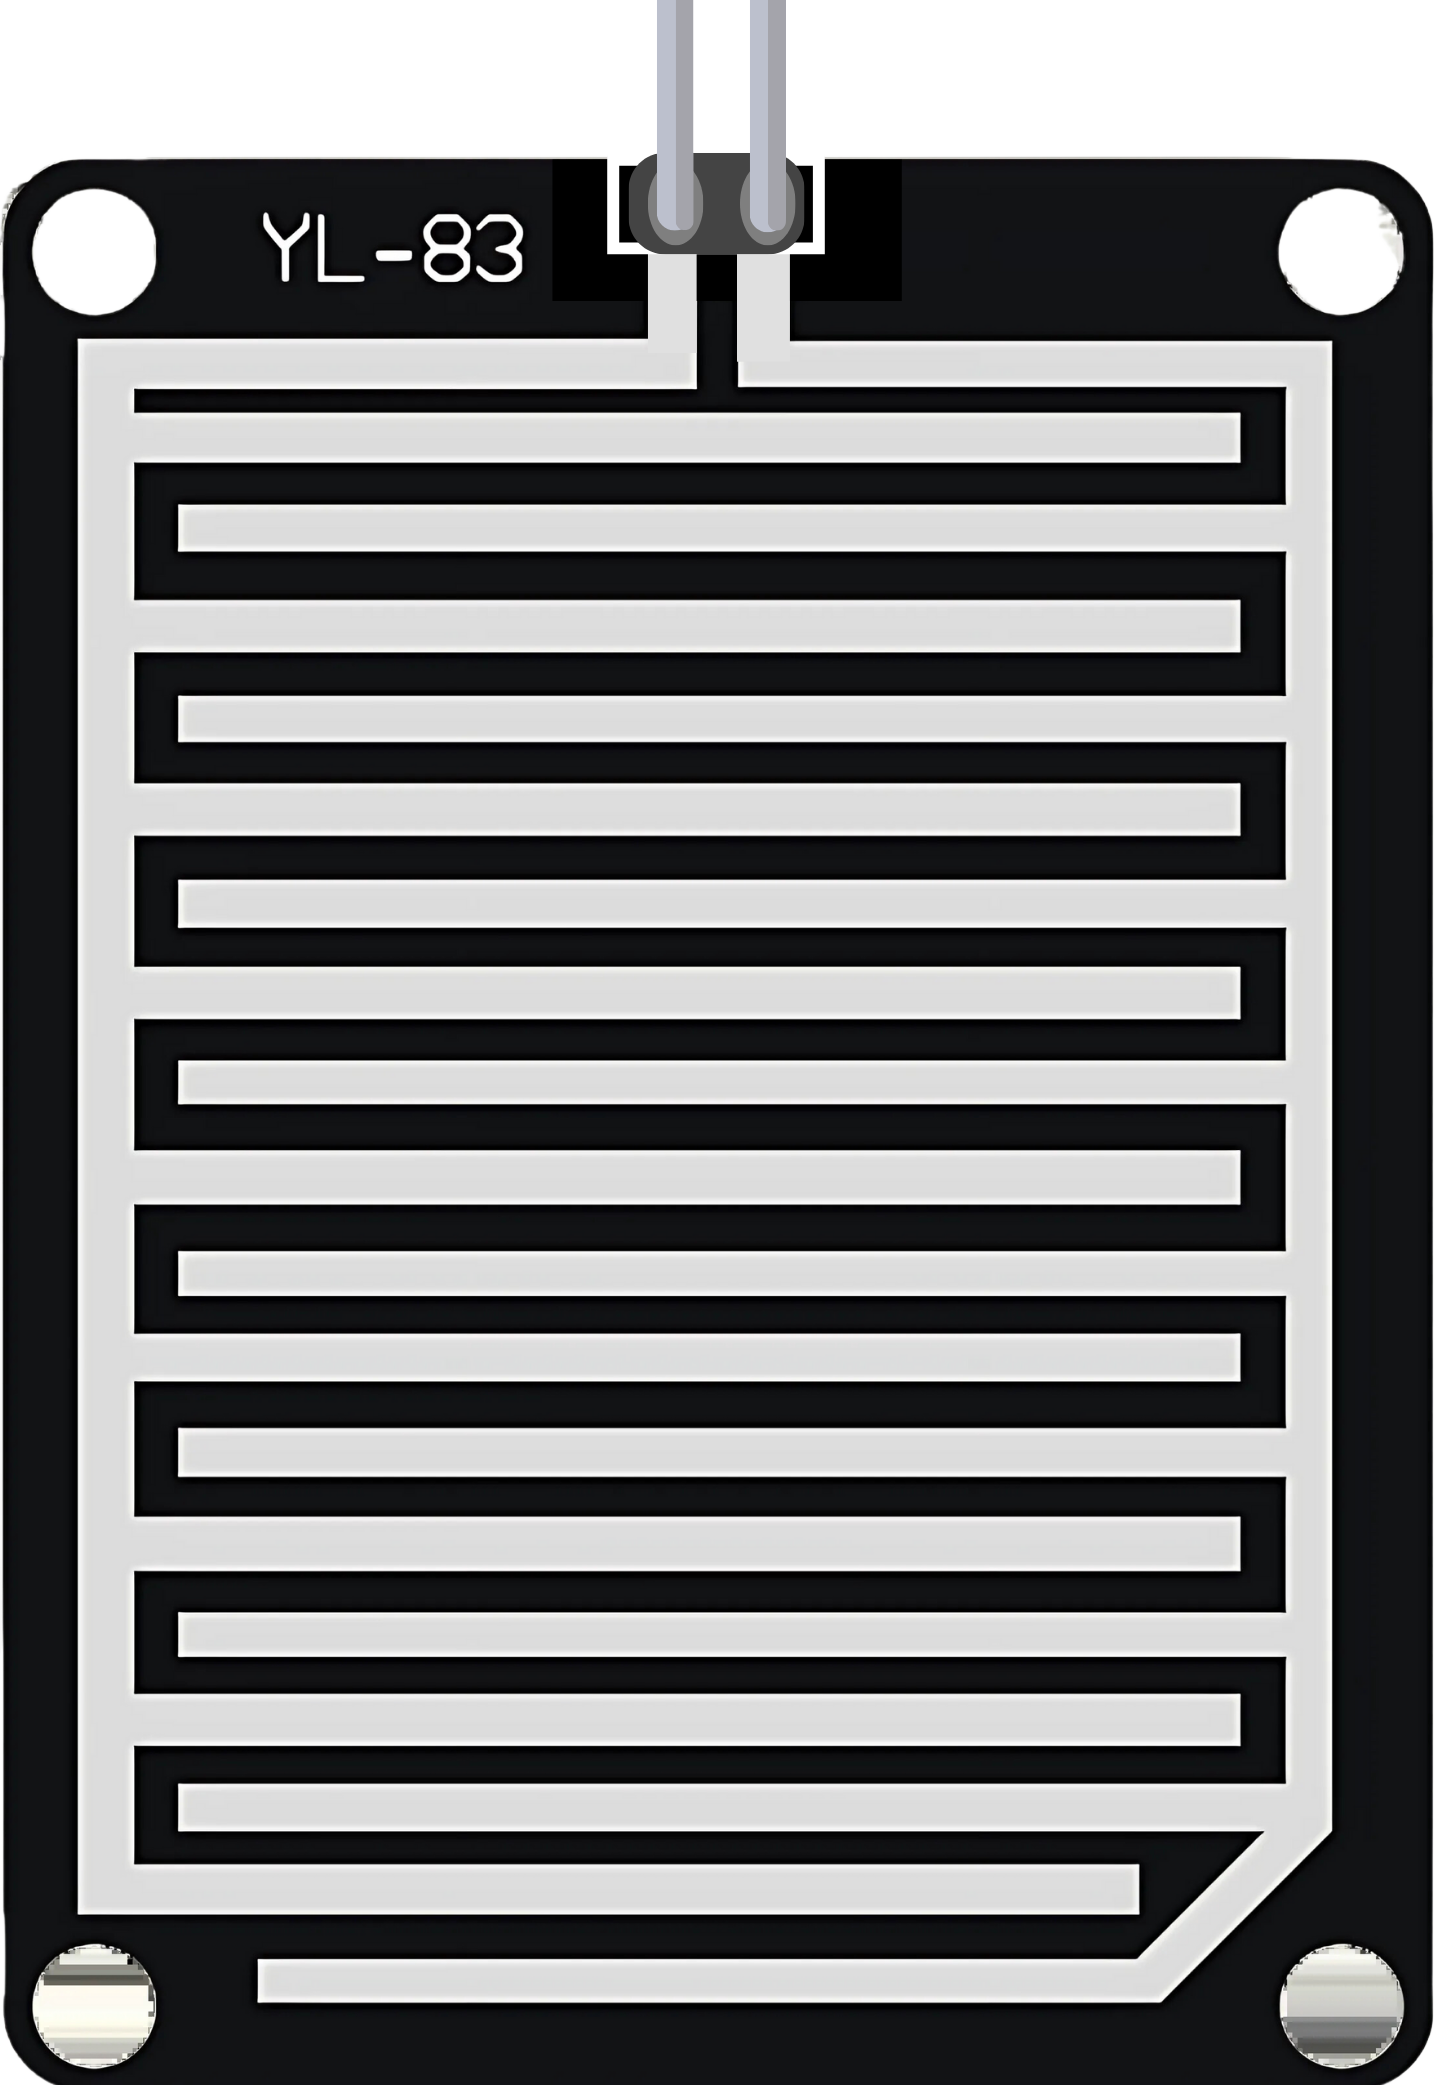
The YL-83 Sonda is a soil moisture sensor designed to measure the moisture content in soil, providing valuable data for agricultural applications, gardening, and automated irrigation systems. By detecting the resistance between two probes, the sensor can infer the level of moisture present, which is crucial for maintaining optimal soil conditions for plant growth.
Explore Projects Built with YL-83 Sonda
Arduino Nano-Based Multi-Zone Soil Moisture Monitor with OLED Display
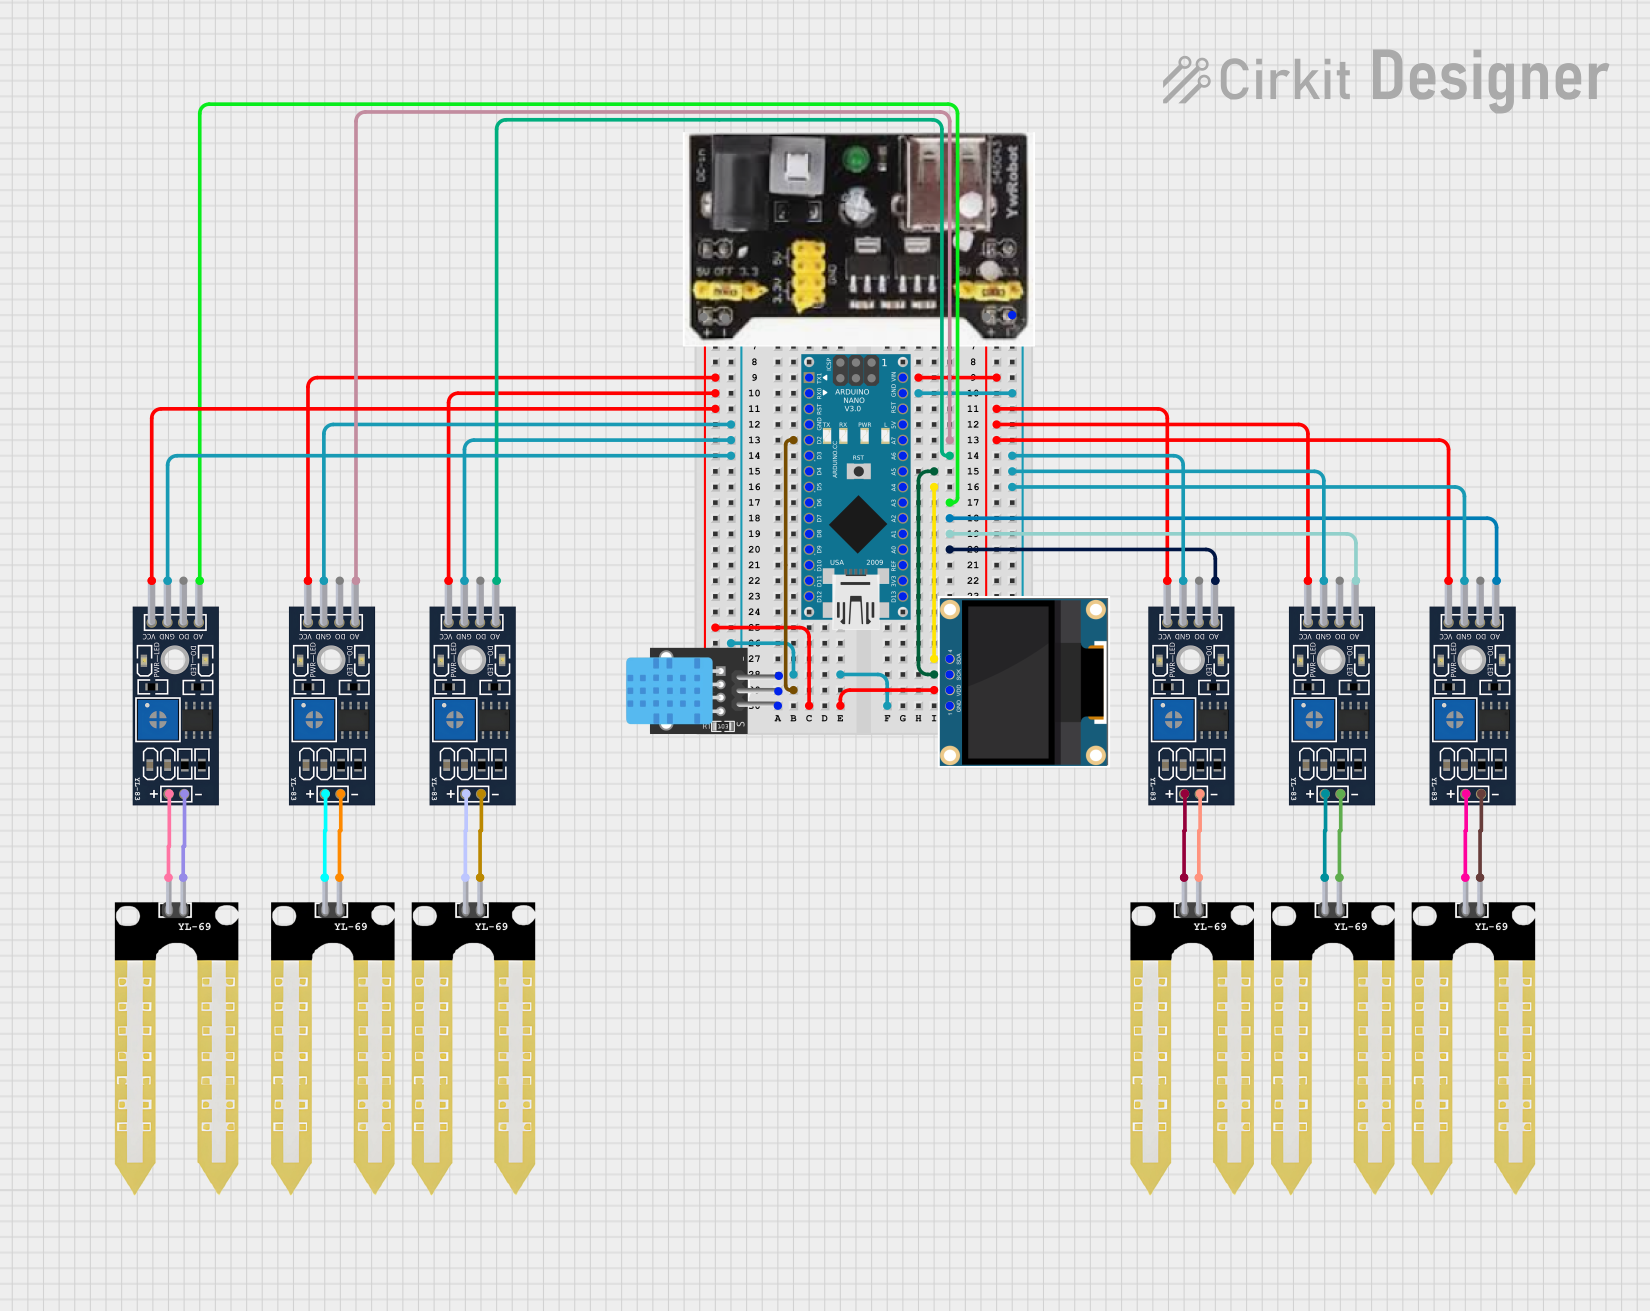
This circuit is designed to collect environmental data using multiple YL-83 modules with YL-69 sondas for soil moisture, and a KY-015 DHT11 sensor for humidity and temperature, all interfaced with an Arduino Nano. Data from the sensors is processed by the Arduino and displayed on an OLED screen, with power supplied by an MB102 Breadboard Power Supply Module.
WiFi LoRa Environmental Monitoring System with INMP441 Mic and Multiple Sensors

This circuit is a solar-powered environmental monitoring system that uses a WiFi LoRa 32V3 microcontroller to collect data from various sensors, including a microphone, UV light sensor, air quality sensor, and temperature/humidity/pressure sensor. The collected data is processed and transmitted via LoRa communication, making it suitable for remote environmental data logging and monitoring applications.
ESP32-Controlled Soil Moisture Monitoring and Water Pump System
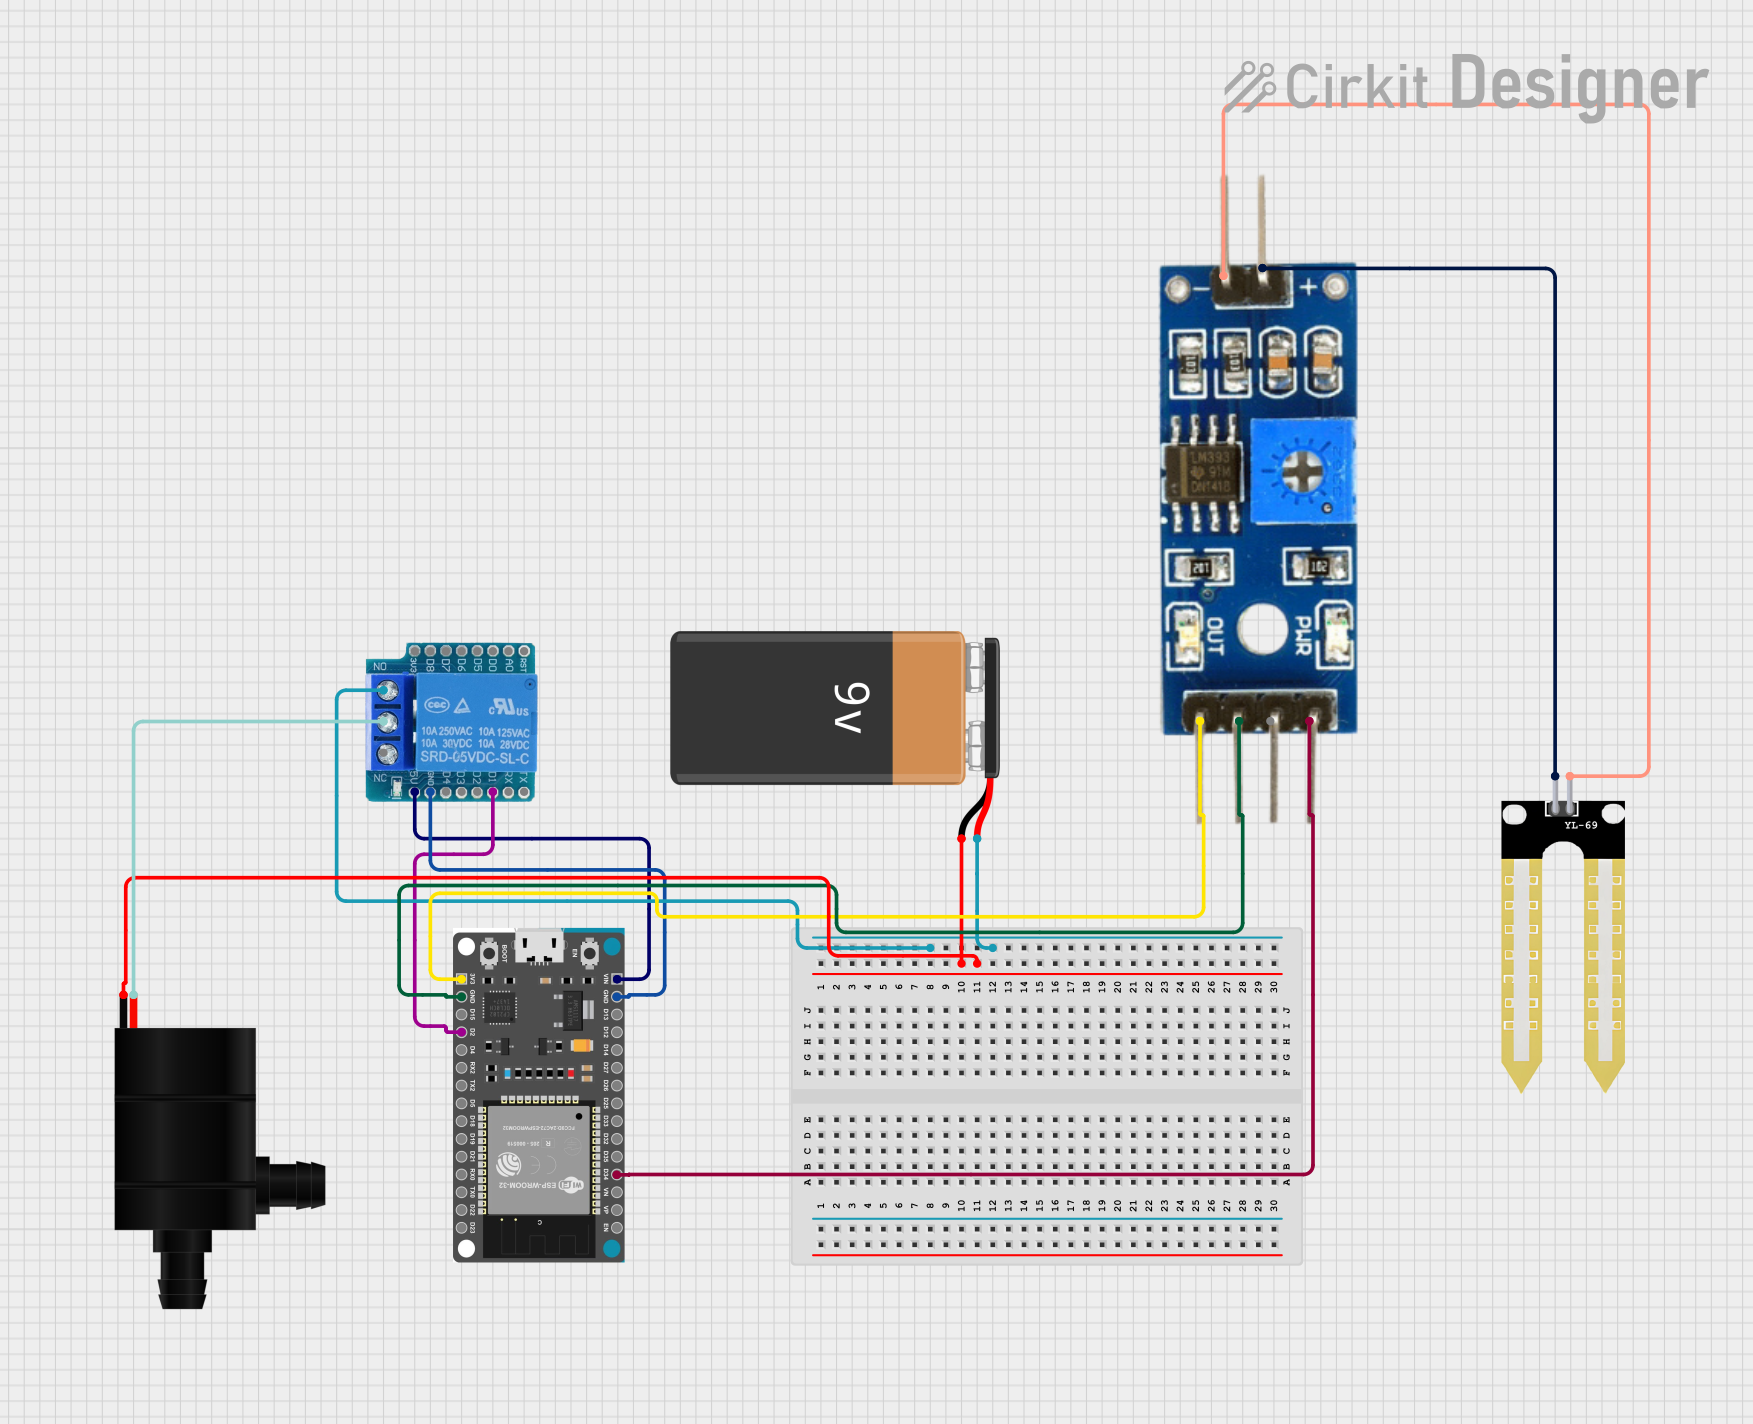
This circuit is designed to monitor soil moisture using a YL-69 Sonda connected to a Soil Moisture Module, which interfaces with an ESP32 Devkit V1 microcontroller. The ESP32 reads the analog moisture level and controls a water pump via a Wemos D1 Mini Relay Shield, which is powered by a 9V battery. The relay allows the microcontroller to safely switch the high-power circuit of the water pump on and off based on the soil moisture readings.
Lilygo 7670e-Based Smart Interface with LCD Display and Keypad

This circuit features a Lilygo 7670e microcontroller interfaced with a 16x2 I2C LCD for display, a 4X4 membrane matrix keypad for input, and an arcade button for additional control. It also includes a 4G antenna and a GPS antenna for communication and location tracking capabilities.
Explore Projects Built with YL-83 Sonda
Arduino Nano-Based Multi-Zone Soil Moisture Monitor with OLED Display
This circuit is designed to collect environmental data using multiple YL-83 modules with YL-69 sondas for soil moisture, and a KY-015 DHT11 sensor for humidity and temperature, all interfaced with an Arduino Nano. Data from the sensors is processed by the Arduino and displayed on an OLED screen, with power supplied by an MB102 Breadboard Power Supply Module.
WiFi LoRa Environmental Monitoring System with INMP441 Mic and Multiple Sensors
This circuit is a solar-powered environmental monitoring system that uses a WiFi LoRa 32V3 microcontroller to collect data from various sensors, including a microphone, UV light sensor, air quality sensor, and temperature/humidity/pressure sensor. The collected data is processed and transmitted via LoRa communication, making it suitable for remote environmental data logging and monitoring applications.
ESP32-Controlled Soil Moisture Monitoring and Water Pump System
This circuit is designed to monitor soil moisture using a YL-69 Sonda connected to a Soil Moisture Module, which interfaces with an ESP32 Devkit V1 microcontroller. The ESP32 reads the analog moisture level and controls a water pump via a Wemos D1 Mini Relay Shield, which is powered by a 9V battery. The relay allows the microcontroller to safely switch the high-power circuit of the water pump on and off based on the soil moisture readings.
Lilygo 7670e-Based Smart Interface with LCD Display and Keypad
This circuit features a Lilygo 7670e microcontroller interfaced with a 16x2 I2C LCD for display, a 4X4 membrane matrix keypad for input, and an arcade button for additional control. It also includes a 4G antenna and a GPS antenna for communication and location tracking capabilities.
Common Applications and Use Cases
- Automated irrigation systems
- Agricultural monitoring
- Garden soil moisture control
- Environmental sensing
- Educational projects related to soil science
Technical Specifications
Key Technical Details
- Operating Voltage: 3.3V to 5V
- Output Voltage: 0V to 4.2V
- Current: 35mA (typical)
- Interface: Analog
- Sensitivity: Adjustable via onboard potentiometer
Pin Configuration and Descriptions
| Pin Number | Name | Description |
|---|---|---|
| 1 | VCC | Power supply (3.3V to 5V) |
| 2 | GND | Ground connection |
| 3 | AOUT | Analog output signal |
| 4 | DOUT | Digital output signal (threshold set by potentiometer) |
Usage Instructions
How to Use the Component in a Circuit
- Connect the VCC pin to the power supply (3.3V or 5V).
- Connect the GND pin to the ground of the power supply.
- Connect the AOUT pin to an analog input pin on your microcontroller (e.g., Arduino).
- (Optional) Connect the DOUT pin to a digital input pin if you wish to use the digital output.
Important Considerations and Best Practices
- Avoid submerging the sensor completely in water or wet soil for extended periods to prevent corrosion.
- Calibrate the sensor by adjusting the onboard potentiometer to set the threshold for the digital output.
- Use a pull-up resistor if you experience unstable readings from the digital output.
- Clean the probes after use to ensure accurate readings and prolong the sensor's life.
Example Code for Arduino UNO
// Define the analog input pin where the sensor is connected
int sensorPin = A0;

void setup() {
  // Initialize serial communication at 9600 baud rate
  Serial.begin(9600);
}

void loop() {
  // Read the value from the soil moisture sensor
  int sensorValue = analogRead(sensorPin);

  // Convert the analog reading to a more familiar percentage
  int moisturePercent = map(sensorValue, 0, 1023, 100, 0);

  // Print the moisture level to the Serial Monitor
  Serial.print("Soil Moisture Level: ");
  Serial.print(moisturePercent);
  Serial.println("%");

  // Wait for a second before taking another reading
  delay(1000);
}
Troubleshooting and FAQs
Common Issues Users Might Face
- Inconsistent Readings: Fluctuating sensor values can be due to loose connections or interference. Ensure all connections are secure and use shielded cables if necessary.
- Sensor Corrosion: Prolonged exposure to moisture can corrode the sensor probes. Minimize direct contact with water and clean the probes regularly.
- No Readings: If the sensor provides no output, check the power supply and connections to the sensor. Ensure the sensor is not damaged.
Solutions and Tips for Troubleshooting
- Calibration: Adjust the onboard potentiometer to calibrate the digital output threshold.
- Cable Length: Keep the cables between the sensor and microcontroller short to reduce potential noise.
- Dry the Sensor: After testing or use, dry the sensor to prevent corrosion.
FAQs
Q: Can the YL-83 Sonda be used with a 3.3V system?
- A: Yes, the sensor can operate at 3.3V, but the output range will be lower.
Q: How do I clean the sensor probes?
- A: Gently wipe the probes with a dry cloth and avoid using any abrasive materials that could damage them.
Q: Is it possible to use the sensor in a permanent installation?
- A: For long-term installations, consider using a sensor with a corrosion-resistant coating or periodically replace the sensor to ensure accuracy.