How to Use Battery : Examples, Pinouts, and Specs
Introduction
A battery is a device that stores electrical energy in chemical form and converts it into electrical energy to power electronic circuits. Batteries are essential components in a wide range of applications, from portable electronics and electric vehicles to backup power systems and renewable energy storage. They are available in various types, such as alkaline, lithium-ion, nickel-metal hydride (NiMH), and lead-acid, each suited for specific use cases.
Common applications of batteries include:
- Powering portable devices like smartphones, laptops, and cameras.
- Providing backup power for uninterruptible power supplies (UPS).
- Storing energy in renewable energy systems (e.g., solar panels).
- Powering electric vehicles and robotics.
Explore Projects Built with Battery

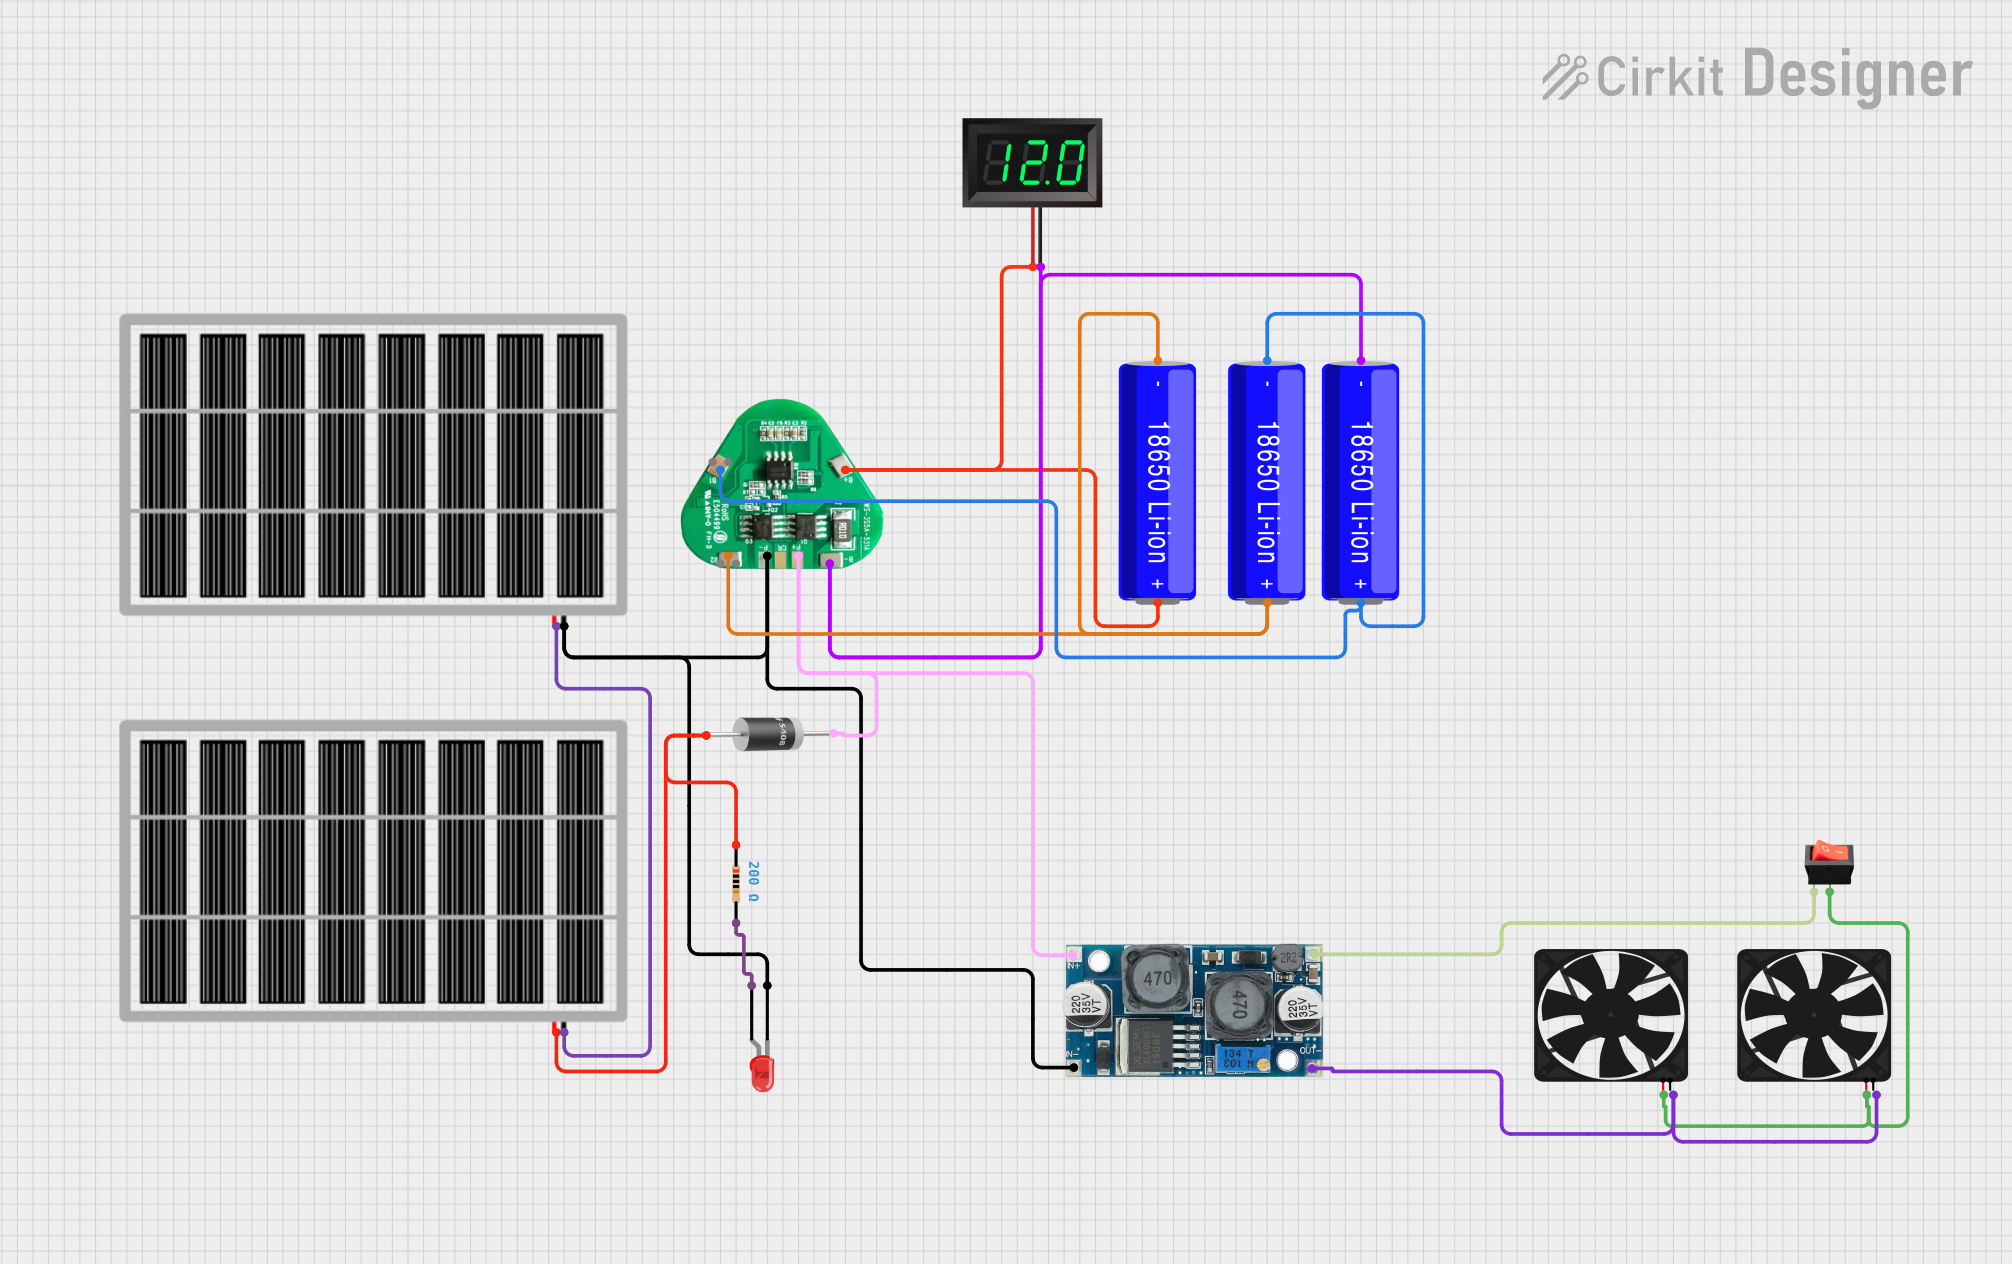
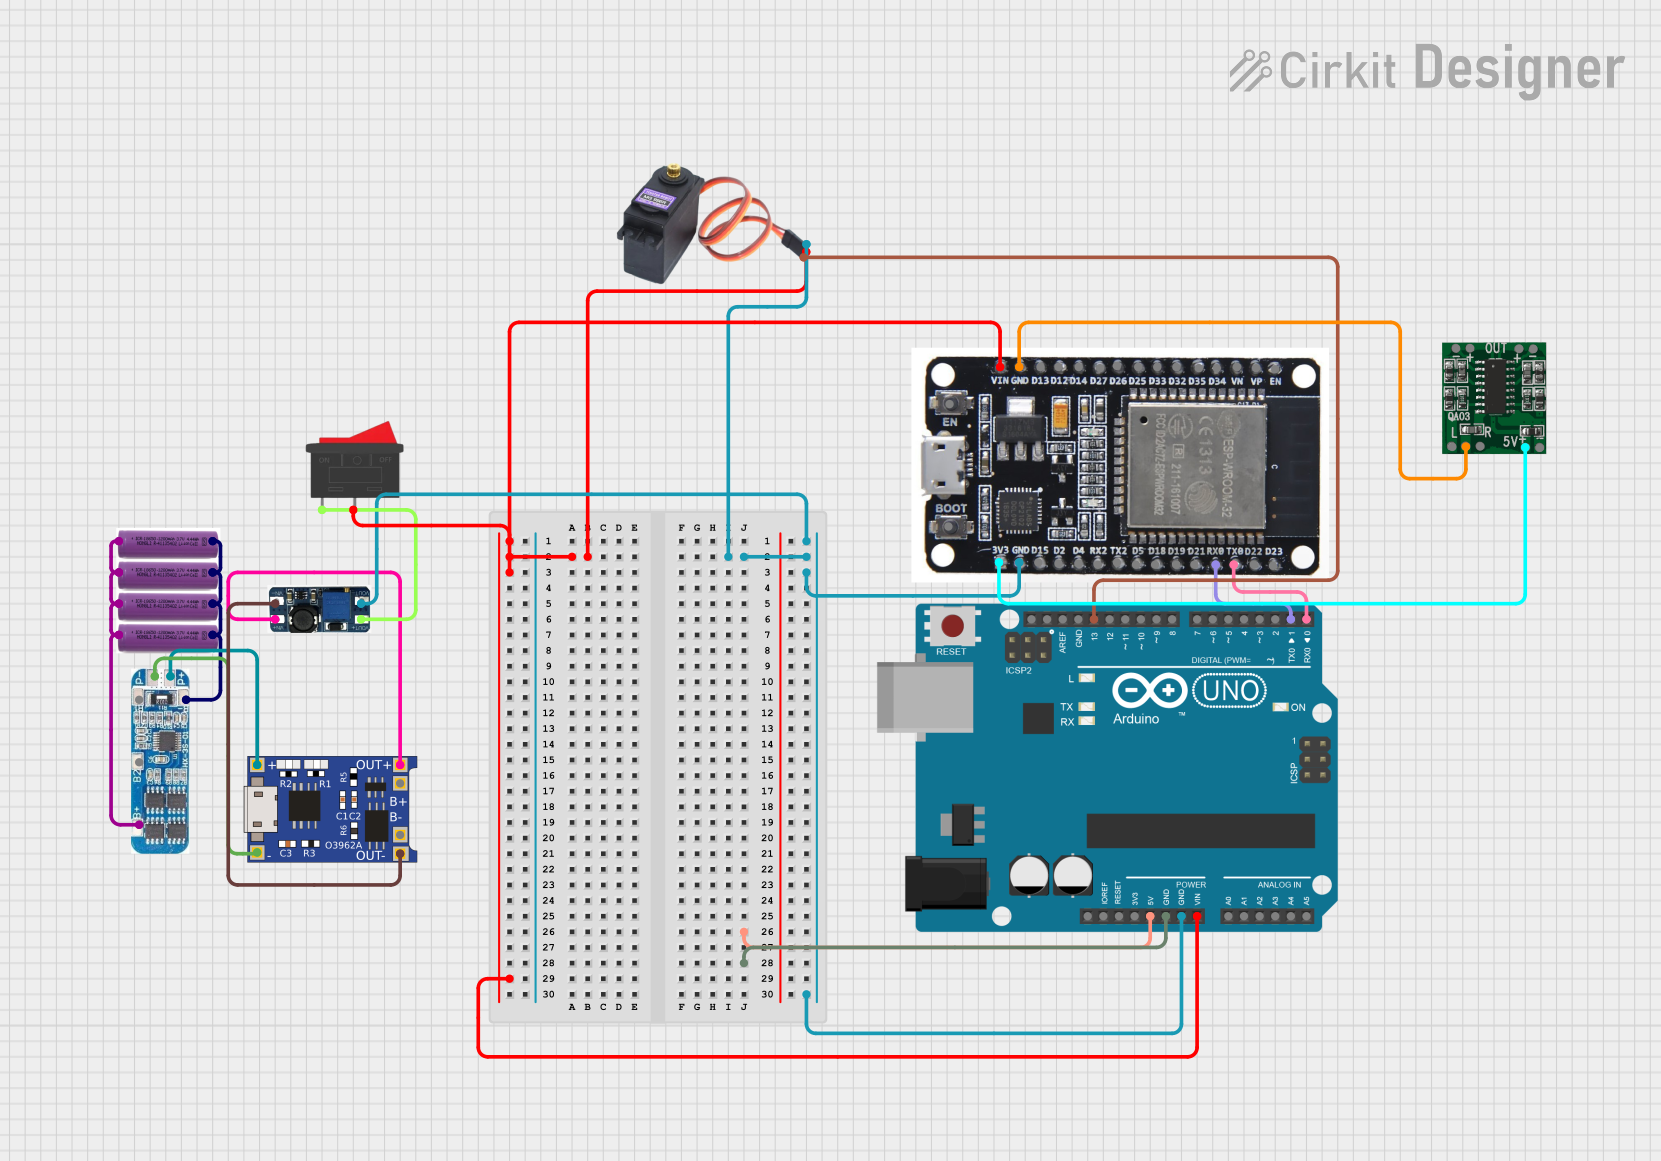
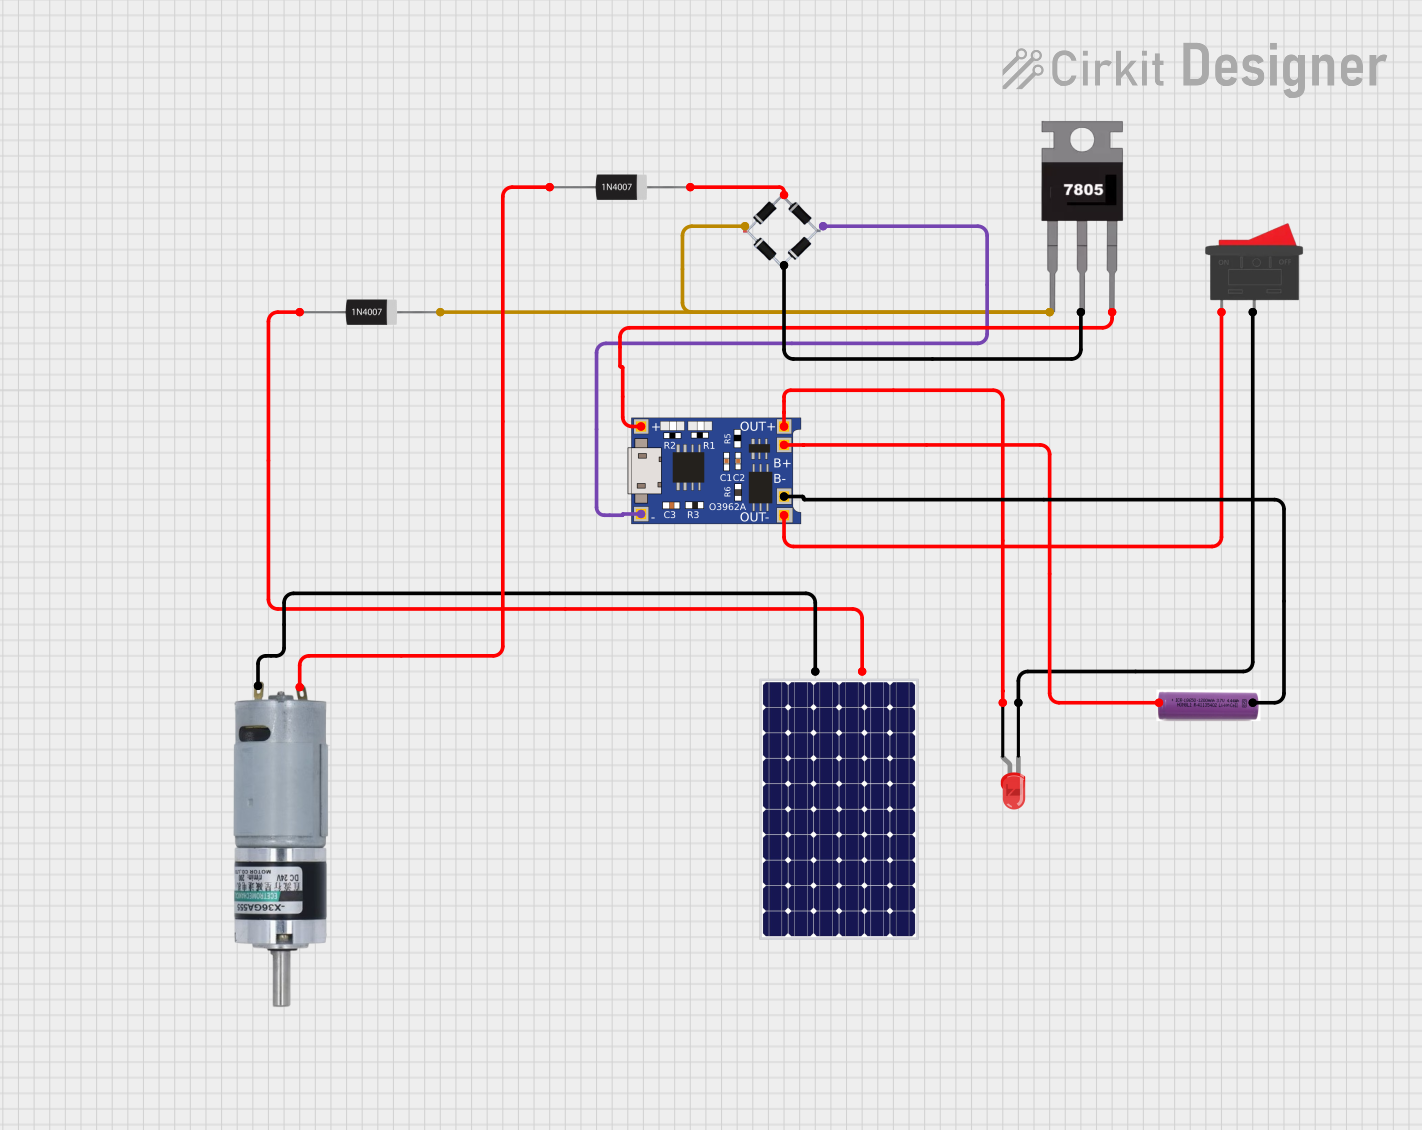
Explore Projects Built with Battery
Technical Specifications
The technical specifications of a battery vary depending on its type and intended application. Below are general specifications for a typical lithium-ion battery, one of the most commonly used types:
| Parameter | Specification |
|---|---|
| Nominal Voltage | 3.7V |
| Capacity | 1000mAh to 5000mAh (varies by model) |
| Maximum Discharge Rate | 1C to 3C (varies by model) |
| Charging Voltage | 4.2V (typical for lithium-ion) |
| Operating Temperature | -20°C to 60°C |
| Cycle Life | 300 to 1000 cycles |
Pin Configuration and Descriptions
For rechargeable batteries with integrated protection circuits, the pin configuration is typically as follows:
| Pin | Label | Description |
|---|---|---|
| 1 | + (Positive) | Positive terminal for power output. |
| 2 | - (Negative) | Negative terminal for power output. |
| 3 | T (Thermistor) | Optional pin for temperature monitoring (if available). |
Note: Non-rechargeable batteries (e.g., alkaline) typically have only two terminals: positive (+) and negative (-).
Usage Instructions
How to Use a Battery in a Circuit
- Determine Voltage and Capacity Requirements: Ensure the battery's voltage and capacity match the requirements of your circuit.
- Connect the Terminals Correctly: Connect the positive terminal of the battery to the positive rail of the circuit and the negative terminal to the ground rail.
- Use a Battery Holder or Connector: For safety and convenience, use a battery holder or connector to secure the battery in place.
- Include Protection Components: Add components like diodes, fuses, or battery management systems (BMS) to prevent overcharging, over-discharging, or short circuits.
- Monitor Battery Voltage: Use a voltage divider or dedicated battery monitoring IC to track the battery's charge level.
Important Considerations and Best Practices
- Avoid Overcharging or Over-discharging: Use a charger designed for the specific battery type to prevent damage.
- Temperature Management: Avoid exposing the battery to extreme temperatures, as this can reduce its lifespan or cause safety hazards.
- Storage: Store batteries in a cool, dry place when not in use. For lithium-ion batteries, maintain a charge level of around 40-60% during long-term storage.
- Recycling: Dispose of batteries responsibly by recycling them at designated facilities.
Example: Connecting a Battery to an Arduino UNO
Below is an example of powering an Arduino UNO using a 9V battery:
Circuit Setup
- Connect the positive terminal of the 9V battery to the Arduino's VIN pin.
- Connect the negative terminal of the battery to the Arduino's GND pin.
Sample Code
// This code reads the battery voltage using an analog pin and displays it
// on the serial monitor. Ensure a voltage divider is used to step down
// the battery voltage if it exceeds the Arduino's input range.

const int batteryPin = A0; // Analog pin connected to the voltage divider
const float voltageDividerRatio = 2.0; // Adjust based on your resistor values
const float referenceVoltage = 5.0; // Arduino's reference voltage (5V for UNO)

void setup() {
  Serial.begin(9600); // Initialize serial communication
}

void loop() {
  int rawValue = analogRead(batteryPin); // Read the analog value
  float batteryVoltage = (rawValue / 1023.0) * referenceVoltage * voltageDividerRatio;

  // Print the battery voltage to the serial monitor
  Serial.print("Battery Voltage: ");
  Serial.print(batteryVoltage);
  Serial.println(" V");

  delay(1000); // Wait for 1 second before the next reading
}
Troubleshooting and FAQs
Common Issues
Battery Drains Quickly:
- Cause: High current draw or a faulty battery.
- Solution: Check the circuit's current consumption and replace the battery if necessary.
Battery Overheats:
- Cause: Overcharging, short circuit, or high discharge rate.
- Solution: Use a proper charger and ensure the circuit's current draw is within the battery's limits.
Battery Does Not Charge:
- Cause: Faulty charger or damaged battery.
- Solution: Test the charger with another battery and replace the battery if needed.
Voltage Drops Under Load:
- Cause: Insufficient capacity or high internal resistance.
- Solution: Use a battery with a higher capacity or lower internal resistance.
FAQs
Q: Can I use any charger for my battery?
- A: No, always use a charger designed for the specific type and voltage of your battery.
Q: How do I know when my battery is fully charged?
- A: Most chargers have an indicator light or stop charging automatically when the battery is full.
Q: Can I connect batteries in series or parallel?
- A: Yes, connecting in series increases voltage, while connecting in parallel increases capacity. Ensure all batteries are of the same type and charge level.
Q: How do I safely dispose of a battery?
- A: Take the battery to a recycling facility or follow local regulations for battery disposal.