How to Use rocker switch: Examples, Pinouts, and Specs
Introduction
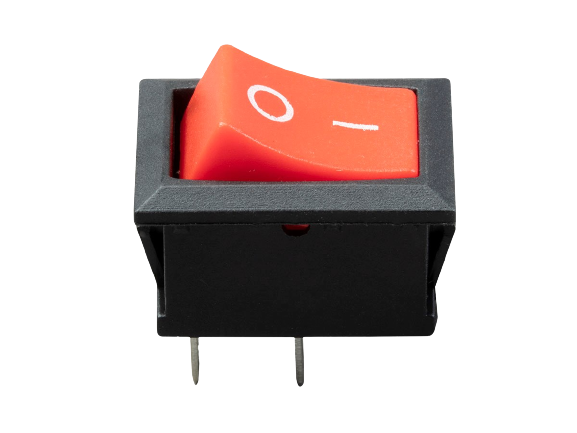
A rocker switch is a type of on/off electrical switch that operates using a rocking motion. It is designed with a lever, or actuator, that can be rocked back and forth to either establish or interrupt an electrical circuit. Rocker switches are widely used in various applications, including household appliances, office equipment, industrial machinery, and automotive electronics, due to their ease of operation and reliability.
Explore Projects Built with rocker switch


Explore Projects Built with rocker switch
Technical Specifications
General Characteristics
- Switch Type: Rocker
- Action: SPST (Single Pole Single Throw), DPST (Double Pole Single Throw), DPDT (Double Pole Double Throw), etc.
- Current Rating: Typically ranges from 3A to 20A
- Voltage Rating: Commonly rated for 120V or 250V AC
- Contact Resistance: Varies by model, often less than 50 mΩ
- Insulation Resistance: Typically greater than 100 MΩ
- Dielectric Strength: Usually around 1500V AC for 1 minute
- Operating Temperature: Varies, often -20°C to +85°C
- Mechanical Life: Often rated for 50,000 to 100,000 cycles
- Electrical Life: Often rated for 10,000 to 50,000 cycles
Pin Configuration and Descriptions
The pin configuration of a rocker switch can vary depending on the type (SPST, DPST, DPDT, etc.). Below is an example of a common DPDT rocker switch pinout:
| Pin Number | Description |
|---|---|
| 1 | Input for Pole 1 |
| 2 | Output for Pole 1 |
| 3 | Output for Pole 1 |
| 4 | Input for Pole 2 |
| 5 | Output for Pole 2 |
| 6 | Output for Pole 2 |
Usage Instructions
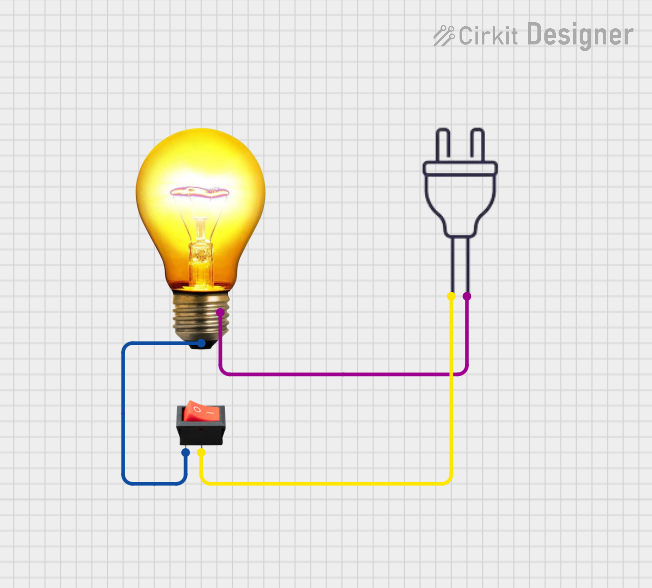
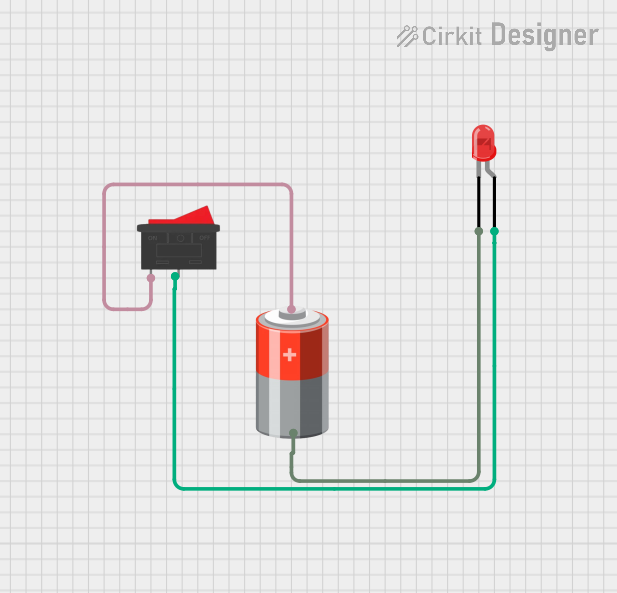
Wiring the Rocker Switch
- Identify the Pins: Refer to the technical specifications for the pin configuration of your specific rocker switch.
- Power Off: Ensure that the power supply to the circuit is turned off before wiring the switch.
- Connect Inputs: Attach the input wires from the power source to the input pins of the switch (Pins 1 and 4 for a DPDT switch).
- Connect Outputs: Connect the output wires leading to the load (e.g., a lamp or motor) to the output pins of the switch (Pins 2 and 5 for one pole, and Pins 3 and 6 for the other pole of a DPDT switch).
- Secure Connections: Ensure that all connections are secure and that there are no loose strands of wire that could cause a short circuit.
Best Practices
- Use a rocker switch with a current and voltage rating that matches or exceeds the requirements of the application.
- Ensure that the switch is properly mounted to prevent movement, which could lead to wiring fatigue or failure.
- If the switch will be exposed to harsh environments, consider using a switch with a higher IP rating for dust and water resistance.
Troubleshooting and FAQs
Common Issues
- Switch Does Not Operate: Check if the switch is properly wired and that there is power to the input. Ensure that the switch is not damaged.
- Intermittent Operation: Inspect the connections for any loose wires or poor solder joints. Also, check for any signs of damage or wear on the switch contacts.
- Overheating: Ensure that the current passing through the switch does not exceed its rated capacity.
FAQs
Q: Can I use a rocker switch with a DC circuit? A: Yes, rocker switches can be used with both AC and DC circuits. Ensure that the DC voltage and current do not exceed the switch's ratings.
Q: How do I know if my rocker switch is on or off? A: Many rocker switches have an indicator, such as a line or dot, on one side to denote the "on" position. When the side with the indicator is depressed, the switch is in the "on" position.
Q: Is it possible to replace a toggle switch with a rocker switch? A: Yes, as long as the rocker switch has the same or higher ratings and the same type of contacts (e.g., SPST, DPST).
Q: How do I mount a rocker switch? A: Rocker switches are typically mounted into a cutout on a panel. The switch may snap into place or be secured with mounting hardware, depending on the design.
Example Code for Arduino UNO
If you're using a rocker switch with an Arduino UNO to control a device like an LED, here's a simple example code:
// Define the pin connected to the rocker switch
const int rockerSwitchPin = 2;
// Define the pin connected to the LED
const int ledPin = 13;

void setup() {
  // Set the switch pin as input
  pinMode(rockerSwitchPin, INPUT);
  // Set the LED pin as output
  pinMode(ledPin, OUTPUT);
}

void loop() {
  // Read the state of the rocker switch
  int switchState = digitalRead(rockerSwitchPin);

  // If the switch is in the ON position, turn on the LED
  if (switchState == HIGH) {
    digitalWrite(ledPin, HIGH);
  } else {
    // If the switch is in the OFF position, turn off the LED
    digitalWrite(ledPin, LOW);
  }
}
Remember to connect one side of the rocker switch to the Arduino's input pin and the other side to the ground. The internal pull-up resistor is used to ensure a known state when the switch is open.