How to Use Force Sensing Resistor: Examples, Pinouts, and Specs

Introduction
A Force Sensing Resistor (FSR) is a passive component that exhibits a decrease in resistance when pressure or force is applied to its surface. It is constructed from a conductive polymer that changes resistance in a predictable manner following the application of force. FSRs are widely used in applications requiring force feedback, such as touch-sensitive interfaces, robotics, musical instruments, and a variety of pressure-sensing mechanisms.
Explore Projects Built with Force Sensing Resistor
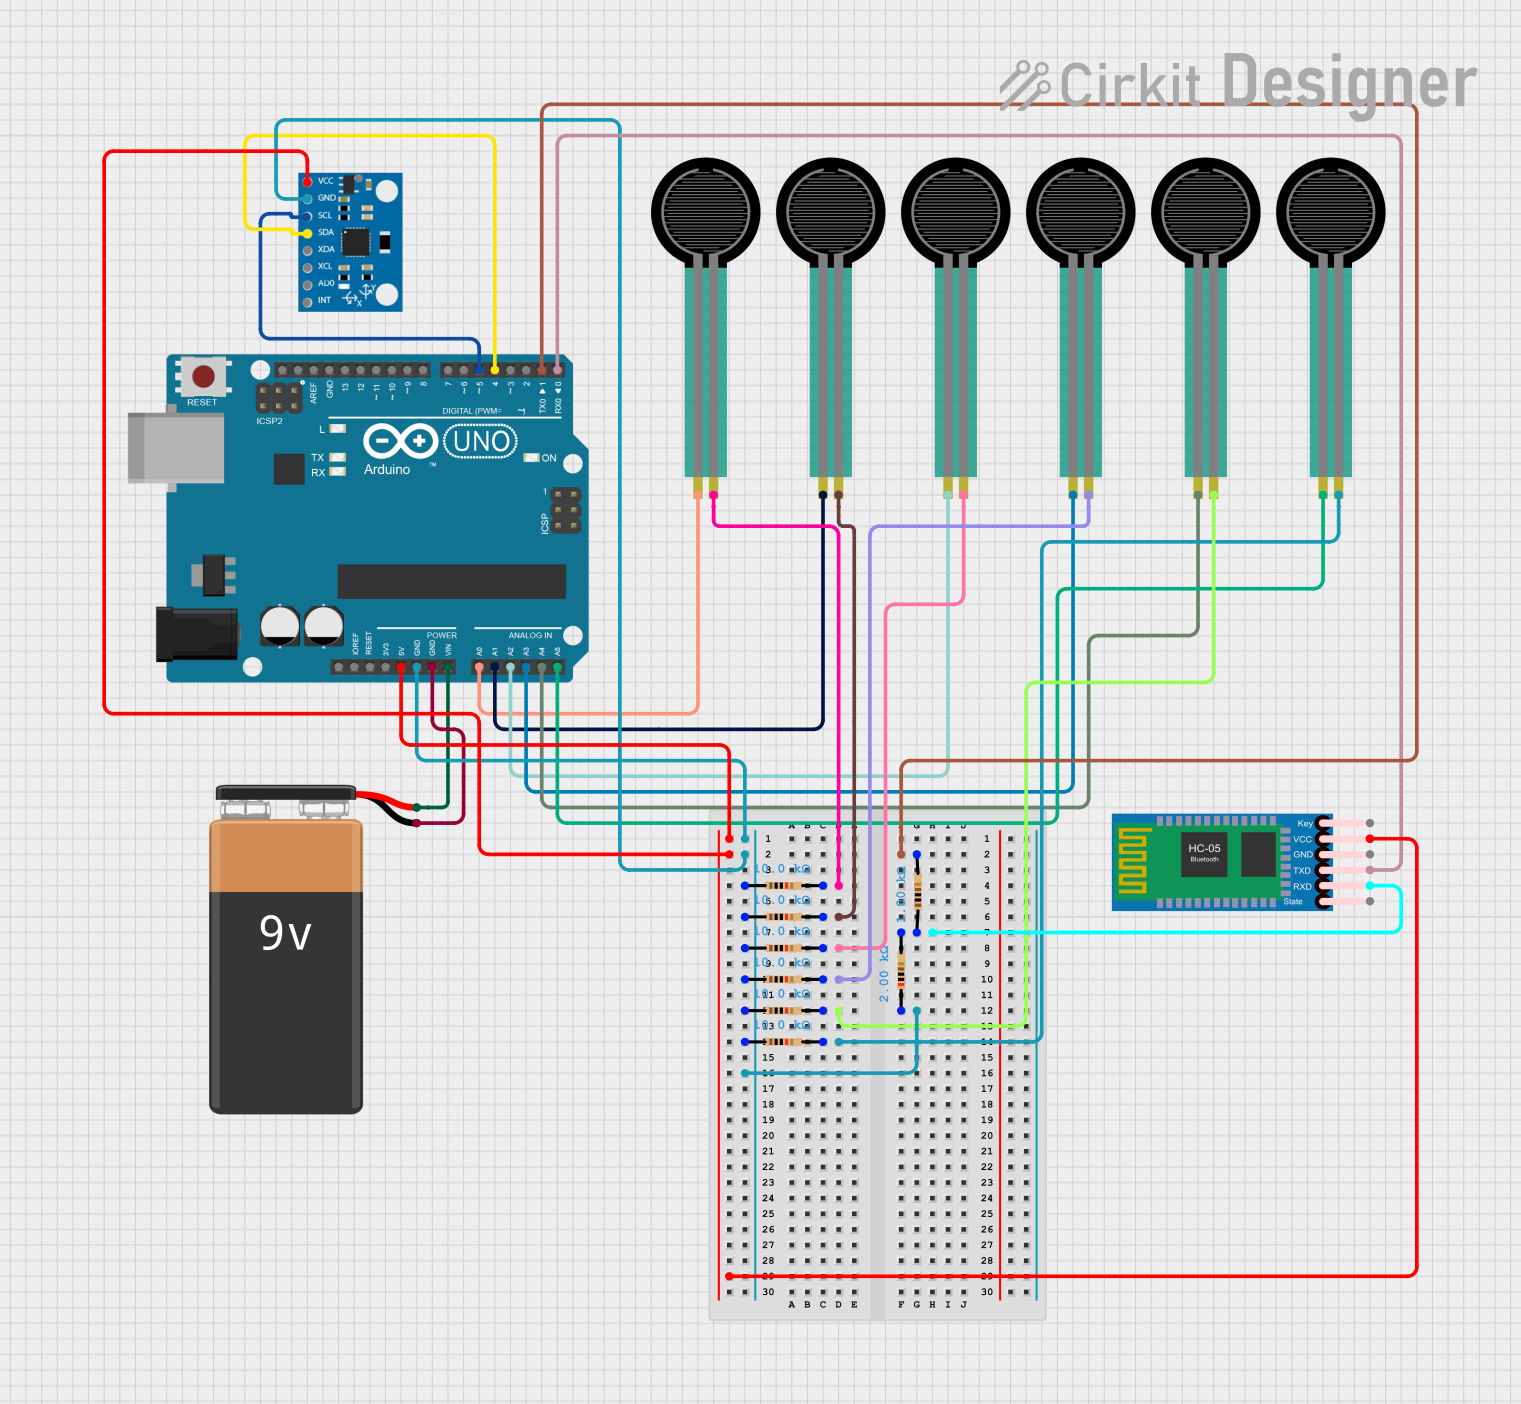

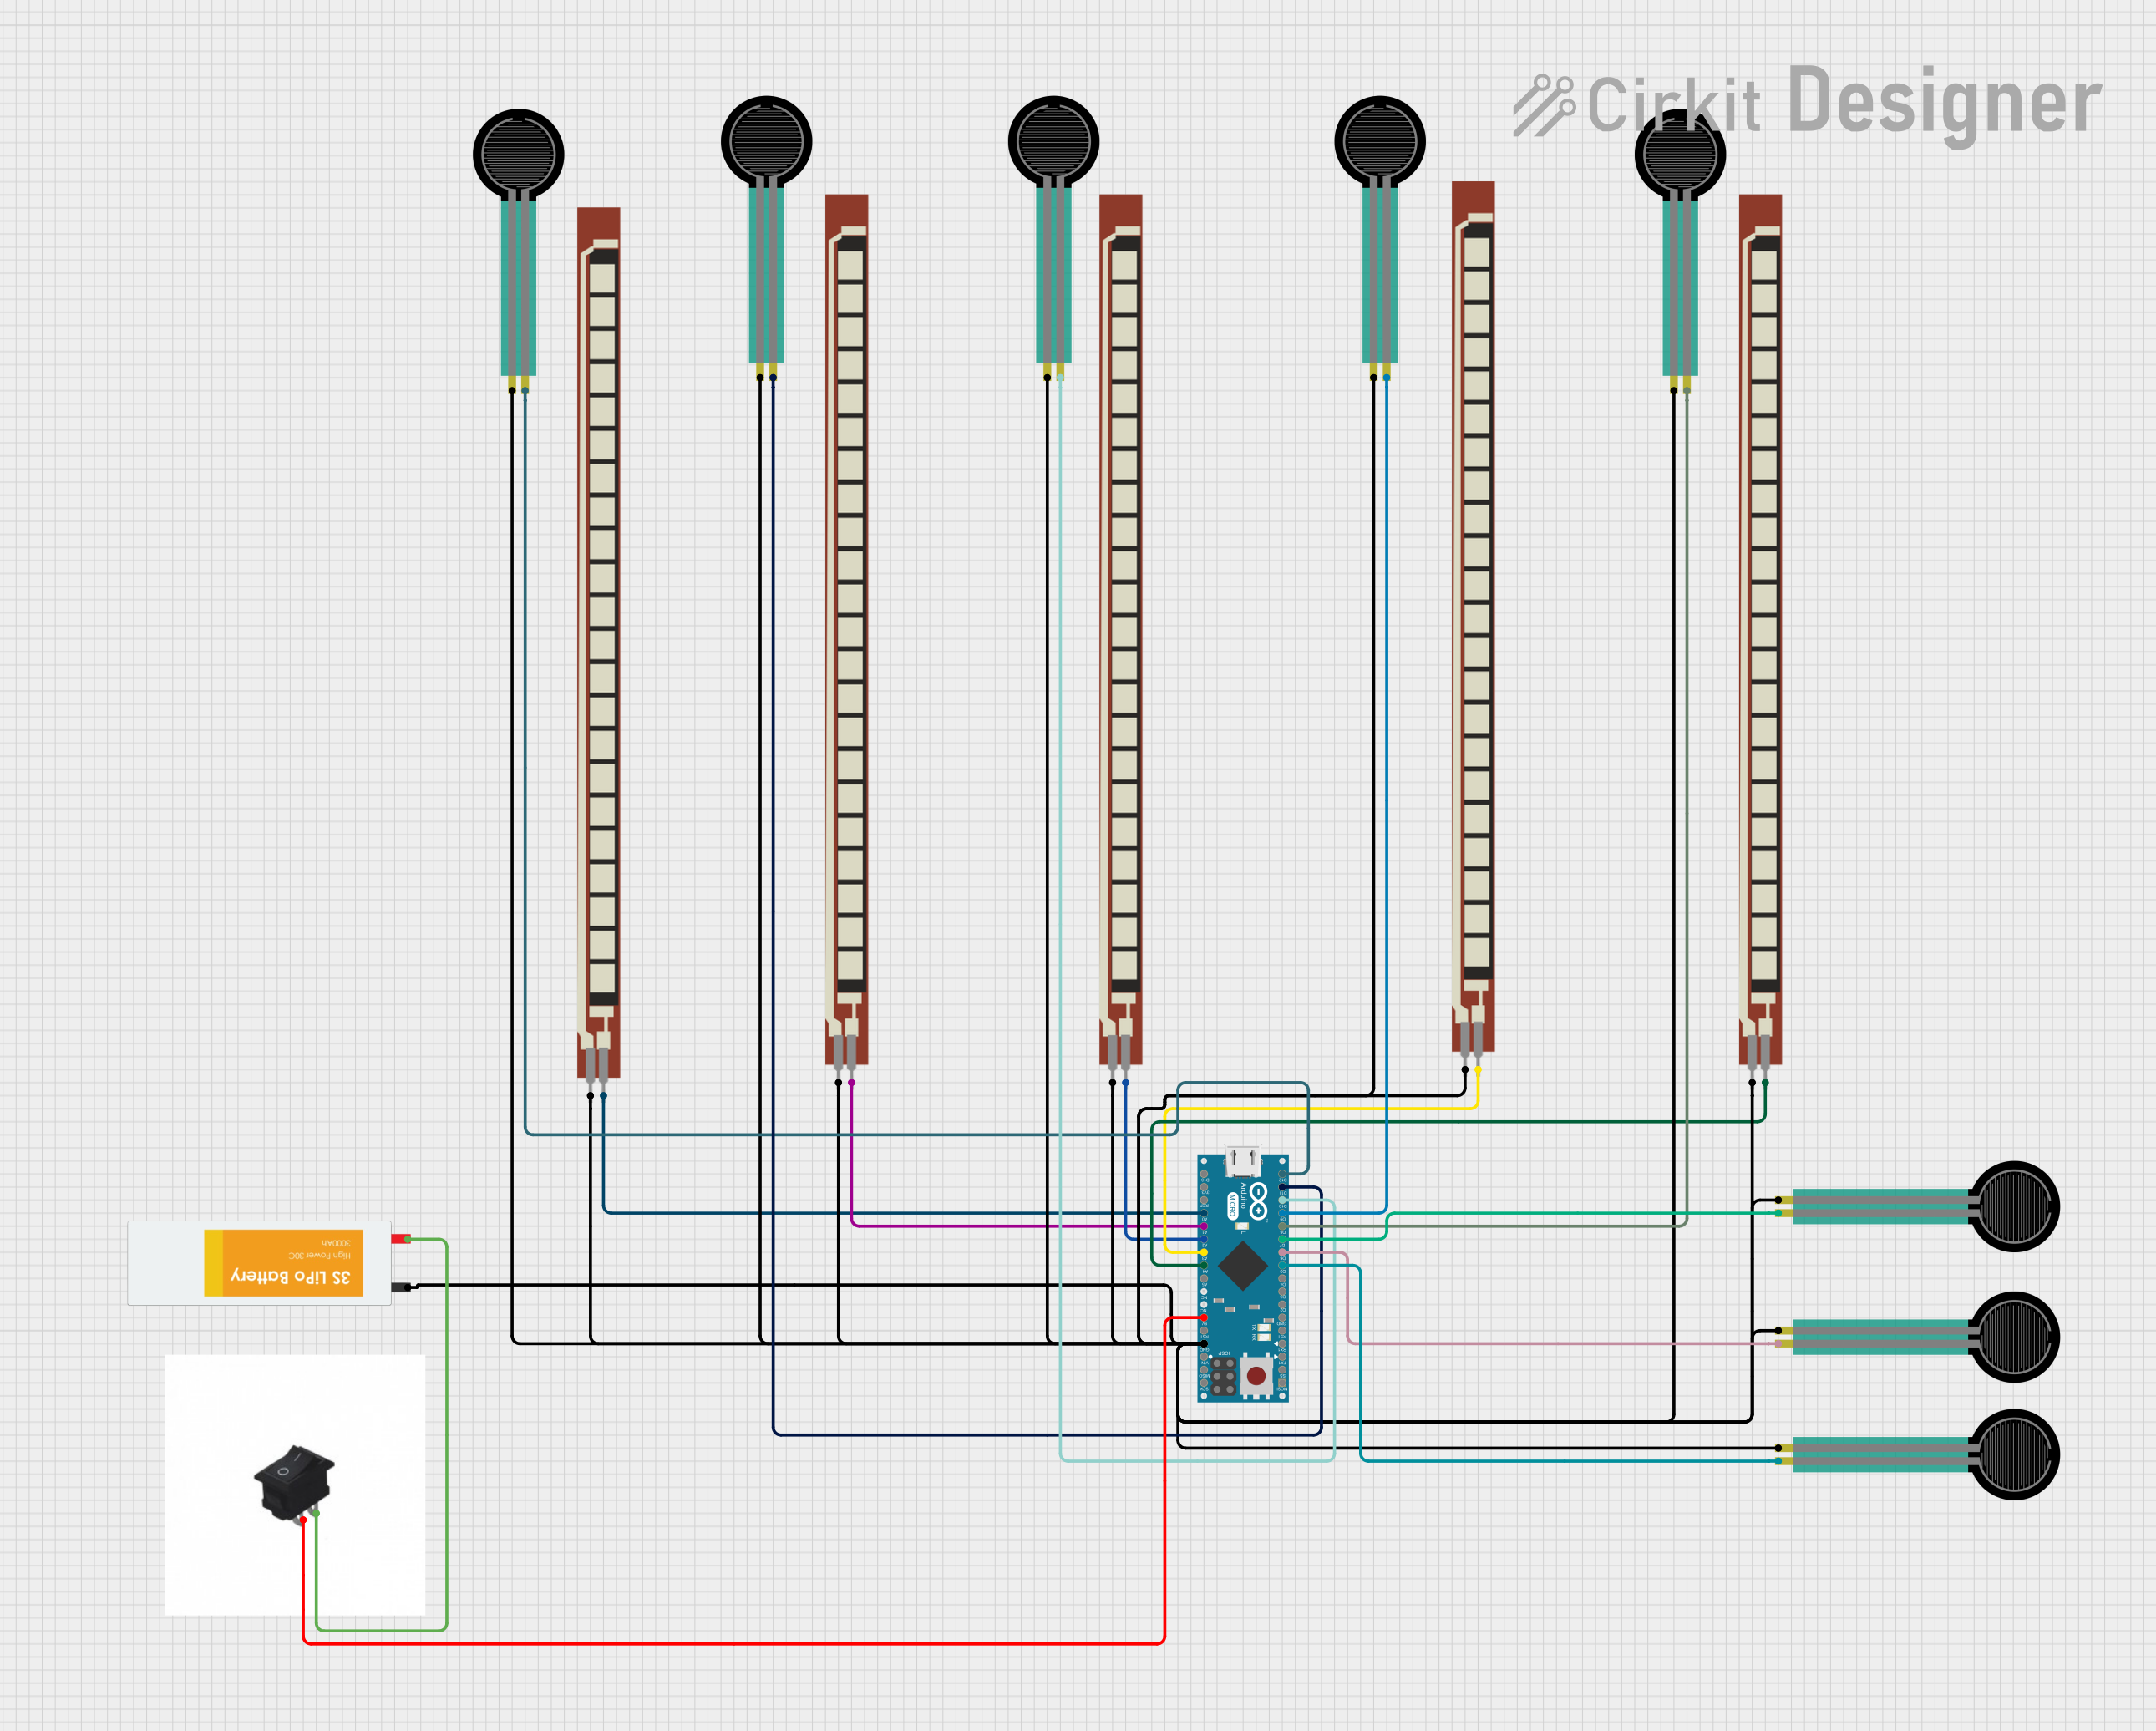
Explore Projects Built with Force Sensing Resistor
Common Applications and Use Cases
- Human touch input for interactive electronics
- Pressure-sensitive controls and buttons
- Weight sensing
- Medical devices such as blood pressure monitors
- Musical instruments like electronic drums
- Robotics for grip and touch sensing
Technical Specifications
Key Technical Details
- Resistance Range: Typically from a few kilo-ohms to mega-ohms with no pressure, down to a few hundred ohms with maximum pressure.
- Force Sensitivity Range: Usually from a few grams to several kilograms.
- Operating Temperature: Varies with the model, often from -30°C to +70°C.
- Response Time: Typically less than 5 milliseconds.
- Durability: Rated for up to 1 million actuations, depending on the model and usage conditions.
Pin Configuration and Descriptions
FSRs typically have two terminals. Below is a table describing the pin configuration:
| Pin Number | Description |
|---|---|
| 1 | Active Sensing Area |
| 2 | Active Sensing Area |
Note: The two terminals are interchangeable as the FSR is non-polarized.
Usage Instructions
How to Use the Component in a Circuit
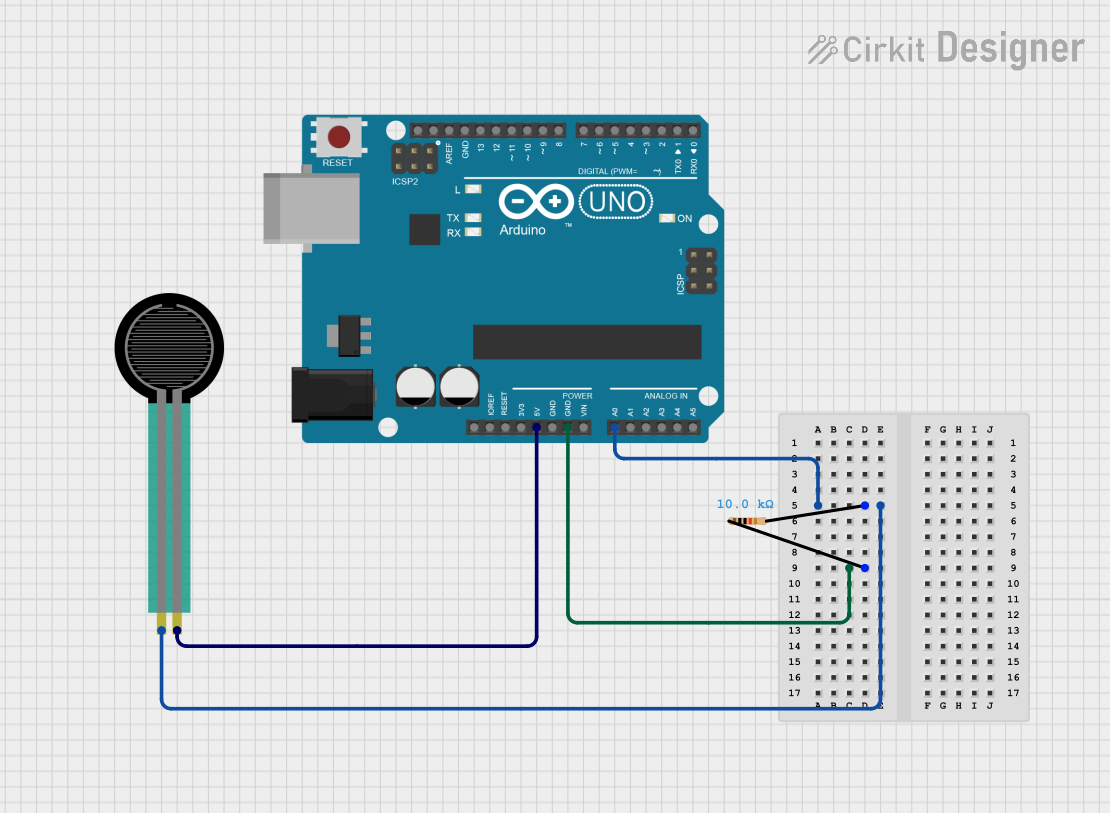
- Connect the FSR: Attach one terminal of the FSR to an analog input pin on a microcontroller, such as an Arduino UNO. Connect the other terminal to ground.
- Voltage Divider: To read the varying resistance, set up a voltage divider by connecting a fixed resistor (10kΩ is commonly used) from the analog input pin to the supply voltage (5V for Arduino UNO).
- Analog Read: Use the microcontroller's ADC (Analog-to-Digital Converter) to read the voltage across the fixed resistor, which is inversely proportional to the force applied to the FSR.
Important Considerations and Best Practices
- Calibration: Since FSRs can vary in their response, it is important to calibrate each sensor for the specific application.
- Overforce Protection: Avoid applying force that exceeds the sensor's maximum rating to prevent damage.
- Mounting: Ensure the FSR is mounted flat and is not subject to bending or twisting forces.
- Temperature Effects: Be aware that the sensor's resistance can change with temperature, which may require compensation in the software.
Example Arduino Code
// Define the FSR pin and the fixed resistor value
const int fsrPin = A0; // FSR is connected to analog pin A0
const int fixedResistorValue = 10000; // 10kΩ fixed resistor

void setup() {
  Serial.begin(9600); // Start serial communication at 9600 baud
}

void loop() {
  int fsrReading = analogRead(fsrPin); // Read the voltage divider value
  // Calculate the voltage at the FSR
  float voltage = fsrReading * (5.0 / 1023.0);
  // Calculate the resistance of the FSR
  float fsrResistance = (5.0 - voltage) * fixedResistorValue / voltage;
  // Print the resistance value to the Serial Monitor
  Serial.println("FSR Resistance: " + String(fsrResistance) + " ohms");
  delay(500); // Wait half a second before reading again
}
Note: The above code assumes a 5V system voltage. Adjust the voltage in the code if using a different system voltage.
Troubleshooting and FAQs
Common Issues
- Inaccurate Readings: Ensure that the FSR is properly connected and that there are no loose connections. Calibrate the sensor for your specific application.
- No Change in Resistance: Check for any damage to the FSR or for a disconnected terminal.
- Drifting Values: Temperature changes can affect the resistance. Implement software compensation if necessary.
Solutions and Tips for Troubleshooting
- Calibration: Use known weights to create a calibration curve for the FSR.
- Connection Check: Verify all connections are secure and that the voltage divider is set up correctly.
- Code Verification: Ensure that the code is correctly reading the analog input and that the calculations for resistance are accurate.
FAQs
Q: Can I use an FSR to measure exact weights? A: FSRs are not typically used for precise weight measurements due to their non-linear response and variability. They are better suited for relative pressure sensing.
Q: How do I increase the sensitivity of the FSR? A: Sensitivity can be adjusted by changing the value of the fixed resistor in the voltage divider circuit. A higher value will increase sensitivity.
Q: What is the lifespan of an FSR? A: The lifespan can vary based on the force applied and the frequency of use, but they are generally rated for up to 1 million actuations.
Q: Can FSRs be used in harsh environments? A: FSRs vary in their environmental tolerance. Check the manufacturer's specifications for temperature, humidity, and mechanical stress limits.