How to Use PilotX: Examples, Pinouts, and Specs
Introduction
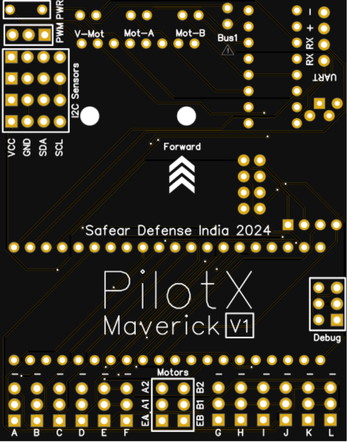
PilotX, manufactured by Safear India (Part ID: Maverick), is a versatile electronic component designed for controlling and managing various circuit functions. It is equipped with programmable settings, making it ideal for automation and enhancing circuit efficiency. PilotX is widely used in applications requiring precise control, such as home automation systems, industrial machinery, and robotics.
Explore Projects Built with PilotX


Explore Projects Built with PilotX
Common Applications and Use Cases
- Home Automation: Used in smart lighting, HVAC systems, and security systems.
- Industrial Automation: Controls motors, relays, and other machinery components.
- Robotics: Manages sensors, actuators, and programmable tasks.
- IoT Devices: Integrates with microcontrollers for connected systems.
- Prototyping: Ideal for testing and developing automated circuits.
Technical Specifications
Below are the key technical details and pin configuration for PilotX:
Key Technical Details
| Parameter | Value |
|---|---|
| Operating Voltage | 3.3V to 5V |
| Maximum Current | 500mA |
| Power Consumption | 1.5W (typical) |
| Communication Protocol | I2C, SPI, UART |
| Programmable Settings | Yes |
| Operating Temperature | -20°C to 85°C |
| Dimensions | 25mm x 15mm x 5mm |
Pin Configuration and Descriptions
| Pin Number | Pin Name | Description |
|---|---|---|
| 1 | VCC | Power supply input (3.3V to 5V) |
| 2 | GND | Ground connection |
| 3 | SDA | I2C Data Line |
| 4 | SCL | I2C Clock Line |
| 5 | TX | UART Transmit Line |
| 6 | RX | UART Receive Line |
| 7 | CS | SPI Chip Select |
| 8 | MOSI | SPI Master Out Slave In |
| 9 | MISO | SPI Master In Slave Out |
| 10 | INT | Interrupt Pin for external event handling |
Usage Instructions
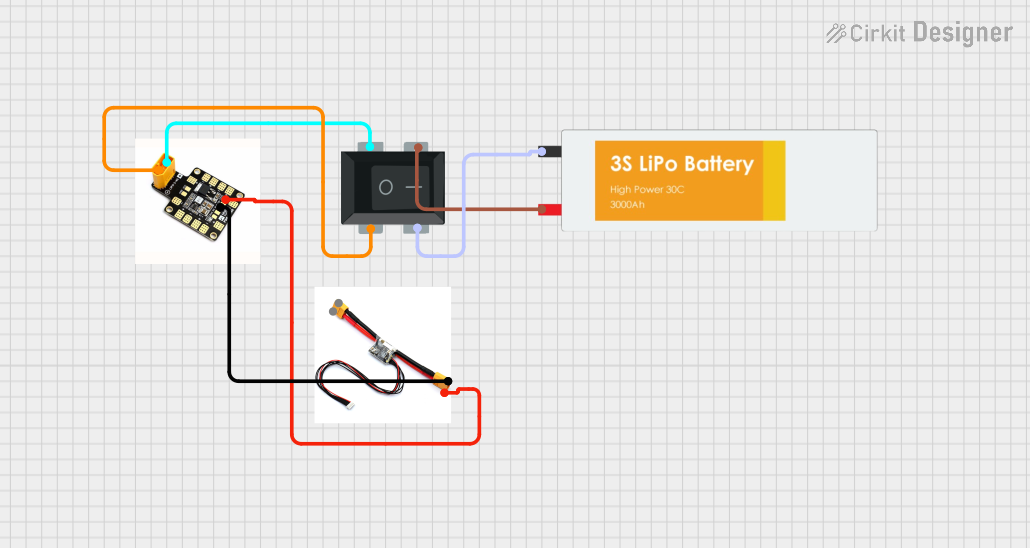
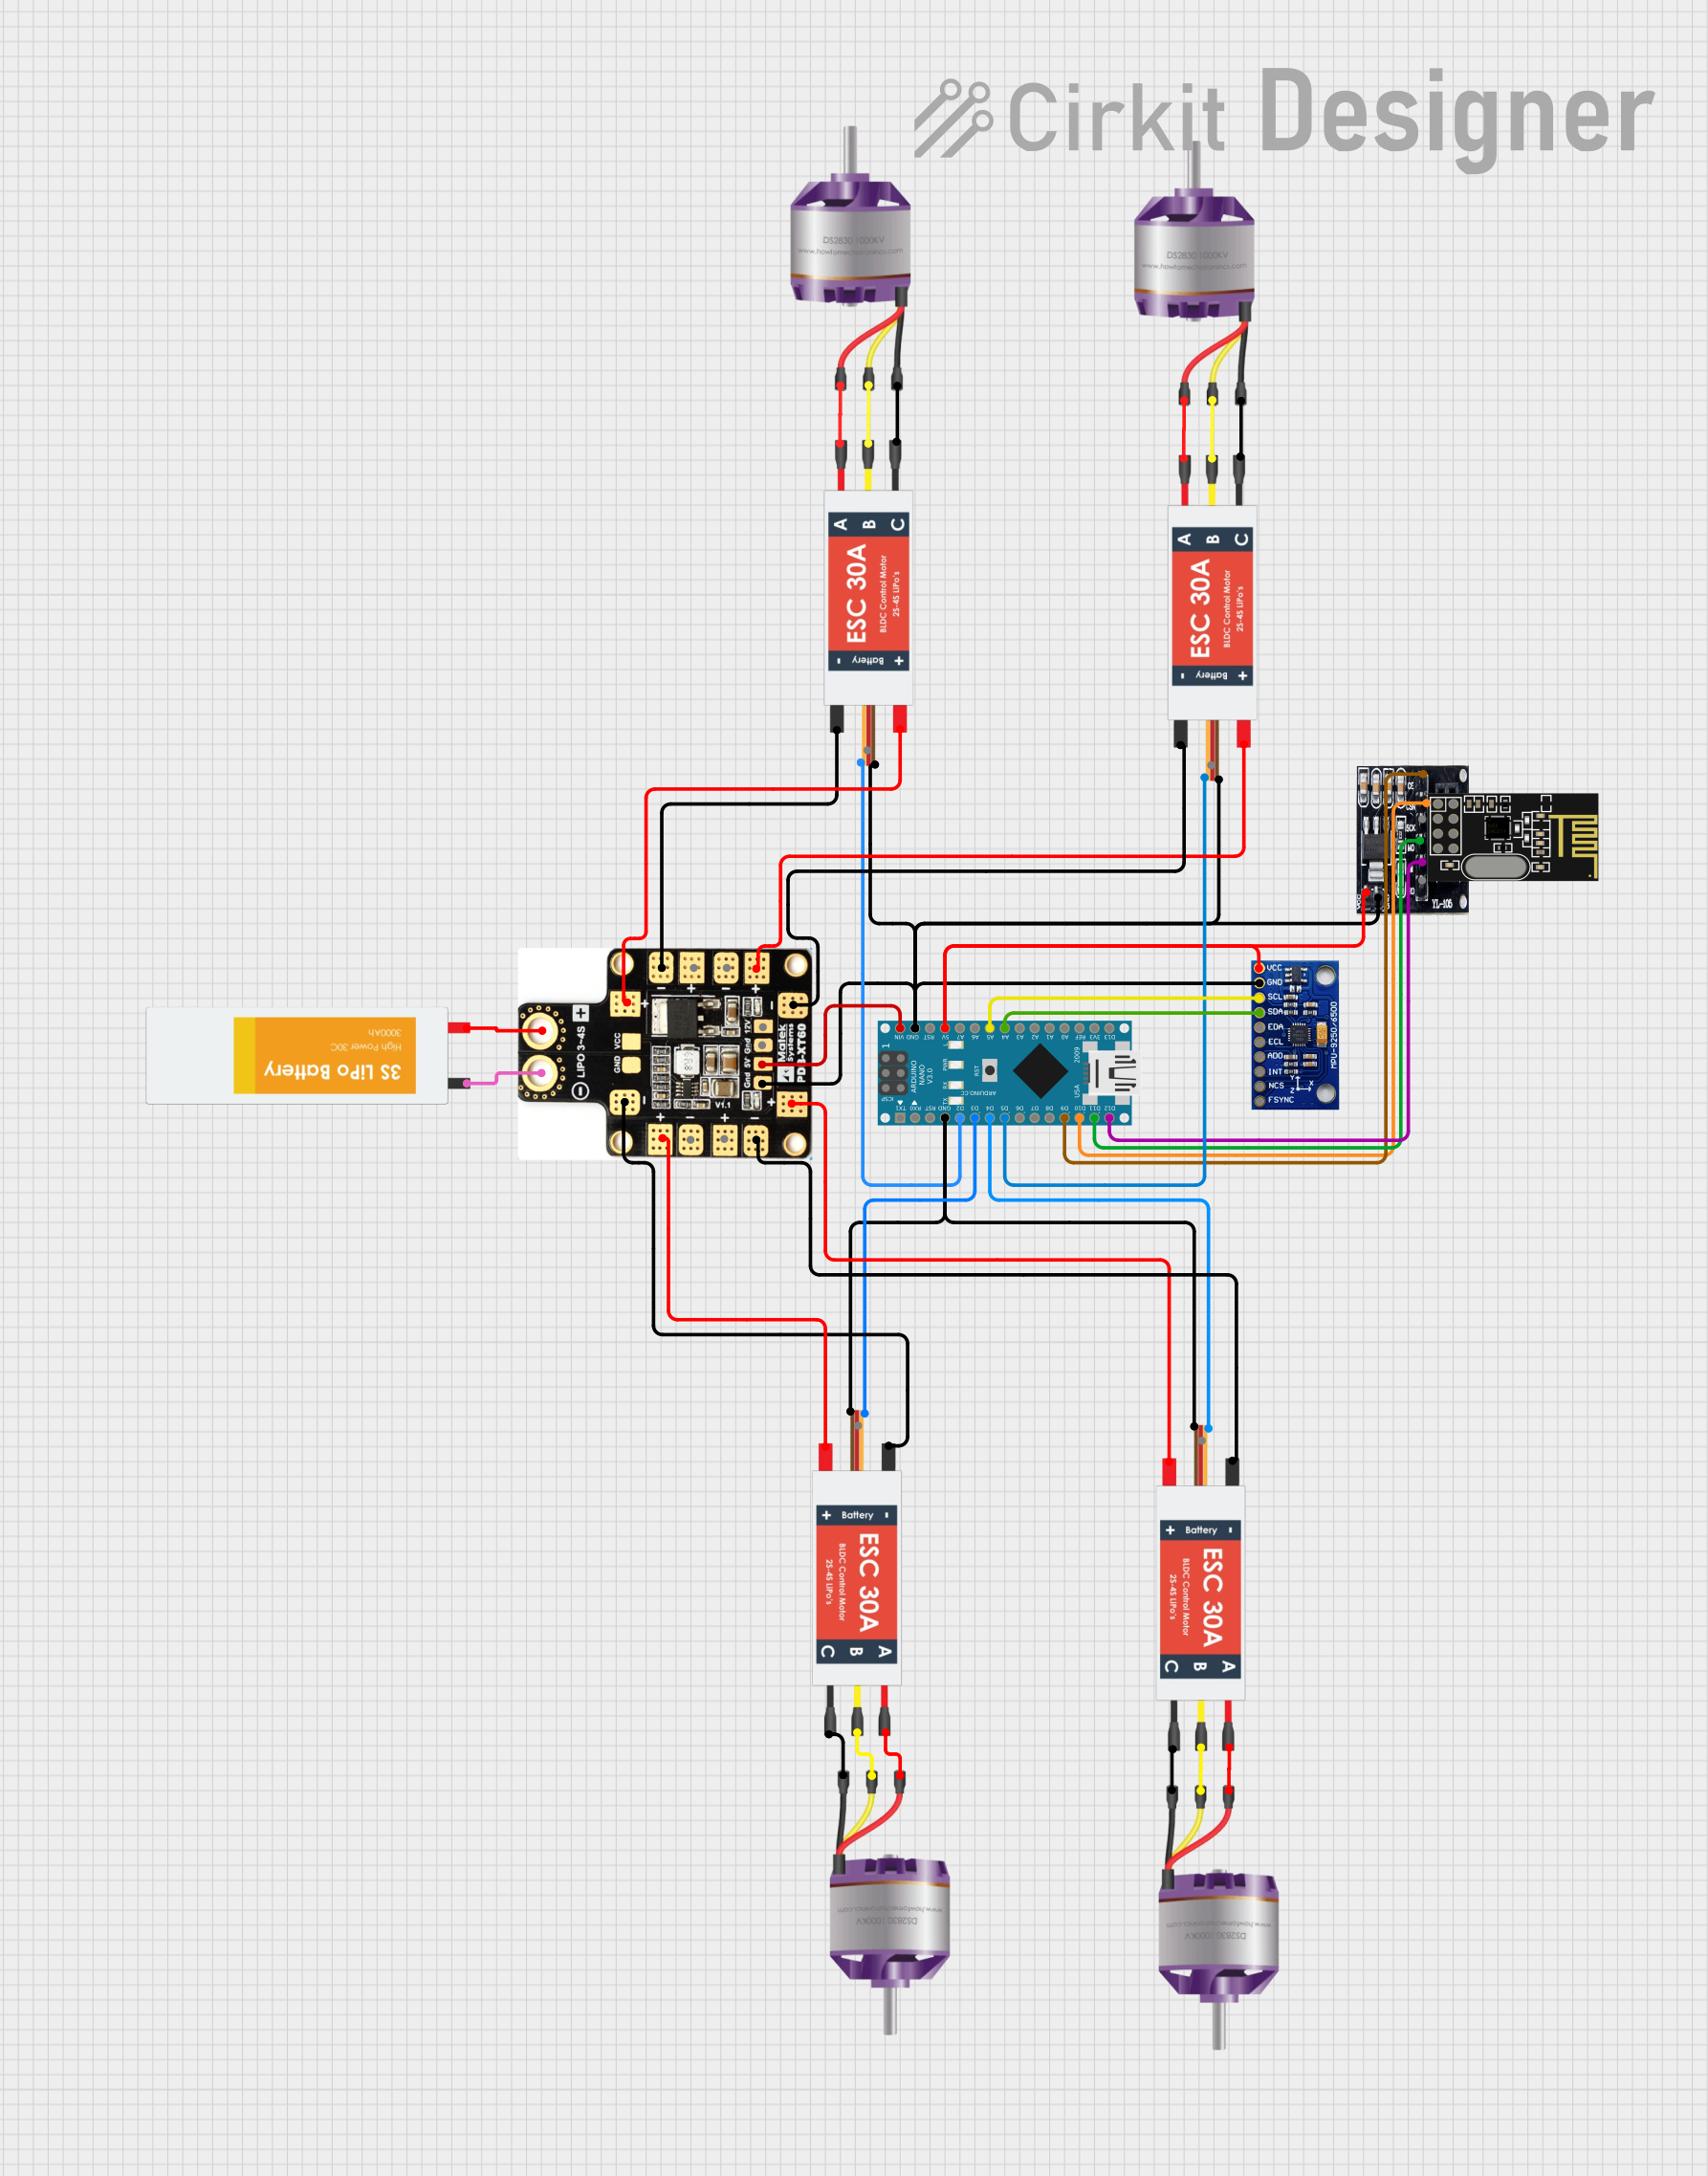
How to Use PilotX in a Circuit
- Power Supply: Connect the VCC pin to a 3.3V or 5V power source and the GND pin to the ground.
- Communication Protocol: Choose the desired communication protocol (I2C, SPI, or UART) and connect the corresponding pins to your microcontroller or other devices.
- Programming: Use the programmable settings to configure PilotX for your specific application. This can be done via the communication interface.
- Interrupt Handling: If required, connect the INT pin to handle external events or triggers.
Important Considerations and Best Practices
- Voltage Levels: Ensure the input voltage does not exceed 5V to avoid damaging the component.
- Pull-Up Resistors: For I2C communication, use appropriate pull-up resistors on the SDA and SCL lines.
- Decoupling Capacitor: Place a 0.1µF decoupling capacitor near the VCC pin to stabilize the power supply.
- Heat Management: If operating at high currents, ensure proper ventilation or heat dissipation to prevent overheating.
- Firmware Updates: Regularly update the firmware to access new features and improve performance.
Example: Connecting PilotX to an Arduino UNO
Below is an example of using PilotX with an Arduino UNO via I2C communication:
#include <Wire.h> // Include the Wire library for I2C communication

#define PILOTX_ADDRESS 0x40 // I2C address of PilotX

void setup() {
  Wire.begin(); // Initialize I2C communication
  Serial.begin(9600); // Start serial communication for debugging

  // Send initialization command to PilotX
  Wire.beginTransmission(PILOTX_ADDRESS);
  Wire.write(0x01); // Example command to initialize PilotX
  Wire.endTransmission();

  Serial.println("PilotX initialized successfully.");
}

void loop() {
  // Request data from PilotX
  Wire.requestFrom(PILOTX_ADDRESS, 2); // Request 2 bytes of data
  if (Wire.available() == 2) {
    int data1 = Wire.read(); // Read first byte
    int data2 = Wire.read(); // Read second byte

    // Print the received data
    Serial.print("Data1: ");
    Serial.println(data1);
    Serial.print("Data2: ");
    Serial.println(data2);
  }

  delay(1000); // Wait for 1 second before the next request
}
Troubleshooting and FAQs
Common Issues and Solutions
Component Not Responding
- Cause: Incorrect wiring or communication protocol mismatch.
- Solution: Double-check the connections and ensure the correct protocol is selected.
Overheating
- Cause: Excessive current draw or insufficient ventilation.
- Solution: Reduce the load or improve heat dissipation.
Data Transmission Errors
- Cause: Noise or incorrect pull-up resistor values in I2C communication.
- Solution: Use appropriate pull-up resistors (typically 4.7kΩ) and ensure clean connections.
Interrupts Not Triggering
- Cause: INT pin not connected or misconfigured.
- Solution: Verify the INT pin connection and configure the interrupt settings in your code.
FAQs
Q1: Can PilotX operate at 12V?
A1: No, PilotX operates within a voltage range of 3.3V to 5V. Exceeding this range may damage the component.
Q2: Is PilotX compatible with Raspberry Pi?
A2: Yes, PilotX can be used with Raspberry Pi via I2C, SPI, or UART communication.
Q3: How do I update the firmware on PilotX?
A3: Firmware updates can be performed via the communication interface. Refer to the manufacturer's firmware update guide for detailed instructions.
Q4: Can I use PilotX for PWM control?
A4: Yes, PilotX supports PWM control when configured through its programmable settings.
Q5: What is the maximum communication speed for I2C?
A5: PilotX supports I2C communication speeds up to 400kHz (Fast Mode).