How to Use Xiao Samd21: Examples, Pinouts, and Specs
Introduction
The Xiao SAMD21, manufactured by Seeed, is a compact microcontroller board based on the SAM D21 ARM Cortex-M0+ processor. Designed for low-power applications, it offers a versatile range of I/O options, including digital and analog pins, making it ideal for a variety of embedded systems and IoT projects. Its small form factor and powerful processing capabilities make it a popular choice for developers seeking a balance between performance and size.
Explore Projects Built with Xiao Samd21

Explore Projects Built with Xiao Samd21
Common Applications and Use Cases
- Wearable devices and portable electronics
- IoT (Internet of Things) applications
- Robotics and automation systems
- Data logging and environmental monitoring
- Prototyping and educational projects
Technical Specifications
The Xiao SAMD21 is packed with features that make it a versatile and efficient microcontroller board. Below are its key technical details:
Key Technical Details
- Processor: ARM Cortex-M0+ (SAMD21G18, 32-bit, 48 MHz)
- Flash Memory: 256 KB
- SRAM: 32 KB
- Operating Voltage: 3.3V
- Input Voltage: 5V (via USB) or 3.3V (via external power supply)
- Digital I/O Pins: 11 (including PWM support)
- Analog Input Pins: 6 (12-bit ADC)
- Analog Output Pins: 1 (10-bit DAC)
- Communication Interfaces: UART, I2C, SPI
- USB Interface: USB Type-C (supports programming and power supply)
- Power Consumption: Ultra-low power consumption in sleep mode
- Dimensions: 20mm x 17.5mm
- Weight: 1g
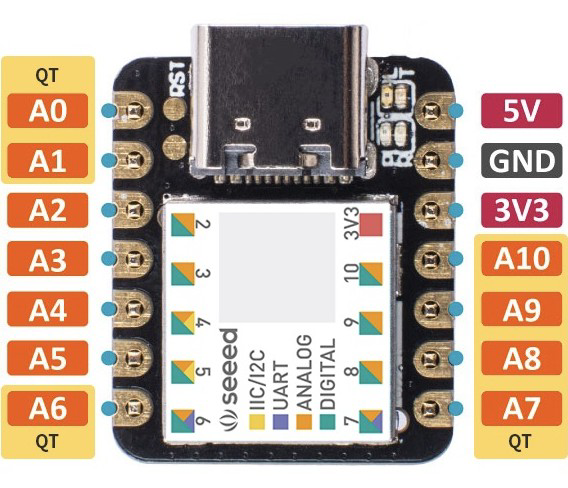
Pin Configuration and Descriptions
The Xiao SAMD21 features a total of 14 pins, including power, digital, and analog pins. Below is the pinout description:
| Pin | Type | Description |
|---|---|---|
| 3V3 | Power | 3.3V output for powering external components. |
| GND | Power | Ground connection. |
| D0/RX | Digital (UART) | Digital I/O pin, also serves as UART RX (receive) pin. |
| D1/TX | Digital (UART) | Digital I/O pin, also serves as UART TX (transmit) pin. |
| D2 | Digital | Digital I/O pin with PWM support. |
| D3 | Digital | Digital I/O pin with PWM support. |
| D4 | Digital | Digital I/O pin with PWM support. |
| D5 | Digital | Digital I/O pin with PWM support. |
| A0 | Analog/Digital | Analog input (12-bit ADC) or digital I/O pin. |
| A1 | Analog/Digital | Analog input (12-bit ADC) or digital I/O pin. |
| A2 | Analog/Digital | Analog input (12-bit ADC) or digital I/O pin. |
| A3 | Analog/Digital | Analog input (12-bit ADC) or digital I/O pin. |
| A4 | Analog/Digital | Analog input (12-bit ADC) or digital I/O pin. |
| A5 | Analog/Digital | Analog input (12-bit ADC) or digital I/O pin. |
Usage Instructions
The Xiao SAMD21 is easy to use and can be programmed using the Arduino IDE or other compatible development environments. Below are the steps to get started and some best practices for using the board.
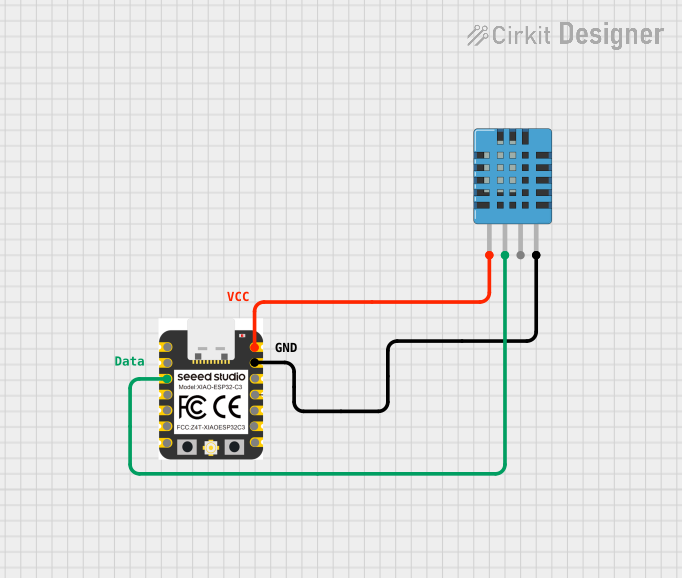
How to Use the Xiao SAMD21 in a Circuit
Powering the Board:
- Connect the Xiao SAMD21 to your computer using a USB Type-C cable for power and programming.
- Alternatively, supply 3.3V to the 3V3 pin and connect GND to ground.
Programming the Board:
- Install the Arduino IDE and add the Seeed SAMD Boards package via the Board Manager.
- Select "Seeeduino XIAO" as the board in the Arduino IDE.
- Write your code and upload it to the board using the USB connection.
Connecting Peripherals:
- Use the digital pins (D0-D5) for digital I/O operations, such as controlling LEDs or reading button states.
- Use the analog pins (A0-A5) for reading sensor data or generating analog output signals.
Important Considerations and Best Practices
- Voltage Levels: Ensure all connected peripherals operate at 3.3V logic levels to avoid damaging the board.
- Pin Current Limits: Do not exceed 7mA per pin to prevent overheating or damage.
- Sleep Mode: Utilize the low-power sleep mode for battery-powered applications to extend runtime.
- USB Connection: Use a high-quality USB Type-C cable for reliable power and data transfer.
Example Code for Arduino UNO Compatibility
The following example demonstrates how to blink an LED connected to pin D2 of the Xiao SAMD21:
// Blink an LED connected to pin D2 on the Xiao SAMD21
const int ledPin = 2; // Define the LED pin (D2)

void setup() {
  pinMode(ledPin, OUTPUT); // Set the LED pin as an output
}

void loop() {
  digitalWrite(ledPin, HIGH); // Turn the LED on
  delay(1000);                // Wait for 1 second
  digitalWrite(ledPin, LOW);  // Turn the LED off
  delay(1000);                // Wait for 1 second
}
Troubleshooting and FAQs
Common Issues and Solutions
The board is not recognized by the computer:
- Ensure the USB cable is not a power-only cable and supports data transfer.
- Check that the correct board and port are selected in the Arduino IDE.
- Double-tap the reset button to enter bootloader mode and try uploading the code again.
Code upload fails:
- Verify that the Xiao SAMD21 is connected to the correct COM port.
- Ensure the Seeed SAMD Boards package is installed in the Arduino IDE.
- Check for syntax errors in your code.
Peripherals are not working as expected:
- Confirm that the peripherals are connected to the correct pins.
- Check that the voltage and current requirements of the peripherals are within the board's limits.
FAQs
Can the Xiao SAMD21 be powered by a battery?
Yes, you can power the board using a 3.7V LiPo battery connected to the 3V3 and GND pins.Does the Xiao SAMD21 support Wi-Fi or Bluetooth?
No, the Xiao SAMD21 does not have built-in wireless connectivity. However, you can add wireless modules via UART, I2C, or SPI.What is the maximum current output of the 3V3 pin?
The 3V3 pin can supply up to 200mA, depending on the input power source.
By following this documentation, you can effectively utilize the Xiao SAMD21 for your projects and troubleshoot common issues with ease.