How to Use Water Pump: Examples, Pinouts, and Specs
Introduction
A water pump is a device designed to move water from one location to another. It is commonly used in applications such as irrigation systems, drainage systems, water supply systems, and aquariums. Water pumps are essential in both residential and industrial settings, providing efficient water transfer for a variety of purposes.
Water pumps come in various types, including submersible pumps, centrifugal pumps, and diaphragm pumps, each suited for specific use cases. They are often powered by electricity, batteries, or solar energy, depending on the application.
Explore Projects Built with Water Pump
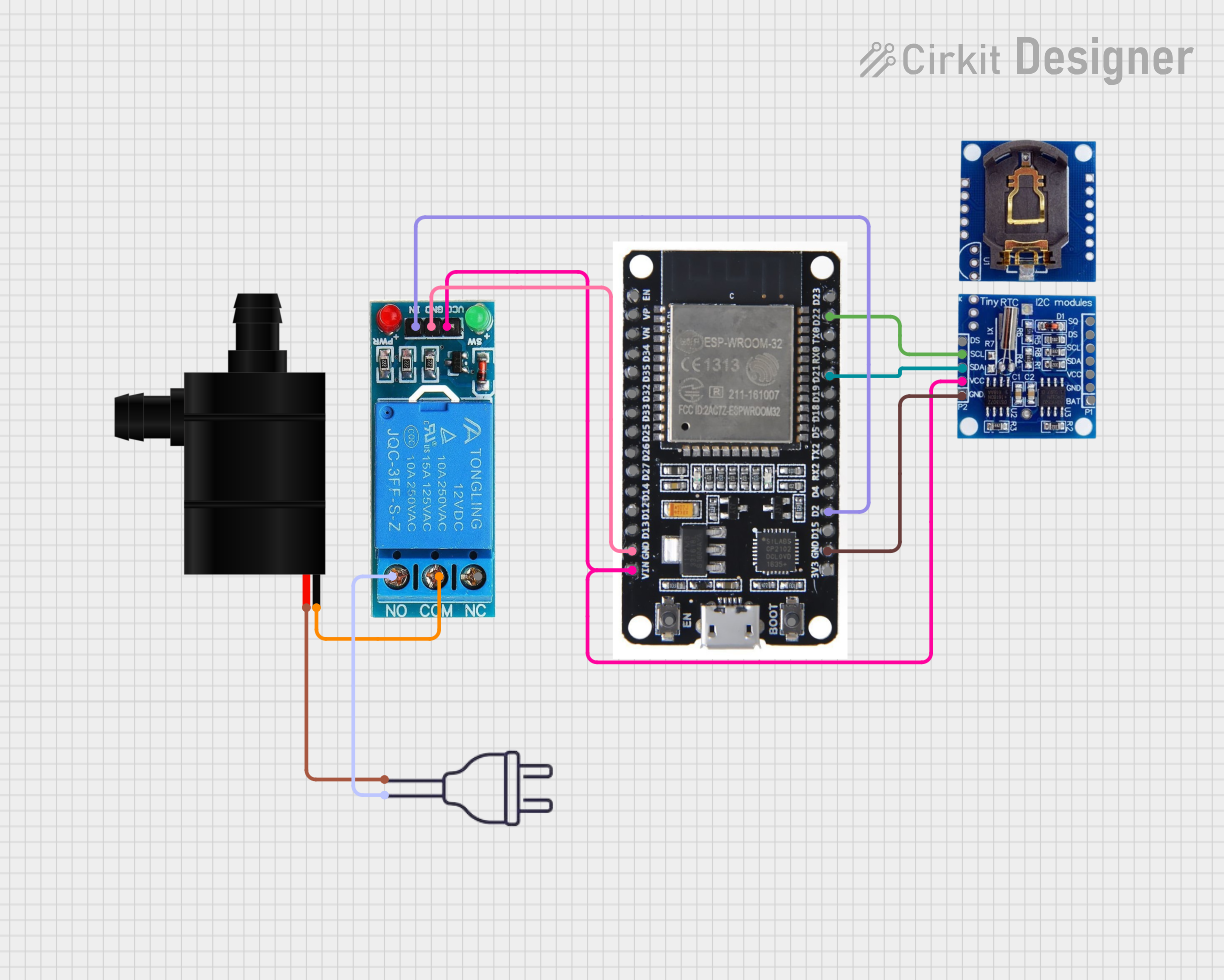
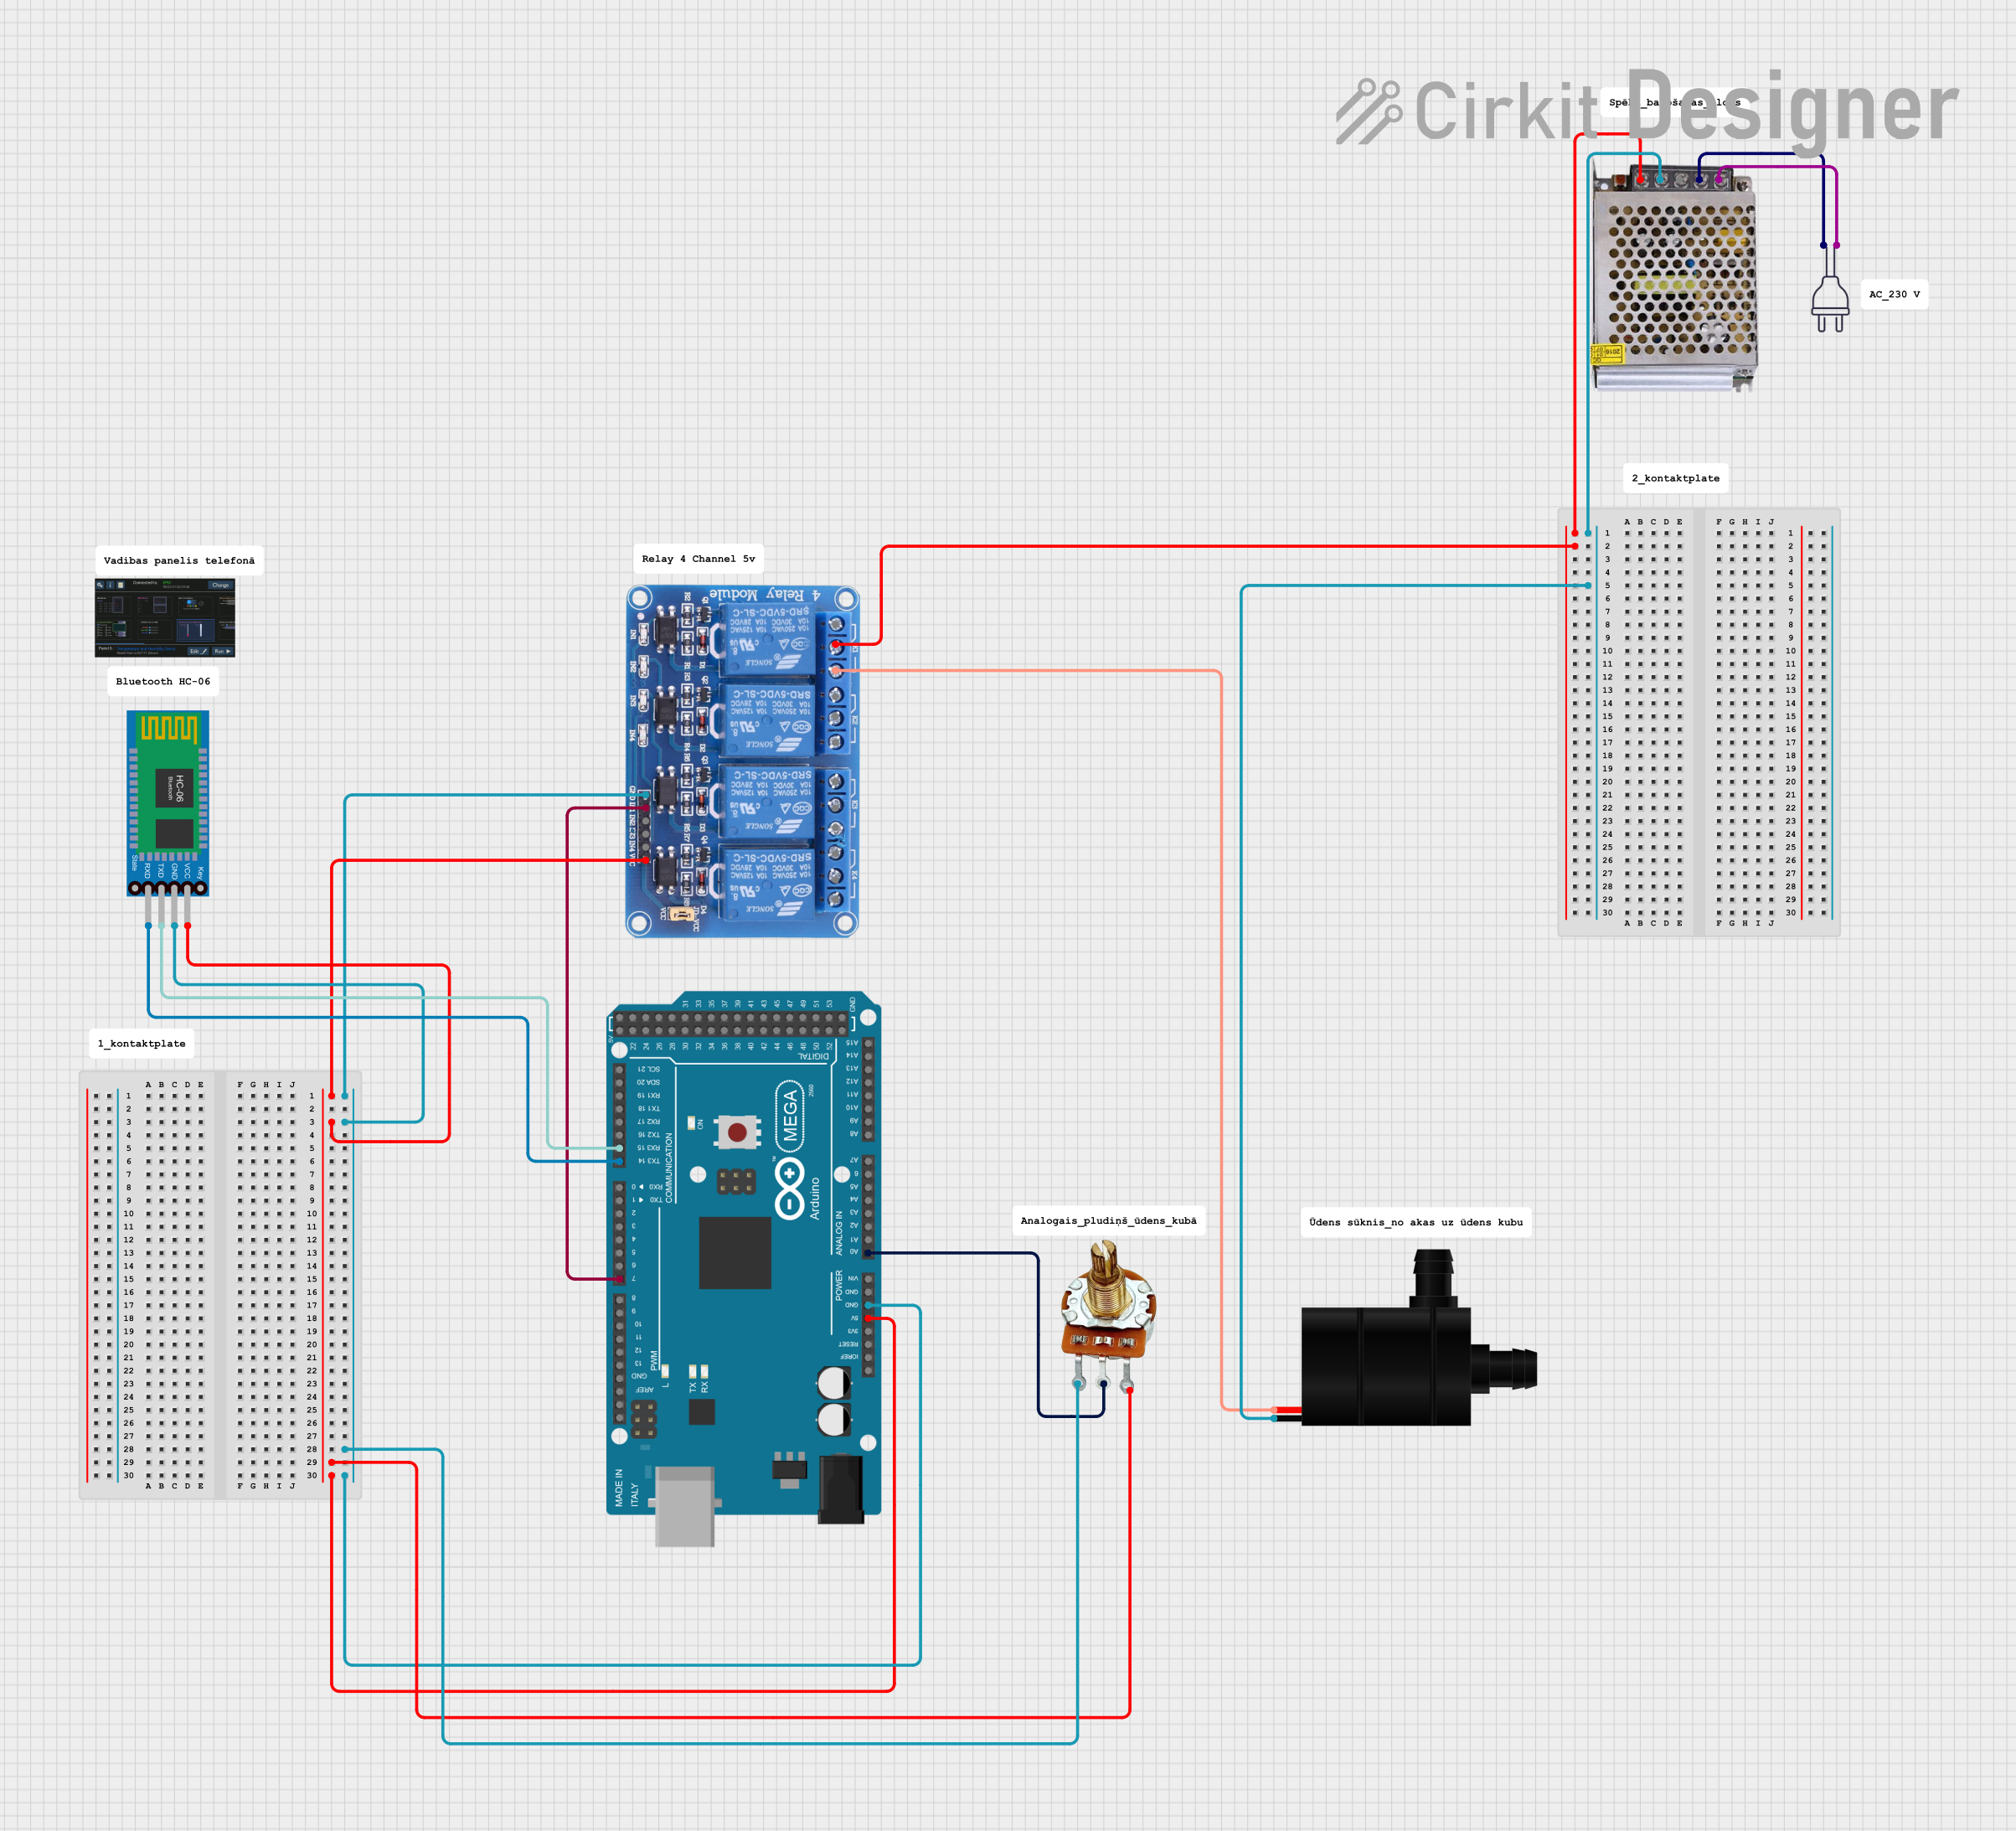
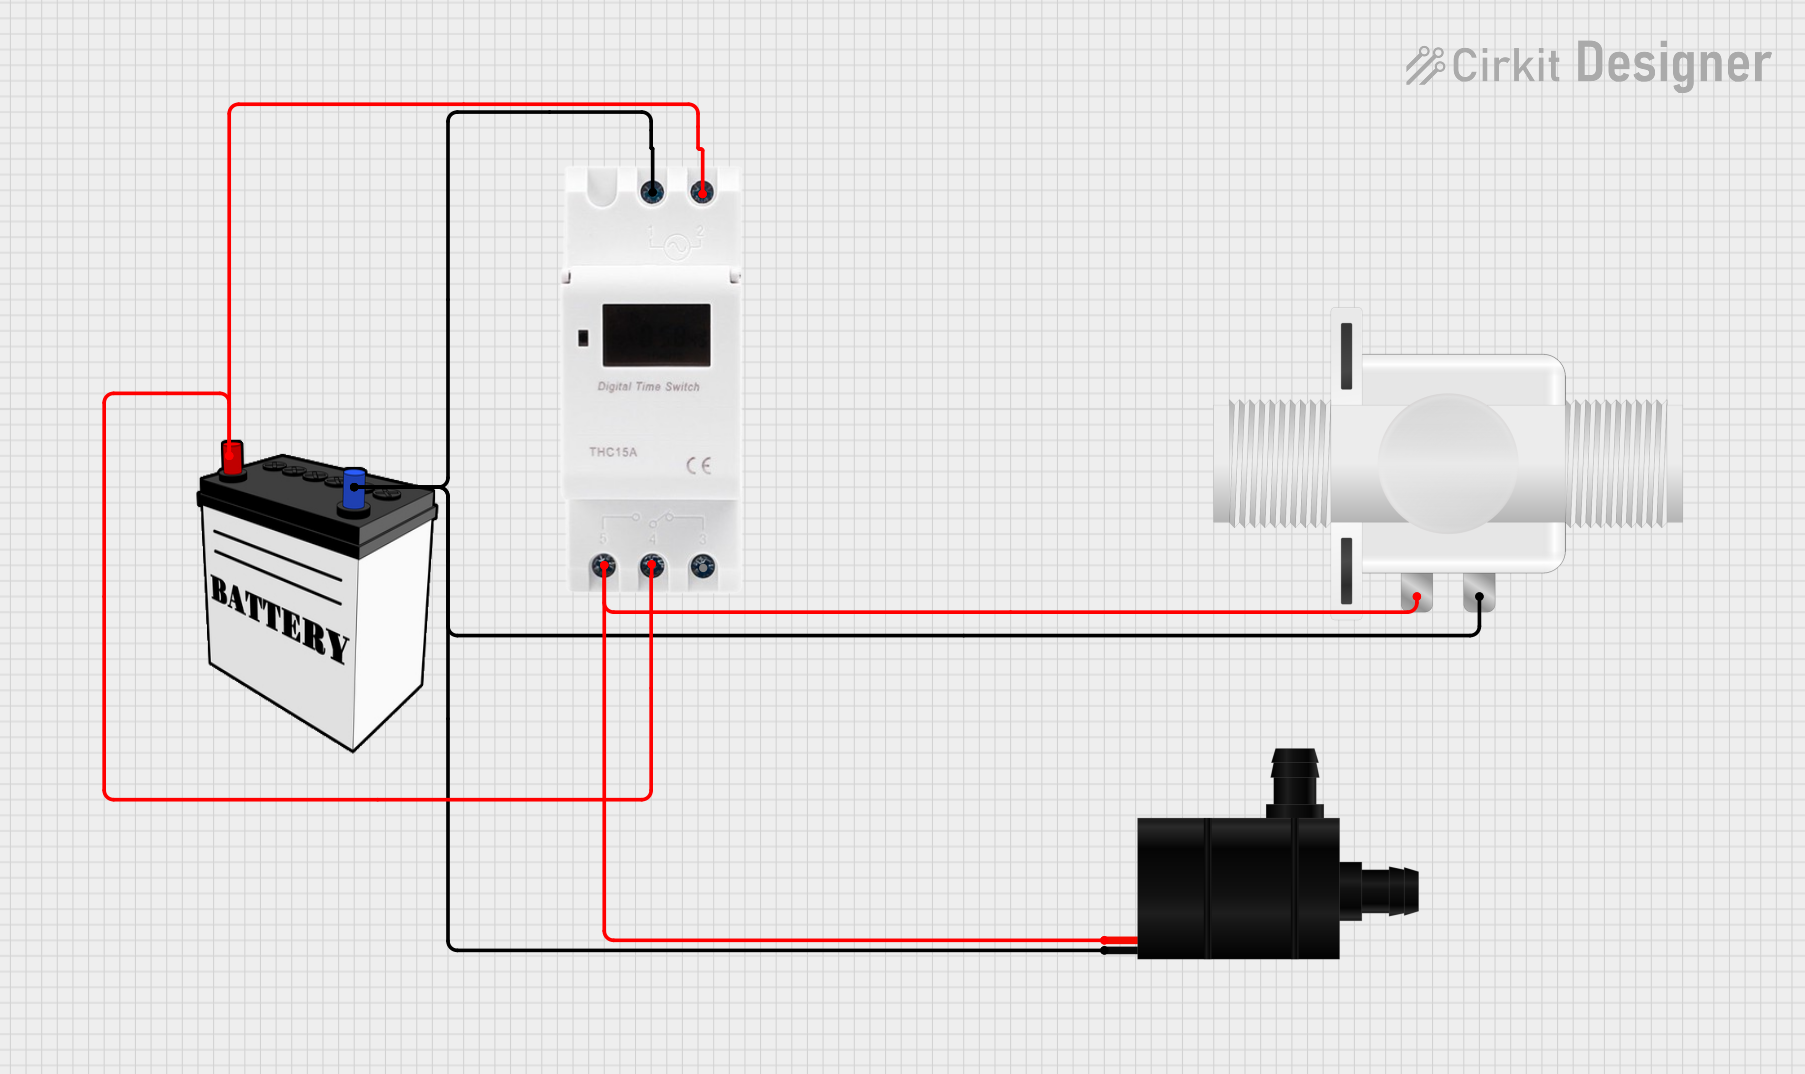
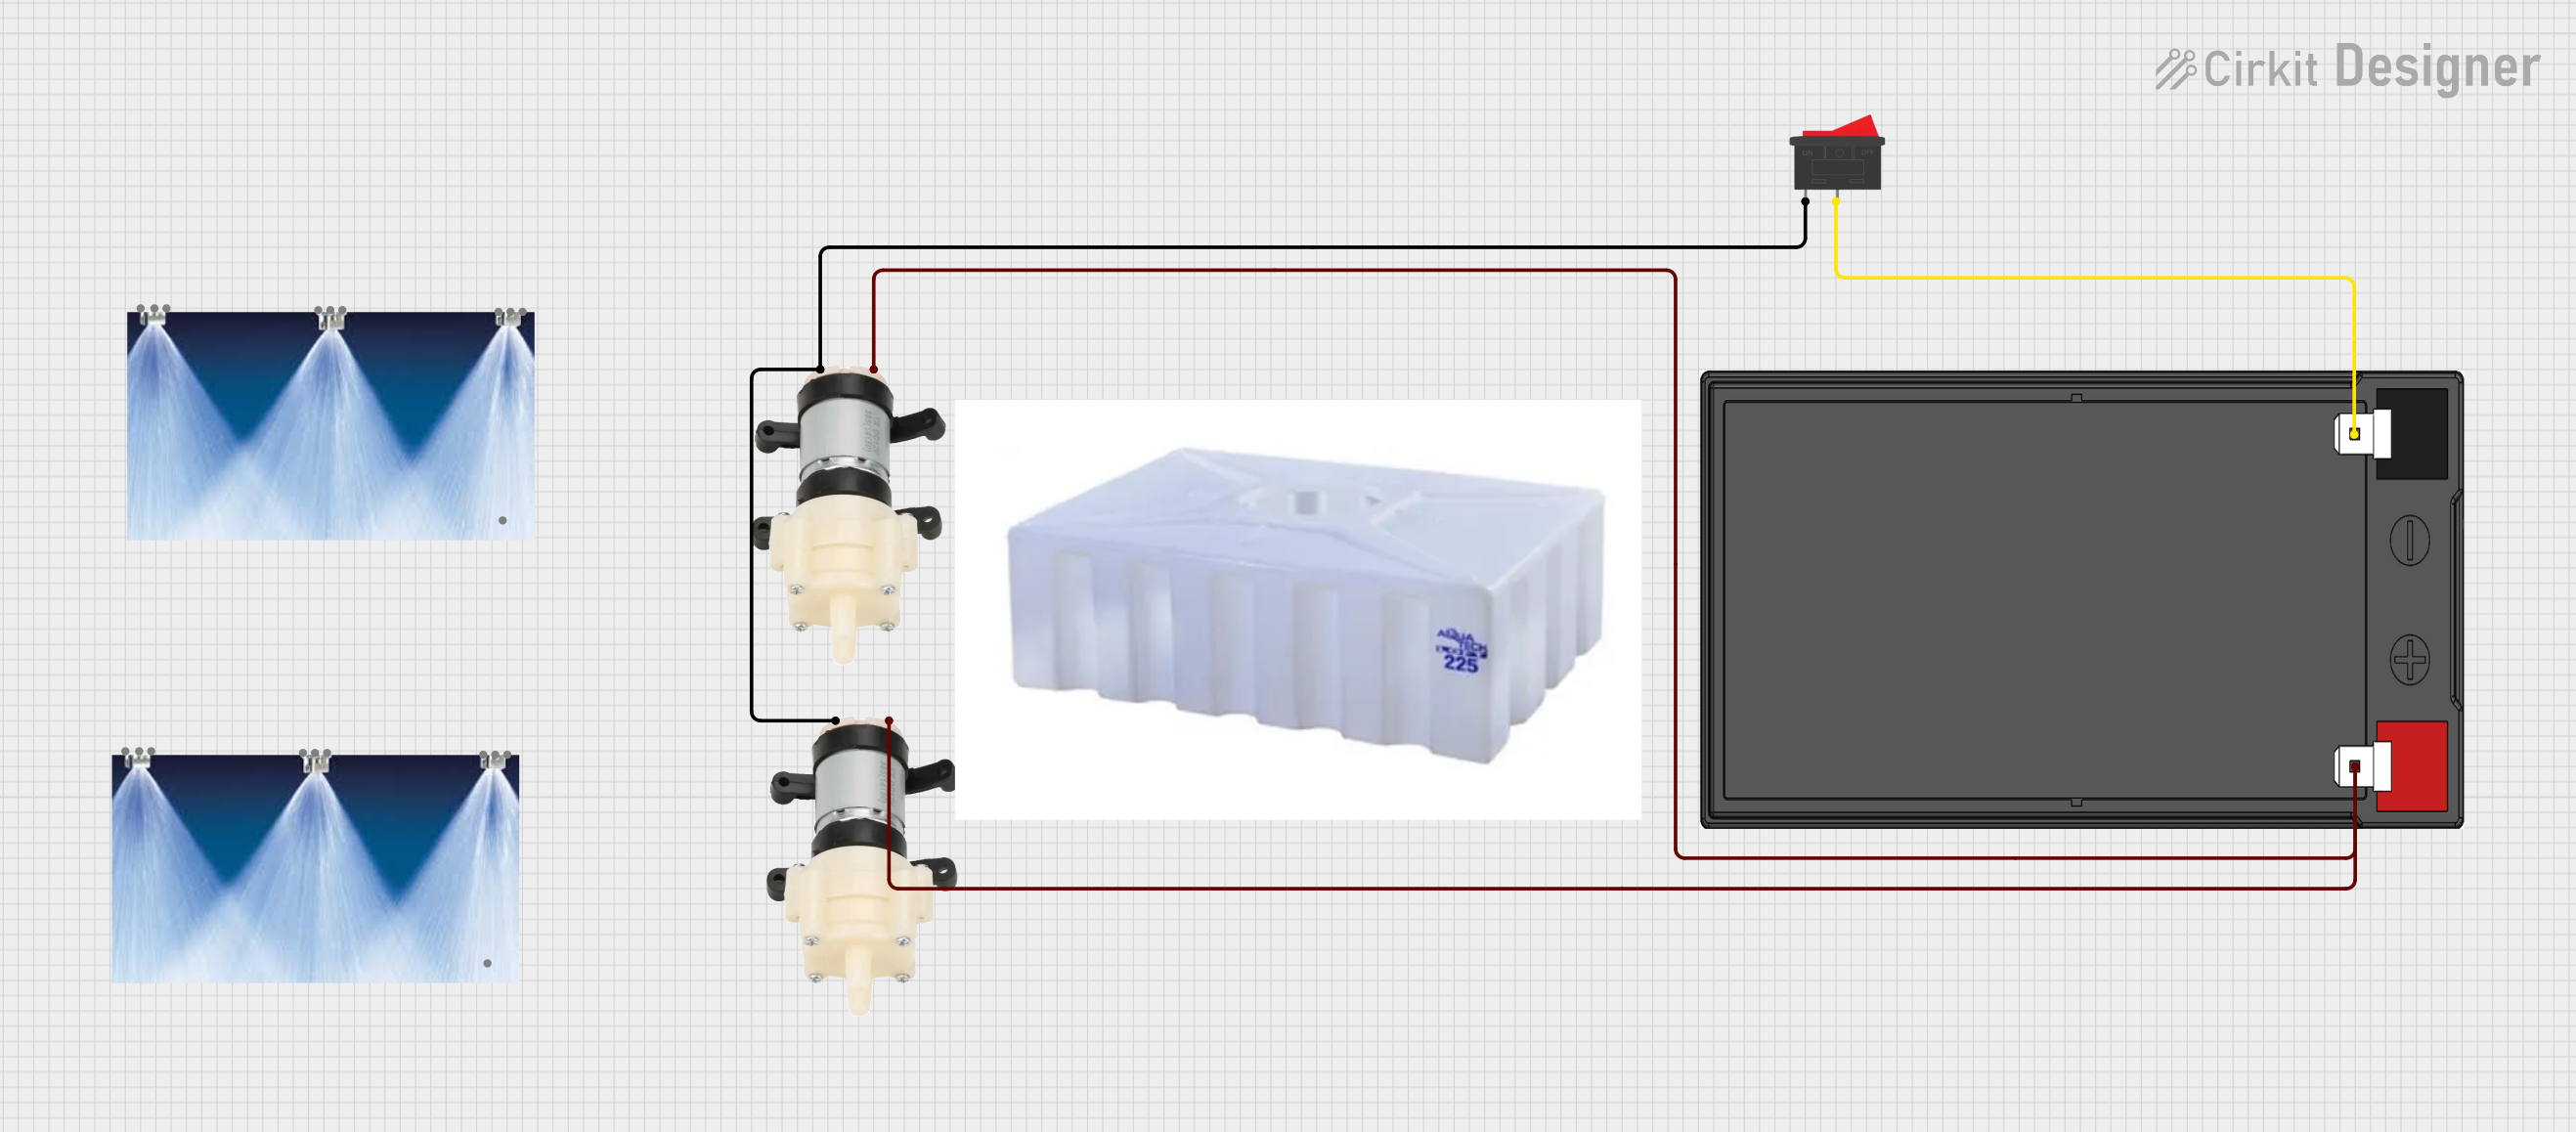
Explore Projects Built with Water Pump
Technical Specifications
Below are the general technical specifications for a typical small DC water pump used in electronics projects:
| Parameter | Value |
|---|---|
| Operating Voltage | 3V to 12V DC |
| Operating Current | 0.1A to 0.5A |
| Power Consumption | 1W to 6W |
| Maximum Flow Rate | 80 to 300 liters per hour (L/h) |
| Maximum Lift Height | 0.5m to 3m |
| Inlet/Outlet Diameter | 4mm to 8mm |
| Material | Plastic (ABS) or similar |
| Weight | 50g to 150g |
Pin Configuration and Descriptions
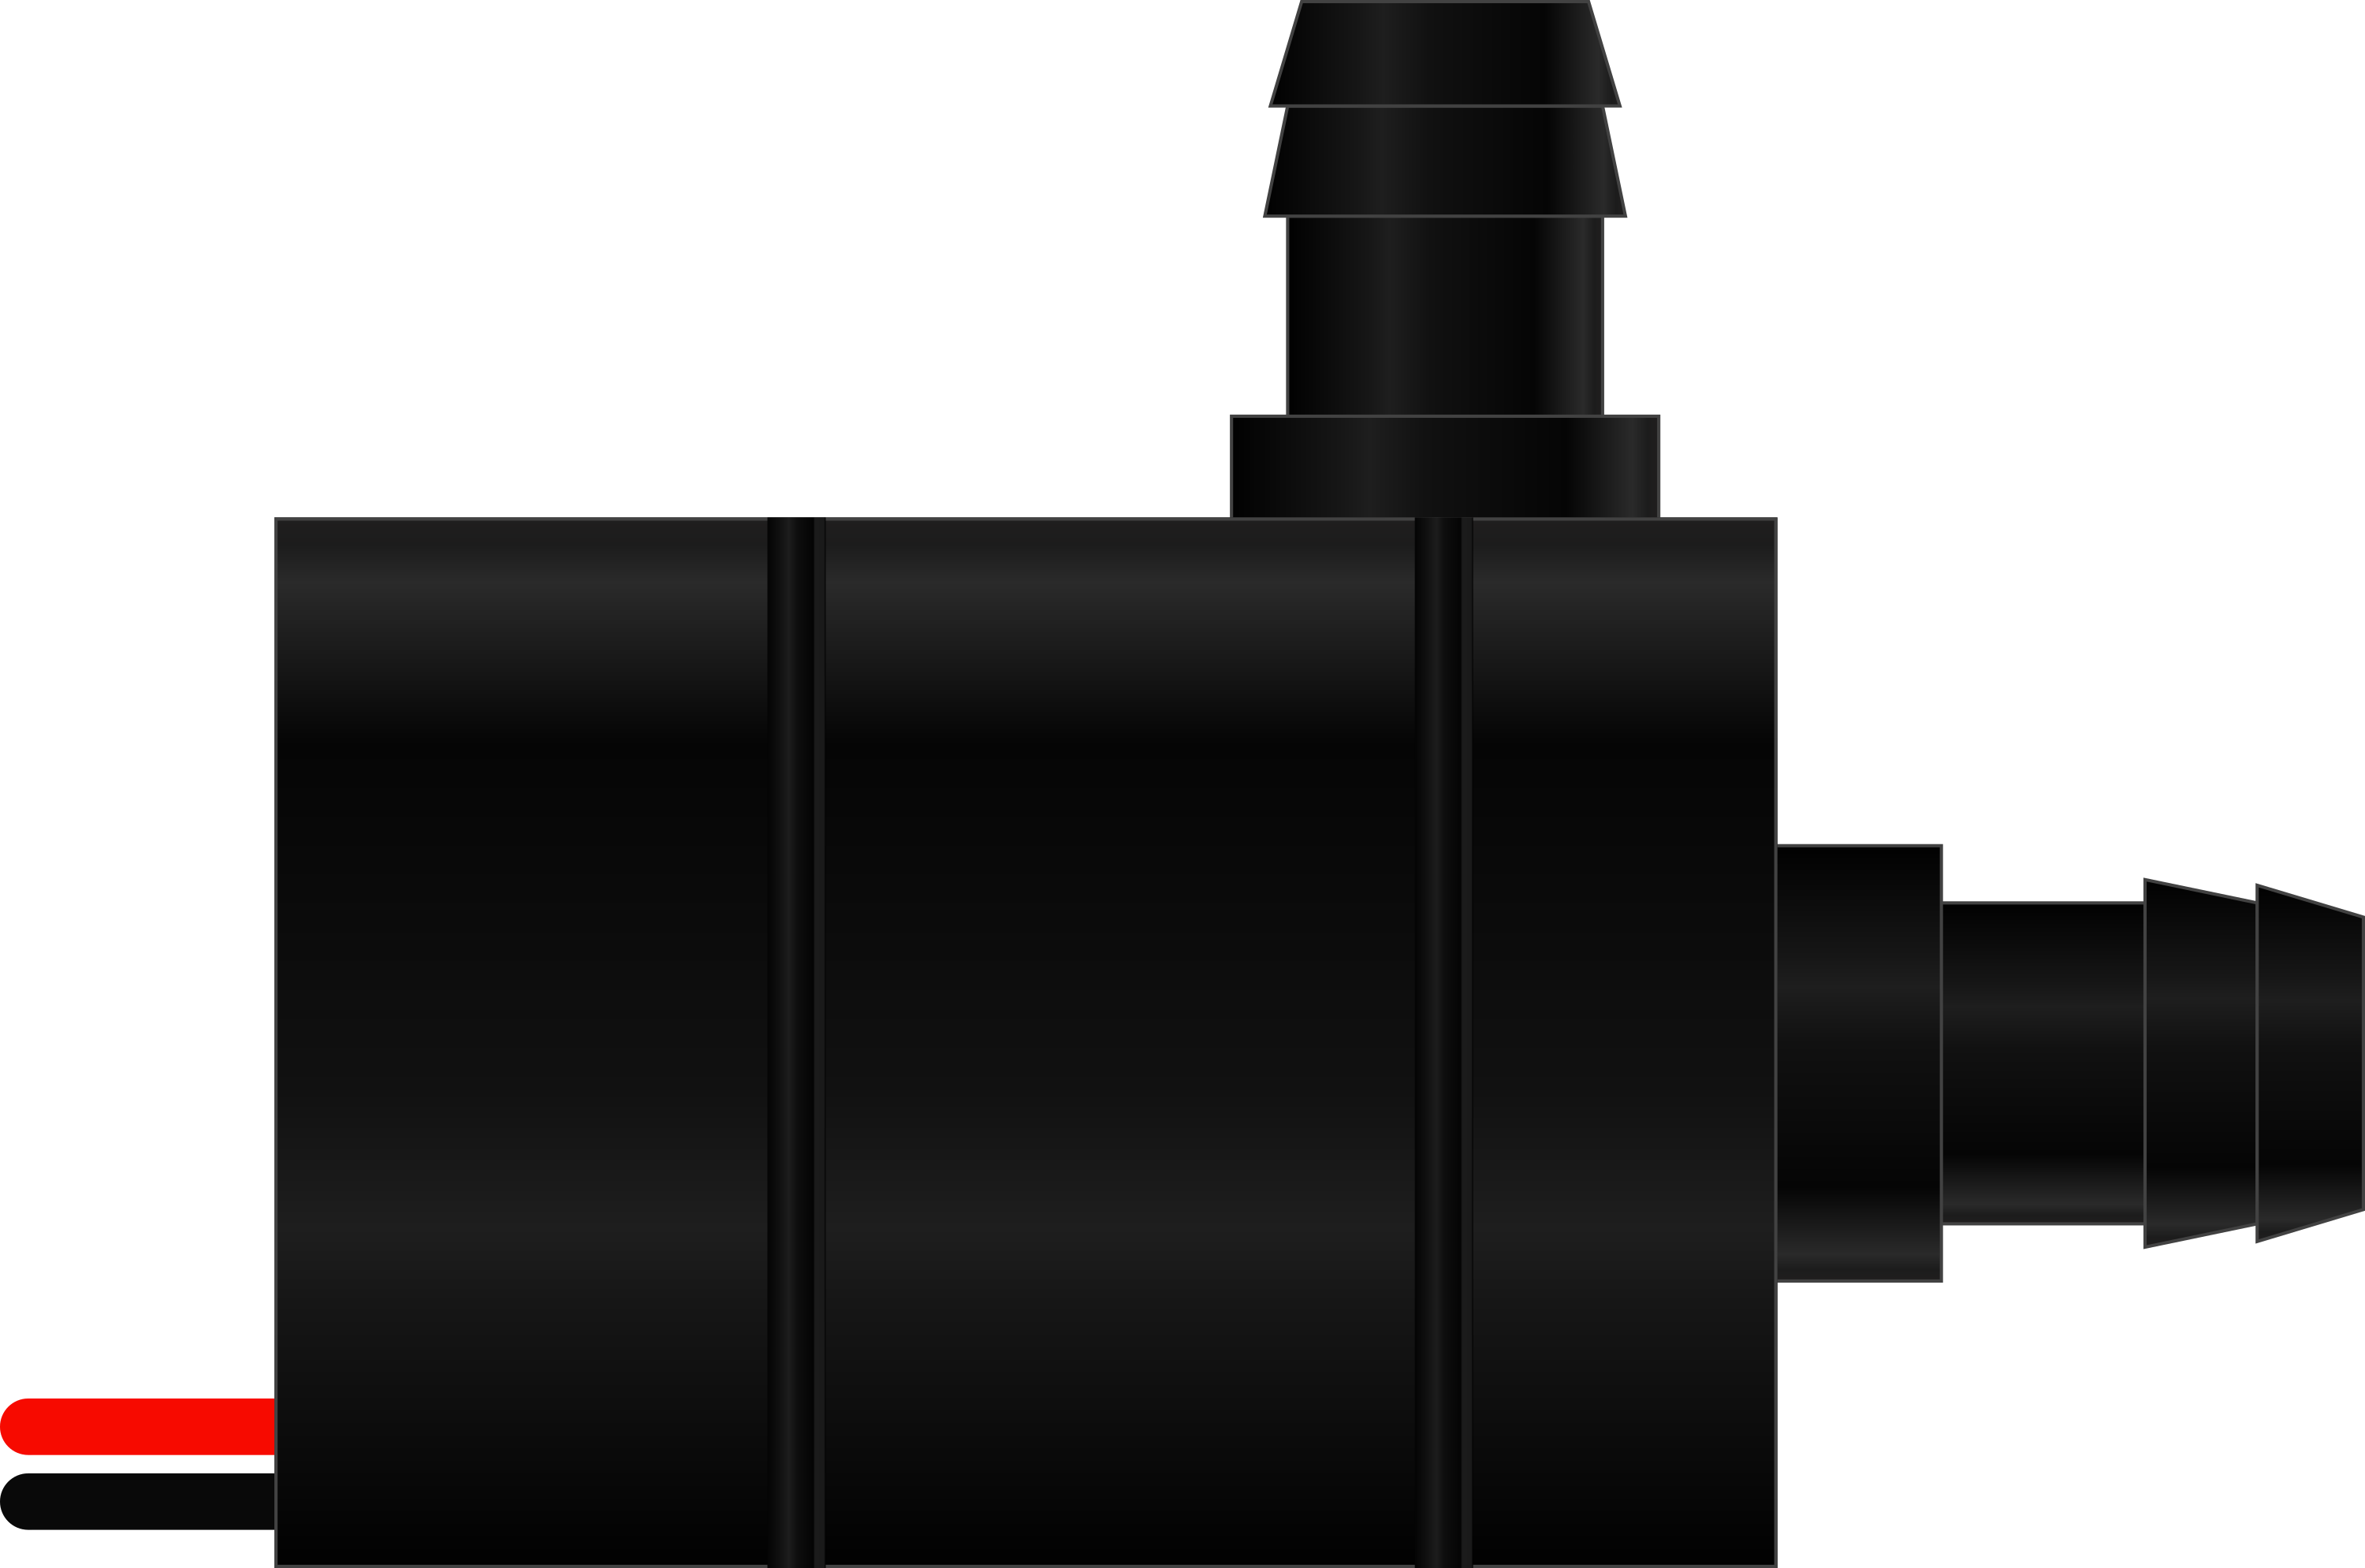
For a typical two-wire DC water pump:
| Pin/Connection | Description |
|---|---|
| Red Wire (+) | Positive terminal (connect to VCC) |
| Black Wire (-) | Negative terminal (connect to GND) |
For a three-wire water pump with a speed control or feedback feature:
| Pin/Connection | Description |
|---|---|
| Red Wire (+) | Positive terminal (connect to VCC) |
| Black Wire (-) | Negative terminal (connect to GND) |
| Yellow Wire | Signal wire (used for speed control or feedback) |
Usage Instructions
How to Use the Water Pump in a Circuit
- Power Supply: Ensure the water pump is powered by a DC voltage source within its operating range (e.g., 5V or 12V). Exceeding the voltage rating may damage the pump.
- Connections:
- Connect the red wire to the positive terminal of the power supply or microcontroller.
- Connect the black wire to the ground terminal.
- If using a three-wire pump, connect the yellow wire to a PWM (Pulse Width Modulation) pin on a microcontroller for speed control.
- Water Flow: Attach appropriate tubing to the inlet and outlet of the pump. Ensure the tubing is securely fastened to prevent leaks.
- Mounting: Secure the pump in a stable position to minimize vibrations and noise during operation.
Important Considerations and Best Practices
- Priming: Some pumps require priming (filling with water) before operation to prevent damage.
- Dry Run Protection: Avoid running the pump without water, as this can cause overheating and damage.
- Power Supply: Use a regulated power supply to ensure stable operation.
- Filtration: Use a filter to prevent debris from entering the pump and causing blockages.
- Polarity: Double-check the polarity of the connections to avoid reversing the motor direction or damaging the pump.
Example: Controlling a Water Pump with Arduino UNO
Below is an example of how to control a DC water pump using an Arduino UNO and a relay module:
// Example: Controlling a DC water pump with Arduino UNO and a relay module

const int relayPin = 7; // Pin connected to the relay module

void setup() {
  pinMode(relayPin, OUTPUT); // Set the relay pin as an output
  digitalWrite(relayPin, LOW); // Ensure the relay is off at startup
}

void loop() {
  // Turn the pump ON
  digitalWrite(relayPin, HIGH); // Activate the relay
  delay(5000); // Keep the pump on for 5 seconds

  // Turn the pump OFF
  digitalWrite(relayPin, LOW); // Deactivate the relay
  delay(5000); // Keep the pump off for 5 seconds
}
Note: Ensure the relay module is rated for the pump's voltage and current. Use an external power source for the pump if its power requirements exceed the Arduino's capabilities.
Troubleshooting and FAQs
Common Issues and Solutions
Pump Not Running:
- Cause: Incorrect wiring or insufficient power supply.
- Solution: Verify the wiring and ensure the power supply matches the pump's voltage and current requirements.
Low Water Flow:
- Cause: Blocked inlet/outlet or insufficient power.
- Solution: Check for blockages in the tubing and ensure the power supply is adequate.
Excessive Noise:
- Cause: Loose mounting or air trapped in the pump.
- Solution: Secure the pump properly and ensure it is primed with water.
Pump Overheating:
- Cause: Running the pump dry or exceeding its duty cycle.
- Solution: Always ensure the pump is submerged or primed and follow the manufacturer's duty cycle recommendations.
FAQs
Q: Can I use a water pump with a battery?
A: Yes, as long as the battery provides the correct voltage and current. For example, a 12V pump can be powered by a 12V battery.Q: Can the pump handle hot water?
A: Most small DC pumps are designed for cold or room-temperature water. Check the manufacturer's specifications for temperature limits.Q: How do I control the pump's speed?
A: Use a PWM signal from a microcontroller (e.g., Arduino) if the pump supports speed control via a signal wire.Q: Can I use the pump for liquids other than water?
A: It depends on the pump's material and design. Some pumps are compatible with certain chemicals, but always consult the manufacturer's guidelines.
This documentation provides a comprehensive guide to understanding, using, and troubleshooting a water pump in various applications.