How to Use dimmer: Examples, Pinouts, and Specs
Introduction
A dimmer is a device used to adjust the brightness of a light by varying the voltage or current supplied to the light fixture. It allows users to control the intensity of lighting, providing flexibility for different environments and moods. Dimmers are commonly used in residential, commercial, and theatrical lighting systems.
Explore Projects Built with dimmer

Explore Projects Built with dimmer
Common Applications and Use Cases
- Residential lighting for ambiance control
- Energy-saving by reducing power consumption
- Stage lighting for dynamic brightness adjustments
- Smart home systems for automated lighting control
- Industrial applications requiring variable light intensity
Technical Specifications
Below are the general technical specifications for a standard dimmer. Note that specific models may vary.
| Parameter | Value |
|---|---|
| Input Voltage | 110V AC or 220V AC (model-specific) |
| Output Voltage | Adjustable (0V to input voltage) |
| Maximum Load Power | 100W to 2000W (model-specific) |
| Control Method | Phase-cut (leading or trailing edge) |
| Operating Temperature | -10°C to 50°C |
| Dimensions | Varies by model |
Pin Configuration and Descriptions
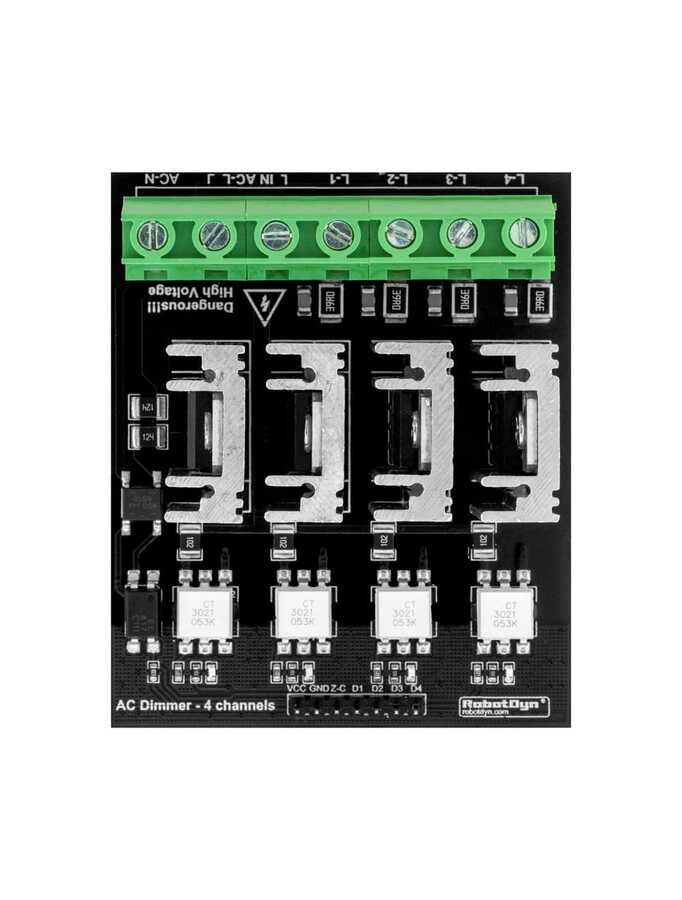
The pin configuration for a typical dimmer module is as follows:
| Pin Name | Description |
|---|---|
| AC IN | Input terminal for AC mains voltage |
| AC OUT | Output terminal for the dimmed AC voltage |
| GND | Ground connection (if applicable) |
| Control Pin | Input for external control (e.g., microcontroller) |
Usage Instructions
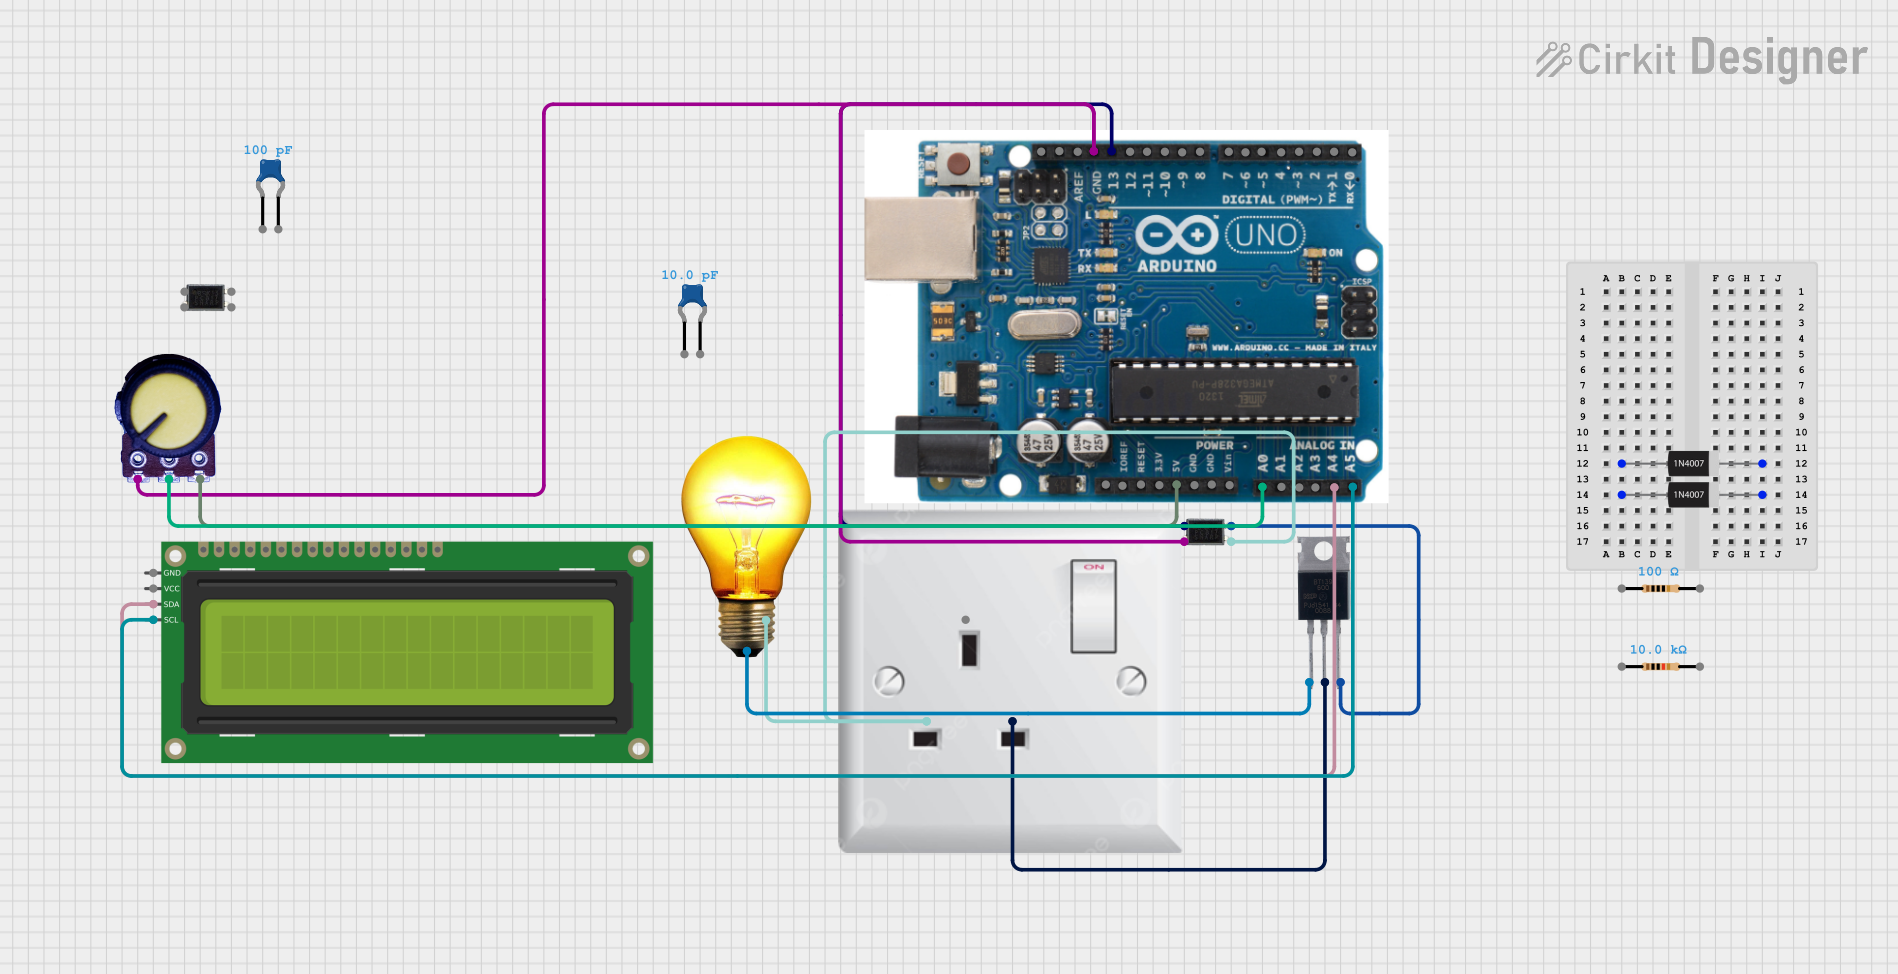
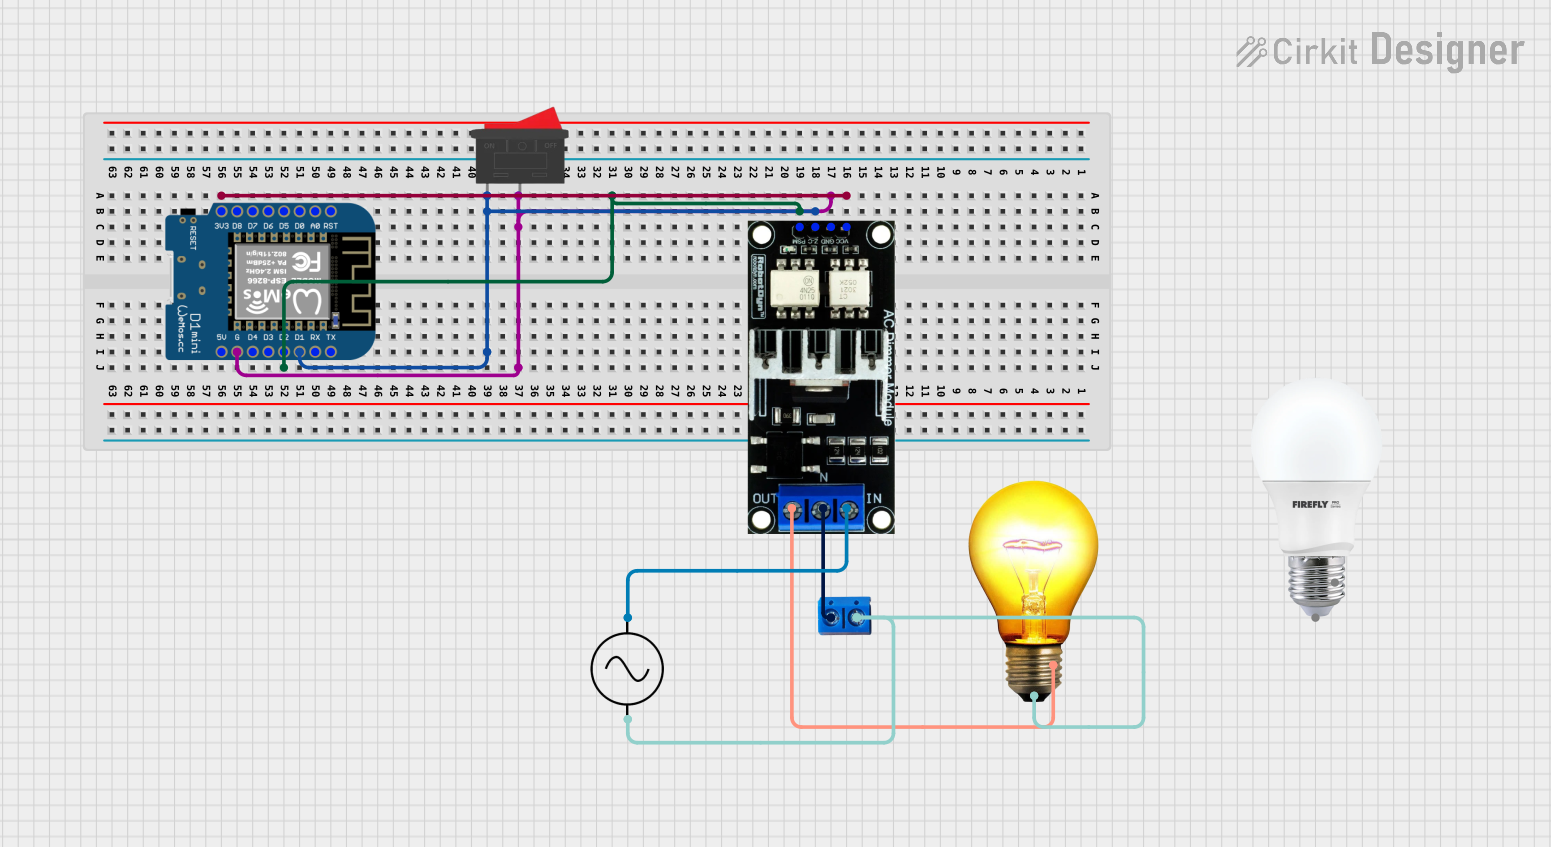
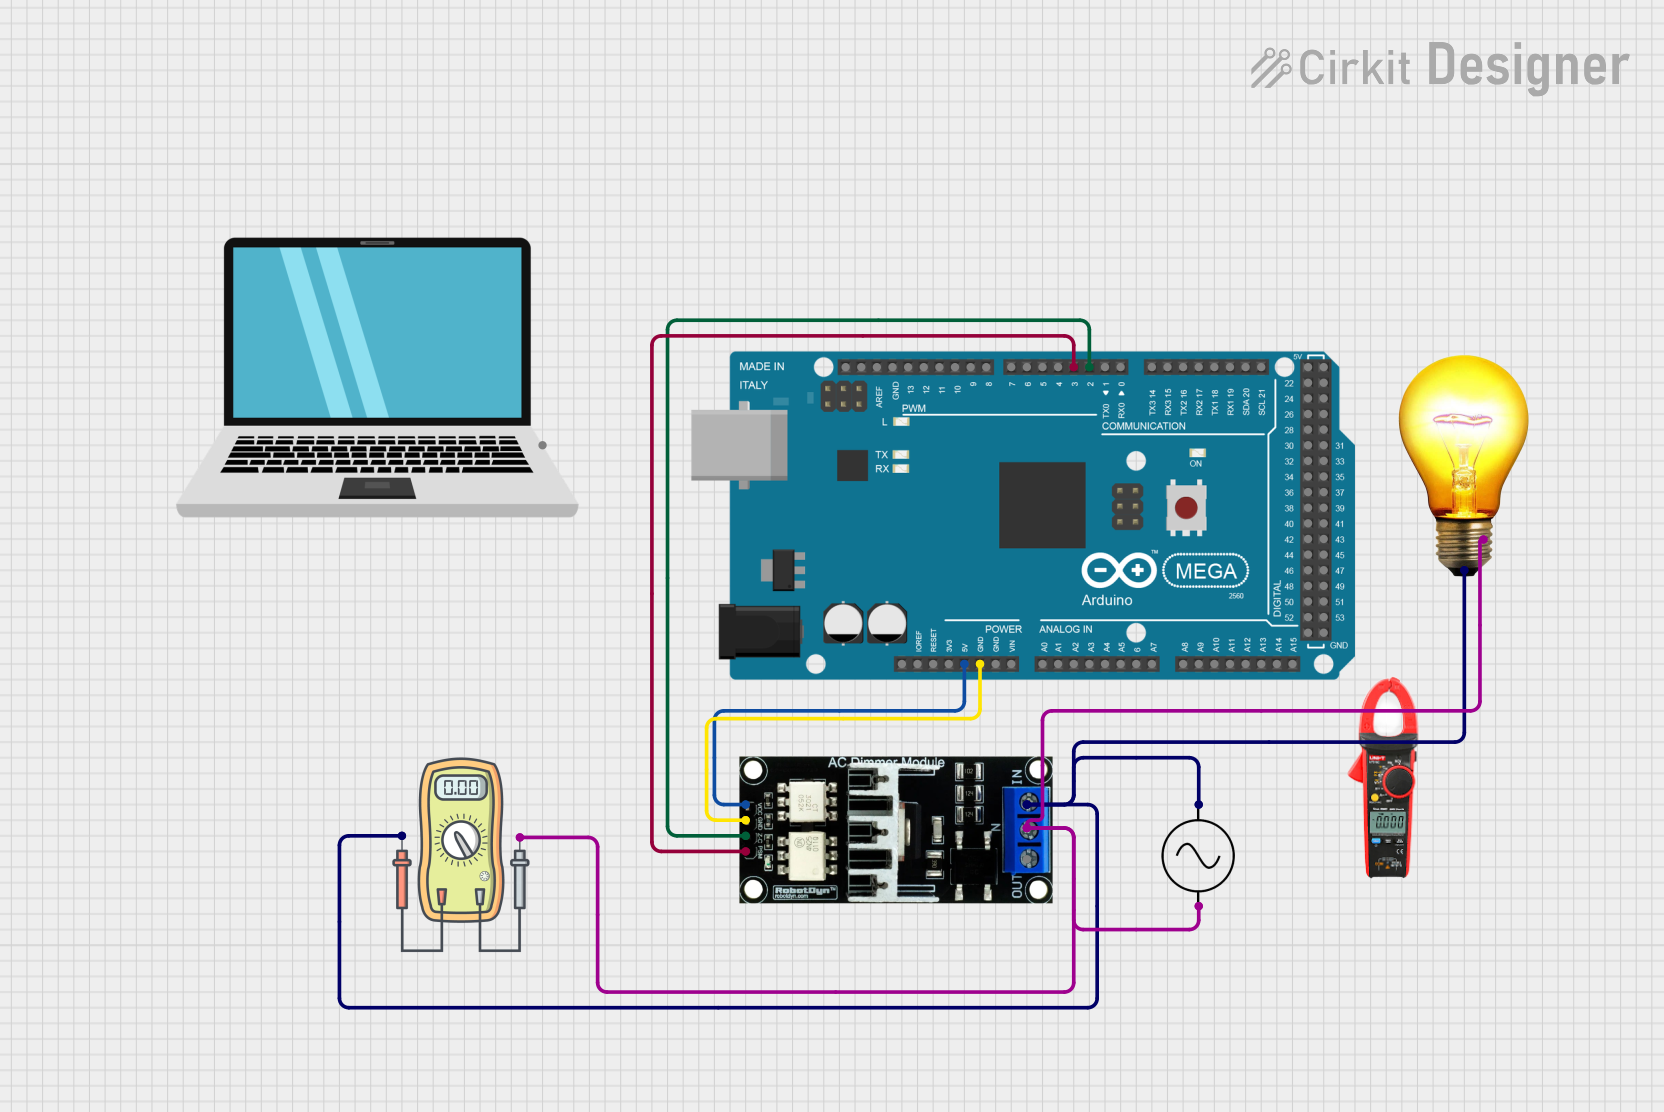
How to Use the Dimmer in a Circuit
- Connect the Input Voltage: Connect the AC mains voltage to the
AC INterminal of the dimmer. - Connect the Load: Attach the light fixture or other load to the
AC OUTterminal. - Adjust the Brightness: Use the built-in potentiometer or external control signal to adjust the brightness.
- Optional Microcontroller Control: If the dimmer supports external control, connect the
Control Pinto a microcontroller (e.g., Arduino) for automated adjustments.
Important Considerations and Best Practices
- Load Compatibility: Ensure the connected load (e.g., LED, incandescent bulb) is compatible with the dimmer type (leading or trailing edge).
- Power Rating: Do not exceed the maximum load power rating of the dimmer.
- Safety Precautions: Always disconnect the power supply before wiring or modifying the circuit.
- Heat Dissipation: Dimmers may generate heat during operation; ensure proper ventilation.
Example: Using a Dimmer with Arduino UNO
If the dimmer supports external control, you can use an Arduino UNO to adjust the brightness programmatically. Below is an example code snippet:
/*
  Example code to control a dimmer using Arduino UNO.
  This code generates a PWM signal to control the dimmer's brightness.
*/

const int controlPin = 9; // Pin connected to the dimmer's control input

void setup() {
  pinMode(controlPin, OUTPUT); // Set the control pin as an output
}

void loop() {
  // Gradually increase brightness
  for (int brightness = 0; brightness <= 255; brightness++) {
    analogWrite(controlPin, brightness); // Send PWM signal
    delay(10); // Wait for 10ms
  }

  // Gradually decrease brightness
  for (int brightness = 255; brightness >= 0; brightness--) {
    analogWrite(controlPin, brightness); // Send PWM signal
    delay(10); // Wait for 10ms
  }
}
Note: Ensure the dimmer module is compatible with PWM control before using this code.
Troubleshooting and FAQs
Common Issues and Solutions
The light does not turn on:
- Check the wiring connections for loose or incorrect connections.
- Verify that the input voltage matches the dimmer's specifications.
- Ensure the load is functional and compatible with the dimmer.
Flickering light:
- Confirm that the load is compatible with the dimmer type (e.g., LED bulbs may require trailing-edge dimmers).
- Check for stable input voltage and proper grounding.
Dimmer overheating:
- Ensure the connected load does not exceed the dimmer's maximum power rating.
- Provide adequate ventilation to dissipate heat.
No response to external control:
- Verify the control signal (e.g., PWM) is within the dimmer's supported range.
- Check the connection between the microcontroller and the dimmer's control pin.
FAQs
Can I use a dimmer with LED lights? Yes, but ensure the dimmer is specifically designed for LED compatibility (e.g., trailing-edge dimmers).
What is the difference between leading-edge and trailing-edge dimmers? Leading-edge dimmers are suitable for resistive loads like incandescent bulbs, while trailing-edge dimmers are better for capacitive loads like LED lights.
Can I control a dimmer remotely? Yes, many modern dimmers support remote control via Wi-Fi, Bluetooth, or external microcontrollers.
By following this documentation, you can effectively use a dimmer in your projects while ensuring safety and optimal performance.