How to Use 12v 20w Solar Panel: Examples, Pinouts, and Specs
Introduction
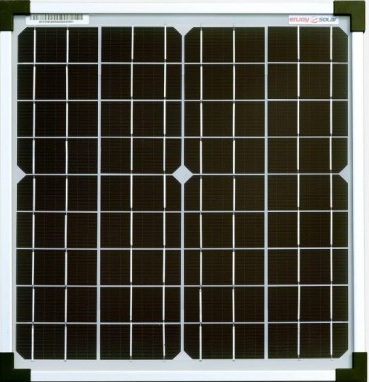
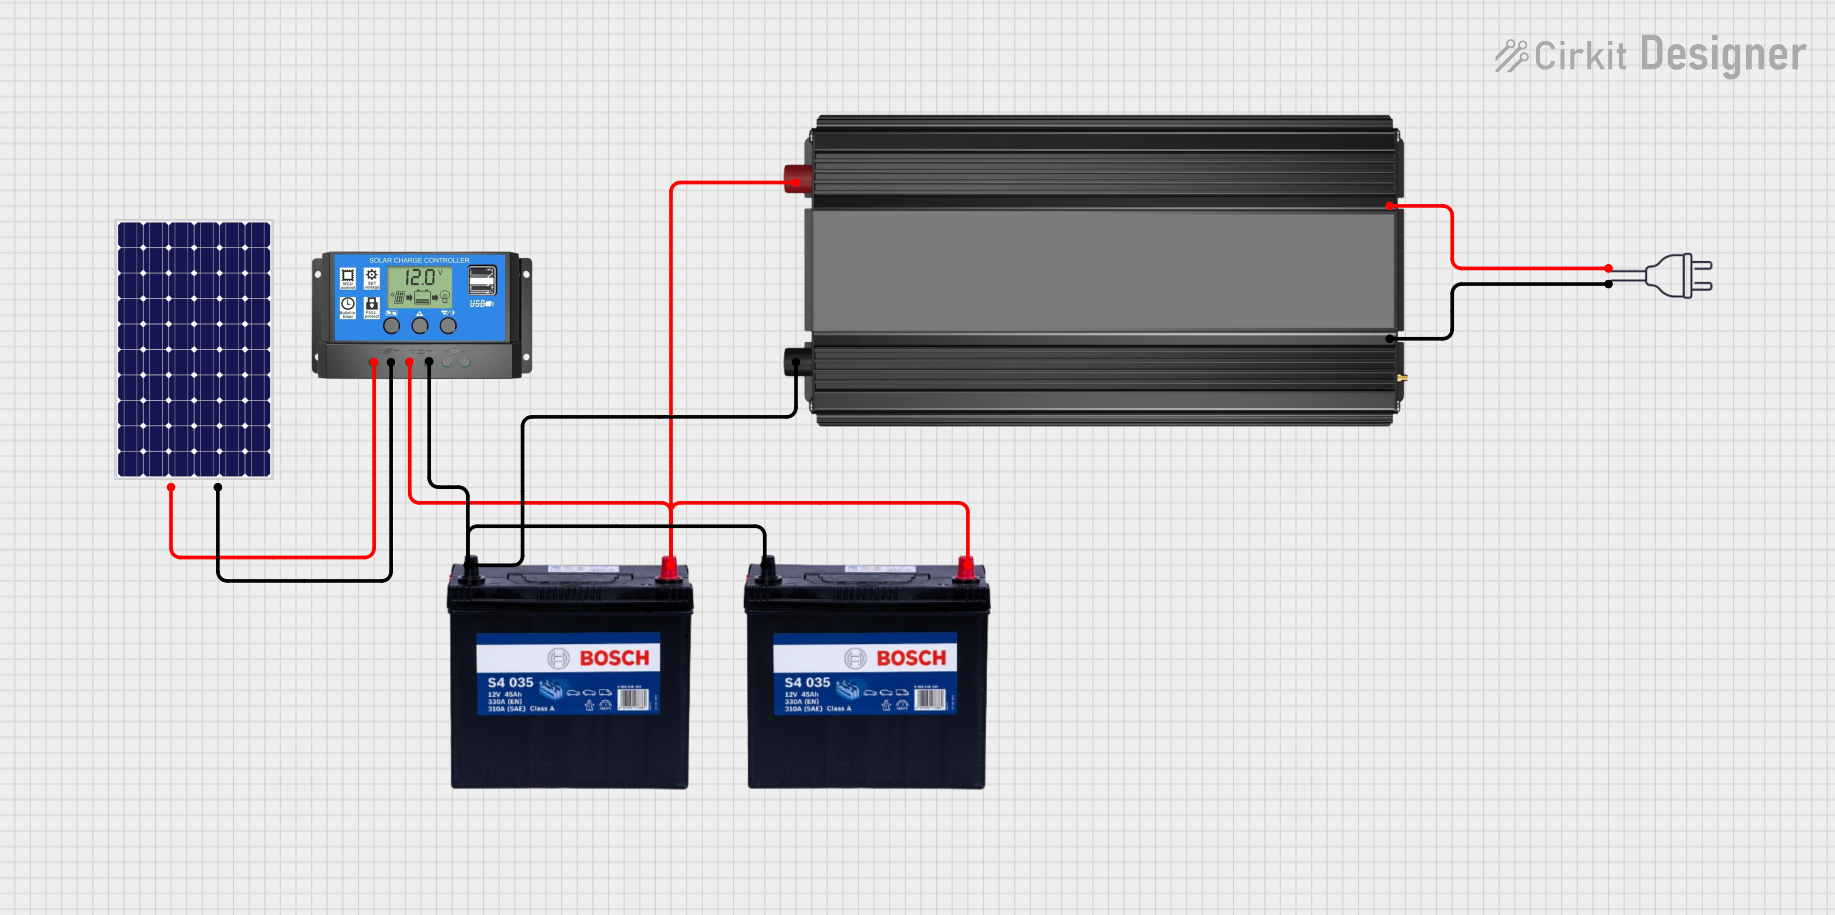
The 12V 20W Solar Panel is a photovoltaic device designed to convert sunlight into electrical energy. With a maximum output of 12 volts and 20 watts, this solar panel is ideal for small-scale energy applications. It is commonly used for charging 12V batteries, powering small electronic devices, or as part of a portable solar energy system. Its compact size and efficiency make it a popular choice for off-grid setups, outdoor activities, and renewable energy projects.
Explore Projects Built with 12v 20w Solar Panel
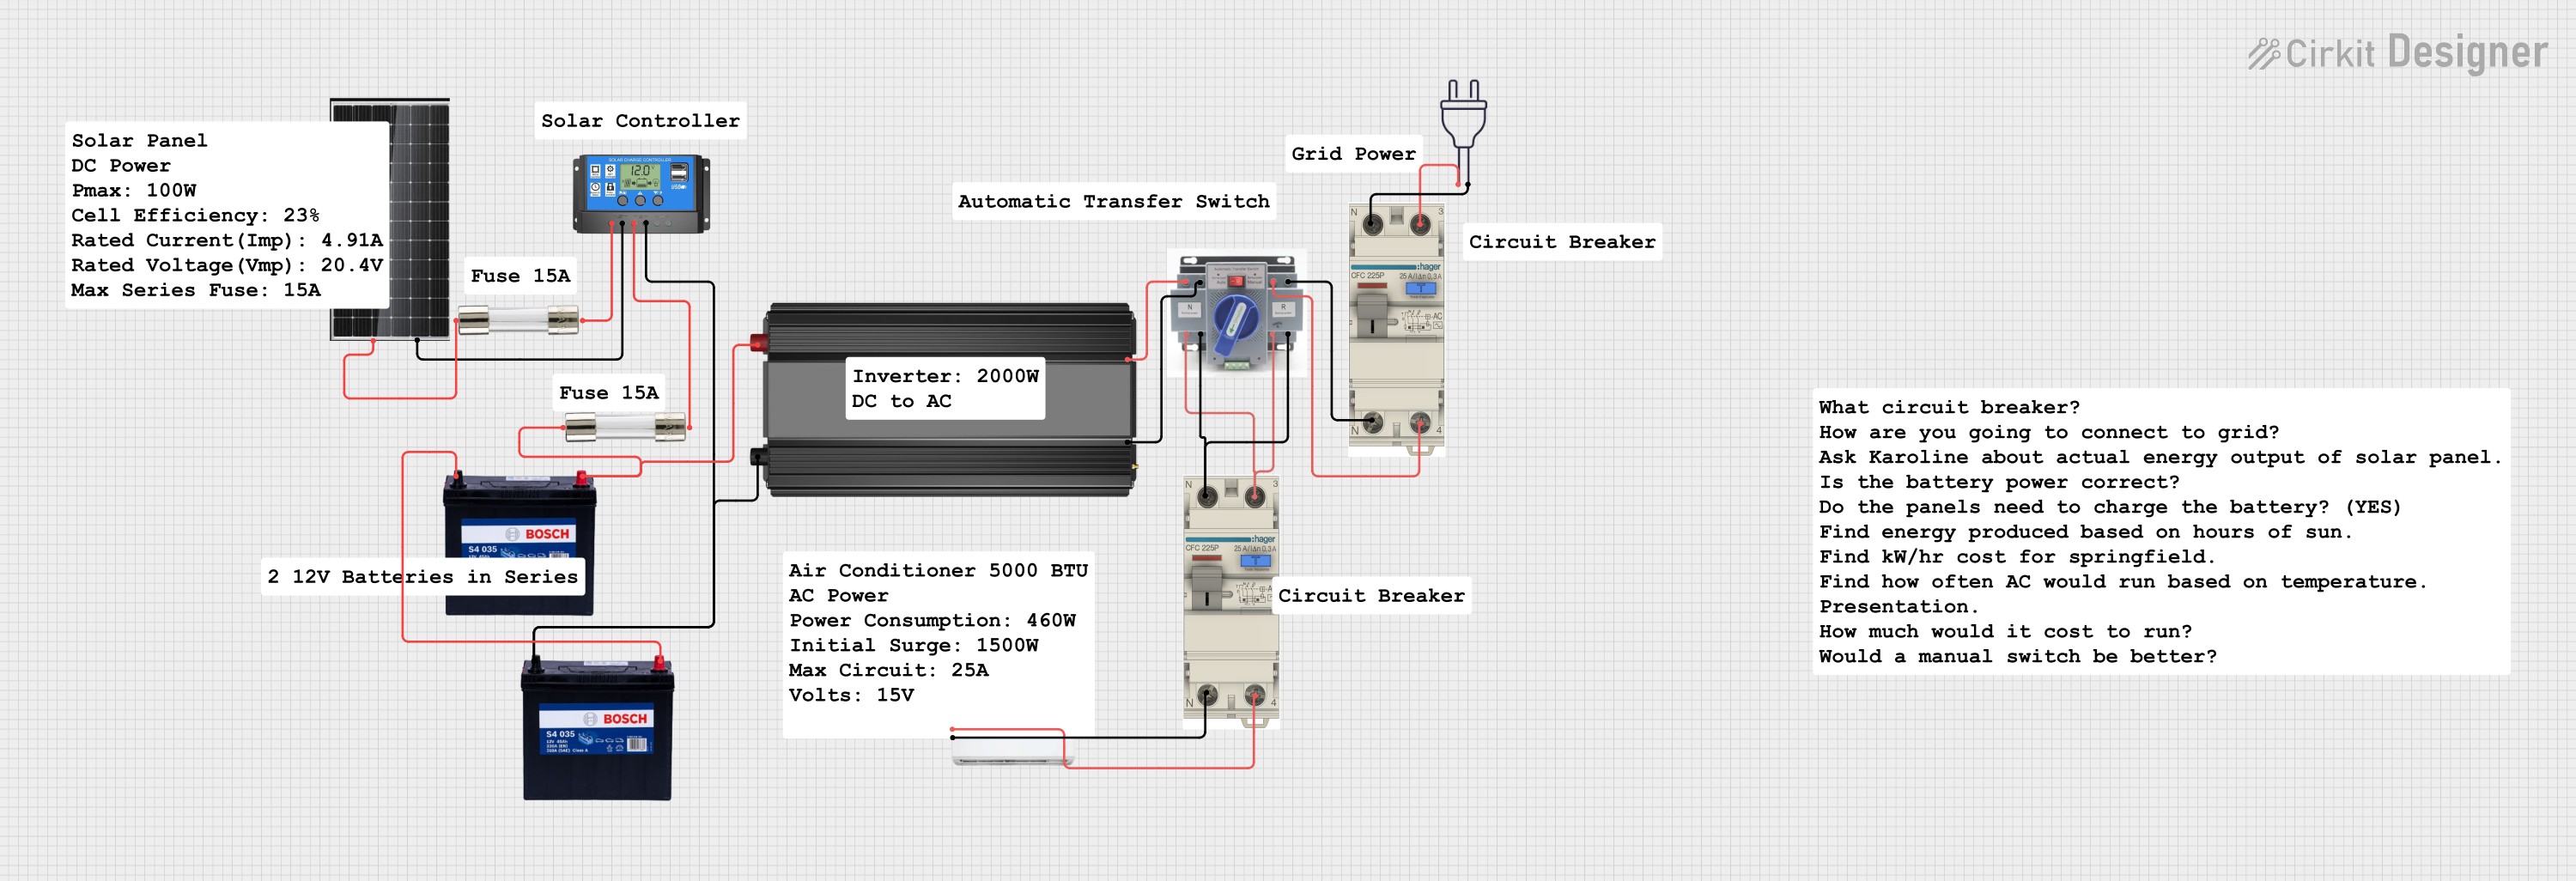
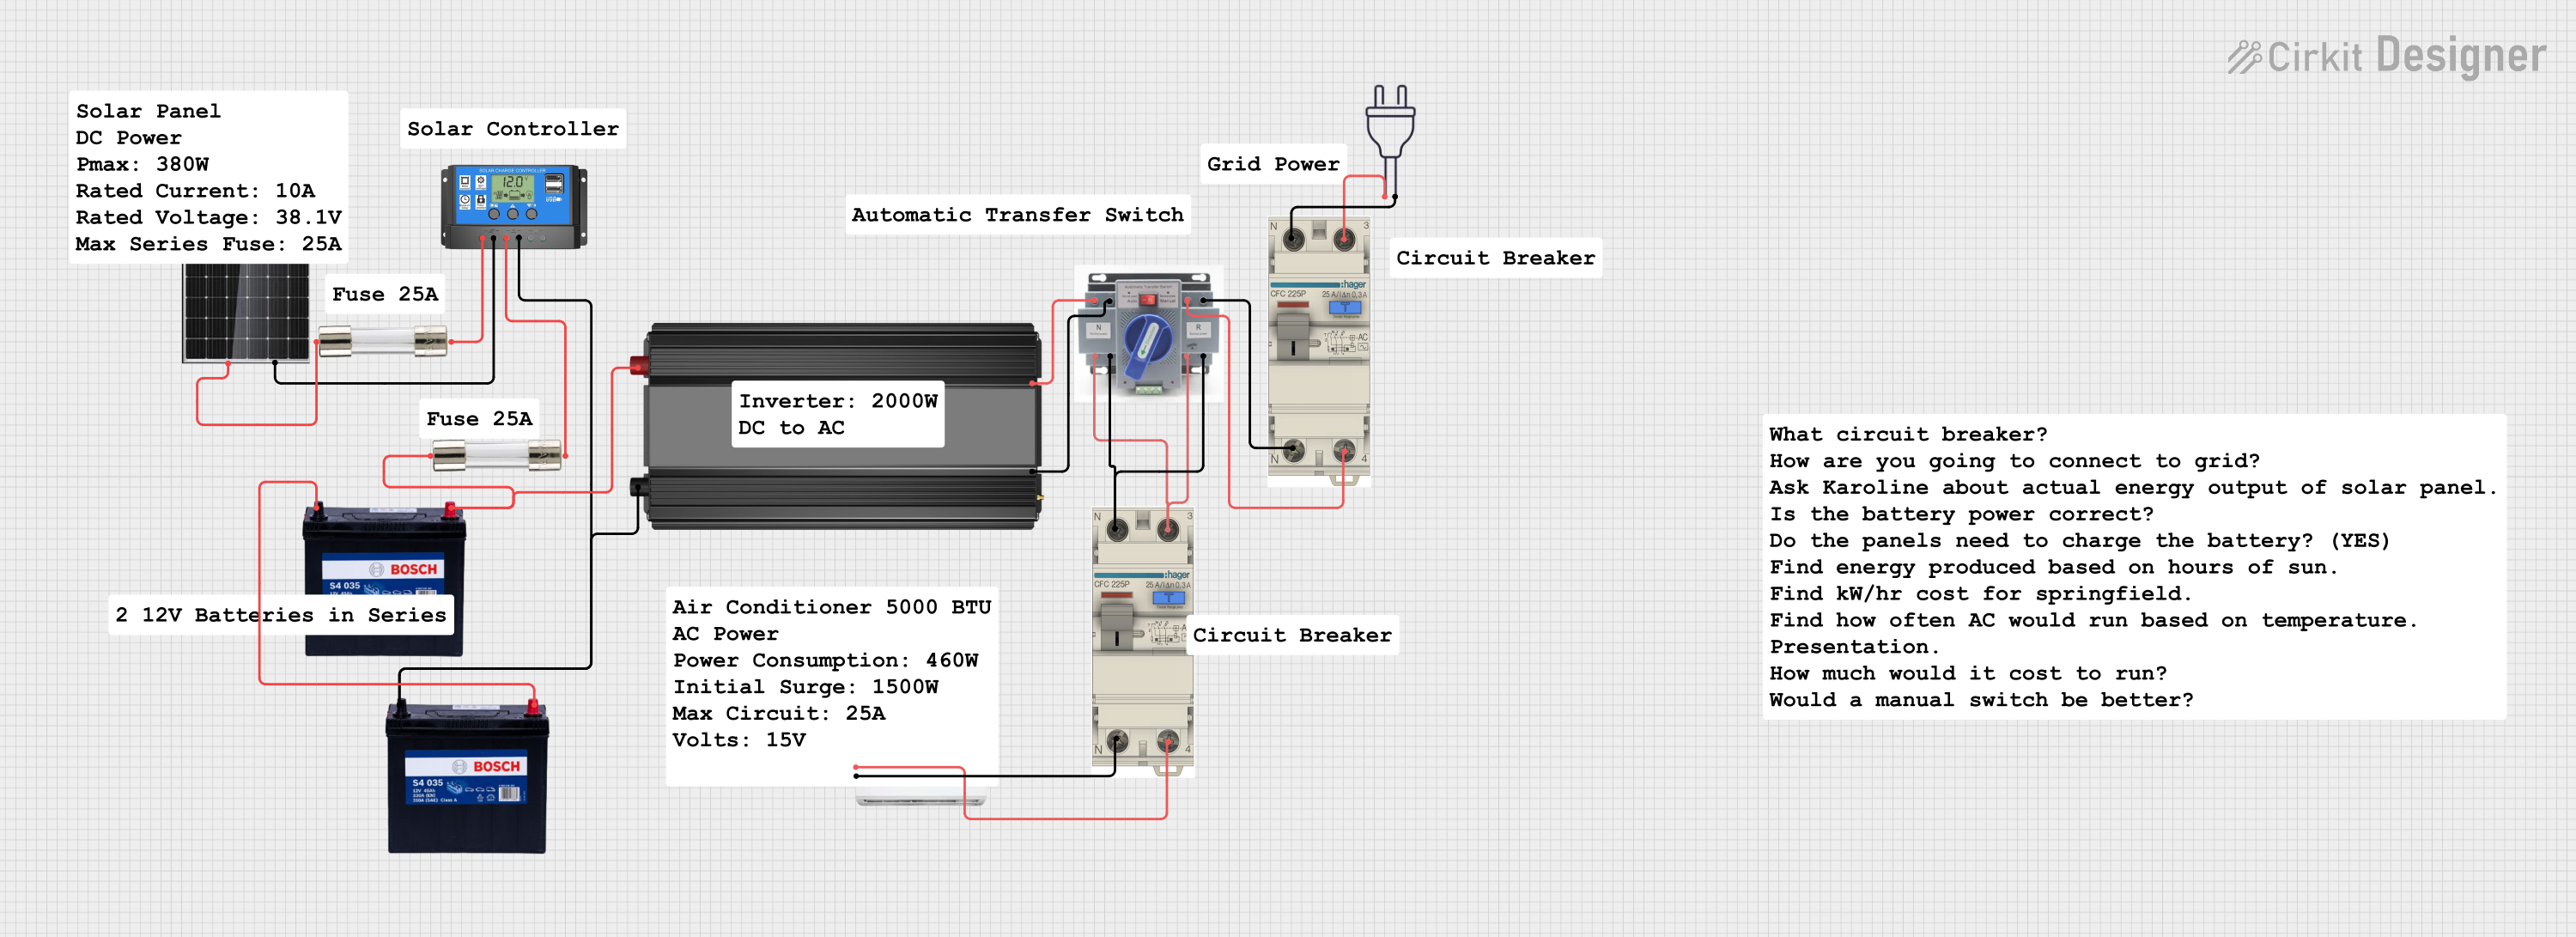
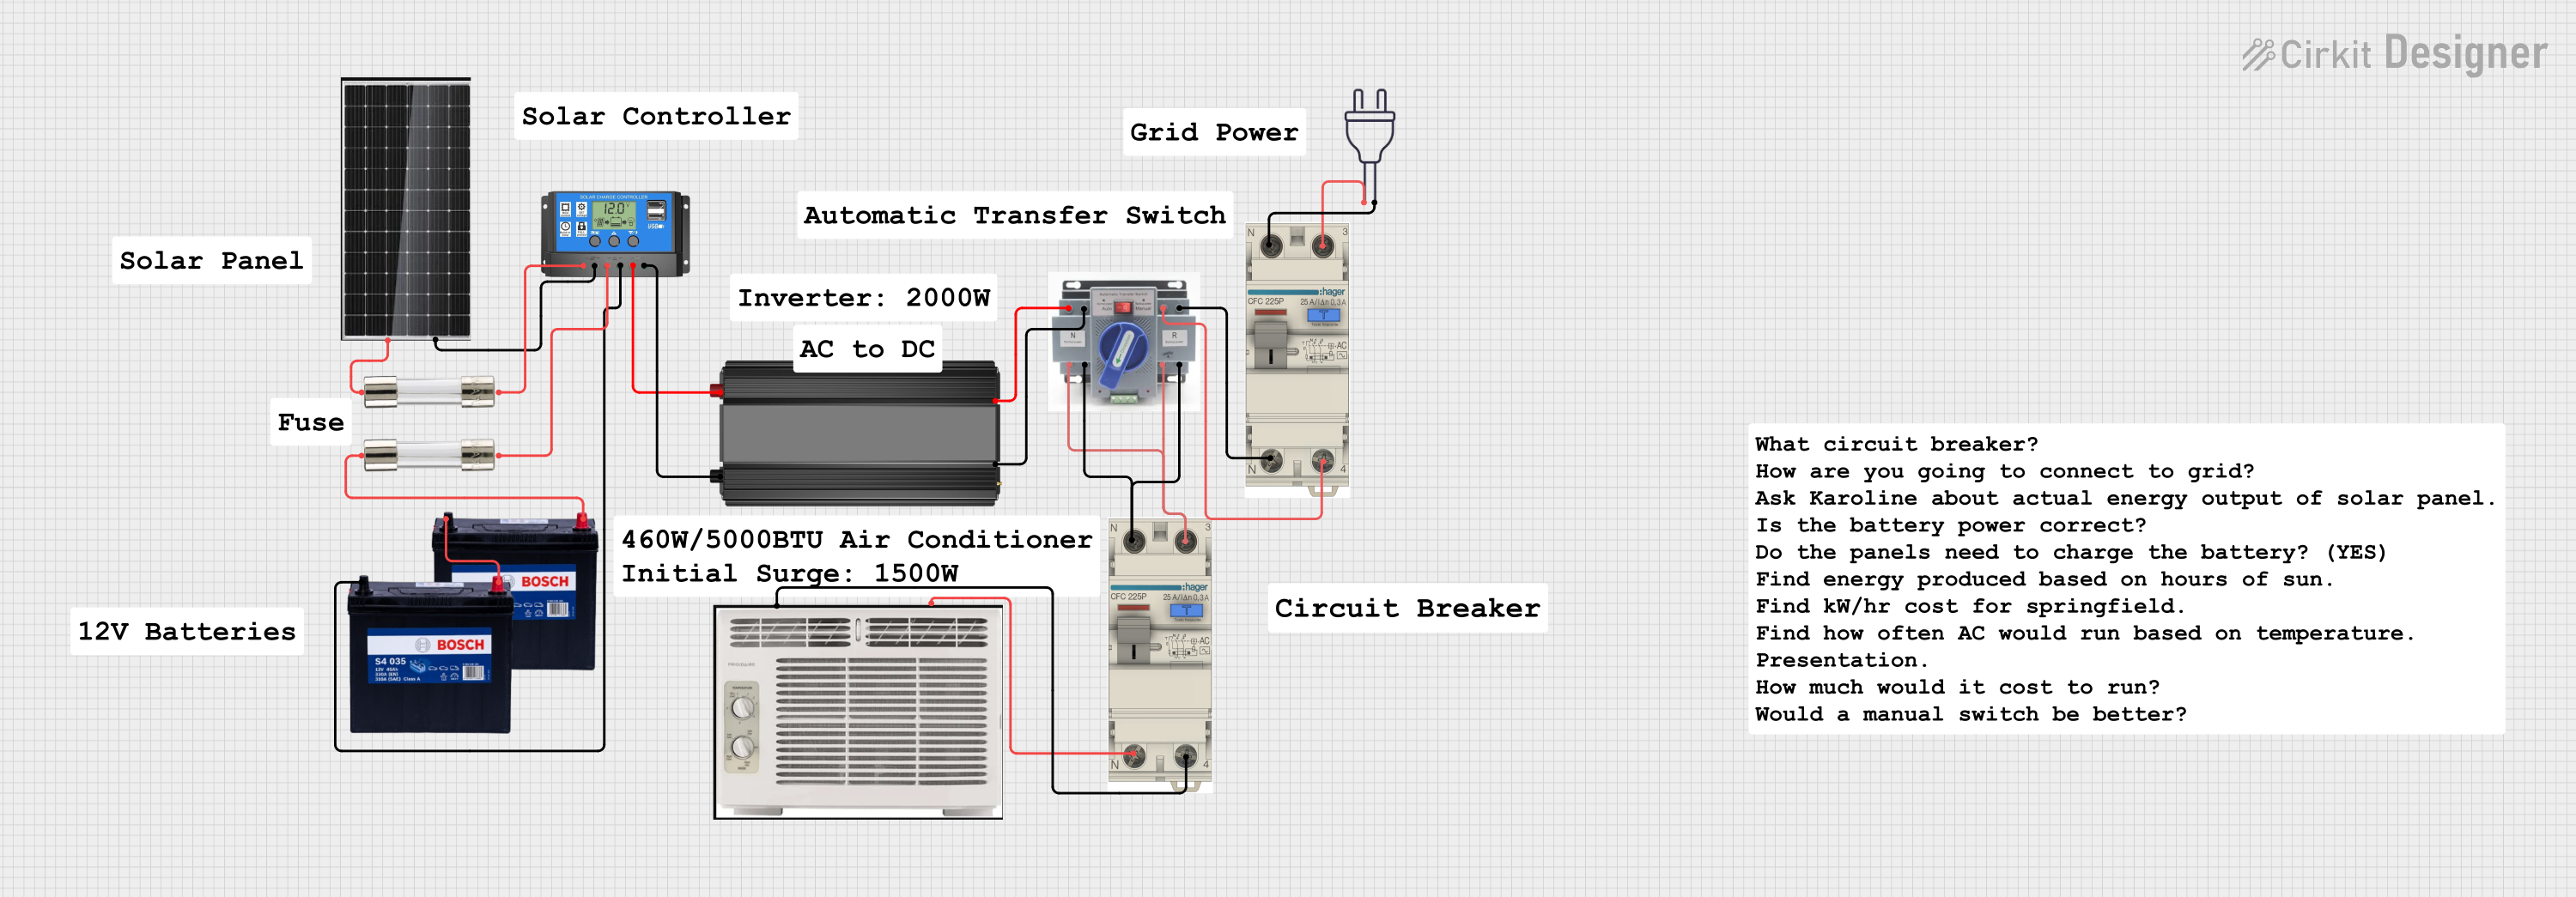
Explore Projects Built with 12v 20w Solar Panel
Common Applications and Use Cases
- Charging 12V lead-acid or lithium-ion batteries
- Powering small DC devices such as LED lights, fans, or USB chargers
- Portable solar energy systems for camping or RVs
- Backup power for emergency situations
- Educational projects and renewable energy experiments
Technical Specifications
Below are the key technical details of the 12V 20W Solar Panel:
| Parameter | Value |
|---|---|
| Maximum Power (Pmax) | 20W |
| Maximum Voltage (Vmp) | 12V |
| Maximum Current (Imp) | 1.67A |
| Open Circuit Voltage (Voc) | 21.6V |
| Short Circuit Current (Isc) | 1.8A |
| Dimensions | Varies (e.g., ~350mm x 250mm) |
| Weight | ~1.5 kg |
| Operating Temperature | -40°C to +85°C |
| Connector Type | MC4 or bare wire leads |
Pin Configuration and Descriptions
The 12V 20W Solar Panel typically has two output terminals:
| Terminal | Description |
|---|---|
| Positive (+) | Red wire or MC4 connector (positive polarity) |
| Negative (-) | Black wire or MC4 connector (negative polarity) |
Ensure proper polarity when connecting the panel to a load or charge controller to avoid damage.
Usage Instructions
How to Use the 12V 20W Solar Panel in a Circuit
- Positioning the Panel: Place the solar panel in direct sunlight for optimal performance. Ensure it is angled correctly based on your geographic location to maximize energy capture.
- Connecting to a Load:
- For direct use, connect the positive (+) and negative (-) terminals of the panel to the load (e.g., a 12V DC device).
- For battery charging, connect the panel to a charge controller first to regulate the voltage and prevent overcharging.
- Using a Charge Controller: Always use a charge controller when charging batteries to protect both the battery and the panel. Connect the panel to the controller's input terminals, and then connect the controller's output terminals to the battery.
- Monitoring Output: Use a multimeter to measure the voltage and current output of the panel to ensure it is functioning correctly.
Important Considerations and Best Practices
- Avoid Shadowing: Even partial shading can significantly reduce the panel's output. Ensure the panel is fully exposed to sunlight.
- Use a Diode for Reverse Current Protection: If the panel is connected to a battery without a charge controller, use a blocking diode to prevent reverse current flow at night.
- Temperature Effects: High temperatures can reduce the panel's efficiency. Ensure proper ventilation and avoid placing the panel on heat-absorbing surfaces.
- Waterproofing: Most solar panels are weather-resistant, but ensure the connectors and wiring are protected from water ingress.
Example: Connecting to an Arduino UNO
The 12V 20W Solar Panel can be used to power an Arduino UNO via a 12V battery and a voltage regulator. Below is an example setup:
- Connect the solar panel to a 12V battery through a charge controller.
- Use a 5V voltage regulator (e.g., LM7805) to step down the battery voltage to 5V.
- Power the Arduino UNO by connecting the regulator's output to the Arduino's 5V pin.
Sample Arduino Code for Monitoring Battery Voltage
// This code reads the battery voltage using an analog pin on the Arduino UNO.
// Ensure a voltage divider is used to step down the 12V battery voltage to a safe level.

const int voltagePin = A0;  // Analog pin connected to the voltage divider
const float dividerRatio = 5.7;  // Adjust based on your resistor values
float batteryVoltage = 0.0;

void setup() {
  Serial.begin(9600);  // Initialize serial communication
}

void loop() {
  int sensorValue = analogRead(voltagePin);  // Read the analog input
  batteryVoltage = (sensorValue * 5.0 / 1023.0) * dividerRatio;

  // Print the battery voltage to the Serial Monitor
  Serial.print("Battery Voltage: ");
  Serial.print(batteryVoltage);
  Serial.println(" V");

  delay(1000);  // Wait for 1 second before the next reading
}
Note: Use a voltage divider to ensure the analog input voltage does not exceed 5V. For example, use a 10kΩ and 47kΩ resistor in series, with the analog pin connected to the junction.
Troubleshooting and FAQs
Common Issues and Solutions
- Low or No Output Voltage:
- Cause: Insufficient sunlight or shading.
- Solution: Ensure the panel is in direct sunlight and free from obstructions.
- Overheating:
- Cause: Poor ventilation or high ambient temperature.
- Solution: Place the panel in a well-ventilated area and avoid heat-absorbing surfaces.
- Reverse Current Flow:
- Cause: No blocking diode or charge controller.
- Solution: Use a charge controller or install a blocking diode in series with the positive terminal.
- Inconsistent Output:
- Cause: Fluctuating sunlight or loose connections.
- Solution: Secure all connections and ensure stable sunlight exposure.
FAQs
Q1: Can I connect the solar panel directly to a 12V battery?
A1: It is not recommended to connect the panel directly to a battery without a charge controller, as this can lead to overcharging and damage the battery.
Q2: What type of batteries can I charge with this panel?
A2: The panel is suitable for charging 12V lead-acid, AGM, or lithium-ion batteries. Always use a compatible charge controller.
Q3: How do I clean the solar panel?
A3: Use a soft cloth and water to clean the panel. Avoid abrasive materials or harsh chemicals that could damage the surface.
Q4: Can I use this panel indoors?
A4: The panel requires direct sunlight for optimal performance. Indoor use under artificial light will result in significantly reduced output.
By following this documentation, you can effectively utilize the 12V 20W Solar Panel for your renewable energy projects.