How to Use Iron Core Solenoid: Examples, Pinouts, and Specs
Introduction
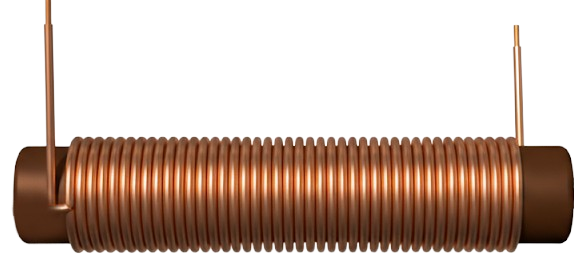
An iron core solenoid is a type of electromagnet consisting of a coil of wire wound around a ferromagnetic core. When an electric current passes through the coil, it generates a magnetic field, which is intensified by the iron core. This enhancement makes the iron core solenoid highly effective in applications requiring strong magnetic fields.
Explore Projects Built with Iron Core Solenoid
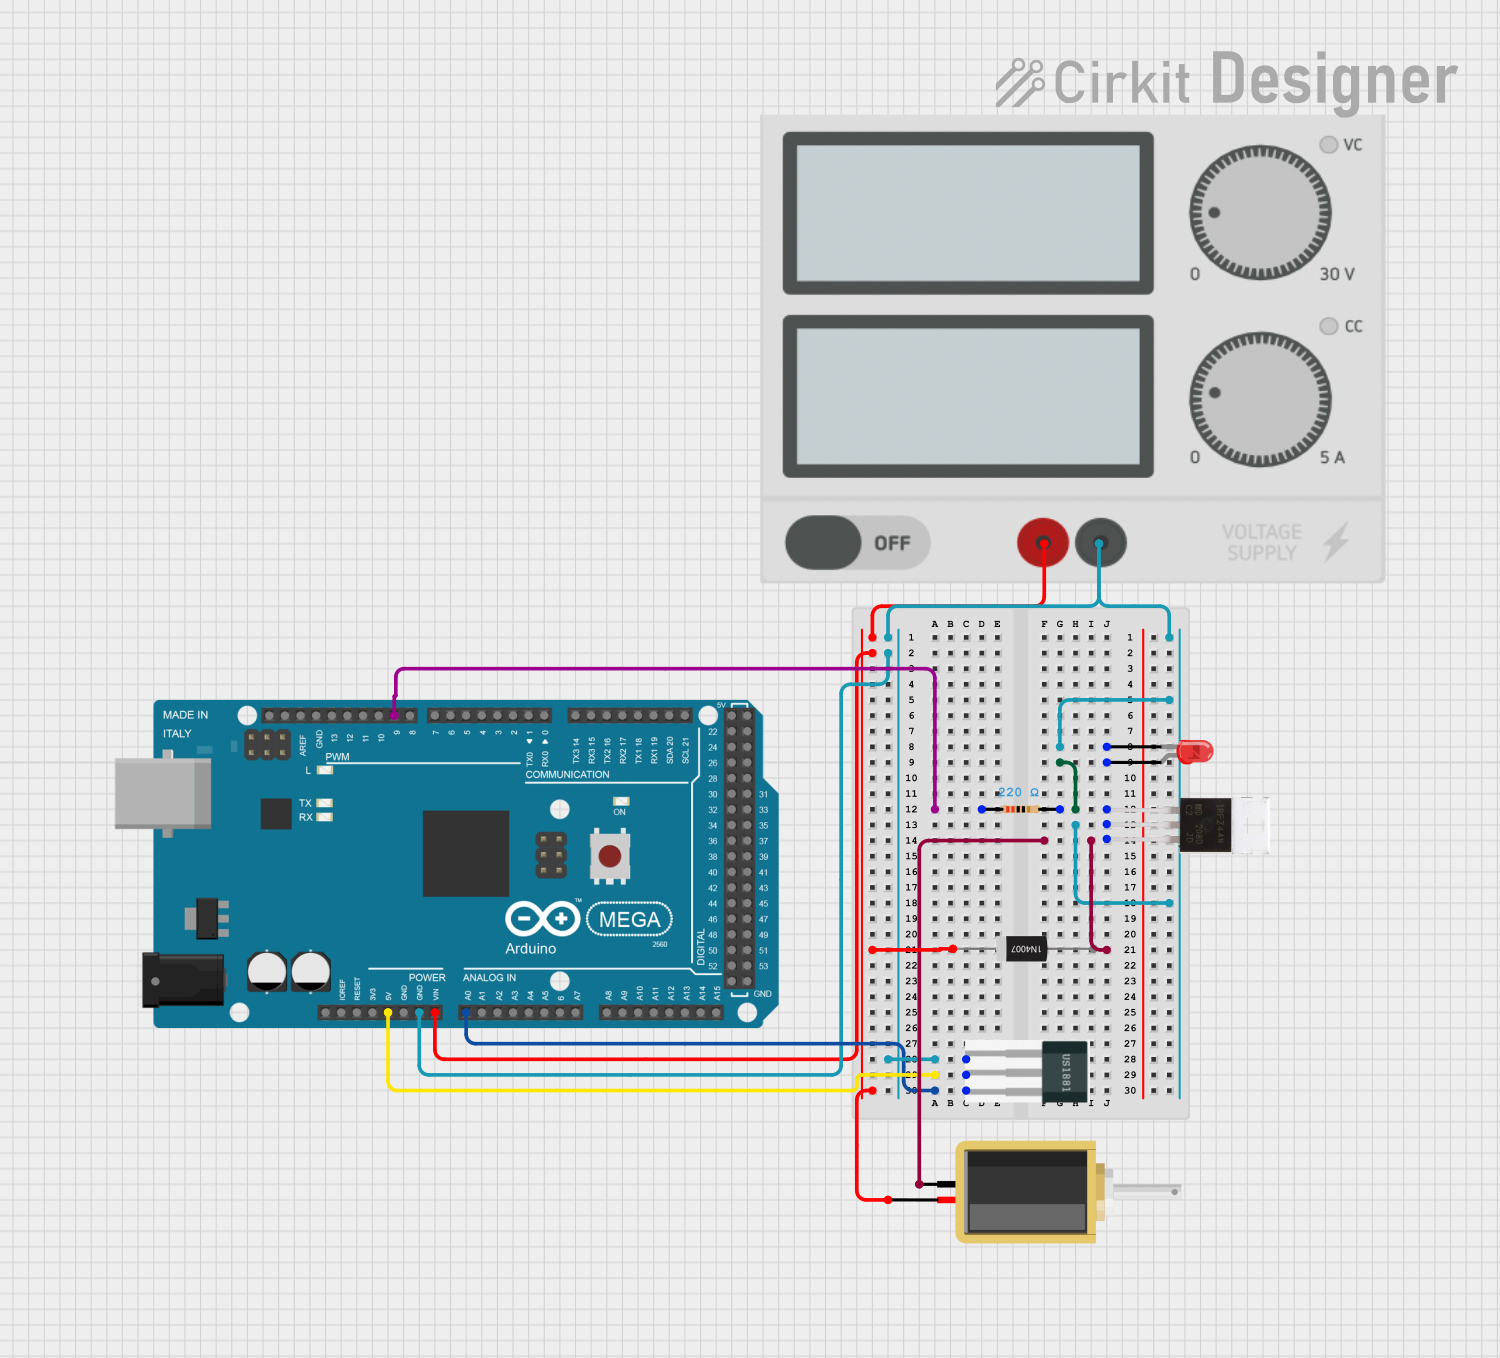
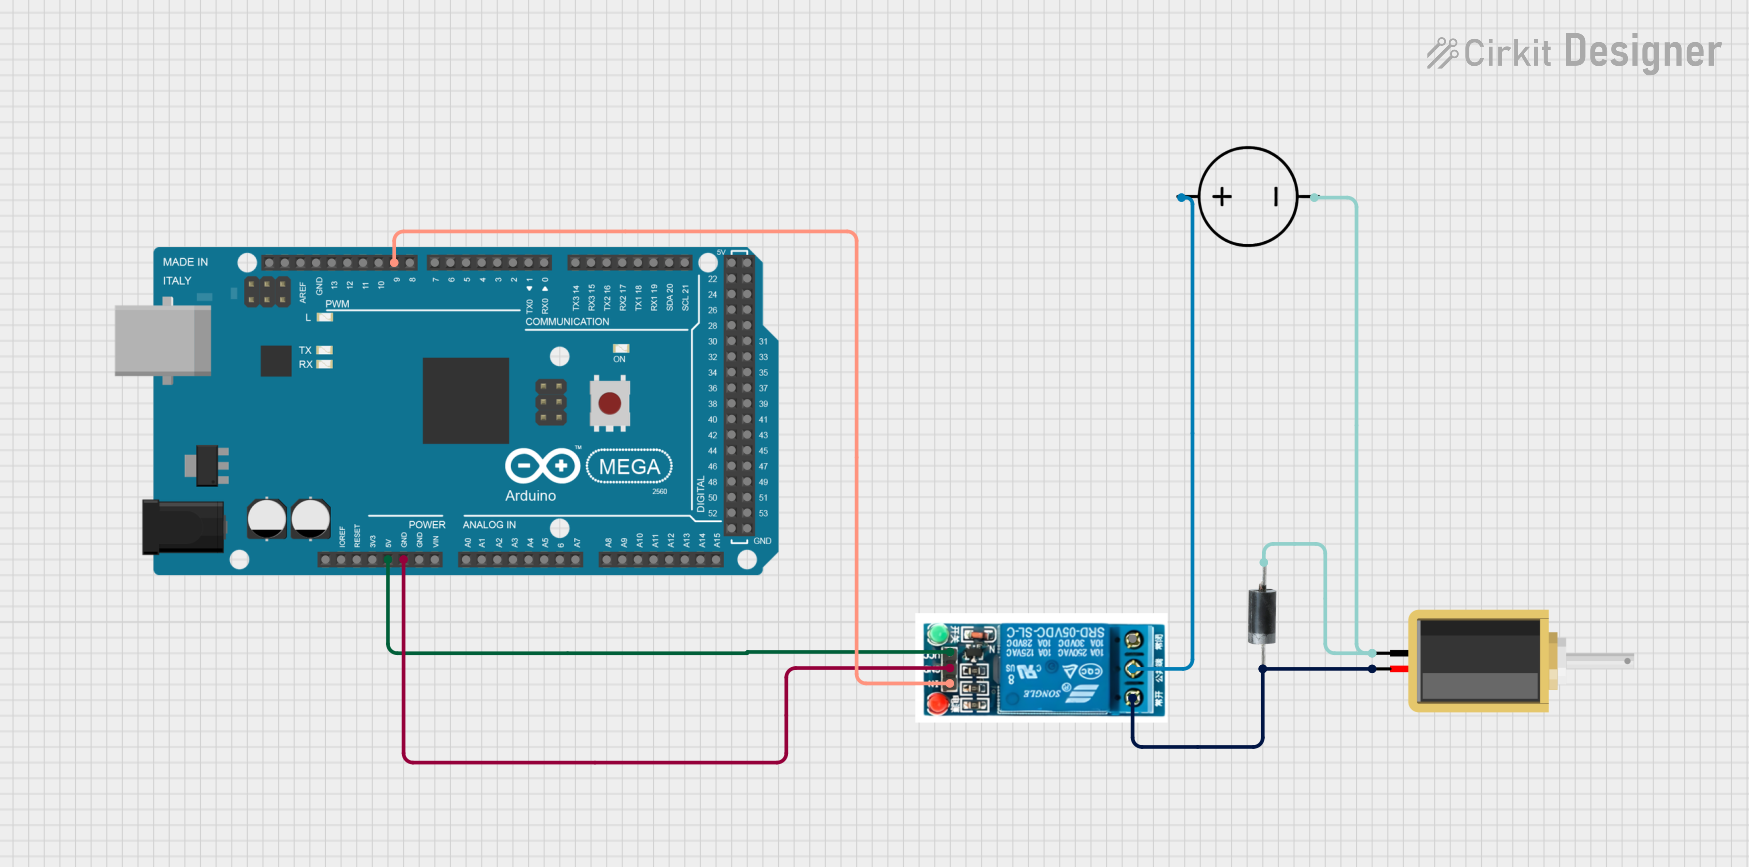
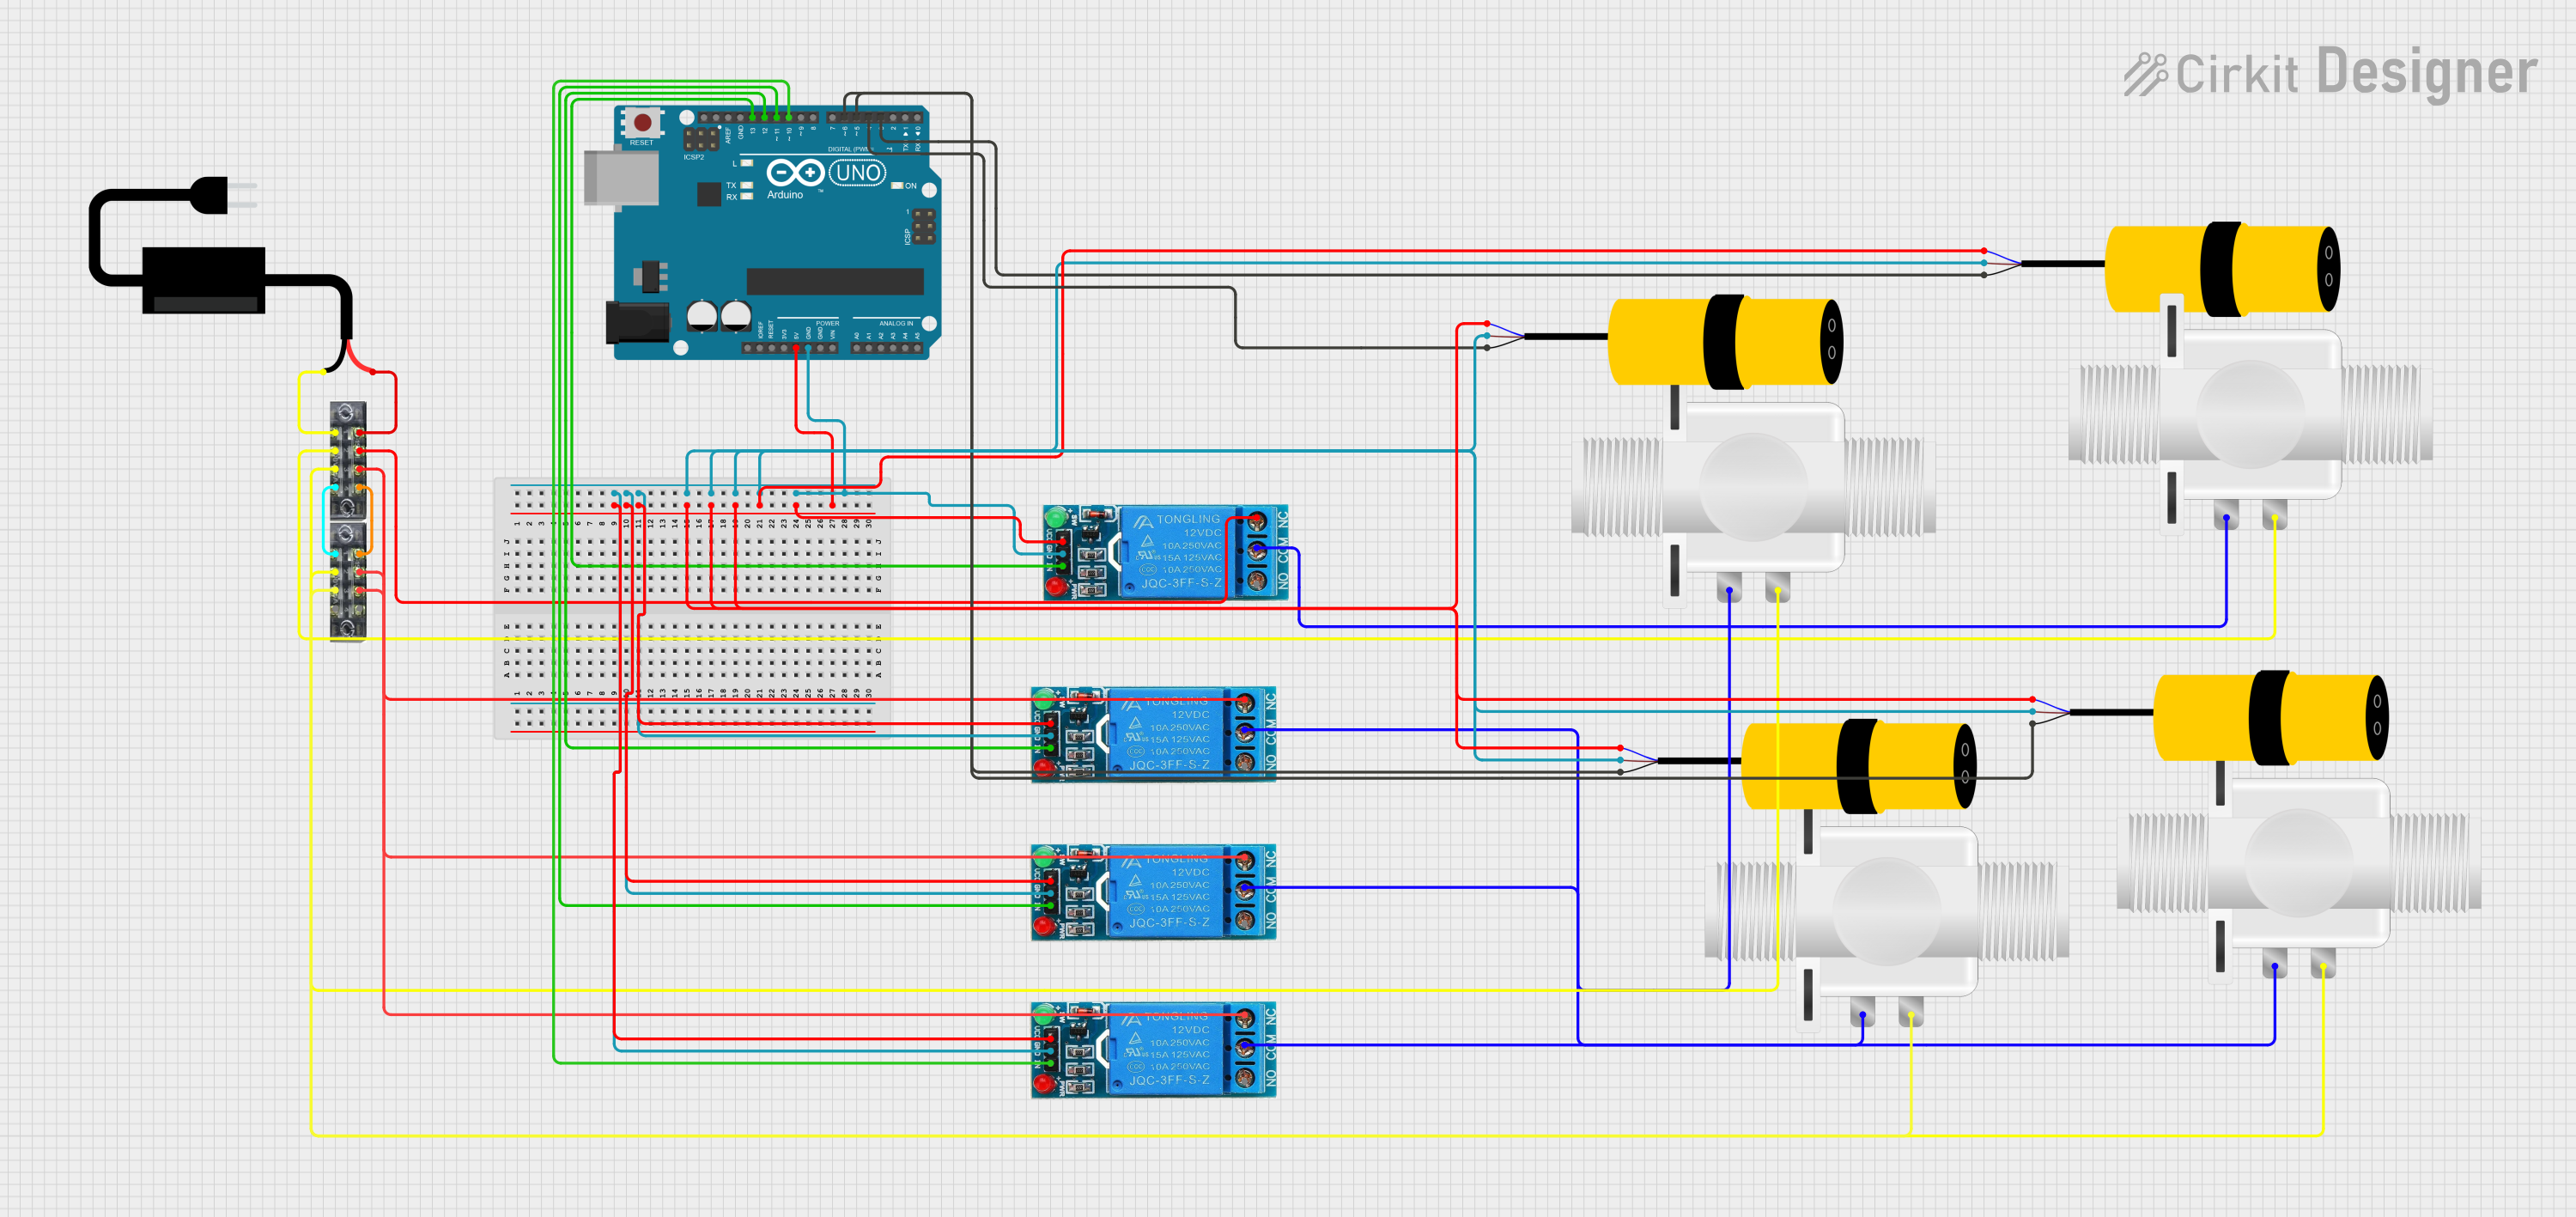
Explore Projects Built with Iron Core Solenoid
Common Applications and Use Cases
- Relays and Switches: Used in electrical relays and magnetic switches for controlling circuits.
- Actuators: Commonly employed in linear actuators for mechanical movement.
- Electromagnetic Locks: Utilized in locking mechanisms for security systems.
- Industrial Machinery: Found in solenoid valves and other industrial automation systems.
- Magnetic Lifting Devices: Used in lifting heavy ferromagnetic materials.
Technical Specifications
Below are the key technical details of a typical iron core solenoid. Note that specifications may vary depending on the specific model or manufacturer.
General Specifications
| Parameter | Value/Range |
|---|---|
| Operating Voltage | 5V to 24V DC (varies by model) |
| Current Rating | 0.5A to 5A (depending on size) |
| Power Consumption | 2.5W to 120W |
| Core Material | Soft iron or ferromagnetic alloy |
| Coil Resistance | 10Ω to 100Ω |
| Magnetic Field Strength | Up to 1 Tesla |
| Duty Cycle | 10% to 100% (continuous or intermittent operation) |
Pin Configuration and Descriptions
Iron core solenoids typically have two terminals for electrical connections. These are described below:
| Pin Name | Description |
|---|---|
| Positive (+) | Connect to the positive terminal of the power supply. |
| Negative (-) | Connect to the negative terminal (ground) of the power supply. |
Note: Some solenoids may include additional terminals for feedback or control, depending on the design.
Usage Instructions
How to Use the Component in a Circuit
- Power Supply: Ensure the solenoid is powered by a DC voltage source within its operating range (e.g., 12V DC).
- Current Control: Use a current-limiting resistor or a driver circuit (e.g., a transistor or MOSFET) to prevent excessive current draw.
- Switching: Use a relay, transistor, or microcontroller (e.g., Arduino UNO) to control the solenoid's activation.
- Diode Protection: Place a flyback diode (e.g., 1N4007) across the solenoid terminals to protect the circuit from voltage spikes caused by inductive kickback when the solenoid is turned off.
Important Considerations and Best Practices
- Heat Management: Solenoids can generate heat during operation. Ensure proper ventilation or heat dissipation to avoid overheating.
- Duty Cycle: Operate the solenoid within its specified duty cycle to prevent damage to the coil or core.
- Mounting: Secure the solenoid firmly to prevent movement or vibration during operation.
- Polarity: Always connect the solenoid with the correct polarity to avoid malfunction.
Example: Connecting an Iron Core Solenoid to an Arduino UNO
Below is an example of how to control an iron core solenoid using an Arduino UNO and a transistor.
Circuit Components
- Arduino UNO
- Iron core solenoid
- NPN transistor (e.g., 2N2222)
- Flyback diode (e.g., 1N4007)
- Resistor (1kΩ)
- External power supply (e.g., 12V DC)
Circuit Diagram
- Connect the solenoid's positive terminal to the 12V power supply.
- Connect the solenoid's negative terminal to the collector of the NPN transistor.
- Connect the emitter of the transistor to ground.
- Place a flyback diode across the solenoid terminals (cathode to positive, anode to negative).
- Connect the base of the transistor to a 1kΩ resistor, and connect the other end of the resistor to an Arduino digital pin (e.g., pin 9).
Arduino Code
// Define the pin connected to the transistor base
const int solenoidPin = 9;

void setup() {
  pinMode(solenoidPin, OUTPUT); // Set the solenoid pin as an output
}

void loop() {
  digitalWrite(solenoidPin, HIGH); // Activate the solenoid
  delay(1000); // Keep the solenoid on for 1 second
  digitalWrite(solenoidPin, LOW);  // Deactivate the solenoid
  delay(1000); // Wait for 1 second before reactivating
}
Note: Ensure the external power supply's ground is connected to the Arduino's ground.
Troubleshooting and FAQs
Common Issues and Solutions
Solenoid Not Activating
- Cause: Insufficient voltage or current.
- Solution: Verify the power supply voltage and current meet the solenoid's requirements.
Overheating
- Cause: Exceeding the duty cycle or continuous operation.
- Solution: Operate the solenoid within its specified duty cycle and provide adequate cooling.
Voltage Spikes Damaging Components
- Cause: Inductive kickback from the solenoid.
- Solution: Ensure a flyback diode is installed across the solenoid terminals.
Weak Magnetic Field
- Cause: Low current or damaged coil.
- Solution: Check the coil resistance and ensure proper current flow.
FAQs
Q: Can I use an AC power supply for an iron core solenoid?
A: Most iron core solenoids are designed for DC operation. Using AC may cause buzzing or reduced performance unless specified by the manufacturer.Q: How do I calculate the resistor value for the transistor base?
A: Use Ohm's Law: ( R = \frac{V_{Arduino} - V_{BE}}{I_{B}} ), where ( V_{BE} ) is the base-emitter voltage (typically 0.7V for an NPN transistor) and ( I_{B} ) is the required base current.Q: Can I operate the solenoid continuously?
A: Only if the solenoid is rated for 100% duty cycle. Otherwise, intermittent operation is recommended to prevent overheating.
By following this documentation, you can effectively integrate and troubleshoot an iron core solenoid in your projects.