Cirkit Designer Logo
Cirkit Designer
Your all-in-one circuit design IDE
Home / 
Component Documentation

How to Use h flow: Examples, Pinouts, and Specs

Image of h flow
Cirkit Designer LogoDesign with h flow in Cirkit Designer

Introduction

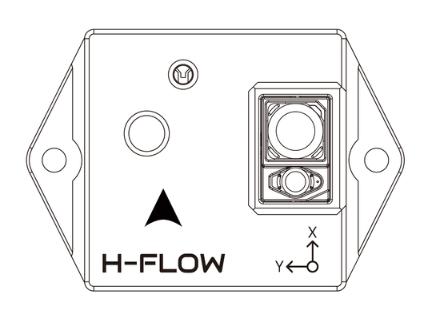
The H Flow is a versatile electronic component designed to control the flow of fluid or gas in a circuit. It is commonly used in hydraulic and pneumatic systems to regulate pressure, direction, and flow rate. This component is essential in applications requiring precise control of fluid dynamics, such as industrial automation, robotics, and HVAC systems.

Explore Projects Built with h flow

Use Cirkit Designer to design, explore, and prototype these projects online. Some projects support real-time simulation. Click "Open Project" to start designing instantly!
ESP32-Based Environmental Monitoring System with Water Flow Sensing
Image of Water: A project utilizing h flow in a practical application
This circuit features an ESP32 Devkit V1 microcontroller connected to a DHT22 temperature and humidity sensor and a water flow sensor. The ESP32 reads environmental data from the DHT22 via a digital input pin (D33) and monitors water flow through the water flow sensor connected to another digital input pin (D23). The ESP32 is powered through its VIN pin, and both sensors are powered by the ESP32's 3V3 output, with common ground connections.
Cirkit Designer LogoOpen Project in Cirkit Designer
ESP32-Based Smart Irrigation and Environmental Monitoring System
Image of Skripsi: A project utilizing h flow in a practical application
This is an automated environmental control system for plant growth that uses an ESP32 to monitor soil moisture and pH levels, and to manage irrigation through solenoid valves. The system aims to maintain optimal growing conditions by adjusting watering schedules based on sensor inputs.
Cirkit Designer LogoOpen Project in Cirkit Designer
Arduino UNO-Based Smart Irrigation System with Motion Detection and Bluetooth Connectivity
Image of Copy of wiring TA: A project utilizing h flow in a practical application
This circuit is a microcontroller-based control and monitoring system. It uses an Arduino UNO to read from a DHT22 temperature and humidity sensor and an HC-SR501 motion sensor, display data on an LCD, and control a water pump and an LED through a relay. The HC-05 Bluetooth module allows for wireless communication.
Cirkit Designer LogoOpen Project in Cirkit Designer
YF-S201 Water Flow Meter Interface with SN74AHCT125N Level Shifter
Image of Copy of flow: A project utilizing h flow in a practical application
This circuit is designed to interface a YF-S201 Water Flow Meter with an SN74AHCT125N buffer/level shifter, likely for signal conditioning purposes. The power supply provides the necessary voltage to the flow meter, and decoupling capacitors are used to stabilize the buffer's power supply. The circuit is prepared for further expansion or connection to a microcontroller for data processing, although no microcontroller or its code is included in the provided information.
Cirkit Designer LogoOpen Project in Cirkit Designer

Explore Projects Built with h flow

Use Cirkit Designer to design, explore, and prototype these projects online. Some projects support real-time simulation. Click "Open Project" to start designing instantly!
Image of Water: A project utilizing h flow in a practical application
ESP32-Based Environmental Monitoring System with Water Flow Sensing
This circuit features an ESP32 Devkit V1 microcontroller connected to a DHT22 temperature and humidity sensor and a water flow sensor. The ESP32 reads environmental data from the DHT22 via a digital input pin (D33) and monitors water flow through the water flow sensor connected to another digital input pin (D23). The ESP32 is powered through its VIN pin, and both sensors are powered by the ESP32's 3V3 output, with common ground connections.
Cirkit Designer LogoOpen Project in Cirkit Designer
Image of Skripsi: A project utilizing h flow in a practical application
ESP32-Based Smart Irrigation and Environmental Monitoring System
This is an automated environmental control system for plant growth that uses an ESP32 to monitor soil moisture and pH levels, and to manage irrigation through solenoid valves. The system aims to maintain optimal growing conditions by adjusting watering schedules based on sensor inputs.
Cirkit Designer LogoOpen Project in Cirkit Designer
Image of Copy of wiring TA: A project utilizing h flow in a practical application
Arduino UNO-Based Smart Irrigation System with Motion Detection and Bluetooth Connectivity
This circuit is a microcontroller-based control and monitoring system. It uses an Arduino UNO to read from a DHT22 temperature and humidity sensor and an HC-SR501 motion sensor, display data on an LCD, and control a water pump and an LED through a relay. The HC-05 Bluetooth module allows for wireless communication.
Cirkit Designer LogoOpen Project in Cirkit Designer
Image of Copy of flow: A project utilizing h flow in a practical application
YF-S201 Water Flow Meter Interface with SN74AHCT125N Level Shifter
This circuit is designed to interface a YF-S201 Water Flow Meter with an SN74AHCT125N buffer/level shifter, likely for signal conditioning purposes. The power supply provides the necessary voltage to the flow meter, and decoupling capacitors are used to stabilize the buffer's power supply. The circuit is prepared for further expansion or connection to a microcontroller for data processing, although no microcontroller or its code is included in the provided information.
Cirkit Designer LogoOpen Project in Cirkit Designer

Common Applications and Use Cases

  • Hydraulic systems for controlling actuator movement
  • Pneumatic systems for regulating air pressure and flow
  • Industrial automation for fluid control in manufacturing processes
  • Robotics for managing pneumatic or hydraulic actuators
  • HVAC systems for controlling airflow and pressure

Technical Specifications

The H Flow component is available in various configurations to suit different system requirements. Below are the general technical specifications:

Key Technical Details

Parameter Value
Operating Voltage 12V to 24V DC
Operating Current 50mA to 200mA
Maximum Pressure Rating 10 MPa (megapascals)
Flow Rate Range 0.1 L/min to 10 L/min
Control Signal Type PWM (Pulse Width Modulation)
Operating Temperature -20°C to 80°C
Material Stainless Steel / Brass

Pin Configuration and Descriptions

The H Flow typically comes with a 4-pin connector for electrical interfacing. Below is the pin configuration:

Pin Number Name Description
1 VCC Power supply input (12V to 24V DC)
2 GND Ground connection
3 Control PWM input for flow control
4 Feedback Analog output for flow rate or pressure feedback

Usage Instructions

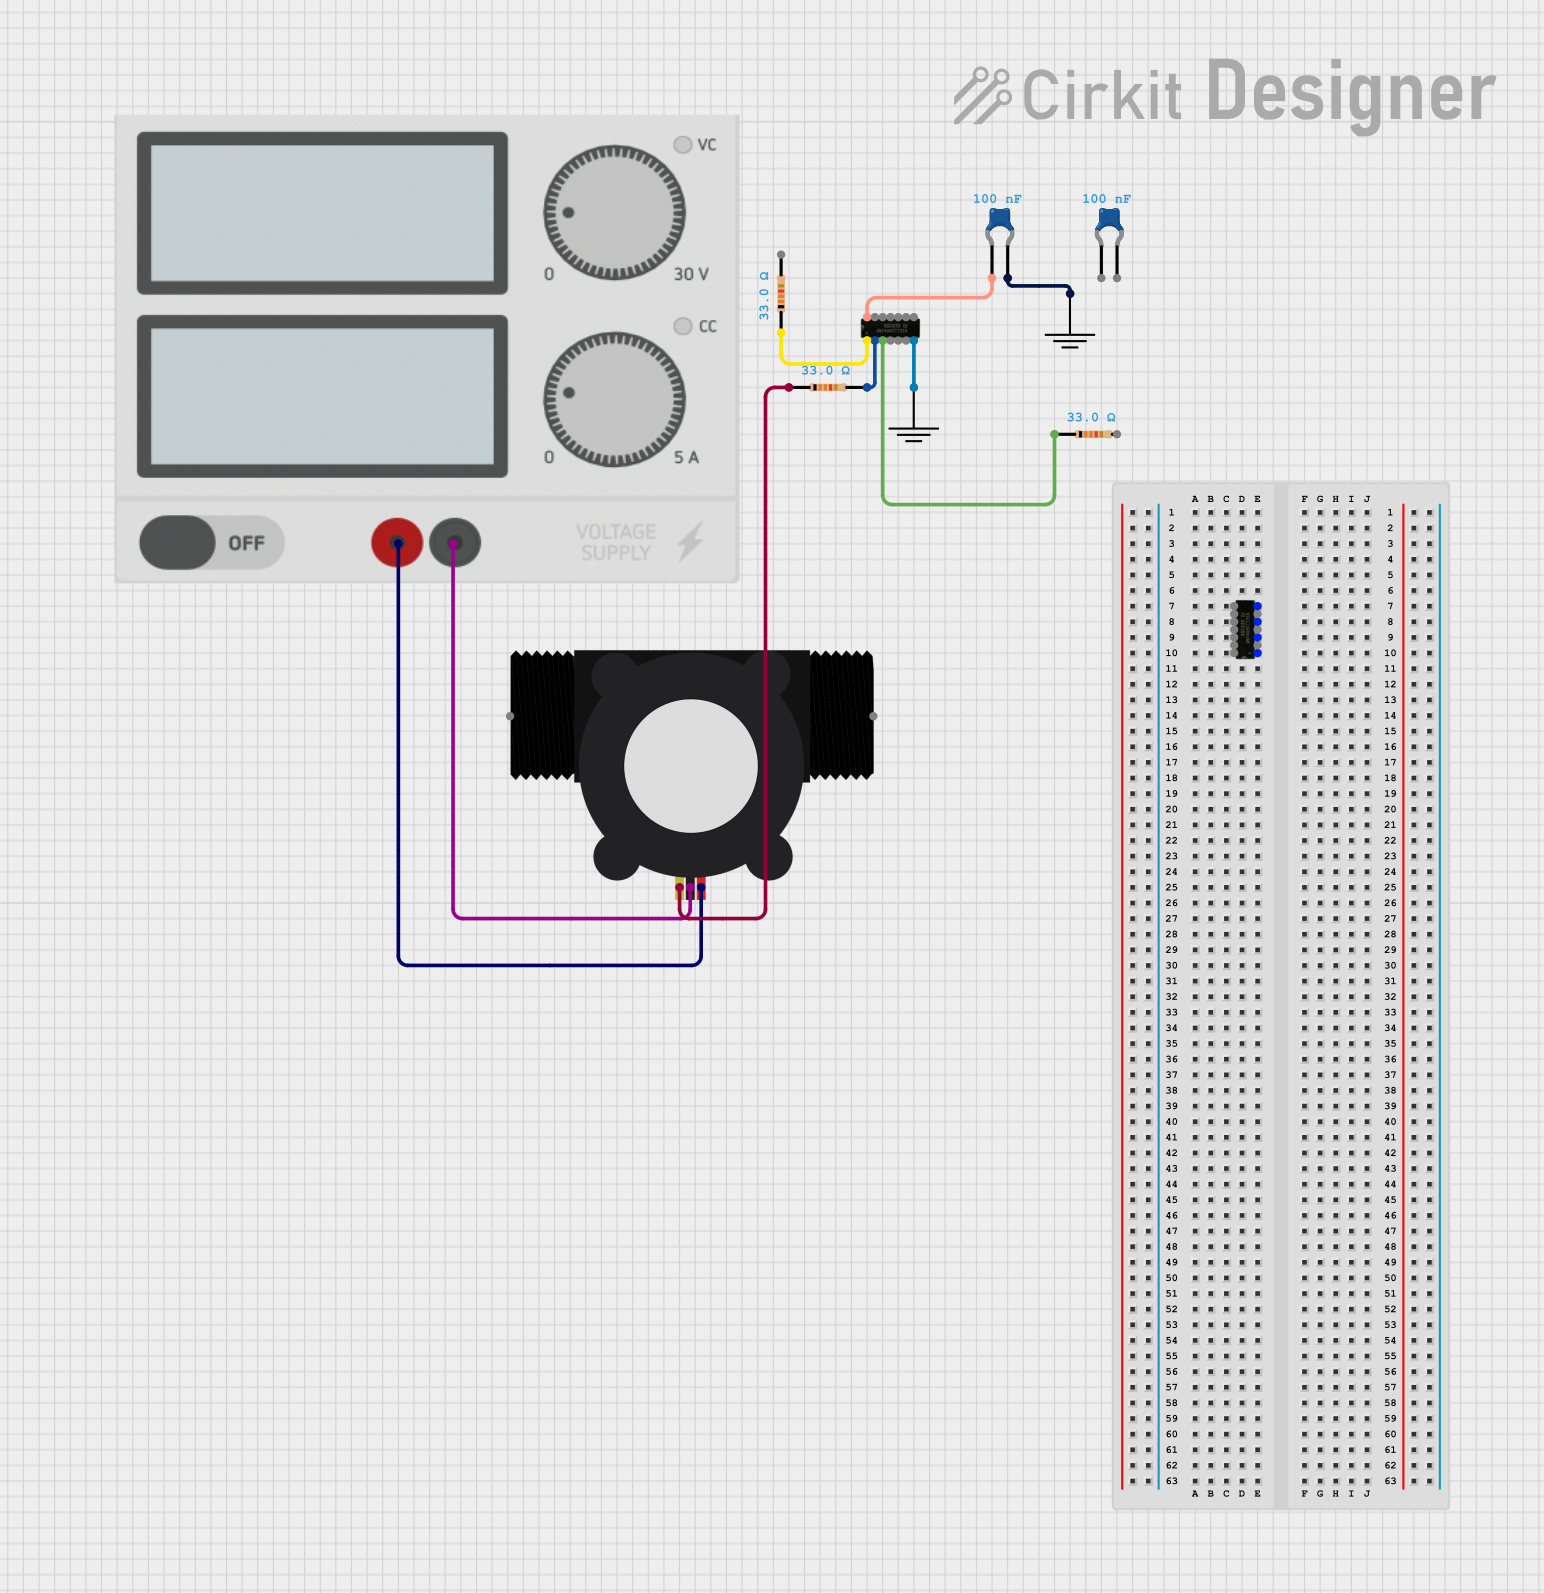
How to Use the H Flow in a Circuit

  1. Power Supply: Connect the VCC pin to a regulated DC power supply (12V to 24V) and the GND pin to the ground of the circuit.
  2. Control Signal: Use a microcontroller (e.g., Arduino UNO) to generate a PWM signal for the Control pin. The duty cycle of the PWM signal determines the flow rate.
  3. Feedback Monitoring: Connect the Feedback pin to an analog input on the microcontroller to monitor the flow rate or pressure in real-time.

Important Considerations and Best Practices

  • Ensure the operating voltage and current are within the specified range to avoid damage.
  • Use appropriate filters or regulators to maintain a stable power supply.
  • Avoid exposing the component to temperatures beyond its operating range.
  • Use proper sealing and fittings to prevent fluid or gas leakage.
  • If using with an Arduino UNO, ensure the PWM frequency matches the component's requirements (typically 1 kHz to 10 kHz).

Example Code for Arduino UNO

Below is an example of how to control the H Flow component using an Arduino UNO:

// Define the PWM pin connected to the Control pin of the H Flow
const int controlPin = 9;

// Define the analog pin connected to the Feedback pin of the H Flow
const int feedbackPin = A0;

void setup() {
  // Set the control pin as an output
  pinMode(controlPin, OUTPUT);

  // Initialize serial communication for monitoring feedback
  Serial.begin(9600);
}

void loop() {
  // Set the flow rate by adjusting the PWM duty cycle (0 to 255)
  int flowRate = 128; // 50% duty cycle for medium flow
  analogWrite(controlPin, flowRate);

  // Read the feedback signal (analog value)
  int feedbackValue = analogRead(feedbackPin);

  // Convert the feedback value to a meaningful unit (e.g., flow rate or pressure)
  float flowRateFeedback = feedbackValue * (10.0 / 1023.0); // Example conversion

  // Print the feedback value to the serial monitor
  Serial.print("Flow Rate Feedback: ");
  Serial.print(flowRateFeedback);
  Serial.println(" L/min");

  // Add a delay for stability
  delay(500);
}

Troubleshooting and FAQs

Common Issues and Solutions

  1. No Flow or Incorrect Flow Rate

    • Cause: Incorrect PWM signal or power supply issues.
    • Solution: Verify the PWM signal frequency and duty cycle. Ensure the power supply voltage is within the specified range.
  2. Erratic Feedback Signal

    • Cause: Electrical noise or poor grounding.
    • Solution: Use decoupling capacitors near the power supply pins and ensure a solid ground connection.
  3. Overheating

    • Cause: Operating beyond the specified pressure or temperature range.
    • Solution: Reduce the operating pressure or ensure proper cooling.
  4. Fluid or Gas Leakage

    • Cause: Improper sealing or damaged fittings.
    • Solution: Inspect and replace seals or fittings as needed.

FAQs

Q: Can the H Flow handle corrosive fluids?
A: The material of the H Flow (stainless steel or brass) determines its compatibility with corrosive fluids. Check the material specifications before use.

Q: What is the maximum PWM frequency supported?
A: The H Flow typically supports PWM frequencies between 1 kHz and 10 kHz. Refer to the datasheet for exact details.

Q: Can I use the H Flow with a 5V microcontroller?
A: Yes, but you will need a level shifter or a transistor circuit to step up the control signal to the required voltage level.

Q: How do I clean the H Flow?
A: Disconnect the component from the circuit and flush it with a compatible cleaning fluid. Ensure it is completely dry before reinstallation.