How to Use Humidity Sensor: Examples, Pinouts, and Specs
Introduction
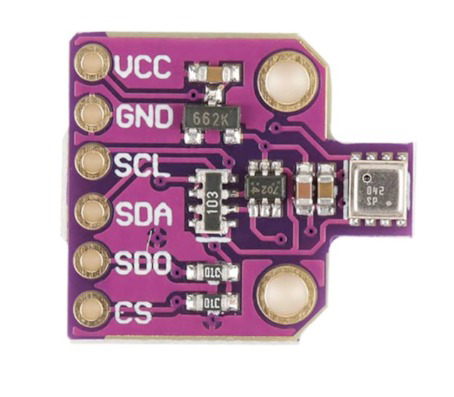
The SHT20 is a high-precision humidity sensor manufactured by Sensirion. It is designed to measure the amount of moisture in the air and is widely used in applications such as HVAC systems, weather stations, and industrial environments where monitoring and controlling humidity levels are critical. The SHT20 offers reliable performance, low power consumption, and a compact design, making it suitable for a variety of embedded systems and IoT applications.
Explore Projects Built with Humidity Sensor

Explore Projects Built with Humidity Sensor
Technical Specifications
The SHT20 is a digital humidity and temperature sensor that communicates via the I²C protocol. Below are its key technical details:
Key Specifications
| Parameter | Value |
|---|---|
| Supply Voltage (VDD) | 2.1V to 3.6V |
| Average Current | 240 µA |
| Humidity Measurement Range | 0% RH to 100% RH |
| Humidity Accuracy | ±3% RH (typical) |
| Temperature Measurement Range | -40°C to +125°C |
| Temperature Accuracy | ±0.3°C (typical) |
| Communication Protocol | I²C |
| Operating Temperature | -40°C to +125°C |
| Response Time (τ63%) | 8 seconds (typical) |
| Dimensions | 3 x 3 x 1.1 mm |
Pin Configuration and Descriptions
The SHT20 sensor has four pins, as described in the table below:
| Pin Number | Pin Name | Description |
|---|---|---|
| 1 | VDD | Power supply (2.1V to 3.6V) |
| 2 | GND | Ground |
| 3 | SDA | Serial Data Line for I²C communication |
| 4 | SCL | Serial Clock Line for I²C communication |
Usage Instructions
How to Use the SHT20 in a Circuit
- Power Supply: Connect the VDD pin to a 3.3V power source and the GND pin to ground.
- I²C Communication: Connect the SDA and SCL pins to the corresponding I²C pins on your microcontroller. Use pull-up resistors (typically 4.7 kΩ) on both SDA and SCL lines.
- Initialization: Configure your microcontroller to communicate with the SHT20 using the I²C protocol. The default I²C address of the SHT20 is
0x40. - Data Reading: Send the appropriate command to the sensor to read humidity or temperature data. The sensor will return the data in a 16-bit format.
Important Considerations and Best Practices
- Avoid Condensation: Ensure the sensor is not exposed to condensation, as this can affect its accuracy and longevity.
- Placement: Place the sensor in a location with good airflow for accurate readings.
- Calibration: The SHT20 is factory-calibrated, so no additional calibration is required.
- Power Supply Stability: Use a stable power supply to avoid measurement errors.
- Pull-Up Resistors: Ensure proper pull-up resistors are used on the I²C lines to maintain signal integrity.
Example Code for Arduino UNO
Below is an example of how to interface the SHT20 with an Arduino UNO to read humidity and temperature:
#include <Wire.h>

// SHT20 I2C address
#define SHT20_ADDRESS 0x40

// Command to trigger humidity measurement
#define TRIGGER_HUMIDITY_MEASUREMENT 0xE5
// Command to trigger temperature measurement
#define TRIGGER_TEMPERATURE_MEASUREMENT 0xE3

void setup() {
  Wire.begin(); // Initialize I2C communication
  Serial.begin(9600); // Initialize serial communication
  Serial.println("SHT20 Sensor Initialization...");
}

void loop() {
  float humidity = readHumidity();
  float temperature = readTemperature();

  Serial.print("Humidity: ");
  Serial.print(humidity);
  Serial.println(" %RH");

  Serial.print("Temperature: ");
  Serial.print(temperature);
  Serial.println(" °C");

  delay(2000); // Wait 2 seconds before the next reading
}

float readHumidity() {
  uint16_t rawHumidity = readSensor(TRIGGER_HUMIDITY_MEASUREMENT);
  // Convert raw data to relative humidity
  return -6.0 + 125.0 * (rawHumidity / 65536.0);
}

float readTemperature() {
  uint16_t rawTemperature = readSensor(TRIGGER_TEMPERATURE_MEASUREMENT);
  // Convert raw data to temperature in Celsius
  return -46.85 + 175.72 * (rawTemperature / 65536.0);
}

uint16_t readSensor(uint8_t command) {
  Wire.beginTransmission(SHT20_ADDRESS);
  Wire.write(command); // Send measurement command
  Wire.endTransmission();
  delay(85); // Wait for measurement to complete

  Wire.requestFrom(SHT20_ADDRESS, 2); // Request 2 bytes of data
  if (Wire.available() == 2) {
    uint16_t data = Wire.read() << 8; // Read MSB
    data |= Wire.read(); // Read LSB
    return data & 0xFFFC; // Mask out status bits
  } else {
    Serial.println("Error: No data received from sensor!");
    return 0;
  }
}
Troubleshooting and FAQs
Common Issues
No Data Received from Sensor:
- Cause: Incorrect wiring or missing pull-up resistors on the I²C lines.
- Solution: Double-check the wiring and ensure pull-up resistors are connected to SDA and SCL.
Inaccurate Readings:
- Cause: Sensor exposed to condensation or placed in a poorly ventilated area.
- Solution: Ensure the sensor is in a dry, well-ventilated location.
I²C Communication Failure:
- Cause: Incorrect I²C address or clock speed mismatch.
- Solution: Verify the I²C address (
0x40) and ensure the microcontroller's I²C clock speed is compatible.
FAQs
Q: Can the SHT20 measure both humidity and temperature simultaneously?
A: No, the SHT20 measures humidity and temperature sequentially. You must send separate commands for each measurement.Q: Do I need to calibrate the SHT20?
A: No, the SHT20 is factory-calibrated and does not require additional calibration.Q: What is the typical lifespan of the SHT20 sensor?
A: The sensor is designed for long-term use and can last several years under normal operating conditions.Q: Can the SHT20 operate at 5V?
A: No, the SHT20 operates within a supply voltage range of 2.1V to 3.6V. Use a voltage regulator or level shifter if interfacing with a 5V system.