Cirkit Designer Logo
Cirkit Designer
Your all-in-one circuit design IDE
Home / 
Component Documentation

How to Use Solenoid: Examples, Pinouts, and Specs

Image of Solenoid
Cirkit Designer LogoDesign with Solenoid in Cirkit Designer

Introduction

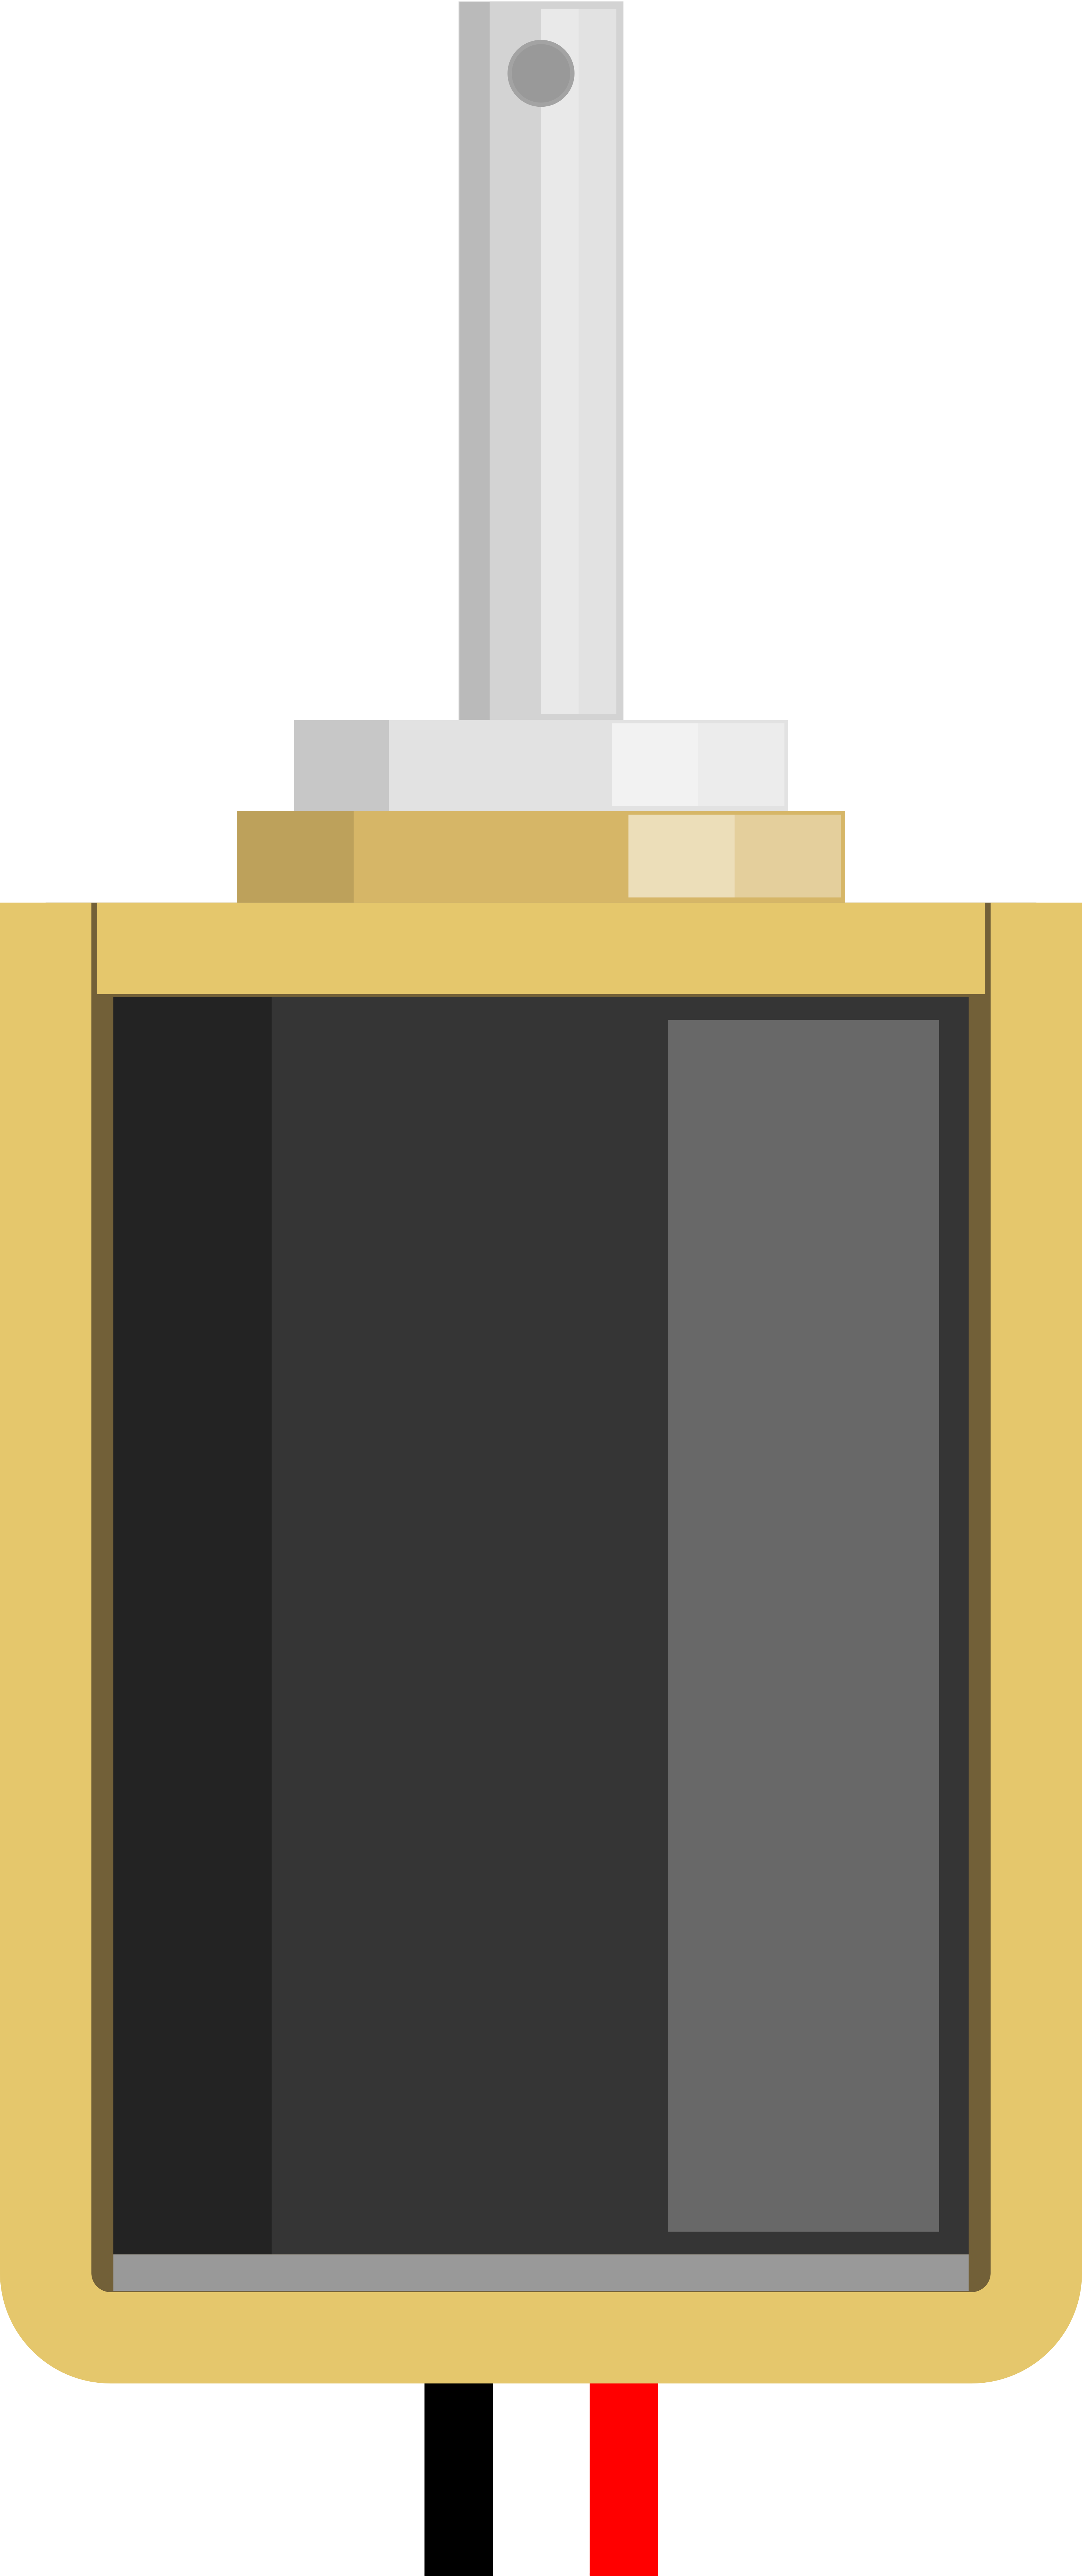
A solenoid is an electromechanical device designed to convert electrical energy into linear mechanical motion. When an electric current passes through the coil of wire within the solenoid, it creates a magnetic field that moves a ferromagnetic core (plunger) either in or out of the coil, depending on the design. Solenoids are widely used in various applications, including electric door locks, actuators in automotive engineering, industrial machinery, and as valves in fluid control systems.

Explore Projects Built with Solenoid

Use Cirkit Designer to design, explore, and prototype these projects online. Some projects support real-time simulation. Click "Open Project" to start designing instantly!
Arduino Mega 2560 Controlled Solenoid with 5V Relay
Image of pnematic suction: A project utilizing Solenoid in a practical application
This circuit uses an Arduino Mega 2560 to control a 5V relay, which in turn operates a solenoid. The relay is powered by the Arduino and a DC power source, and the solenoid is connected through a diode for protection against back EMF.
Cirkit Designer LogoOpen Project in Cirkit Designer
Arduino Mega 2560 Controlled Dual Solenoid Actuator with Rotary Potentiometer
Image of Solenoid_project: A project utilizing Solenoid in a practical application
This circuit uses an Arduino Mega 2560 to control two solenoids via NPN transistors, with a rotary potentiometer providing variable input. The solenoids are protected by diodes, and resistors are used to limit current through the transistors. The Arduino reads the potentiometer value and can modulate the solenoids' activation through PWM signals.
Cirkit Designer LogoOpen Project in Cirkit Designer
Arduino-Based Security System with Fingerprint Authentication and PIR Detection
Image of Securing Boarding House: A project utilizing Solenoid in a practical application
This circuit is designed to control a solenoid using an Arduino UNO, which is interfaced with a PIR sensor for motion detection and a fingerprint scanner for authentication. The Arduino controls a relay module to switch the solenoid on and off, and it can provide feedback or alerts using a buzzer. The circuit likely serves as a security or access control system, where the solenoid acts as an electronic lock that is triggered by motion and unlocked with a valid fingerprint.
Cirkit Designer LogoOpen Project in Cirkit Designer
Arduino UNO Controlled Relay System with Infrared Proximity Sensors
Image of KRAN OTOMATIS: A project utilizing Solenoid in a practical application
This circuit consists of an Arduino UNO microcontroller interfaced with multiple E18-D80NK infrared proximity sensors and 12V single-channel relays controlling several plastic solenoid valves. The Arduino monitors the sensors and activates the corresponding relays to control the flow through the solenoid valves based on the proximity sensor inputs. A DC power source provides power to the system, with the relays switching the higher voltage lines for the solenoid valves.
Cirkit Designer LogoOpen Project in Cirkit Designer

Explore Projects Built with Solenoid

Use Cirkit Designer to design, explore, and prototype these projects online. Some projects support real-time simulation. Click "Open Project" to start designing instantly!
Image of pnematic suction: A project utilizing Solenoid in a practical application
Arduino Mega 2560 Controlled Solenoid with 5V Relay
This circuit uses an Arduino Mega 2560 to control a 5V relay, which in turn operates a solenoid. The relay is powered by the Arduino and a DC power source, and the solenoid is connected through a diode for protection against back EMF.
Cirkit Designer LogoOpen Project in Cirkit Designer
Image of Solenoid_project: A project utilizing Solenoid in a practical application
Arduino Mega 2560 Controlled Dual Solenoid Actuator with Rotary Potentiometer
This circuit uses an Arduino Mega 2560 to control two solenoids via NPN transistors, with a rotary potentiometer providing variable input. The solenoids are protected by diodes, and resistors are used to limit current through the transistors. The Arduino reads the potentiometer value and can modulate the solenoids' activation through PWM signals.
Cirkit Designer LogoOpen Project in Cirkit Designer
Image of Securing Boarding House: A project utilizing Solenoid in a practical application
Arduino-Based Security System with Fingerprint Authentication and PIR Detection
This circuit is designed to control a solenoid using an Arduino UNO, which is interfaced with a PIR sensor for motion detection and a fingerprint scanner for authentication. The Arduino controls a relay module to switch the solenoid on and off, and it can provide feedback or alerts using a buzzer. The circuit likely serves as a security or access control system, where the solenoid acts as an electronic lock that is triggered by motion and unlocked with a valid fingerprint.
Cirkit Designer LogoOpen Project in Cirkit Designer
Image of KRAN OTOMATIS: A project utilizing Solenoid in a practical application
Arduino UNO Controlled Relay System with Infrared Proximity Sensors
This circuit consists of an Arduino UNO microcontroller interfaced with multiple E18-D80NK infrared proximity sensors and 12V single-channel relays controlling several plastic solenoid valves. The Arduino monitors the sensors and activates the corresponding relays to control the flow through the solenoid valves based on the proximity sensor inputs. A DC power source provides power to the system, with the relays switching the higher voltage lines for the solenoid valves.
Cirkit Designer LogoOpen Project in Cirkit Designer

Technical Specifications

General Specifications

  • Operating Voltage Range: Typically 6V to 24V DC
  • Current Rating: Varies with solenoid size and application
  • Power Consumption: Depends on the operating voltage and resistance of the coil
  • Force: Dependent on the design and size of the solenoid
  • Stroke Length: The distance the plunger can move, usually a few millimeters to several centimeters

Pin Configuration and Descriptions

Pin Number Description
1 Solenoid Coil Lead 1
2 Solenoid Coil Lead 2

Note: The solenoid has two leads for the coil, which are not polarized, meaning that the direction of the current does not matter for basic operation.

Usage Instructions

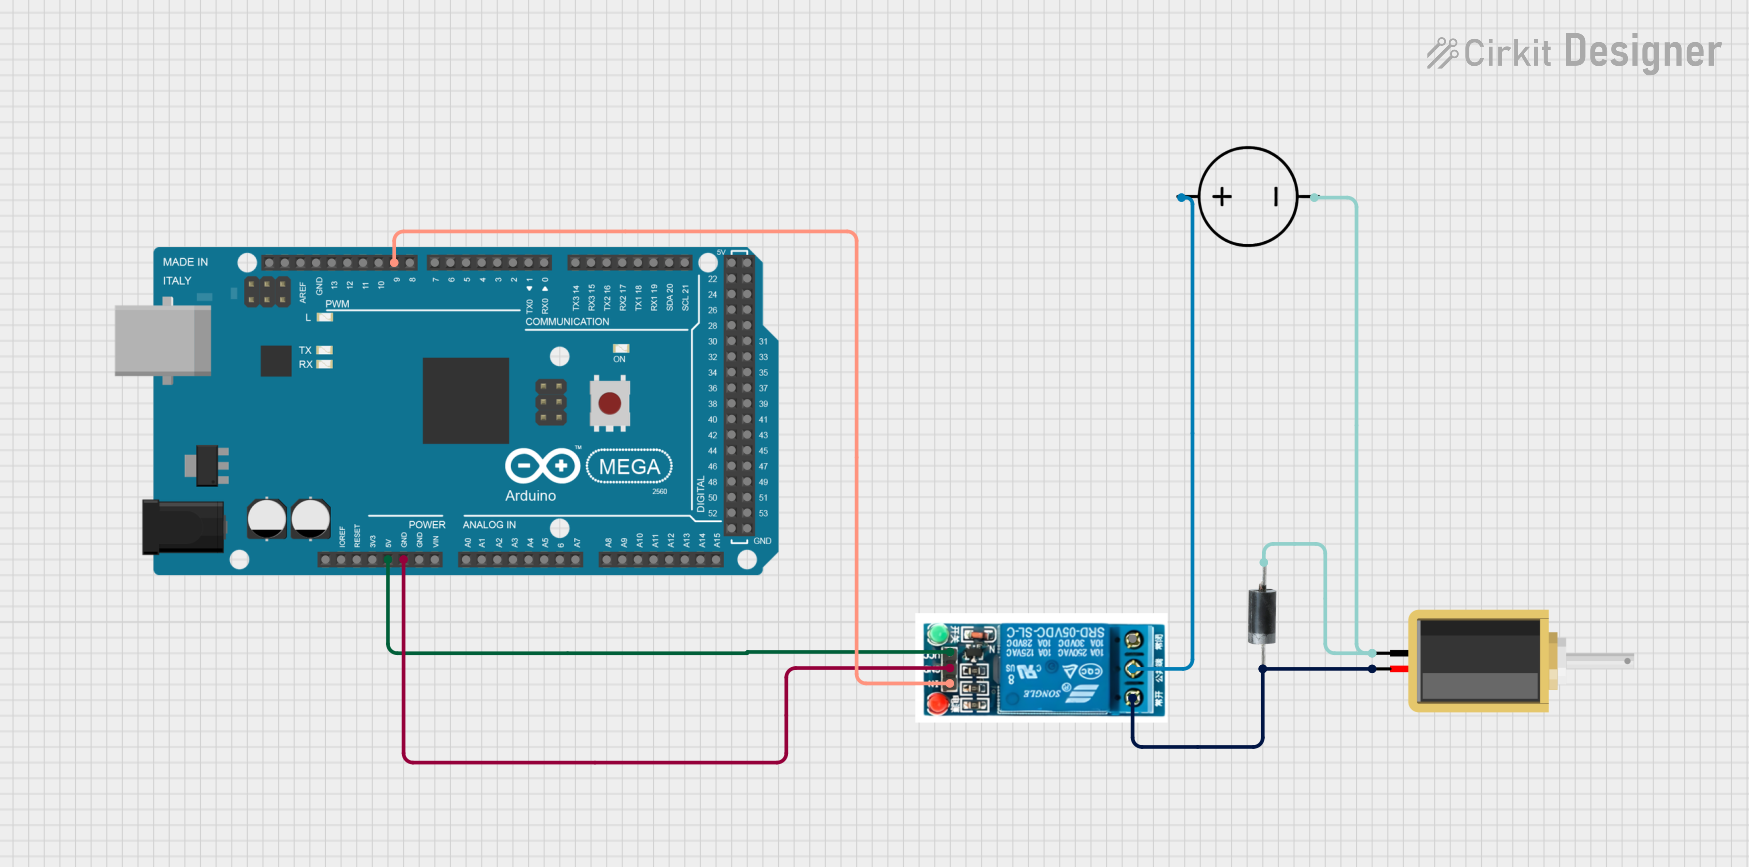
Connecting a Solenoid to a Circuit

  1. Power Source: Connect a suitable power source to the solenoid leads. Ensure that the voltage matches the solenoid's specifications.
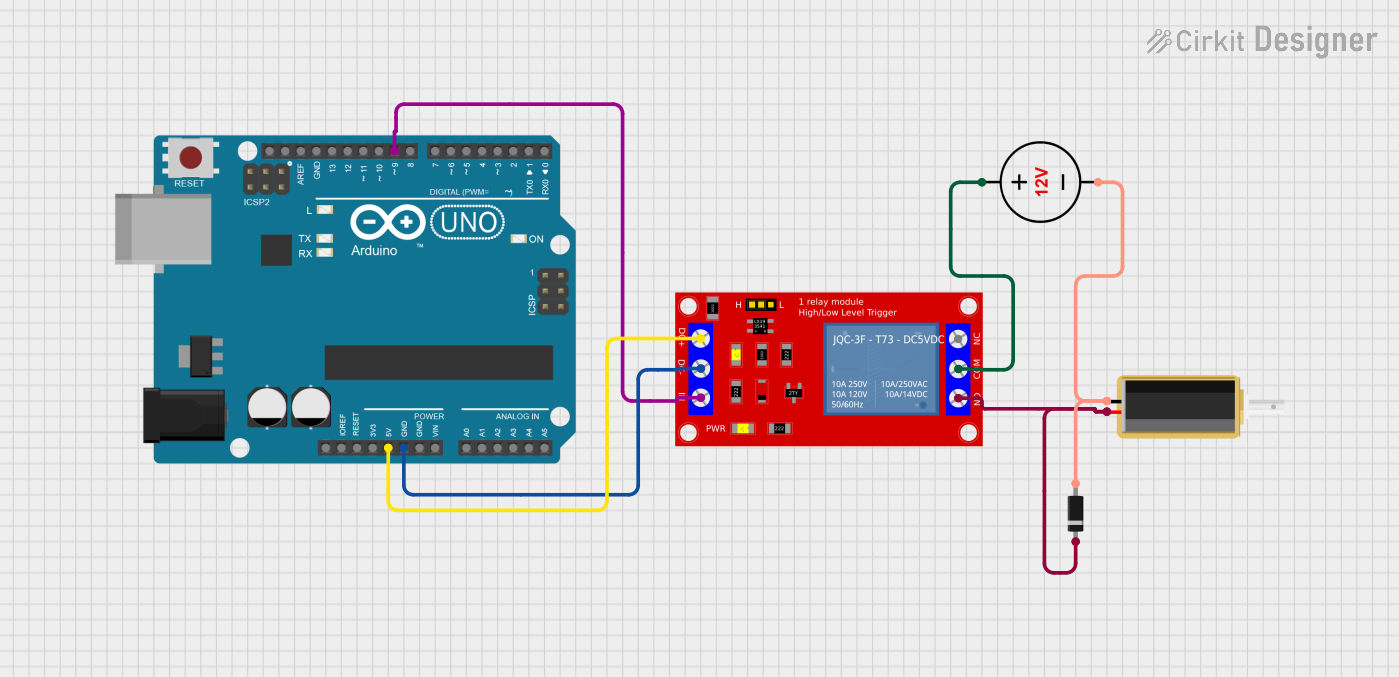
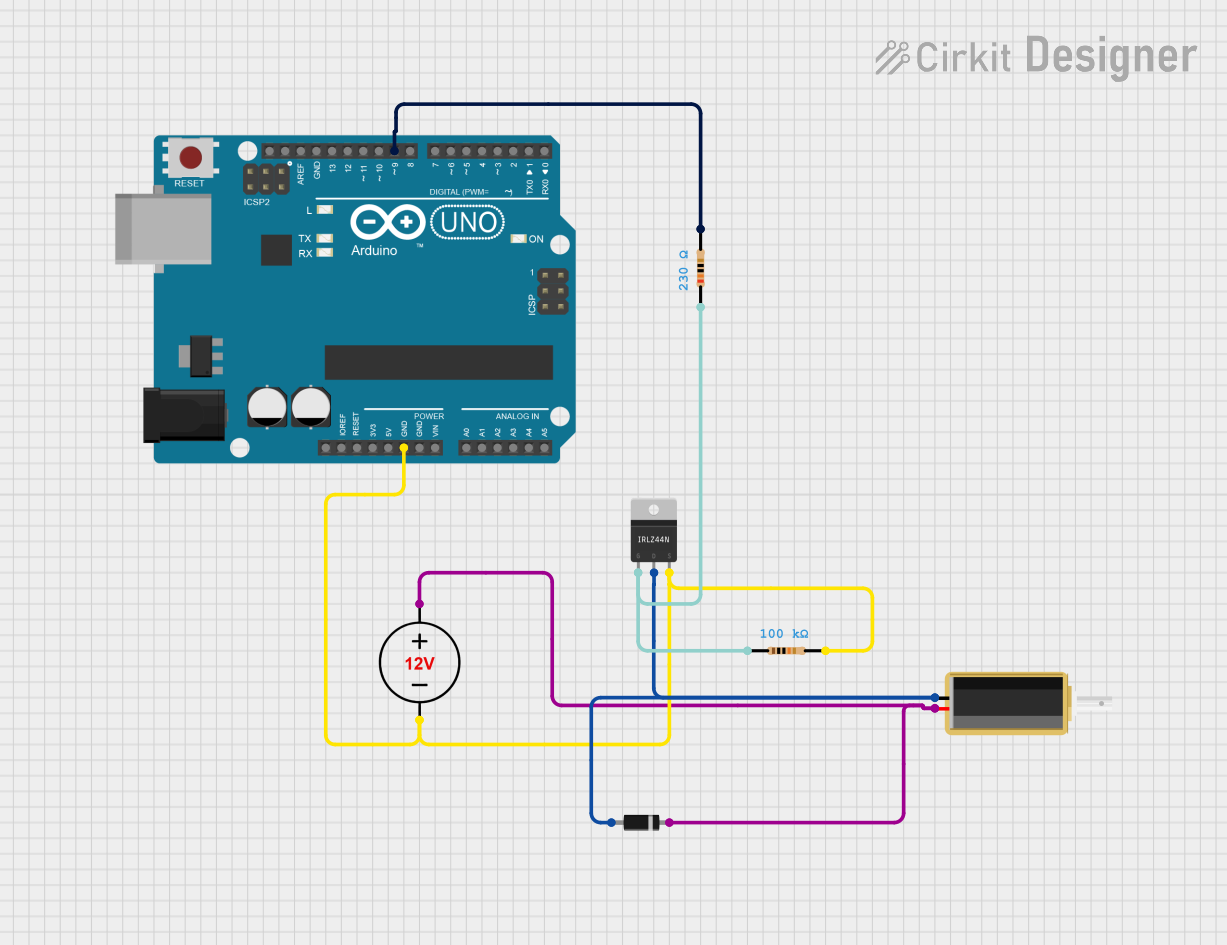
  2. Control Mechanism: Use a transistor, relay, or a microcontroller to control the solenoid. This is necessary to handle the current and to protect the control device from the high inrush current of the solenoid.
  3. Flyback Diode: Always use a flyback diode across the solenoid coil to prevent voltage spikes when the solenoid is turned off. The diode should be connected in reverse bias across the solenoid leads.

Best Practices

  • Duty Cycle: Do not exceed the recommended duty cycle to prevent overheating.
  • Heat Dissipation: Provide adequate ventilation or heat sinks if the solenoid is expected to get warm during operation.
  • Mounting: Secure the solenoid firmly to prevent movement and noise during operation.

Example Code for Arduino UNO

// Example code to control a solenoid with an Arduino UNO

const int solenoidPin = 9; // Connect solenoid to digital pin 9

void setup() {
  pinMode(solenoidPin, OUTPUT); // Set solenoid pin as an output
}

void loop() {
  digitalWrite(solenoidPin, HIGH); // Activate the solenoid
  delay(1000);                     // Keep the solenoid on for 1 second
  digitalWrite(solenoidPin, LOW);  // Deactivate the solenoid
  delay(1000);                     // Wait for 1 second
}

Note: Ensure that you use a transistor or relay to connect the solenoid to the Arduino, as the solenoid may draw more current than the Arduino pin can supply.

Troubleshooting and FAQs

Common Issues

  • Solenoid Does Not Actuate: Check the power supply voltage and connections. Ensure the control circuit is functioning correctly.
  • Overheating: If the solenoid becomes too hot, reduce the duty cycle or improve cooling.
  • Weak Actuation: Ensure the solenoid is rated for the load it is supposed to move. Check for mechanical obstructions.

FAQs

Q: Can I control the solenoid directly from an Arduino pin? A: No, the current required by a solenoid is typically more than an Arduino pin can supply. Use a transistor or relay.

Q: How do I reverse the direction of a solenoid? A: Standard solenoids only move in one direction. To achieve movement in the opposite direction, a spring or external force is usually required to return the plunger.

Q: What is the purpose of the flyback diode? A: The flyback diode protects the control circuit from voltage spikes caused by the inductive "kickback" when the solenoid is turned off.

This documentation provides a comprehensive guide to understanding, connecting, and troubleshooting a solenoid in various applications. Always refer to the specific datasheet of the solenoid model you are using for precise specifications and recommendations.