How to Use 12v air compressor: Examples, Pinouts, and Specs
Introduction
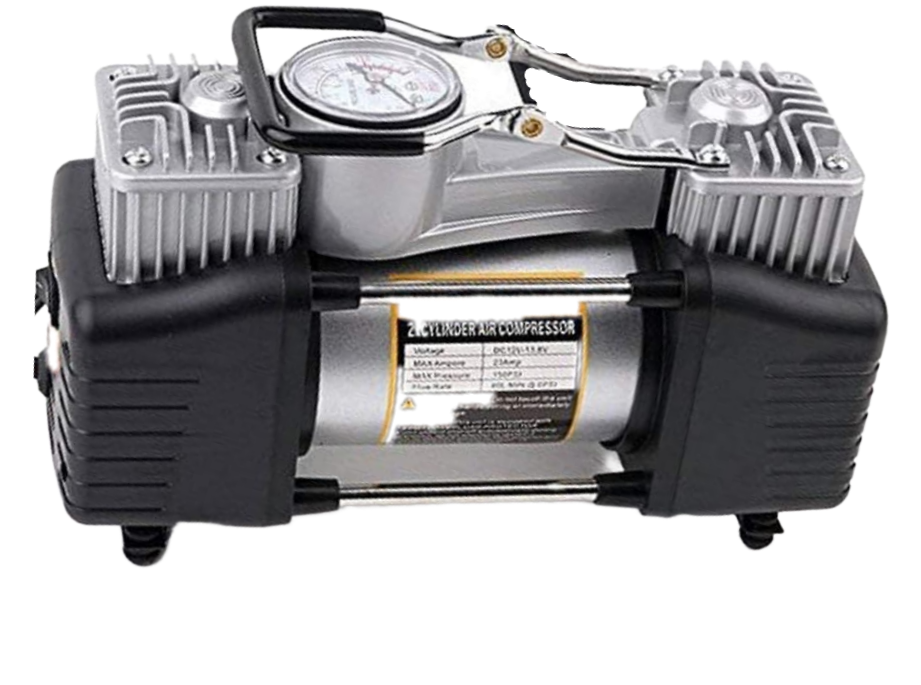
A 12V air compressor is a compact, electrically powered device designed to inflate tires, sports equipment, and other inflatable objects. It operates on a 12-volt power supply, making it ideal for automotive applications, roadside emergencies, or portable use with air tools. These compressors are commonly used due to their portability, ease of use, and compatibility with car cigarette lighter sockets or other 12V power sources.
Explore Projects Built with 12v air compressor
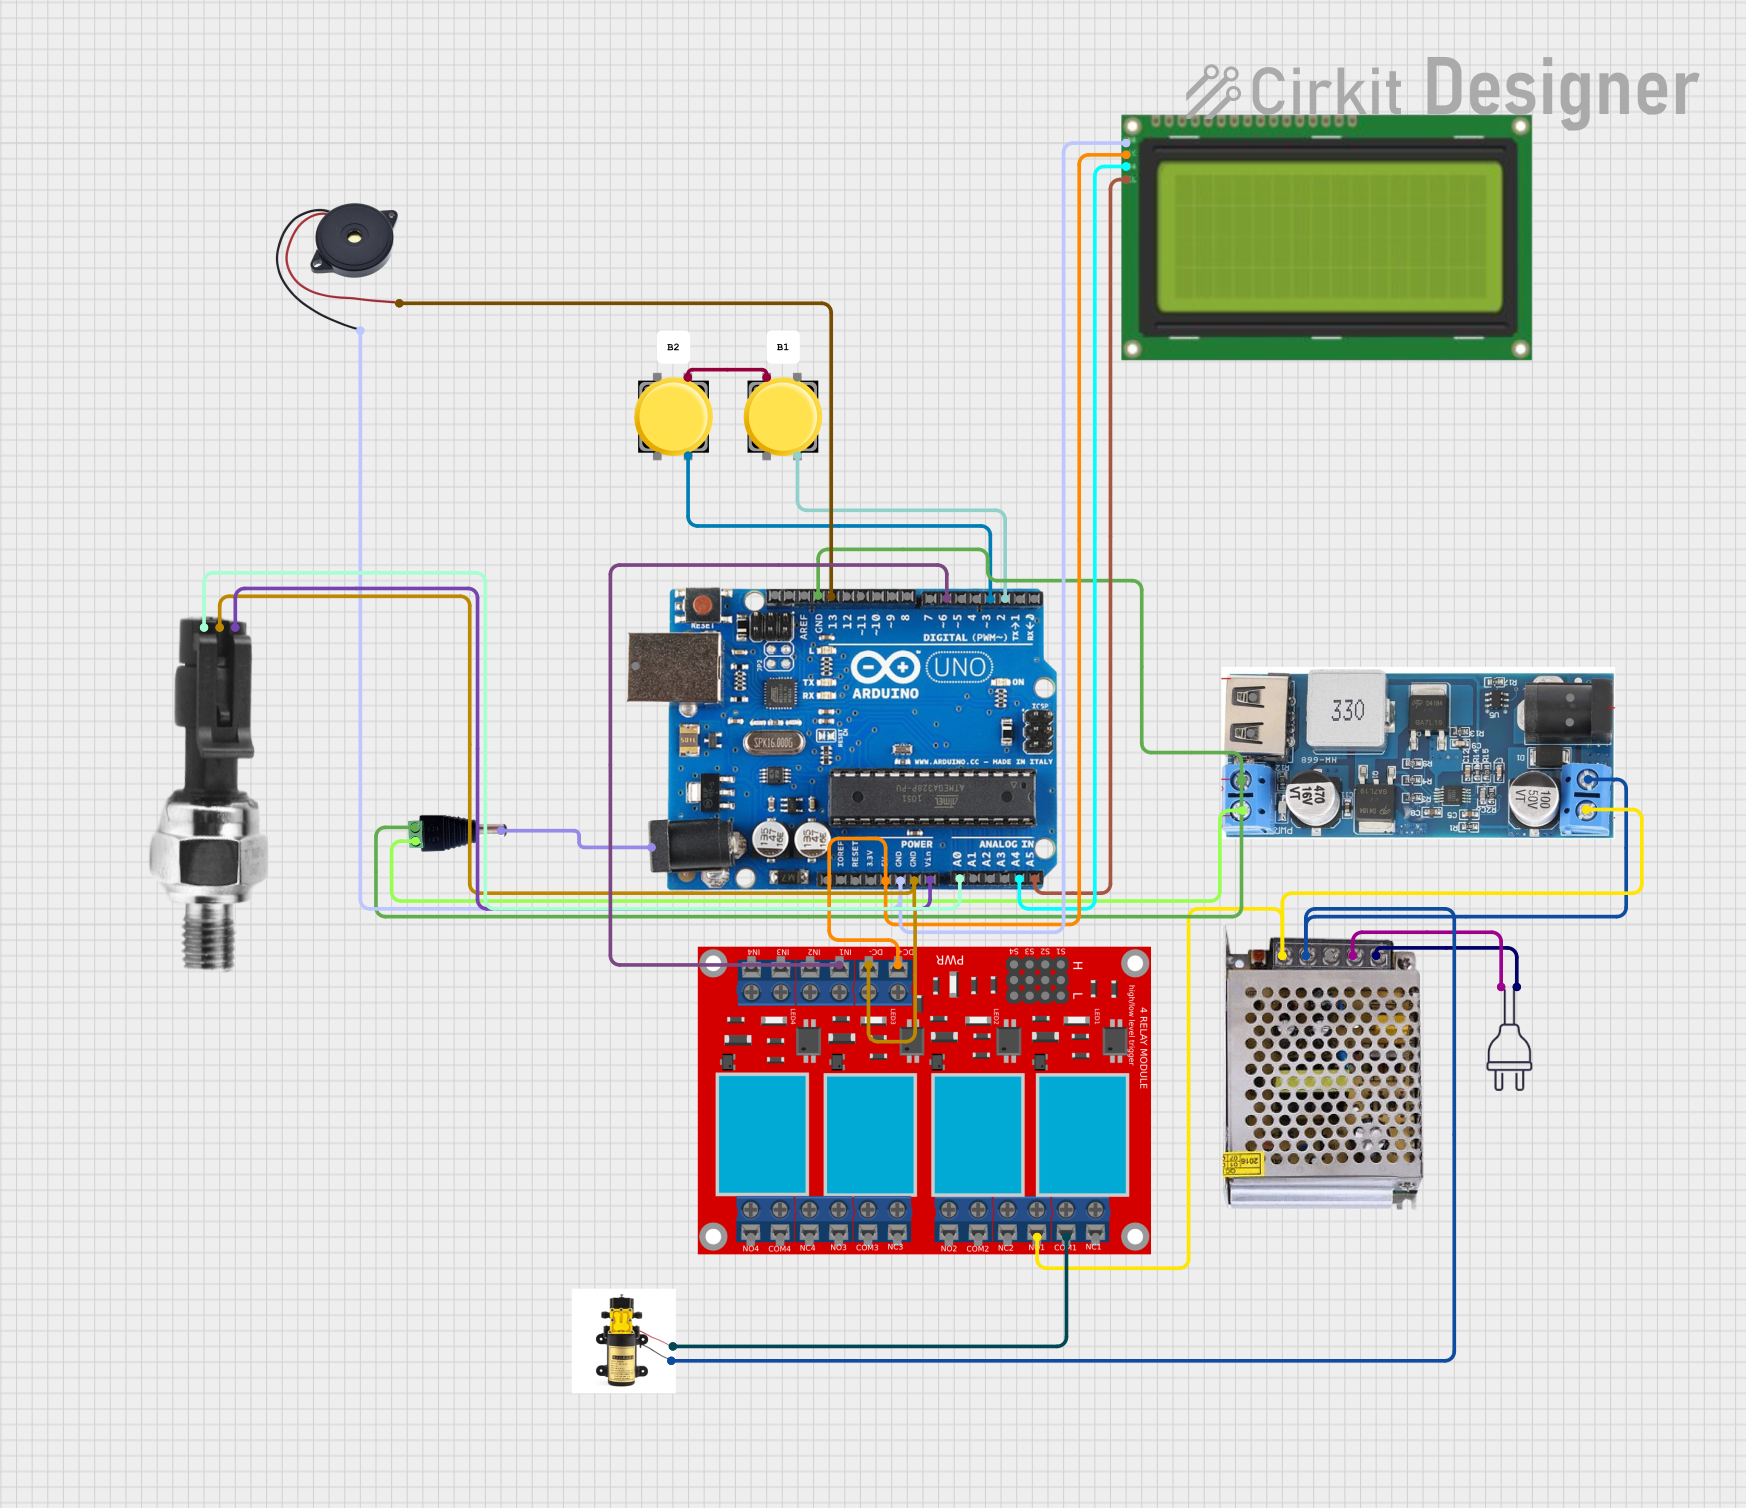
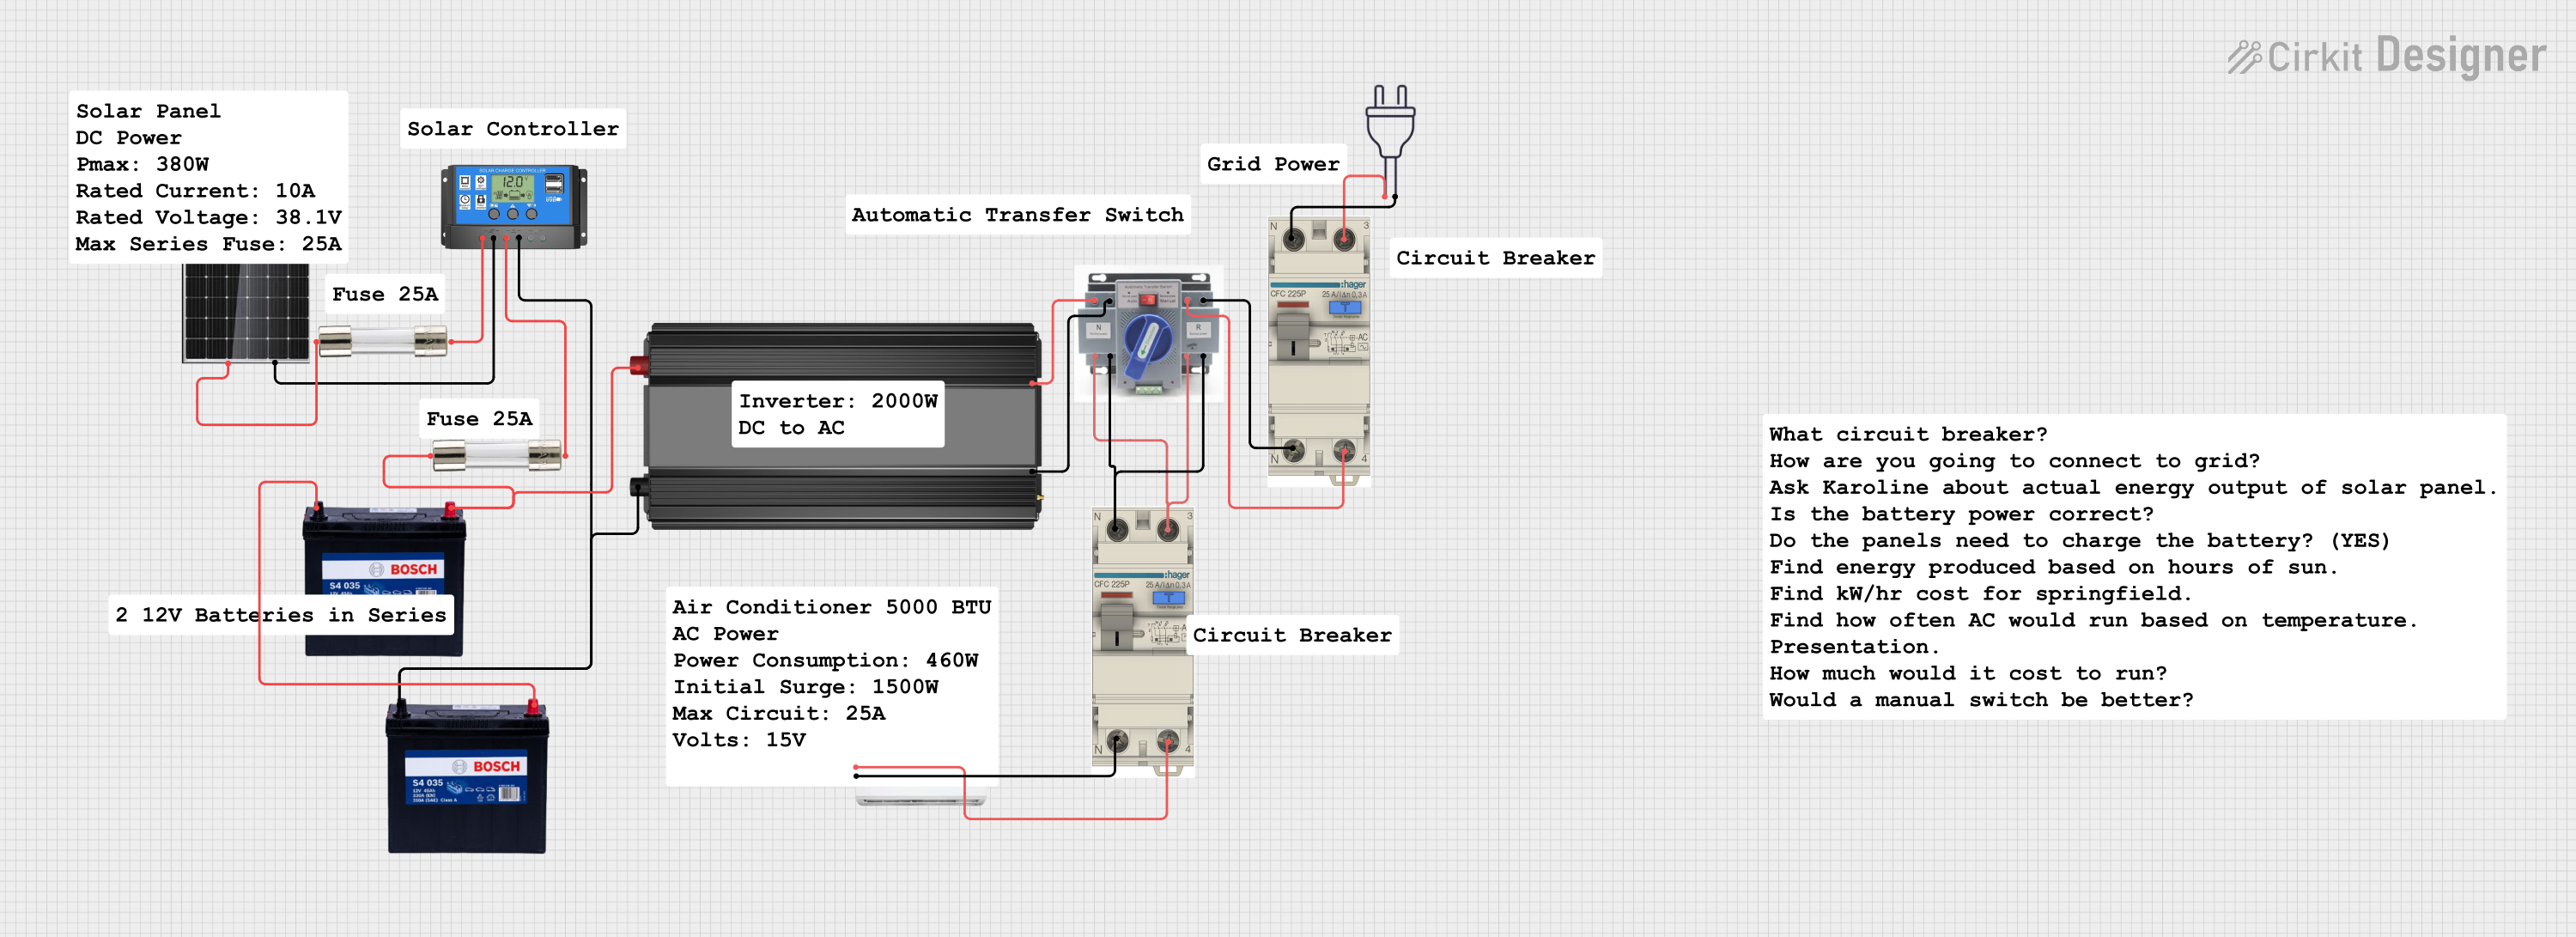

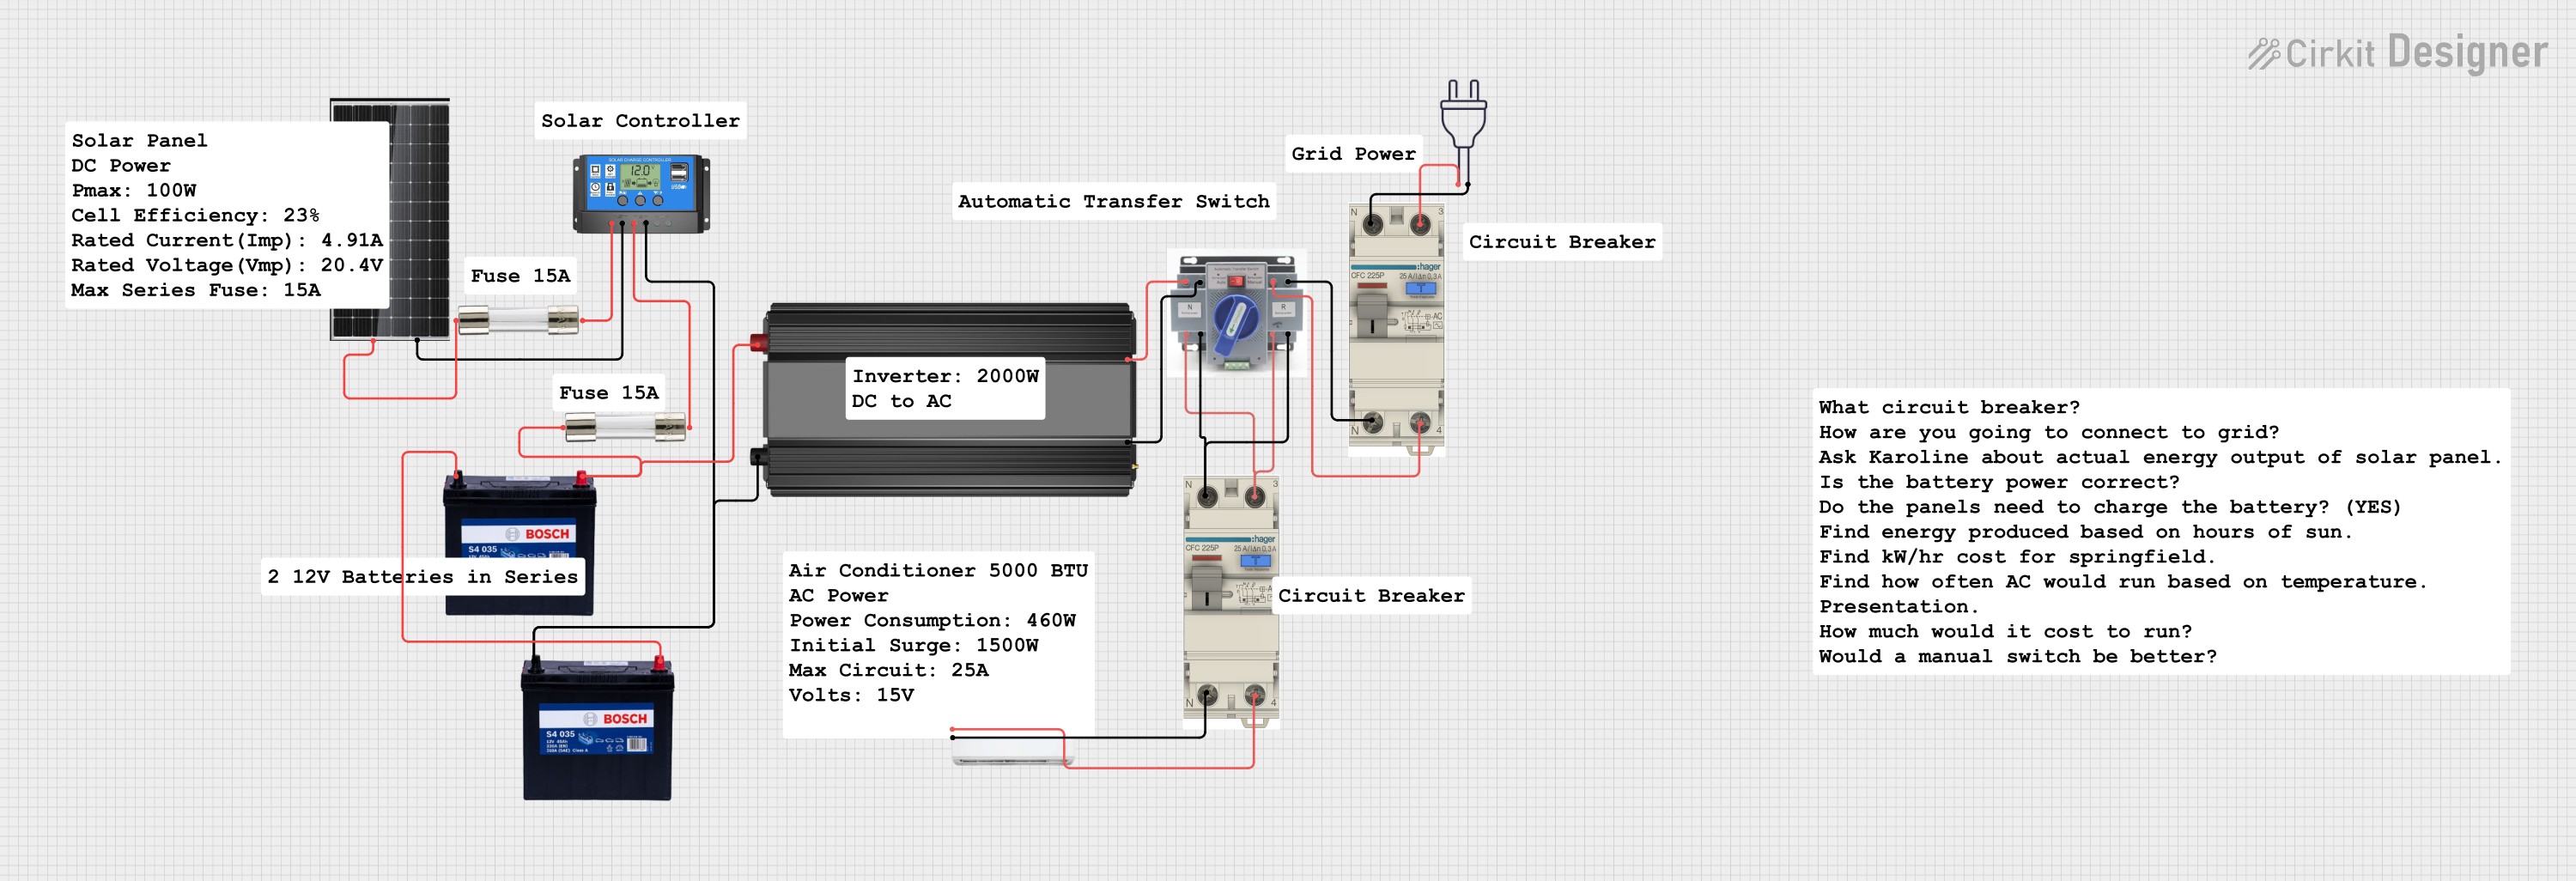
Explore Projects Built with 12v air compressor
Technical Specifications
General Specifications
| Specification | Detail |
|---|---|
| Operating Voltage | 12V DC |
| Maximum Current | 10A - 15A (depending on model) |
| Maximum Pressure | 100 PSI - 150 PSI (depending on model) |
| Duty Cycle | Varies by model (e.g., 30 minutes on / 30 minutes off) |
| Air Flow Rate | 30 - 35 L/min (depending on model) |
| Power Connector | Cigarette lighter plug / Battery clamps |
| Hose Length | Typically 50 - 100 cm |
| Power Cord Length | Typically 2.5 - 3 meters |
| Weight | Varies by model |
| Dimensions | Varies by model |
Pin Configuration and Descriptions
Since a 12V air compressor is not a pin-based electronic component, it typically comes with a power connector and an air hose. Below is a description of these connections:
| Connection Type | Description |
|---|---|
| Power Connector | Provides power to the compressor; usually designed to fit a standard 12V car cigarette lighter socket or equipped with battery clamps for direct connection to a car battery. |
| Air Hose | Used to channel compressed air from the compressor to the object being inflated. Typically includes a quick-connect valve and various nozzle adapters for different applications. |
Usage Instructions
Setting Up the Compressor
Power Connection: Ensure the vehicle's engine is running before connecting the compressor to avoid draining the car battery. Plug the power connector into the 12V cigarette lighter socket or connect the battery clamps to the car battery terminals (red to positive, black to negative).
Connecting the Hose: Attach the air hose to the compressor, ensuring a secure connection. Select the appropriate nozzle adapter for the item you are inflating and connect it to the other end of the hose.
Inflation: Turn on the compressor using the switch provided. Monitor the pressure gauge (if available) to avoid over-inflation. Once the desired pressure is reached, turn off the compressor.
Post-Inflation: Disconnect the hose from the inflatable item, then disconnect the power connector from the 12V source. Allow the compressor to cool down before storing it.
Best Practices
- Always follow the manufacturer's duty cycle recommendations to prevent overheating.
- Check the compressor's air filter regularly and clean or replace it as needed.
- Store the compressor in a cool, dry place when not in use.
Troubleshooting and FAQs
Common Issues and Solutions
- Compressor won't turn on: Check the power connection, ensure the car's engine is running, and verify that the 12V outlet is functional.
- Insufficient pressure: Ensure there are no leaks in the hose or connections. Check if the compressor's air filter is clogged and clean or replace it if necessary.
- Overheating: Give the compressor time to cool down. Avoid exceeding the recommended duty cycle.
FAQs
Q: Can I use the compressor continuously for extended periods? A: No, you should adhere to the manufacturer's duty cycle to prevent overheating and damage to the compressor.
Q: How do I know when to stop inflating? A: Many compressors come with a built-in pressure gauge. Use this to monitor the pressure level and stop inflating once the desired pressure is reached.
Q: Can the compressor be used to inflate large items like air mattresses or pool toys? A: Yes, but it may take longer due to the compressor's flow rate. Ensure you have the correct nozzle adapter for the item.
Q: What should I do if the compressor vibrates excessively? A: Make sure the compressor is placed on a stable surface during operation. Check for any loose parts and tighten them as necessary.
Code Example for Automated Inflation System (Arduino UNO)
// This example demonstrates how to create a simple automated inflation system
// using an Arduino UNO and a relay module to control a 12V air compressor.

#include <Arduino.h>

const int relayPin = 2; // Relay module connected to digital pin 2
const int pressureSensorPin = A0; // Pressure sensor connected to analog pin A0
const int desiredPressure = 30; // Desired pressure in PSI

void setup() {
  pinMode(relayPin, OUTPUT);
  Serial.begin(9600);
}

void loop() {
  int sensorValue = analogRead(pressureSensorPin);
  int currentPressure = map(sensorValue, 0, 1023, 0, 150); // Map sensor value to 0-150 PSI range

  Serial.print("Current Pressure: ");
  Serial.println(currentPressure);

  if (currentPressure < desiredPressure) {
    digitalWrite(relayPin, HIGH); // Turn on the compressor
  } else {
    digitalWrite(relayPin, LOW); // Turn off the compressor
  }

  delay(1000); // Wait for 1 second before reading the pressure again
}
Note: This code is a simple example and assumes the use of a pressure sensor with a linear output corresponding to 0-150 PSI. The actual implementation may require calibration and additional components such as a relay module rated for the compressor's current draw. Always ensure that the components used are compatible and rated appropriately for the application.