How to Use Terminal Block: Examples, Pinouts, and Specs

Introduction
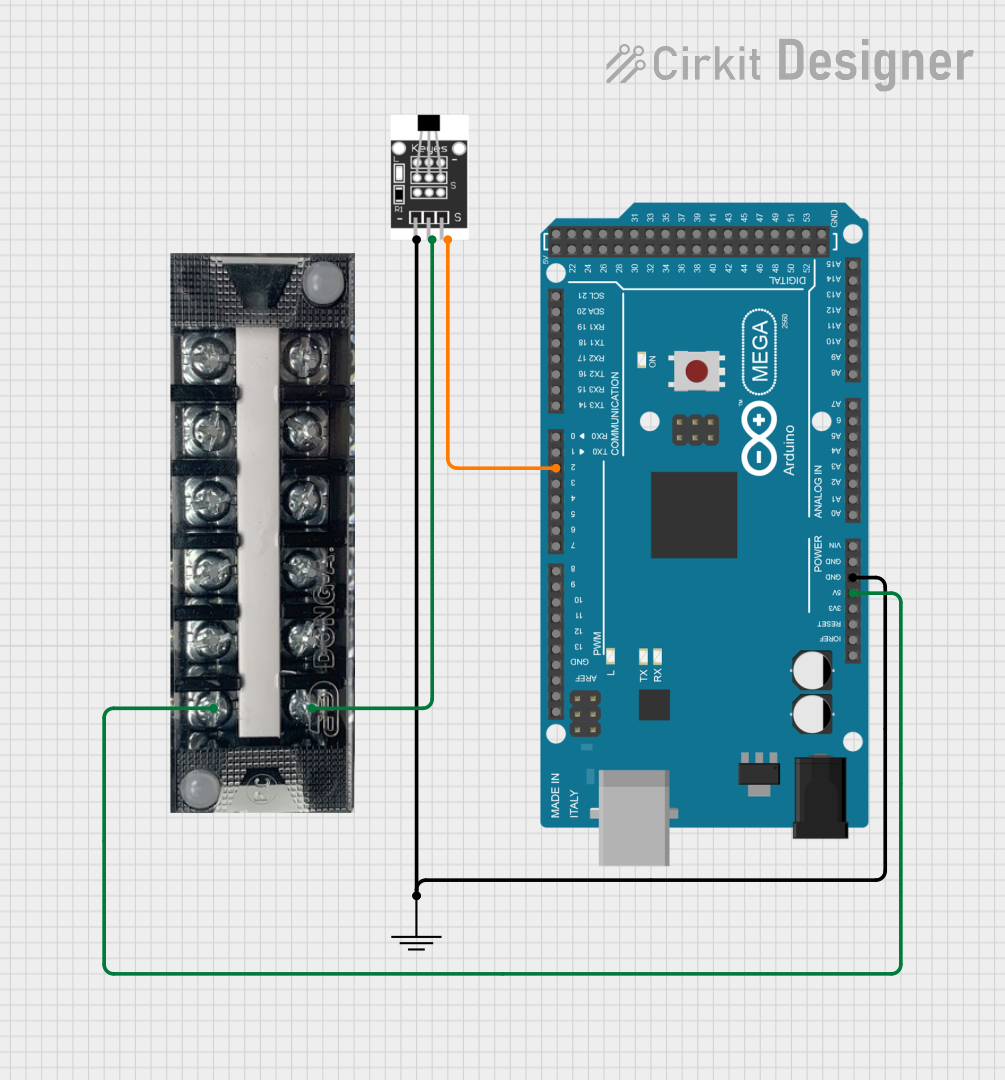
A terminal block, manufactured by HSEAMALL (Part ID: 12 Position), is a modular, insulated block designed to secure two or more wires together. It provides a reliable and convenient way to connect and disconnect electrical circuits without the need for soldering. Terminal blocks are widely used in electrical and electronic systems for organizing wiring and ensuring safe, secure connections.
Explore Projects Built with Terminal Block


Explore Projects Built with Terminal Block
Common Applications and Use Cases
- Industrial control panels and automation systems
- Power distribution in electrical enclosures
- Audio and speaker connections
- Circuit testing and prototyping
- Renewable energy systems (e.g., solar panel wiring)
- Home and building electrical installations
Technical Specifications
The HSEAMALL 12 Position Terminal Block is designed for versatile use in various electrical and electronic applications. Below are its key technical details:
General Specifications
| Parameter | Value |
|---|---|
| Manufacturer | HSEAMALL |
| Part ID | 12 Position |
| Number of Positions | 12 |
| Rated Voltage | 600V |
| Rated Current | 15A |
| Wire Size Compatibility | 22-12 AWG |
| Insulation Material | Polyamide (PA66) |
| Operating Temperature | -40°C to +105°C |
| Mounting Type | Screw Mount or DIN Rail Mount |
Pin Configuration and Descriptions
The terminal block does not have traditional "pins" like an IC but instead features screw terminals for wire connections. Below is a description of its layout:
| Terminal Number | Description |
|---|---|
| 1-12 | Screw terminals for wire connections |
| Grounding Point | Optional grounding connection point |
Each terminal is designed to secure one or more wires using a screw mechanism, ensuring a firm and reliable connection.
Usage Instructions
How to Use the Terminal Block in a Circuit
Prepare the Wires:
- Strip the insulation from the ends of the wires to expose approximately 5-7 mm of the conductor.
- Ensure the wire ends are clean and free of frayed strands.
Connect the Wires:
- Loosen the screw on the desired terminal using a screwdriver.
- Insert the stripped end of the wire into the terminal opening.
- Tighten the screw to secure the wire. Avoid overtightening, as this may damage the wire or terminal.
Mount the Terminal Block:
- Use screws to mount the terminal block onto a panel or enclosure.
- Alternatively, attach it to a DIN rail if the terminal block supports DIN rail mounting.
Verify Connections:
- Double-check all connections to ensure they are secure and free of loose strands.
- Test the circuit to confirm proper functionality.
Important Considerations and Best Practices
- Wire Size: Ensure the wire gauge is within the supported range (22-12 AWG) for optimal connection.
- Tightening Torque: Do not overtighten the screws, as this may strip the threads or damage the wire.
- Insulation: Verify that no exposed conductor is visible outside the terminal to prevent short circuits.
- Labeling: Use labels or markers to identify each terminal for easier troubleshooting and maintenance.
- Environmental Conditions: Ensure the terminal block is used within its rated temperature range and protected from moisture or corrosive environments.
Example: Connecting to an Arduino UNO
While terminal blocks are not directly connected to microcontrollers like the Arduino UNO, they can be used to organize and distribute power or signals in a circuit. Below is an example of how to use a terminal block to distribute power to multiple components:
// Example: Distributing 5V power from Arduino UNO to multiple components
// Connect the Arduino's 5V and GND pins to the terminal block
// Use the terminal block to distribute power to sensors, LEDs, etc.

// No specific code is required for the terminal block itself, as it is a passive
// component. Ensure proper wiring and secure connections for reliable operation.
Troubleshooting and FAQs
Common Issues and Solutions
| Issue | Solution |
|---|---|
| Loose wire connections | Ensure the screws are tightened securely without overtightening. |
| Wire slipping out of the terminal | Verify that the wire is stripped to the correct length (5-7 mm). |
| Overheating of terminals | Check that the current does not exceed the rated 15A. |
| Corrosion or damage to terminals | Use the terminal block in a dry, non-corrosive environment. |
| Difficulty mounting the block | Confirm compatibility with the mounting method (screw or DIN rail). |
FAQs
Can I use this terminal block for AC and DC circuits?
- Yes, the terminal block is suitable for both AC and DC circuits, provided the voltage and current ratings are not exceeded.
What tools are required to use the terminal block?
- A screwdriver (typically flathead or Phillips) is required to tighten or loosen the screws.
Can I connect multiple wires to a single terminal?
- Yes, but ensure the combined wire size does not exceed the terminal's capacity and that all wires are securely fastened.
Is the terminal block reusable?
- Yes, the terminal block can be reused multiple times as long as it is not physically damaged.
By following the guidelines and best practices outlined in this documentation, you can effectively use the HSEAMALL 12 Position Terminal Block in your projects.