Cirkit Designer Logo
Cirkit Designer
Your all-in-one circuit design IDE
Home / 
Component Documentation

How to Use KY-026 Flame Sensor: Examples, Pinouts, and Specs

Image of KY-026 Flame Sensor
Cirkit Designer LogoDesign with KY-026 Flame Sensor in Cirkit Designer

Introduction

The KY-026 Flame Sensor is a versatile and sensitive module designed to detect the presence of flames or fire. It operates by sensing the infrared (IR) light emitted by a flame, which is then converted into an electrical signal. This sensor is commonly used in fire alarm systems, fire-fighting robots, and other fire detection applications. Its built-in signal amplifier enhances detection sensitivity, and it provides both analog and digital outputs for interfacing with microcontrollers like the Arduino UNO.

Explore Projects Built with KY-026 Flame Sensor

Use Cirkit Designer to design, explore, and prototype these projects online. Some projects support real-time simulation. Click "Open Project" to start designing instantly!
ESP32 and KY-026 Flame Sensor Fire Detection System
Image of flame sensor testing: A project utilizing KY-026 Flame Sensor in a practical application
This circuit consists of an ESP32 microcontroller connected to a KY-026 Flame Sensor. The ESP32 provides power to the flame sensor and reads the digital output signal from the sensor to detect the presence of a flame.
Cirkit Designer LogoOpen Project in Cirkit Designer
Flame Sensor Activated Water Pump and Buzzer System with LED Indicator
Image of soil sensor: A project utilizing KY-026 Flame Sensor in a practical application
This circuit is a flame detection and response system. When the KY-026 Flame Sensor detects a flame, it activates a PNP transistor, which in turn powers a water pump and a buzzer to alert and extinguish the flame. Additionally, an LED indicator is used to show the system's status, and a rocker switch controls the power supply from a 5V battery.
Cirkit Designer LogoOpen Project in Cirkit Designer
Arduino UNO Flame Detection System with LED and Piezo Speaker Alert
Image of MQ2 LED: A project utilizing KY-026 Flame Sensor in a practical application
This circuit uses an Arduino UNO to monitor a KY-026 flame sensor. When a flame is detected, the Arduino activates a piezo speaker and a red LED as indicators.
Cirkit Designer LogoOpen Project in Cirkit Designer
Arduino UNO Based Flame Detection System
Image of flame_wiring: A project utilizing KY-026 Flame Sensor in a practical application
This circuit connects an Arduino UNO to a KY-026 Flame Sensor for detecting the presence of a flame. The Arduino is powered by its 5V pin, and it monitors the digital output (DO) from the flame sensor on its digital pin D6. The code provided for the Arduino is currently a template without specific functionality, indicating that the user is expected to implement the flame detection logic in the loop function.
Cirkit Designer LogoOpen Project in Cirkit Designer

Explore Projects Built with KY-026 Flame Sensor

Use Cirkit Designer to design, explore, and prototype these projects online. Some projects support real-time simulation. Click "Open Project" to start designing instantly!
Image of flame sensor testing: A project utilizing KY-026 Flame Sensor in a practical application
ESP32 and KY-026 Flame Sensor Fire Detection System
This circuit consists of an ESP32 microcontroller connected to a KY-026 Flame Sensor. The ESP32 provides power to the flame sensor and reads the digital output signal from the sensor to detect the presence of a flame.
Cirkit Designer LogoOpen Project in Cirkit Designer
Image of soil sensor: A project utilizing KY-026 Flame Sensor in a practical application
Flame Sensor Activated Water Pump and Buzzer System with LED Indicator
This circuit is a flame detection and response system. When the KY-026 Flame Sensor detects a flame, it activates a PNP transistor, which in turn powers a water pump and a buzzer to alert and extinguish the flame. Additionally, an LED indicator is used to show the system's status, and a rocker switch controls the power supply from a 5V battery.
Cirkit Designer LogoOpen Project in Cirkit Designer
Image of MQ2 LED: A project utilizing KY-026 Flame Sensor in a practical application
Arduino UNO Flame Detection System with LED and Piezo Speaker Alert
This circuit uses an Arduino UNO to monitor a KY-026 flame sensor. When a flame is detected, the Arduino activates a piezo speaker and a red LED as indicators.
Cirkit Designer LogoOpen Project in Cirkit Designer
Image of flame_wiring: A project utilizing KY-026 Flame Sensor in a practical application
Arduino UNO Based Flame Detection System
This circuit connects an Arduino UNO to a KY-026 Flame Sensor for detecting the presence of a flame. The Arduino is powered by its 5V pin, and it monitors the digital output (DO) from the flame sensor on its digital pin D6. The code provided for the Arduino is currently a template without specific functionality, indicating that the user is expected to implement the flame detection logic in the loop function.
Cirkit Designer LogoOpen Project in Cirkit Designer

Technical Specifications

Key Technical Details

  • Operating Voltage: 3.3V to 5V
  • Detection Wavelength: 760 nm to 1100 nm
  • Detection Angle: Approximately 60 degrees
  • Digital Output: TTL (0V or 5V)
  • Analog Output: 0V to 5V (proportional to flame intensity)
  • Response Time: < 1 second

Pin Configuration and Descriptions

Pin Number Pin Name Description
1 A0 Analog output pin
2 GND Ground
3 + Power supply (3.3V to 5V)
4 D0 Digital output pin (TTL level)

Usage Instructions

Interfacing with a Circuit

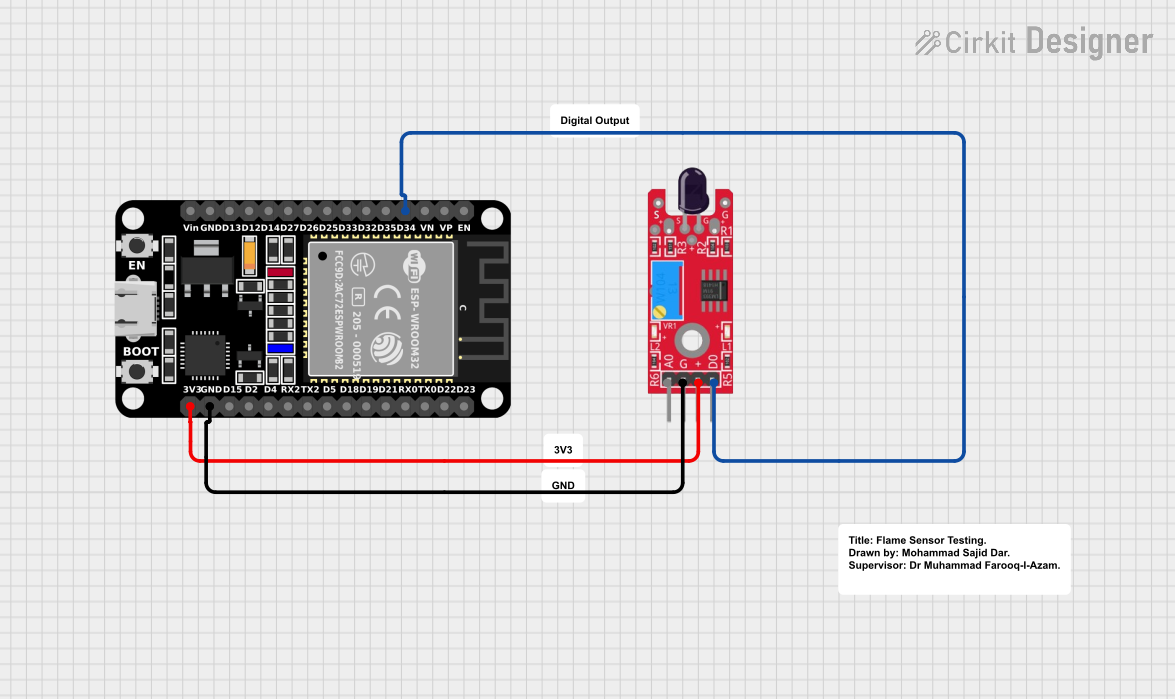
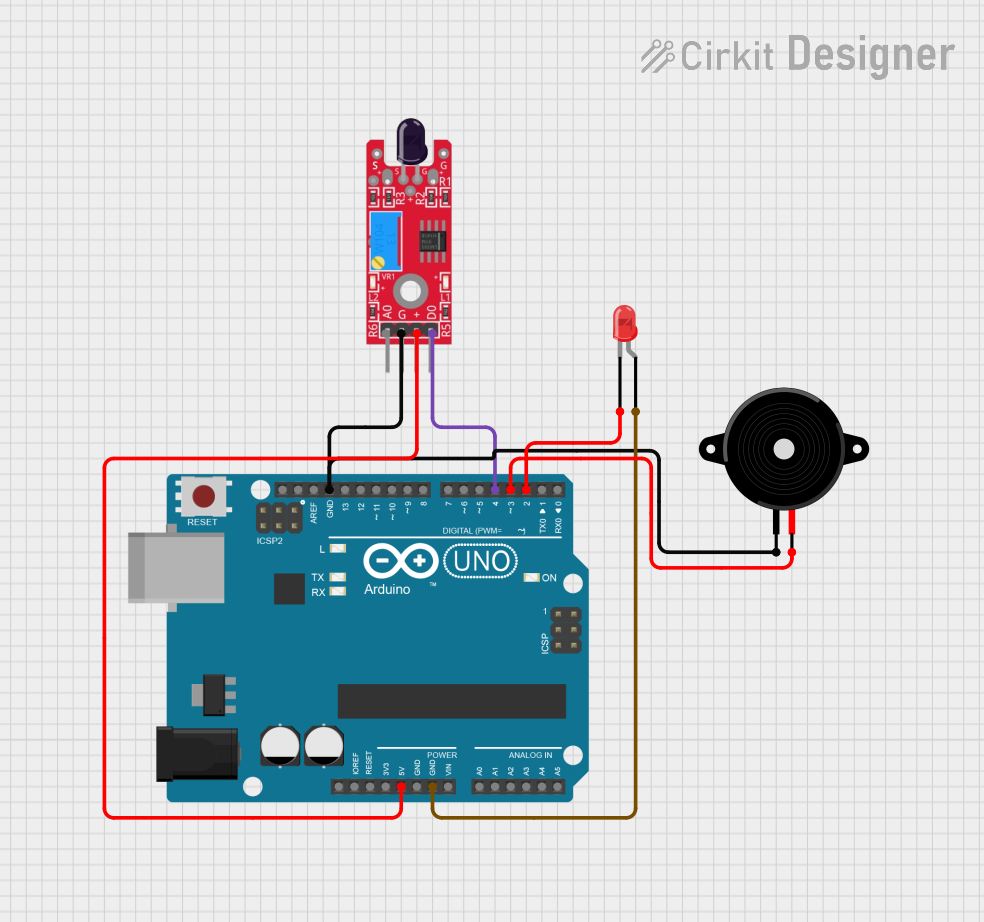
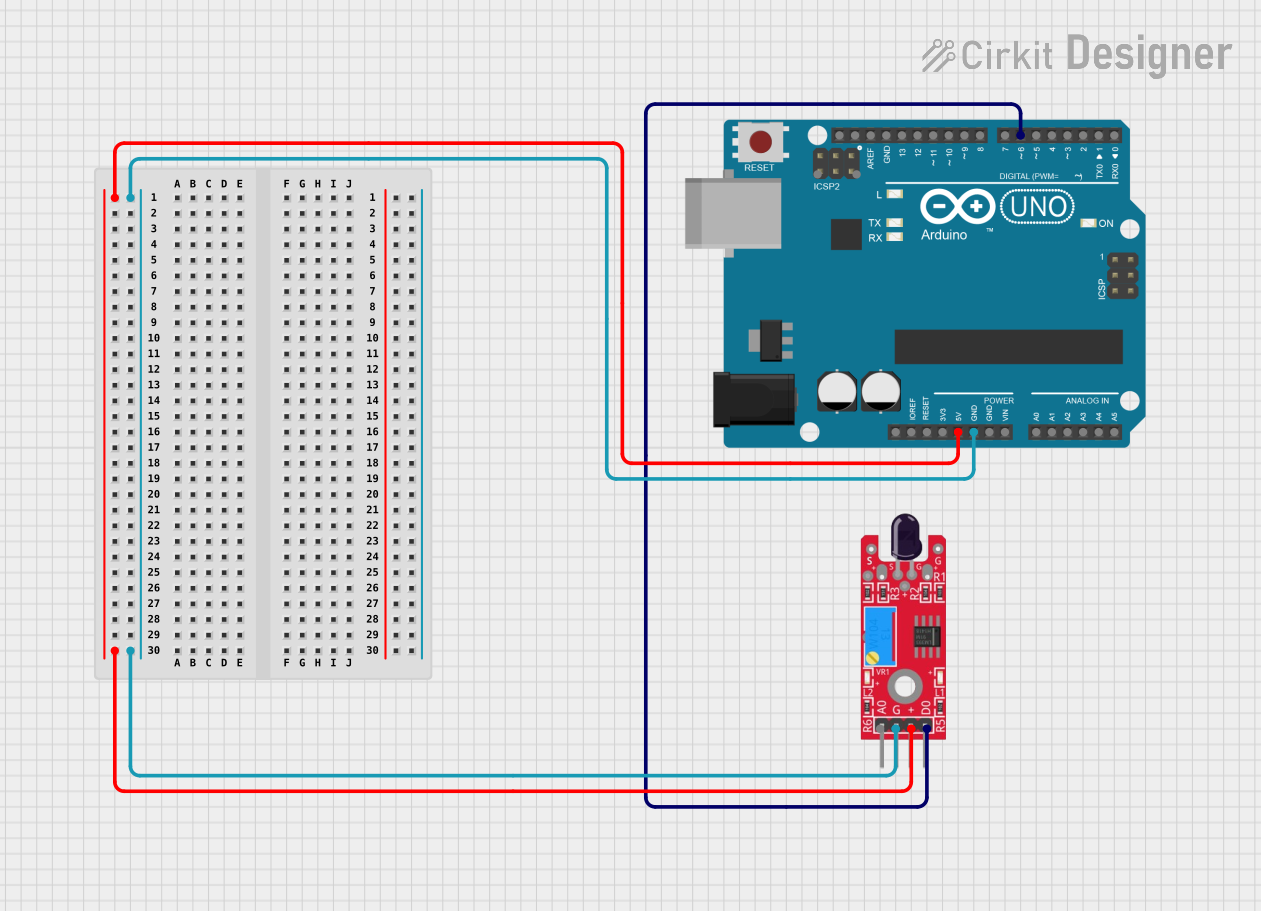
To use the KY-026 Flame Sensor in a circuit, follow these steps:

  1. Connect the + pin to the 5V output on the Arduino UNO or to a 3.3V to 5V power supply.
  2. Connect the GND pin to the ground on the Arduino UNO or to the power supply ground.
  3. Connect the A0 pin to an analog input on the Arduino UNO if you wish to measure the intensity of the flame.
  4. Connect the D0 pin to a digital input on the Arduino UNO if you only need a simple flame presence indication.

Important Considerations and Best Practices

  • Avoid exposing the sensor to direct sunlight or other strong IR sources, as this may interfere with flame detection.
  • Adjust the onboard potentiometer to set the digital output threshold according to your application needs.
  • Ensure that the sensor is mounted away from heat sources that could damage the module.
  • Use a pull-up resistor if you experience floating inputs when using the digital output.

Example Arduino Code

// KY-026 Flame Sensor Example Code

const int analogPin = A0; // Analog output from the flame sensor
const int digitalPin = 2; // Digital output from the flame sensor
const int ledPin = 13;    // Onboard LED

void setup() {
  pinMode(ledPin, OUTPUT);      // Set the LED pin as an output
  pinMode(digitalPin, INPUT);   // Set the digital pin as an input
  Serial.begin(9600);           // Start serial communication at 9600 baud
}

void loop() {
  int analogValue = analogRead(analogPin); // Read the analog value
  int digitalValue = digitalRead(digitalPin); // Read the digital value

  Serial.print("Analog Value: ");
  Serial.print(analogValue);    // Print the analog value
  Serial.print(" | Digital Value: ");
  Serial.println(digitalValue); // Print the digital value

  if (digitalValue == HIGH) {   // If a flame is detected
    digitalWrite(ledPin, HIGH); // Turn on the LED
  } else {
    digitalWrite(ledPin, LOW);  // Turn off the LED
  }

  delay(100); // Wait for 100 milliseconds
}

Troubleshooting and FAQs

Common Issues

  • Sensor not responding: Ensure that the sensor is correctly powered and that all connections are secure.
  • False positives/negatives: Adjust the onboard potentiometer to fine-tune the threshold for the digital output.
  • Inconsistent readings: Avoid placing the sensor in environments with rapid temperature changes or near other IR sources.

Solutions and Tips for Troubleshooting

  • If the digital output is unstable, try adding a pull-up resistor to the digital output pin.
  • For more accurate flame detection, calibrate the sensor in the environment where it will be used.
  • Use the analog output to gauge the intensity of the flame and set appropriate thresholds in your code.

FAQs

Q: Can the KY-026 Flame Sensor detect smoke? A: No, the KY-026 is designed to detect infrared light from flames and does not detect smoke.

Q: What is the range of the sensor? A: The sensor can typically detect flames within a range of up to 1 meter, depending on the size and intensity of the flame.

Q: How do I adjust the sensitivity of the sensor? A: Turn the onboard potentiometer clockwise to increase sensitivity and counterclockwise to decrease it.

Q: Can the sensor differentiate between different types of flames? A: The KY-026 sensor does not differentiate between flame types; it detects the presence of IR light within its wavelength range.