How to Use Stereo 3.7W Class D Amplifier: Examples, Pinouts, and Specs
Introduction
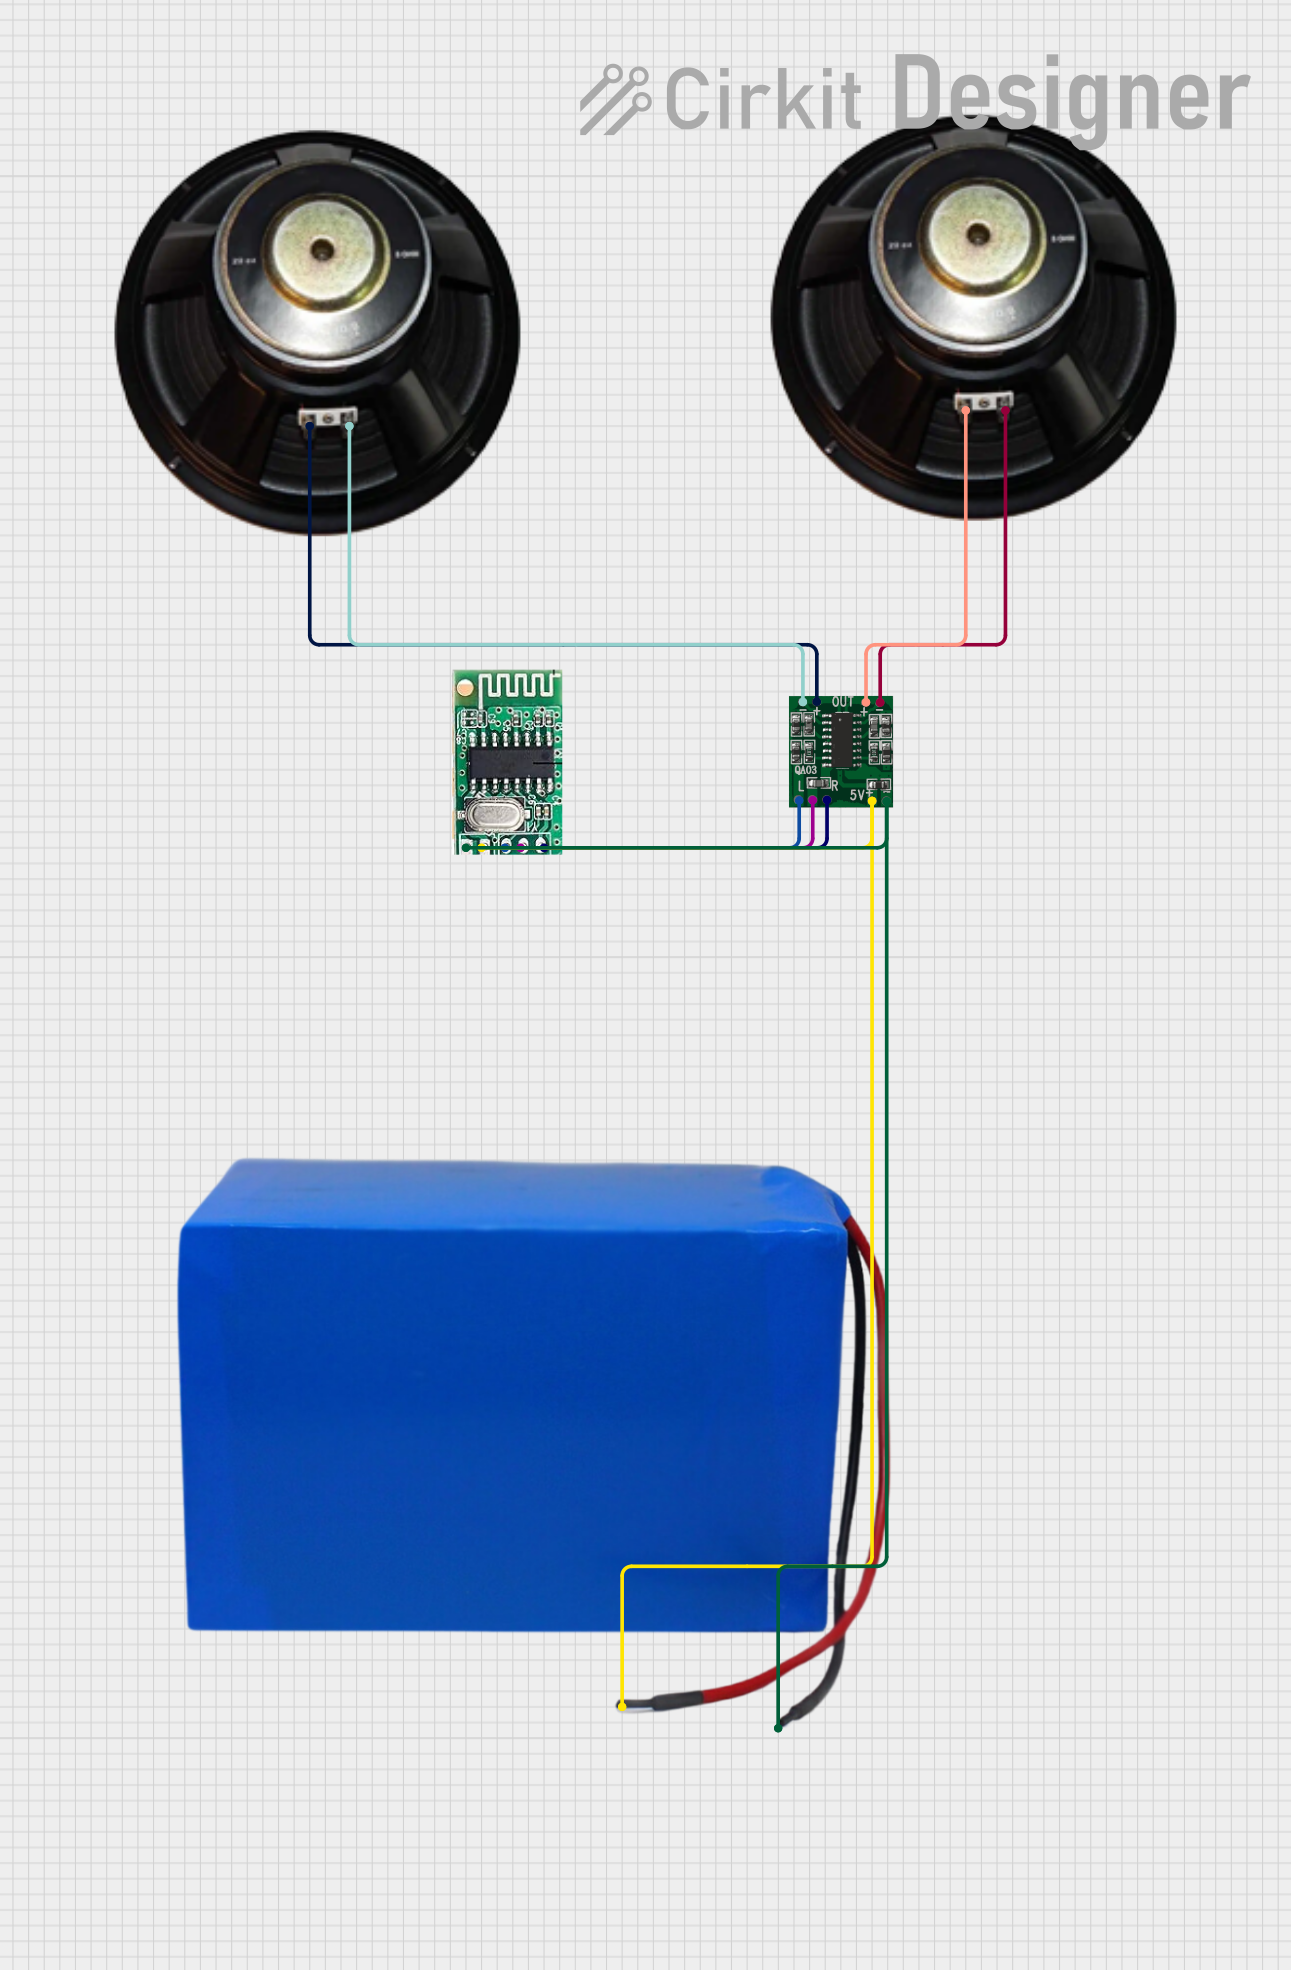
The Stereo 3.7W Class D Amplifier is an integrated circuit (IC) designed to provide high-quality audio amplification with efficient power usage. This makes it an ideal choice for battery-powered applications where space and energy efficiency are critical. Common applications include portable audio devices, such as smartphones, tablets, and Bluetooth speakers, as well as DIY audio projects with microcontrollers like the Arduino UNO.
Explore Projects Built with Stereo 3.7W Class D Amplifier


Explore Projects Built with Stereo 3.7W Class D Amplifier
Technical Specifications
Key Technical Details
- Output Power: 3.7W (Typical) per channel at 4.5V
- Supply Voltage Range: 2.5V to 5.5V
- Efficiency: Up to 90% (Typical)
- Signal-to-Noise Ratio (SNR): ≥90dB
- Total Harmonic Distortion (THD): <0.2% at 1W
- Load Impedance: Compatible with 4Ω to 8Ω speakers
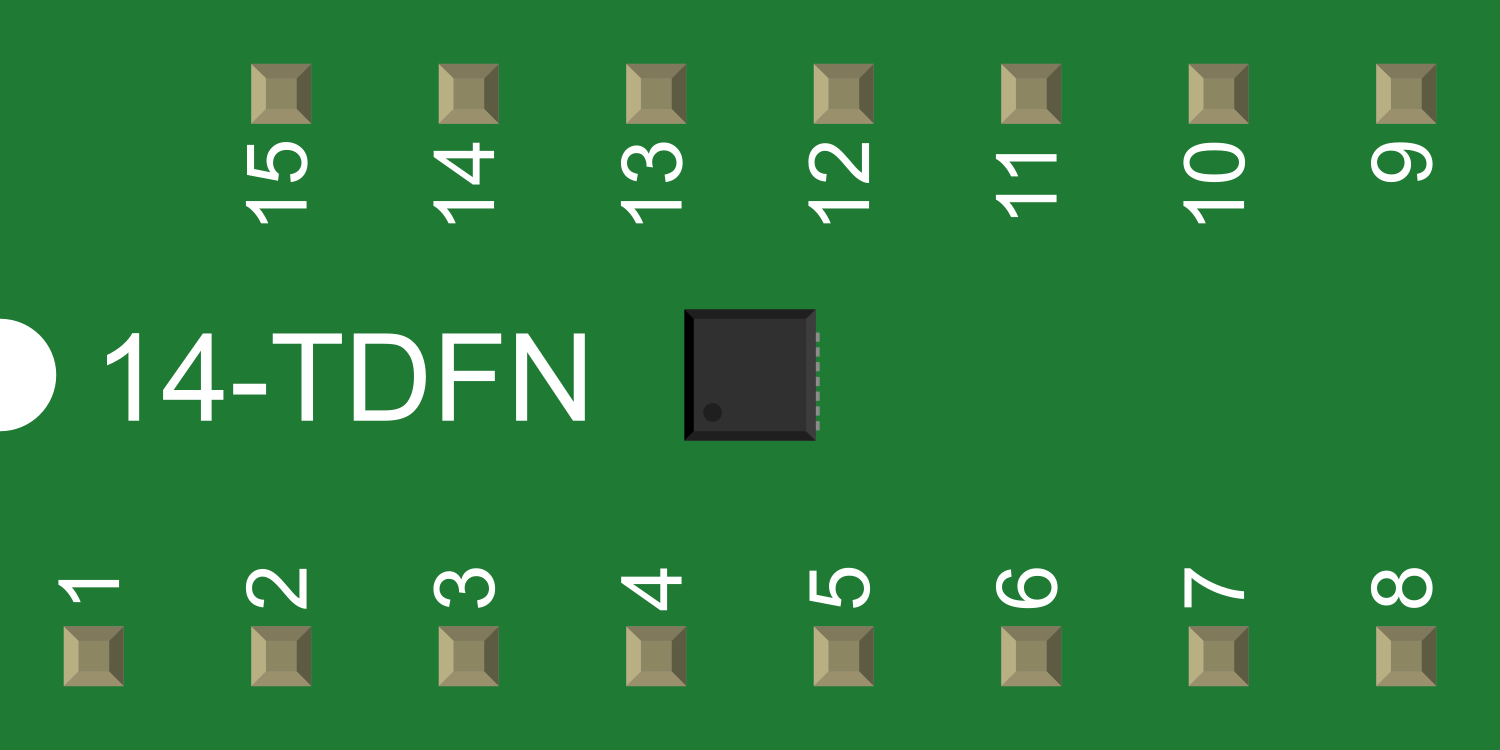
Pin Configuration and Descriptions
| Pin Number | Pin Name | Description |
|---|---|---|
| 1 | L-IN | Left channel audio input |
| 2 | GND | Ground connection |
| 3 | R-IN | Right channel audio input |
| 4 | VDD | Power supply voltage |
| 5 | L-OUT | Left channel audio output |
| 6 | R-OUT | Right channel audio output |
| 7 | SD | Shutdown control input (active low) |
| 8 | GAIN | Gain selection input |
Usage Instructions
How to Use the Component in a Circuit
- Power Supply: Connect the VDD pin to a power source within the specified voltage range (2.5V to 5.5V). Ensure that the power supply can deliver sufficient current for the desired output power.
- Audio Input: Connect the audio source to the L-IN and R-IN pins for the left and right channels, respectively.
- Audio Output: Connect the L-OUT and R-OUT pins to the speakers, ensuring that the speakers' impedance matches the amplifier's specifications (4Ω to 8Ω).
- Shutdown Control: The SD pin can be connected to a microcontroller or switch to enable or disable the amplifier. Pulling this pin low will put the amplifier into shutdown mode.
- Gain Control: The GAIN pin allows for the selection of different gain settings. Connect this pin to the appropriate logic level as per the datasheet to set the desired gain.
Important Considerations and Best Practices
- Decoupling Capacitors: Use appropriate decoupling capacitors close to the power supply pin to minimize noise and ripple.
- Heat Dissipation: Ensure adequate heat dissipation, as Class D amplifiers can generate significant heat at higher output powers.
- Input Signal Level: Avoid clipping by ensuring the input signal level does not exceed the amplifier's maximum input threshold.
- PCB Layout: Careful PCB layout is crucial to minimize electromagnetic interference (EMI) and achieve optimal audio performance.
Troubleshooting and FAQs
Common Issues
- No Sound Output: Check power supply connections, ensure the SD pin is not pulling the amplifier into shutdown mode, and verify that the input signal is present.
- Distorted Sound: This may be due to input signal clipping or an impedance mismatch with the speakers. Adjust the input signal level and check the speaker specifications.
- Overheating: Ensure proper heat dissipation and verify that the power supply voltage and speaker impedance are within specified limits.
Solutions and Tips for Troubleshooting
- Use a multimeter to check for proper voltage levels at the power supply and output pins.
- Inspect connections for any loose wires or soldering issues.
- Listen for noise or hum which could indicate grounding issues or interference.
FAQs
Q: Can I use this amplifier with 8Ω speakers? A: Yes, the amplifier is compatible with speakers ranging from 4Ω to 8Ω.
Q: What should I do if the amplifier gets too hot? A: Ensure proper ventilation and heat sinking. If overheating persists, reduce the output power or check for short circuits.
Q: How can I control the volume with this amplifier? A: Volume control can be achieved by varying the input signal level, either through a potentiometer or digitally via a microcontroller.
Example Arduino UNO Connection and Code
To connect the Stereo 3.7W Class D Amplifier to an Arduino UNO for basic operation, you can use the following schematic and code snippet:
Schematic
- Connect Arduino 5V to VDD.
- Connect Arduino GND to GND.
- Connect a digital pin to SD for shutdown control (optional).
- Connect analog audio signals to L-IN and R-IN.
Arduino Code
// Define the shutdown control pin
const int shutdownPin = 7; // Use any available digital pin

void setup() {
  pinMode(shutdownPin, OUTPUT);
  // Start the amplifier by setting the shutdown pin high
  digitalWrite(shutdownPin, HIGH);
}

void loop() {
  // Your audio processing code would go here
  // To shutdown the amplifier, set the shutdown pin low
  // digitalWrite(shutdownPin, LOW);
}
Remember to adjust the pin number to match your actual setup. The above code simply enables the amplifier and assumes that you have an audio source connected to the input pins. Audio processing and advanced control require additional code and circuitry.