Cirkit Designer Logo
Cirkit Designer
Your all-in-one circuit design IDE
Home / 
Component Documentation

How to Use Adafruit PowerBoost 500 Shield: Examples, Pinouts, and Specs

Image of Adafruit PowerBoost 500 Shield
Cirkit Designer LogoDesign with Adafruit PowerBoost 500 Shield in Cirkit Designer

Introduction

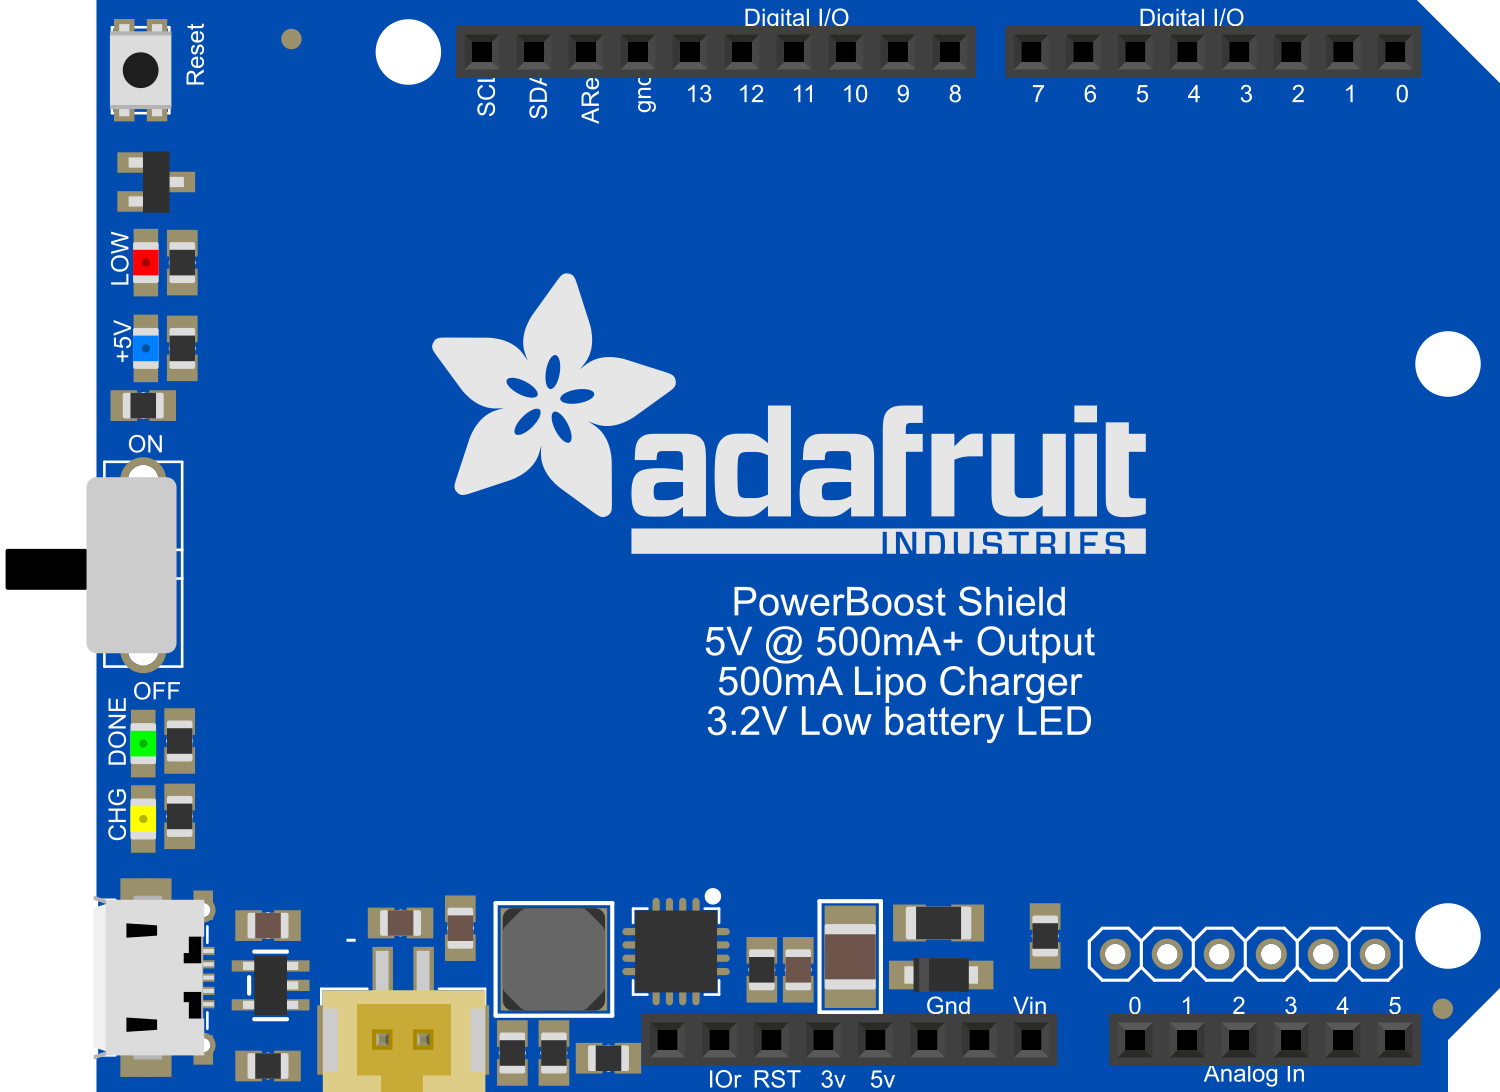
The Adafruit PowerBoost 500 Shield is a versatile power management solution designed for Arduino and compatible microcontroller boards. This shield allows users to power their projects with a rechargeable lithium polymer (LiPo) battery, providing the convenience of portability and the flexibility of untethered operation. Additionally, the shield includes an integrated charging circuit, enabling the battery to be charged while the board is powered via a USB connection.

Explore Projects Built with Adafruit PowerBoost 500 Shield

Use Cirkit Designer to design, explore, and prototype these projects online. Some projects support real-time simulation. Click "Open Project" to start designing instantly!
Teensy 4.0 Audio Controller with Adjustable Volume and Power Management
Image of proj2: A project utilizing Adafruit PowerBoost 500 Shield in a practical application
This circuit features a Teensy 4.0 microcontroller interfaced with an audio shield for audio processing, controlled by a potentiometer for volume adjustment. It is powered by an Adafruit PowerBoost 1000C with a toggle switch for power control, and includes a 12-pin FFC converter for additional connectivity options.
Cirkit Designer LogoOpen Project in Cirkit Designer
Battery-Powered Raspberry Pi Zero with OLED Display and EmStat Pico for Portable Data Acquisition
Image of RPI Zero Prototype: A project utilizing Adafruit PowerBoost 500 Shield in a practical application
This circuit is a portable system powered by a 3.7V LiPo battery, which is boosted to 5V using an Adafruit PowerBoost 1000C to power a Raspberry Pi Zero and an EmStat Pico. The Raspberry Pi Zero interfaces with an OLED display via I2C and a tactile switch for user input, while the EmStat Pico communicates with the Raspberry Pi over UART for data acquisition or control purposes.
Cirkit Designer LogoOpen Project in Cirkit Designer
Arduino Sensor Shield with I2C LCD and Bluetooth Interface
Image of wallE: A project utilizing Adafruit PowerBoost 500 Shield in a practical application
This circuit features an Arduino Sensor Shield v5.0 interfaced with an I2C LCD Display and an HC-05 Bluetooth Module. The LCD Display is connected for power, ground, and I2C communication, allowing it to display data or messages. The HC-05 Bluetooth Module is wired for serial communication with the Arduino Sensor Shield, enabling wireless data exchange with other Bluetooth-enabled devices.
Cirkit Designer LogoOpen Project in Cirkit Designer
Battery-Powered Raspberry Pi Zero W with MPU-6050 and LCD Display
Image of Science Fair: A project utilizing Adafruit PowerBoost 500 Shield in a practical application
This circuit is a portable system powered by a 2000mAh battery, which is stepped up to 5V using a boost converter to power a Raspberry Pi Zero W. The Raspberry Pi interfaces with an MPU-6050 sensor for motion detection, an LCD TFT screen for display, and a vibration motor for haptic feedback.
Cirkit Designer LogoOpen Project in Cirkit Designer

Explore Projects Built with Adafruit PowerBoost 500 Shield

Use Cirkit Designer to design, explore, and prototype these projects online. Some projects support real-time simulation. Click "Open Project" to start designing instantly!
Image of proj2: A project utilizing Adafruit PowerBoost 500 Shield in a practical application
Teensy 4.0 Audio Controller with Adjustable Volume and Power Management
This circuit features a Teensy 4.0 microcontroller interfaced with an audio shield for audio processing, controlled by a potentiometer for volume adjustment. It is powered by an Adafruit PowerBoost 1000C with a toggle switch for power control, and includes a 12-pin FFC converter for additional connectivity options.
Cirkit Designer LogoOpen Project in Cirkit Designer
Image of RPI Zero Prototype: A project utilizing Adafruit PowerBoost 500 Shield in a practical application
Battery-Powered Raspberry Pi Zero with OLED Display and EmStat Pico for Portable Data Acquisition
This circuit is a portable system powered by a 3.7V LiPo battery, which is boosted to 5V using an Adafruit PowerBoost 1000C to power a Raspberry Pi Zero and an EmStat Pico. The Raspberry Pi Zero interfaces with an OLED display via I2C and a tactile switch for user input, while the EmStat Pico communicates with the Raspberry Pi over UART for data acquisition or control purposes.
Cirkit Designer LogoOpen Project in Cirkit Designer
Image of wallE: A project utilizing Adafruit PowerBoost 500 Shield in a practical application
Arduino Sensor Shield with I2C LCD and Bluetooth Interface
This circuit features an Arduino Sensor Shield v5.0 interfaced with an I2C LCD Display and an HC-05 Bluetooth Module. The LCD Display is connected for power, ground, and I2C communication, allowing it to display data or messages. The HC-05 Bluetooth Module is wired for serial communication with the Arduino Sensor Shield, enabling wireless data exchange with other Bluetooth-enabled devices.
Cirkit Designer LogoOpen Project in Cirkit Designer
Image of Science Fair: A project utilizing Adafruit PowerBoost 500 Shield in a practical application
Battery-Powered Raspberry Pi Zero W with MPU-6050 and LCD Display
This circuit is a portable system powered by a 2000mAh battery, which is stepped up to 5V using a boost converter to power a Raspberry Pi Zero W. The Raspberry Pi interfaces with an MPU-6050 sensor for motion detection, an LCD TFT screen for display, and a vibration motor for haptic feedback.
Cirkit Designer LogoOpen Project in Cirkit Designer

Common Applications and Use Cases

  • Portable Arduino projects
  • Wearable electronics
  • Remote sensing devices
  • Robotics
  • Battery backup systems

Technical Specifications

Key Technical Details

  • Input Voltage (USB): 5V
  • Battery Voltage: 3.7V LiPo/Li-ion
  • Output Voltage: 5V regulated output
  • Peak Output Current: 500mA
  • Charging Current: 100mA (default), adjustable up to 500mA
  • Efficiency: 90%+
  • Dimensions: 68mm x 53mm x 4mm

Pin Configuration and Descriptions

Pin Number Name Description
1 GND Ground connection
2 BAT Connection to the battery positive terminal
3 5V Regulated 5V output
4 EN Enable pin for the regulator
5 USB USB input for charging and power
6 CHG Charging status output (low when charging)
7 VSYS System voltage (unregulated battery voltage)

Usage Instructions

How to Use the Component in a Circuit

  1. Connecting the Battery:

    • Connect a 3.7V LiPo battery to the BAT and GND pins.
  2. Powering the Arduino:

    • Mount the PowerBoost 500 Shield onto your Arduino board.
    • Ensure the onboard switch is set to 'ON' to enable power output.
  3. Charging the Battery:

    • Connect a USB power source to the USB input on the shield.
    • The CHG LED will indicate the charging status.

Important Considerations and Best Practices

  • Do not exceed the recommended battery voltage and current ratings.
  • Ensure proper polarity when connecting the battery to prevent damage.
  • Avoid short-circuiting the output as it may damage the shield.
  • Use the EN pin to disable the 5V output when not in use to conserve battery life.
  • Monitor battery voltage to prevent over-discharge, which can damage the battery.

Troubleshooting and FAQs

Common Issues

  • Shield not powering on:

    • Check battery connection and charge.
    • Ensure the onboard switch is in the 'ON' position.
  • Battery not charging:

    • Verify the USB power source is connected and functioning.
    • Check for proper connection at the USB and BAT pins.

Solutions and Tips for Troubleshooting

  • If the shield does not power on, verify the battery voltage and recharge if necessary.
  • For charging issues, try a different USB cable or power source.
  • If the CHG LED does not light up, inspect the solder joints and connections for any faults.

FAQs

  • Can I use a different type of battery?

    • The PowerBoost 500 Shield is designed for 3.7V LiPo batteries. Using other types may require additional circuitry or could cause damage.
  • How do I adjust the charging current?

    • The default charging current is 100mA. To adjust, you may need to change the onboard resistor. Refer to the Adafruit guide for detailed instructions.
  • What is the maximum output current the shield can provide?

    • The shield can provide a peak output current of 500mA.

Example Code for Arduino UNO

// Example code to monitor charging status with Adafruit PowerBoost 500 Shield

const int CHG_PIN = 7; // Charging status pin connected to pin 7 on Arduino

void setup() {
  pinMode(CHG_PIN, INPUT);
  Serial.begin(9600);
}

void loop() {
  // Read the charging status pin
  int charging = digitalRead(CHG_PIN);

  // Check if the battery is currently charging
  if (charging == LOW) {
    Serial.println("Battery is charging...");
  } else {
    Serial.println("Battery is not charging.");
  }

  // Wait for a second before checking again
  delay(1000);
}

This example code sets up the Arduino to monitor the charging status of the battery connected to the PowerBoost 500 Shield. It reads the CHG pin and outputs the charging status to the Serial Monitor.