How to Use DC 12V Submersible Water Pump: Examples, Pinouts, and Specs

Introduction
The DC 12V Submersible Water Pump is a compact and efficient device designed to operate underwater. It is commonly used for moving water in aquariums, fountains, hydroponic systems, or small-scale irrigation setups. This pump operates on a 12V DC power supply, making it ideal for low-voltage applications where safety and energy efficiency are priorities. Its small size and quiet operation make it suitable for both residential and hobbyist projects.
Explore Projects Built with DC 12V Submersible Water Pump
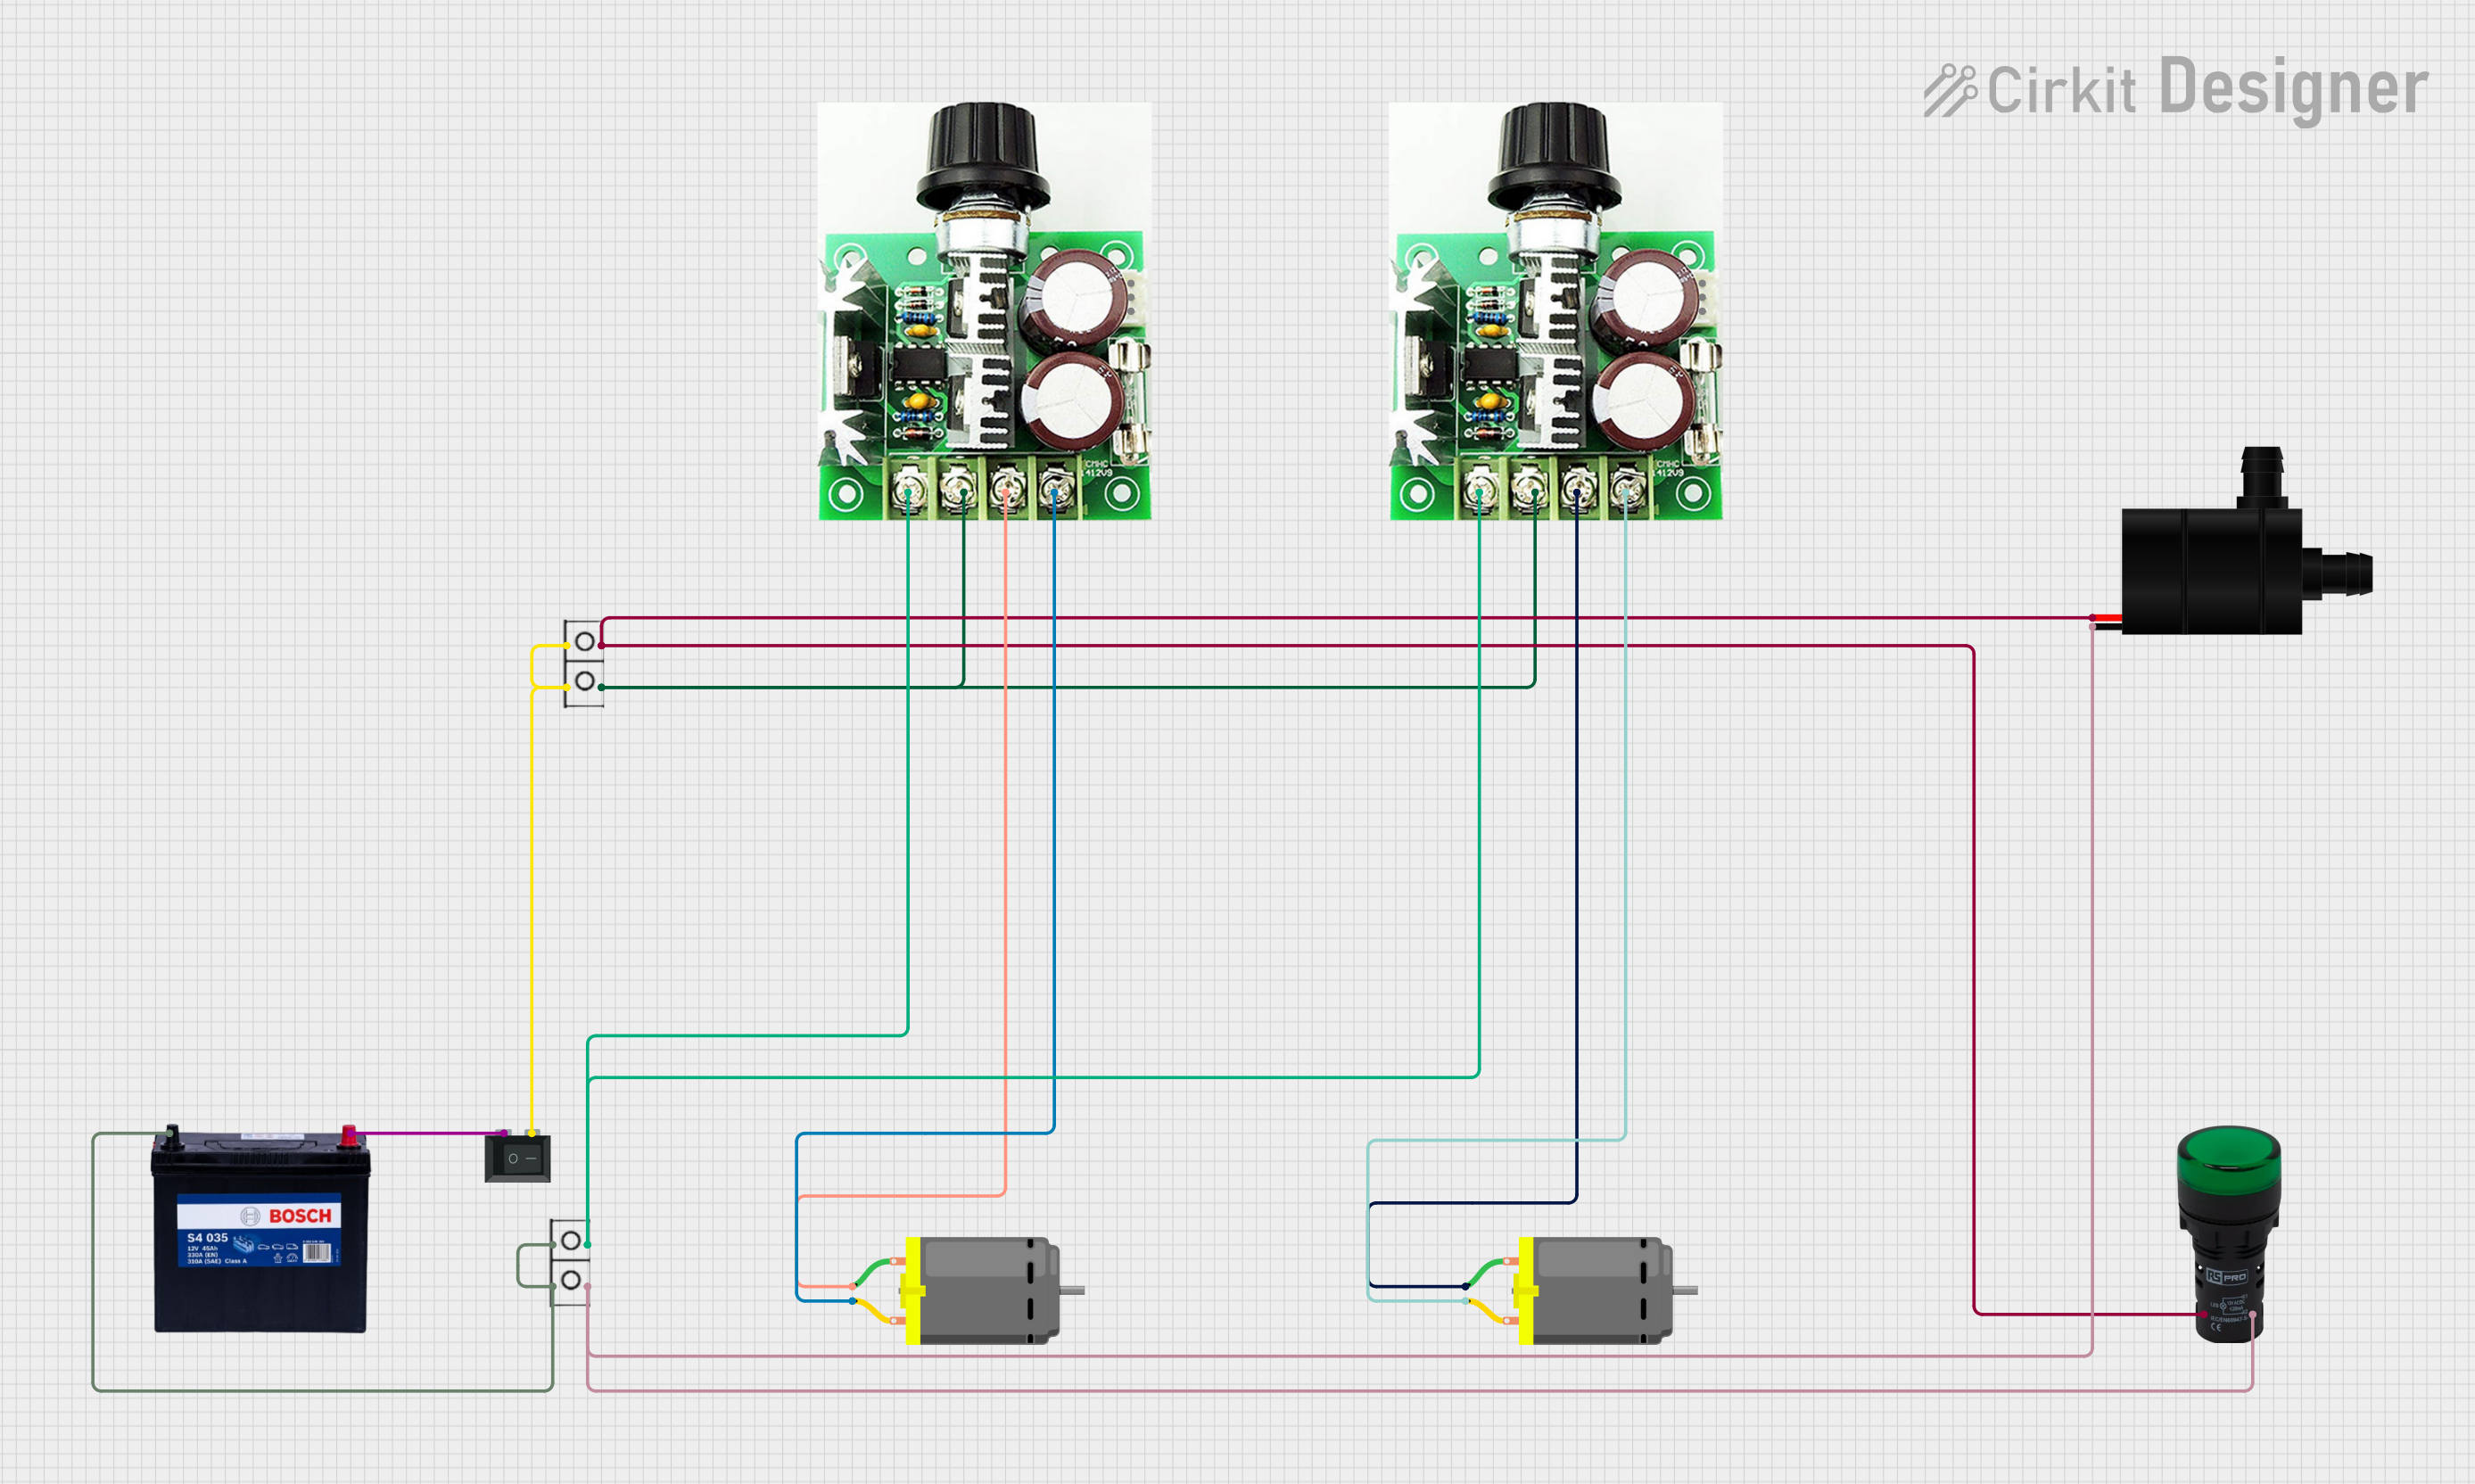
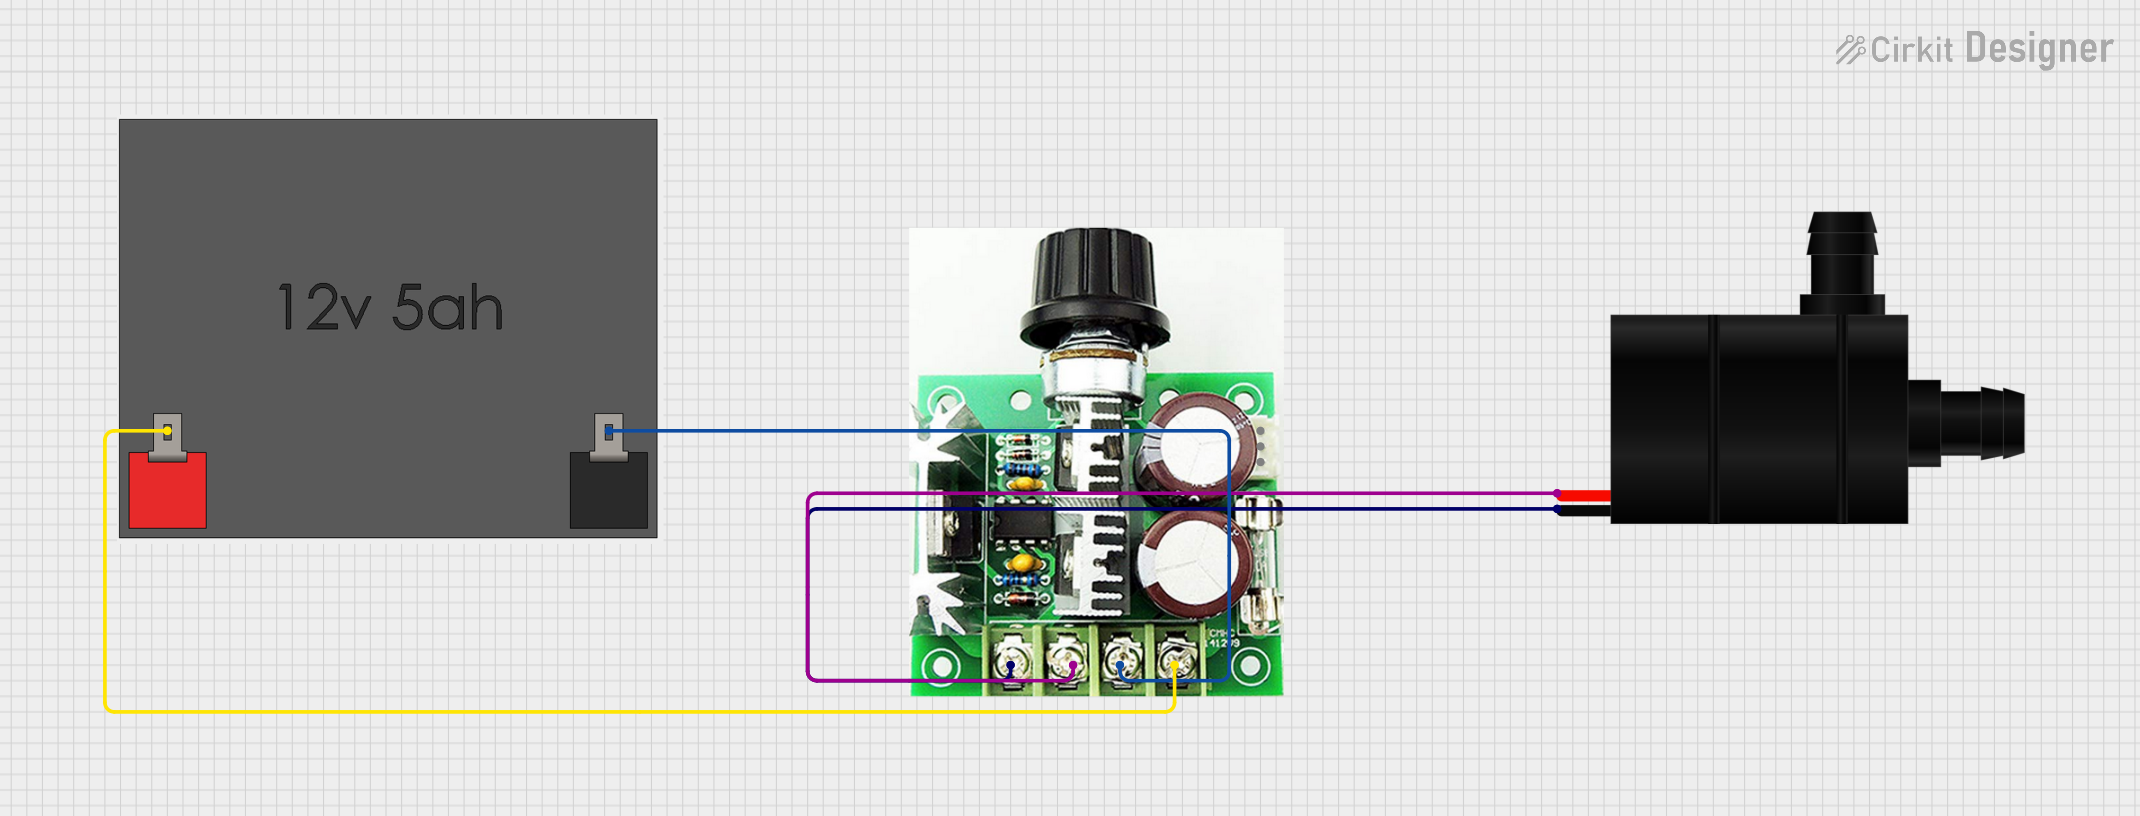
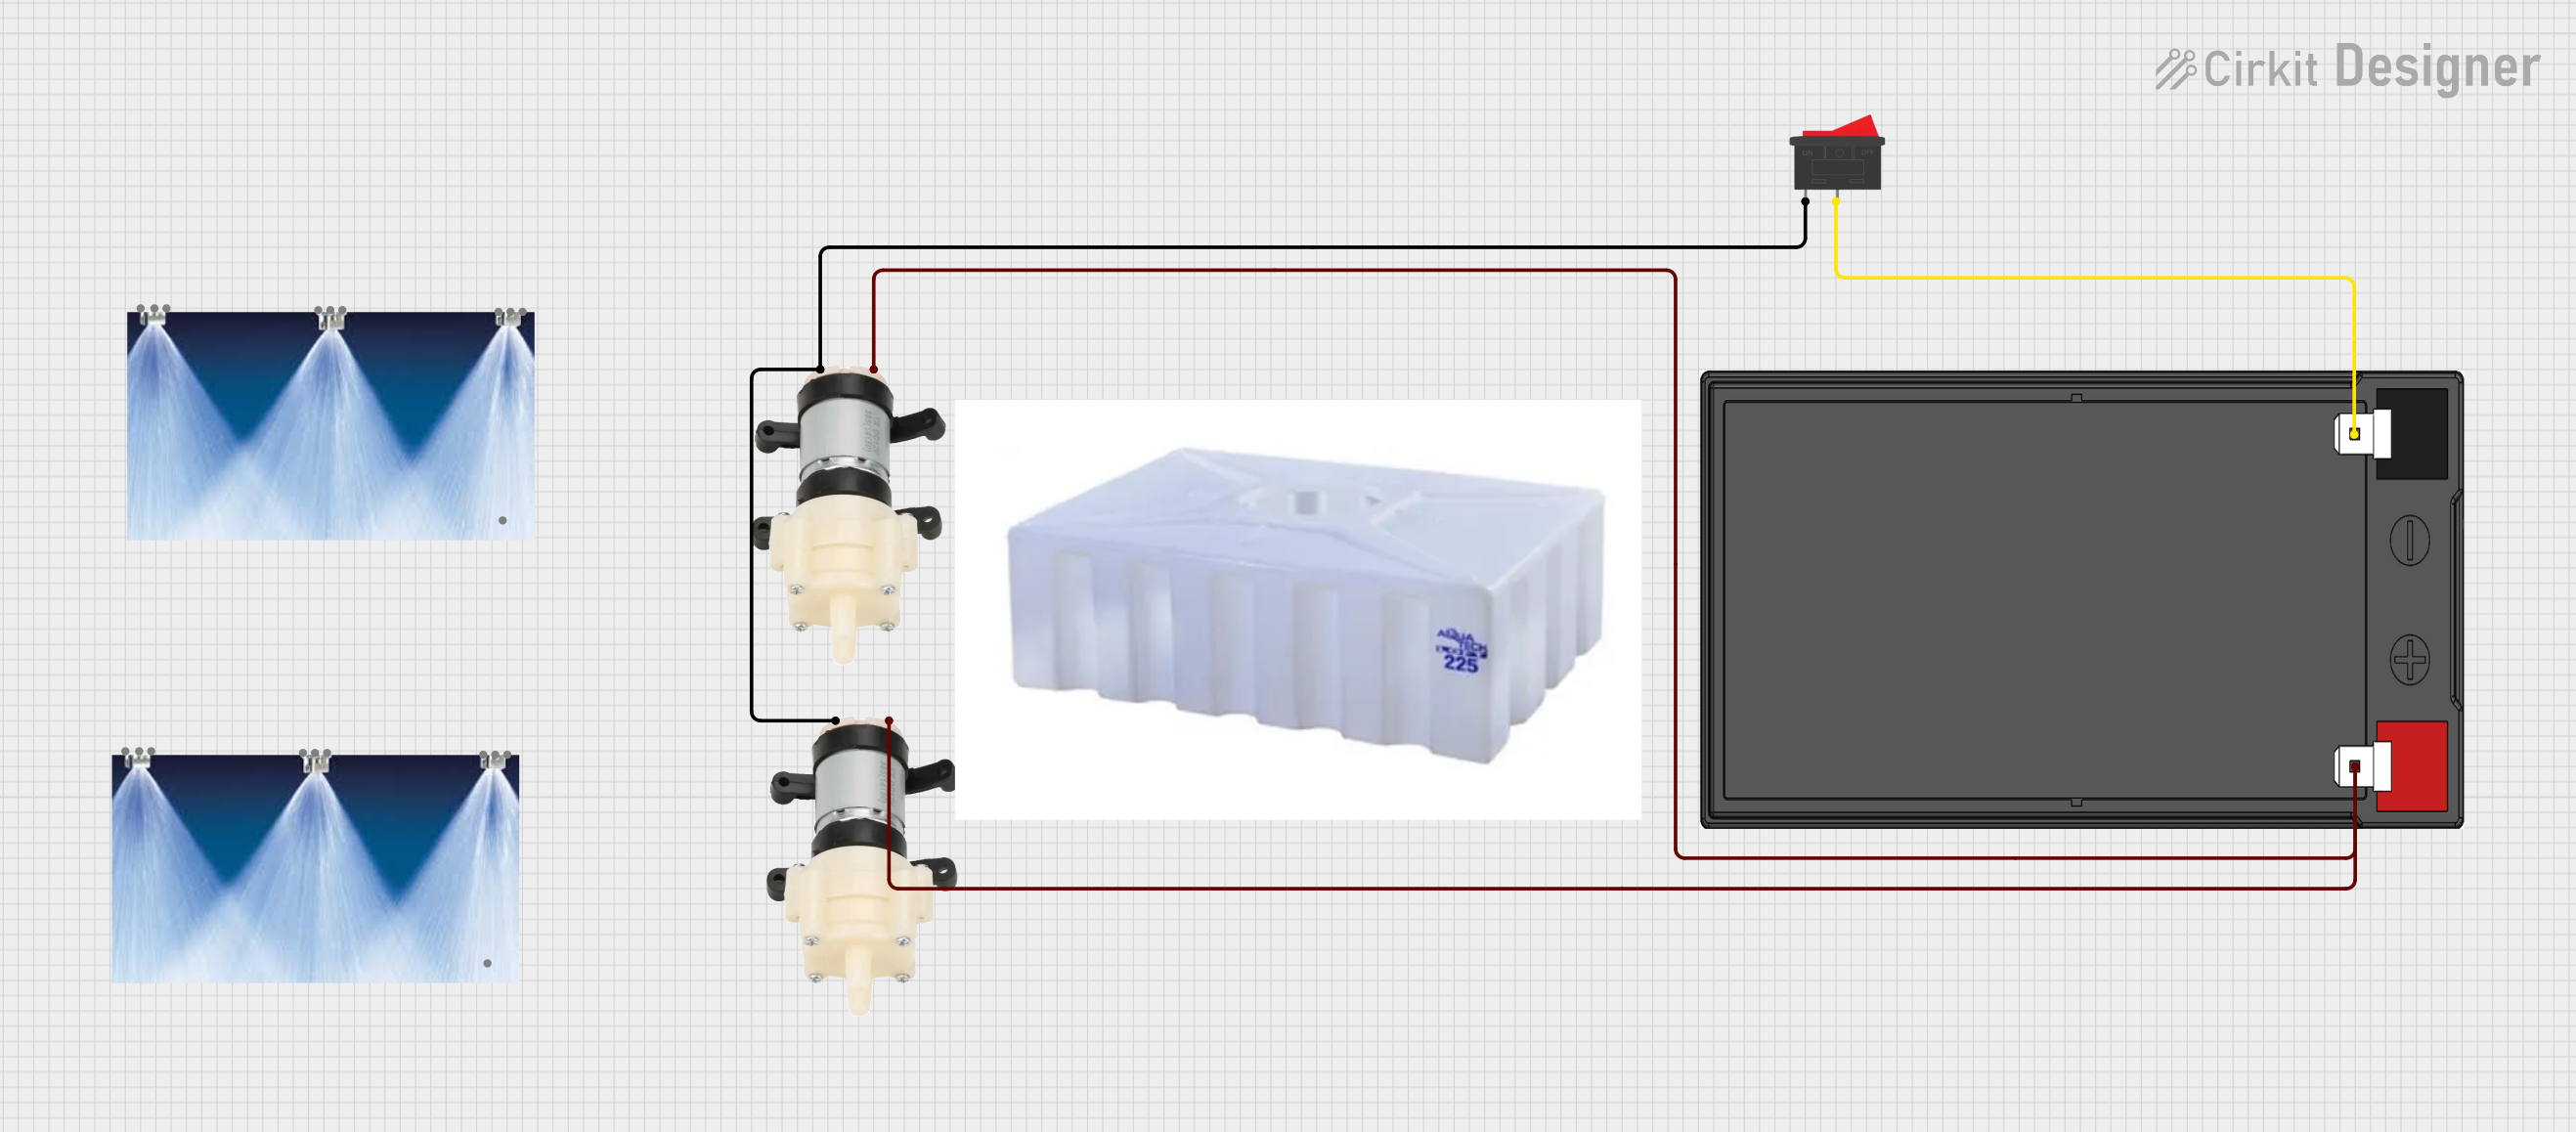
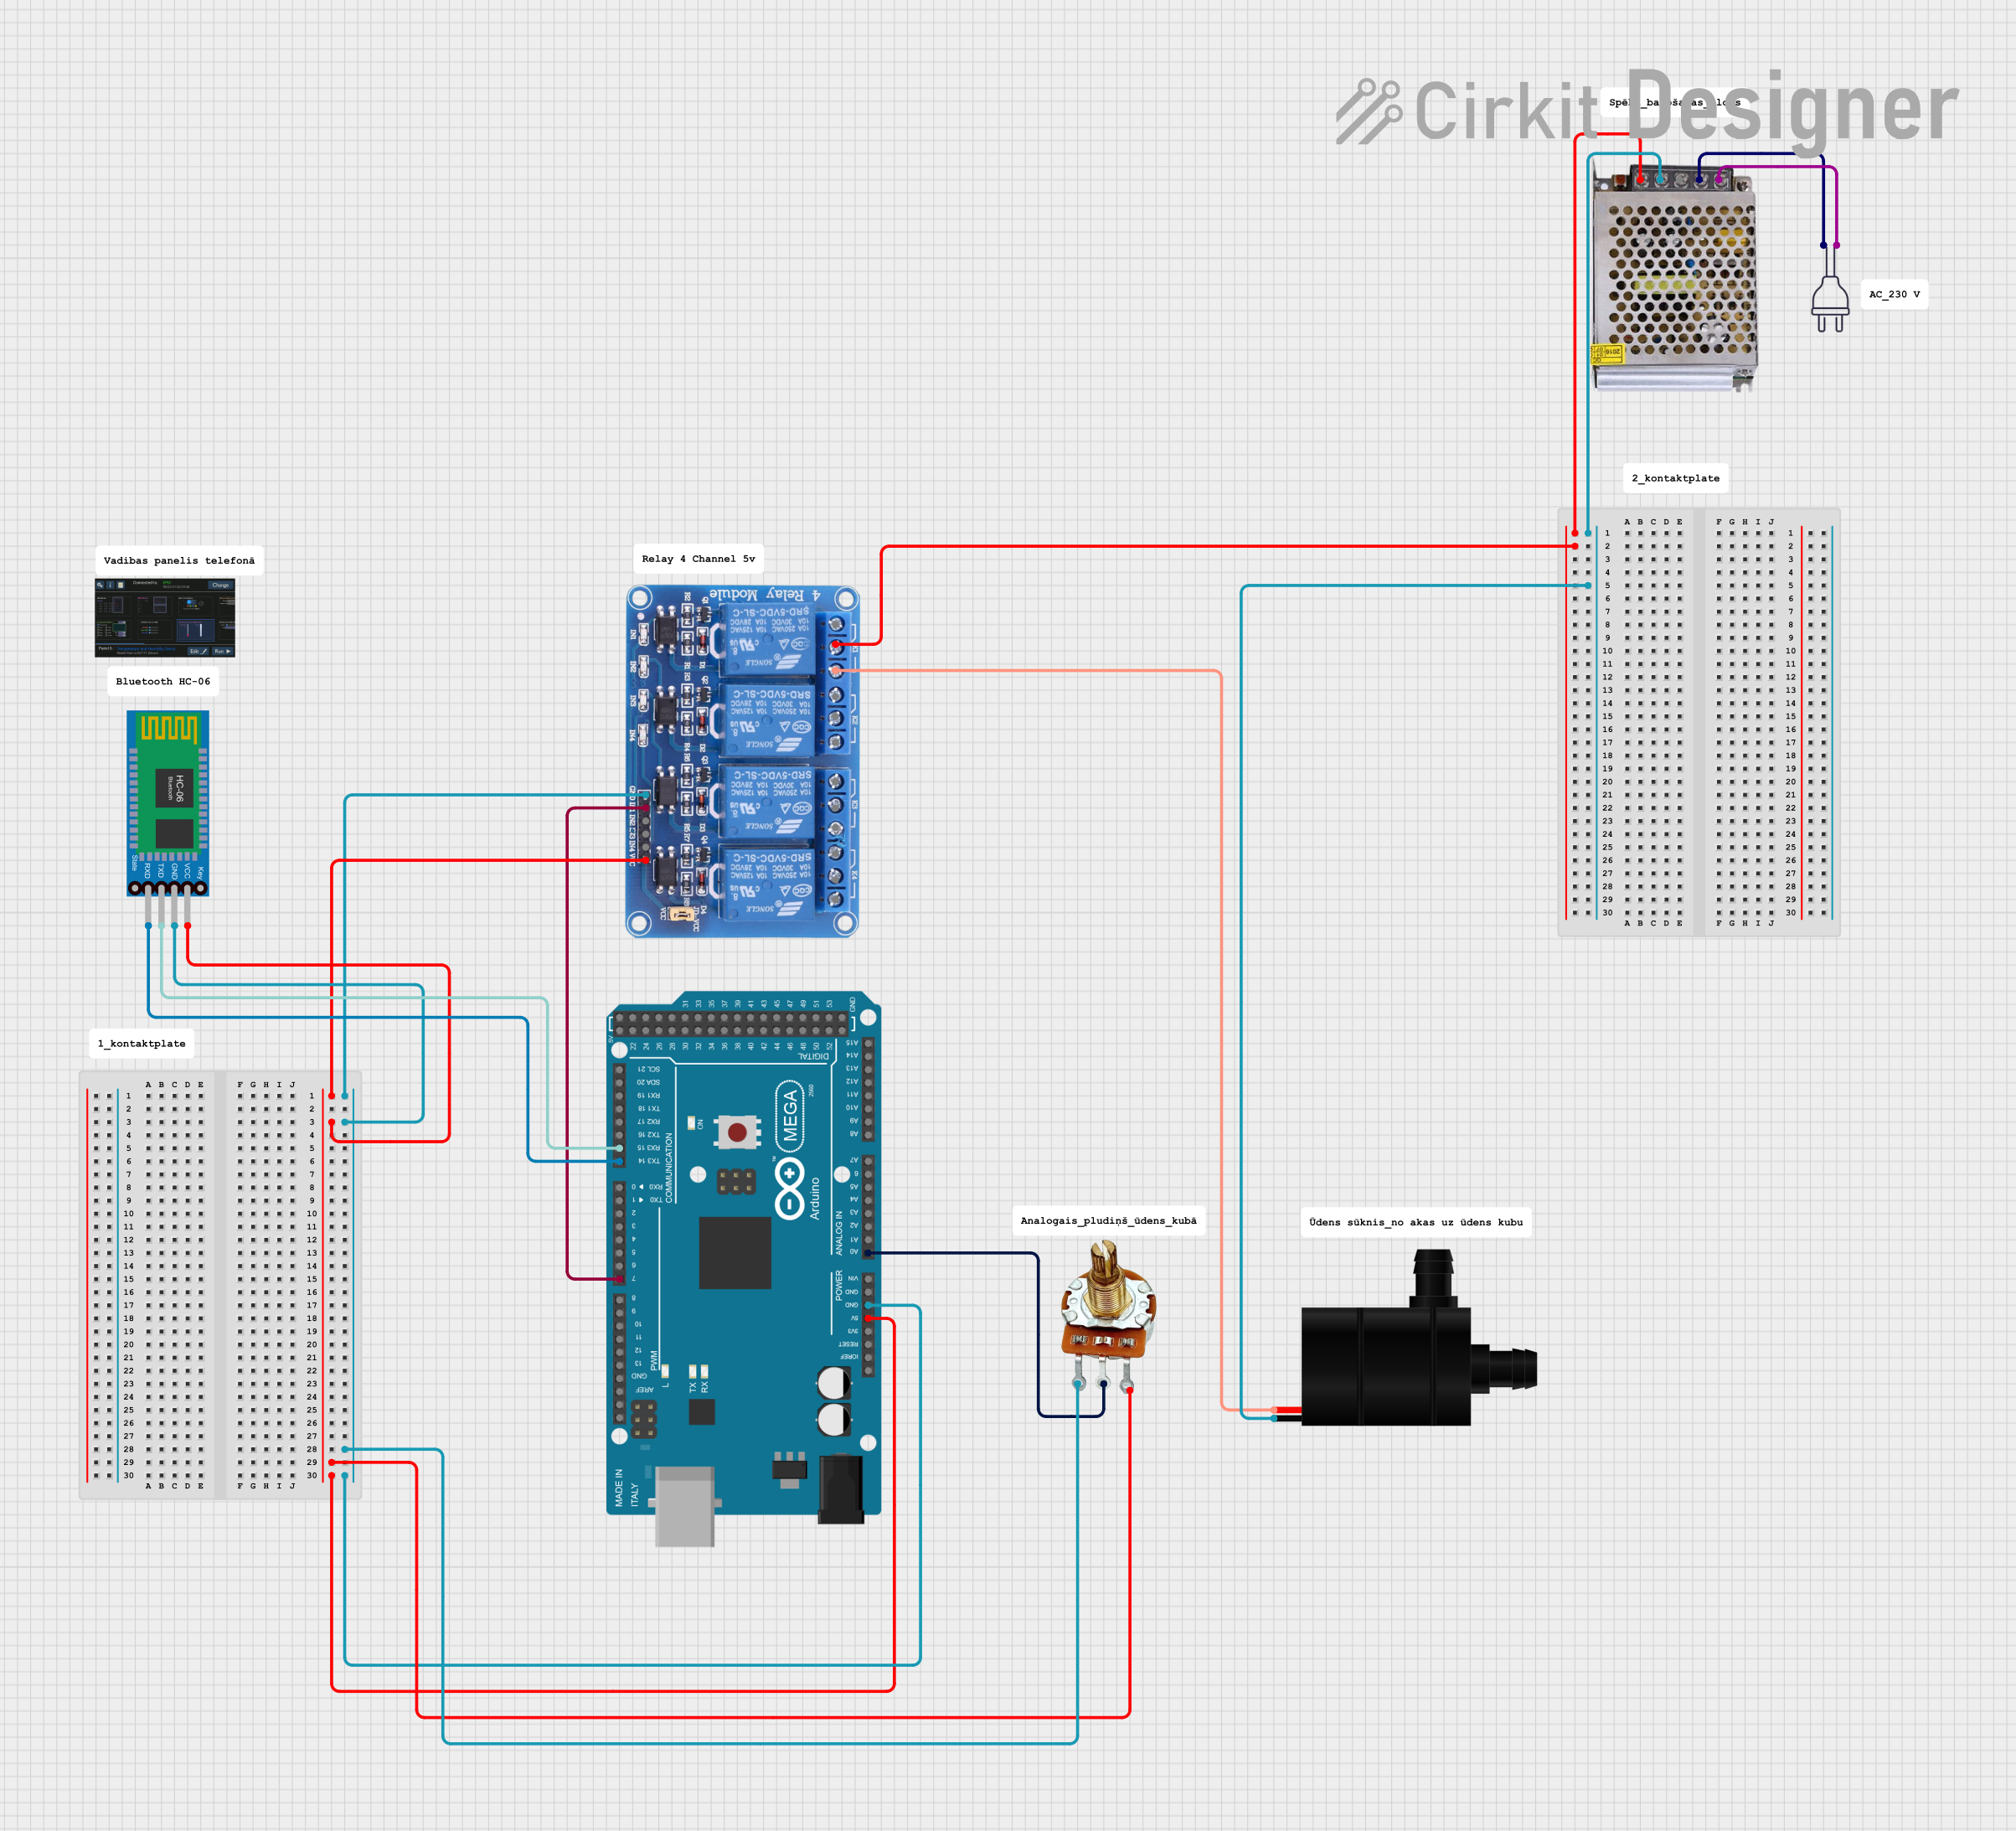
Explore Projects Built with DC 12V Submersible Water Pump
Technical Specifications
Below are the key technical details and pin configuration for the DC 12V Submersible Water Pump:
Key Technical Details
| Parameter | Value |
|---|---|
| Operating Voltage | 12V DC |
| Operating Current | 0.5A to 1A (depending on load) |
| Power Consumption | 6W to 12W |
| Maximum Flow Rate | 240 liters per hour (L/h) |
| Maximum Lift Height | 3 meters |
| Pump Type | Submersible |
| Material | Plastic (waterproof housing) |
| Dimensions | ~45mm x 35mm x 30mm |
| Weight | ~100g |
| Cable Length | ~1 meter |
| Operating Temperature | 0°C to 50°C |
Pin Configuration and Descriptions
The DC 12V Submersible Water Pump has a simple two-wire connection:
| Wire Color | Description |
|---|---|
| Red | Positive terminal (+12V DC) |
| Black | Negative terminal (Ground) |
Usage Instructions
How to Use the Component in a Circuit
- Power Supply: Connect the red wire to the positive terminal of a 12V DC power source and the black wire to the ground terminal. Ensure the power supply can provide at least 1A of current.
- Submersion: Place the pump fully underwater before powering it on. The pump is designed to operate only when submerged.
- Water Flow Direction: Ensure the inlet and outlet are not obstructed. The inlet should be submerged, and the outlet should be connected to a hose or left open for water flow.
- Control: For automated control, you can use a relay module or a transistor circuit to switch the pump on and off using a microcontroller like an Arduino.
Important Considerations and Best Practices
- Do not run the pump dry: Operating the pump without water can damage the motor and reduce its lifespan.
- Voltage Regulation: Use a stable 12V DC power supply to avoid overvoltage, which can damage the pump.
- Filtration: If the water contains debris, use a filter to prevent clogging the pump.
- Temperature: Avoid using the pump in water temperatures exceeding 50°C.
- Polarity: Ensure correct polarity when connecting the wires to avoid damage.
Example: Controlling the Pump with an Arduino UNO
Below is an example of how to control the DC 12V Submersible Water Pump using an Arduino UNO and a relay module:
// Example: Controlling a DC 12V Submersible Water Pump with Arduino UNO
// This code turns the pump on for 5 seconds and off for 5 seconds in a loop.

const int relayPin = 7; // Pin connected to the relay module

void setup() {
  pinMode(relayPin, OUTPUT); // Set the relay pin as an output
  digitalWrite(relayPin, LOW); // Ensure the pump is off at startup
}

void loop() {
  digitalWrite(relayPin, HIGH); // Turn the pump on
  delay(5000); // Keep the pump on for 5 seconds
  digitalWrite(relayPin, LOW); // Turn the pump off
  delay(5000); // Keep the pump off for 5 seconds
}
Wiring Notes:
- Connect the relay module's control pin to Arduino pin 7.
- Connect the pump's red wire to the relay's normally open (NO) terminal.
- Connect the pump's black wire to the ground.
- Connect the relay's common (COM) terminal to the 12V DC power supply's positive terminal.
Troubleshooting and FAQs
Common Issues and Solutions
| Issue | Possible Cause | Solution |
|---|---|---|
| Pump does not start | Incorrect wiring or no power supply | Check connections and ensure 12V DC is supplied. |
| Pump runs but no water is pumped | Airlock or clogged inlet/outlet | Submerge the pump fully and clear any obstructions. |
| Pump is noisy | Debris inside the pump | Clean the pump and ensure water is free of debris. |
| Pump overheats | Running dry or excessive voltage | Ensure the pump is submerged and use a regulated 12V DC supply. |
FAQs
Can the pump be used with liquids other than water?
- The pump is designed for water. Using it with other liquids may damage the internal components.
Can the pump be used outdoors?
- Yes, but ensure the power connections are waterproof and protected from the elements.
What happens if the pump is run dry?
- Running the pump dry can cause overheating and permanent damage to the motor. Always ensure it is submerged before use.
Can the pump be controlled with a PWM signal?
- No, the pump is not designed for direct PWM control. Use a relay or MOSFET for on/off control.
By following this documentation, you can effectively use the DC 12V Submersible Water Pump in your projects while ensuring safety and optimal performance.