How to Use Set battery (7v): Examples, Pinouts, and Specs
Introduction
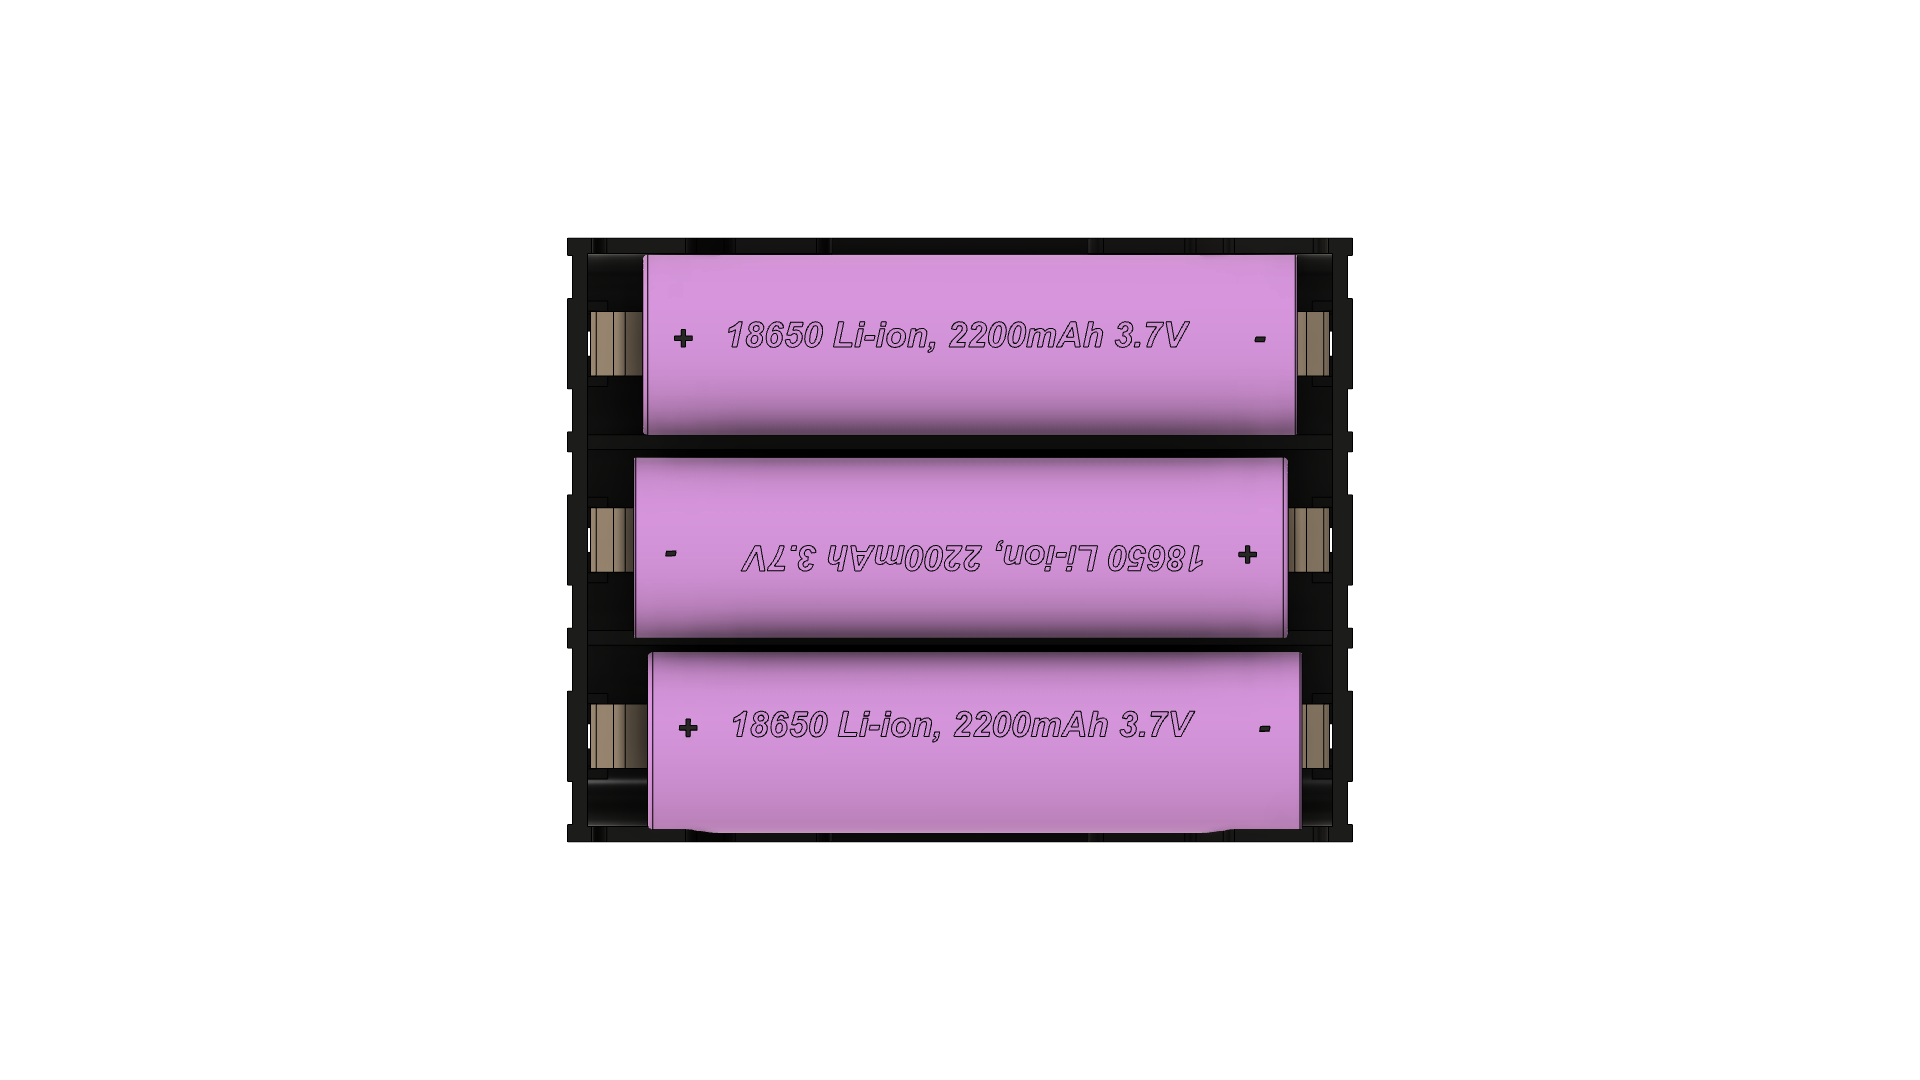
A set battery with a voltage output of 7 volts is a portable energy source commonly used in various electronic projects and applications. These batteries are designed to provide a consistent voltage level, making them ideal for powering devices that require a stable power supply. Common applications include portable electronics, hobbyist projects such as remote-controlled vehicles, and as a power source for development boards like the Arduino UNO.
Explore Projects Built with Set battery (7v)


Explore Projects Built with Set battery (7v)
Technical Specifications
General Characteristics
- Nominal Voltage: 7V
- Chemistry: [Chemistry type, e.g., Li-ion, NiMH]
- Capacity: [Capacity in mAh]
- Rechargeable: [Yes/No]
- Cycle Life: [Number of charge/discharge cycles]
- Operating Temperature Range: [Min] - [Max] °C
Physical Attributes
- Dimensions: [Length x Width x Height in mm]
- Weight: [Weight in grams]
- Connector Type: [Connector type, e.g., JST, barrel plug]
Electrical Specifications
| Parameter | Specification |
|---|---|
| Nominal Voltage | 7V |
| Maximum Continuous Discharge Current | [Current in A] |
| Peak Discharge Current | [Current in A] |
| Charge Current | [Current in A] |
| Overcharge Protection Voltage | [Voltage in V] |
| Discharge Cut-off Voltage | [Voltage in V] |
| Internal Resistance | [Resistance in mΩ] |
Usage Instructions
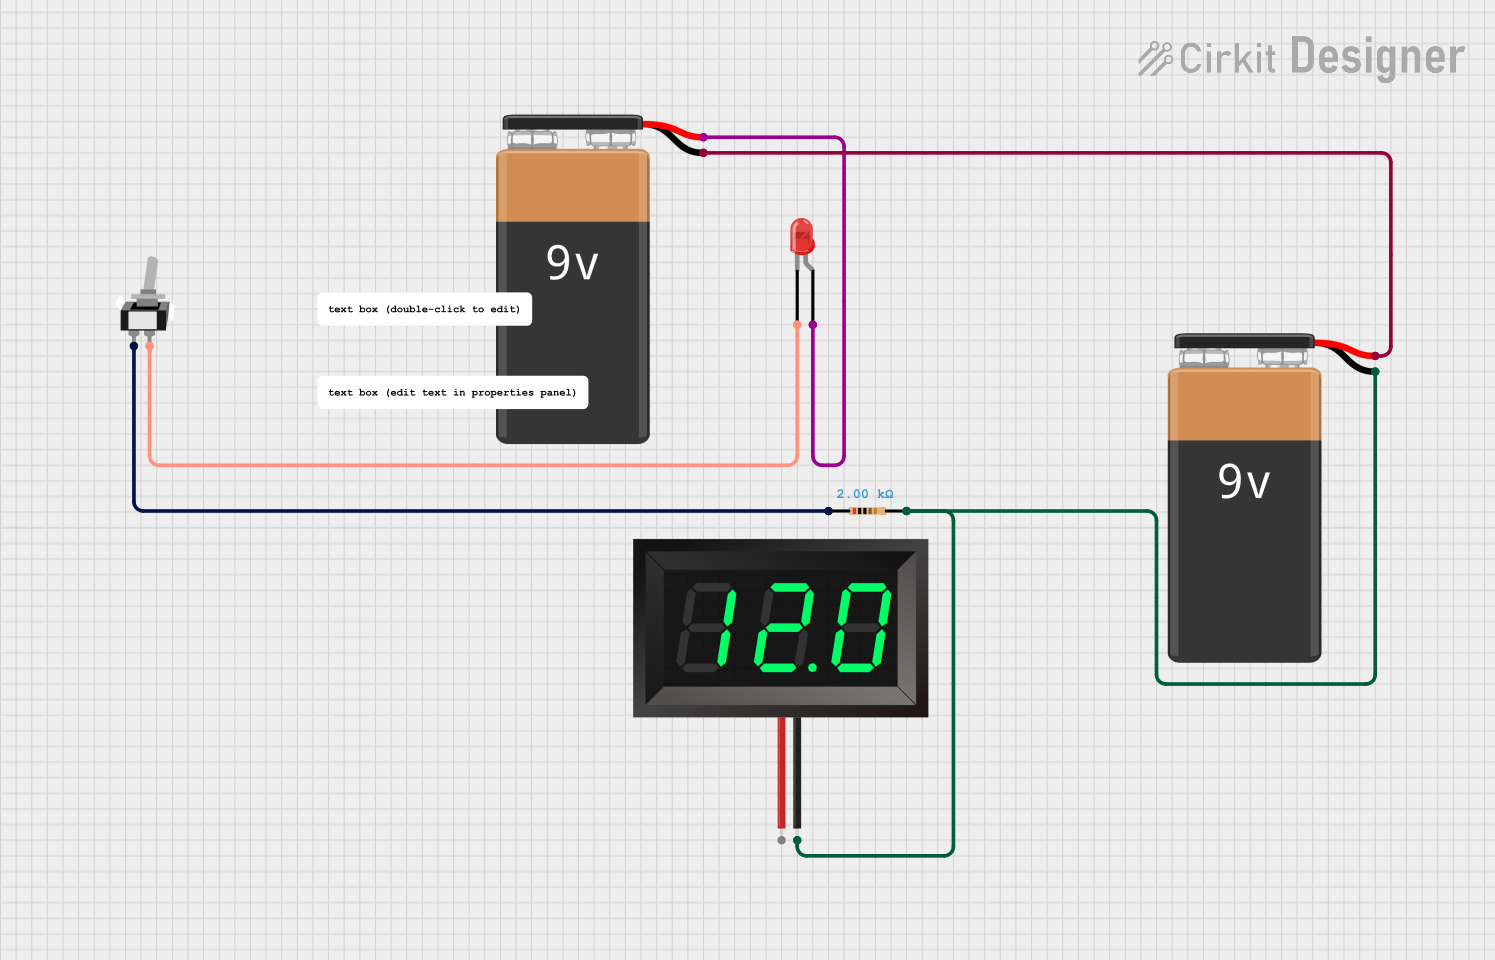
Integrating with a Circuit
- Connection: Ensure the battery connector is compatible with the power input connector of your device. If not, you may need an adapter or to modify the connectors.
- Voltage Regulation: If your device requires a voltage lower than 7V, use a voltage regulator to prevent damage.
- Charging: Use a charger that matches the battery's chemistry and specifications. Overcharging can lead to battery damage or failure.
- Discharging: Do not over-discharge the battery below its cut-off voltage to avoid damaging the battery.
- Storage: Store the battery at room temperature in a dry environment. Long-term storage at full charge or high temperatures can reduce battery life.
Best Practices
- Always follow the manufacturer's guidelines for charging and discharging.
- Monitor battery temperature during high-current applications.
- Use a battery management system (BMS) for rechargeable batteries to ensure safety and longevity.
- Avoid mechanical stress and puncture to prevent battery damage and potential hazards.
Troubleshooting and FAQs
Common Issues
- Battery won't charge: Ensure the charger is functioning and compatible. Check for damaged connectors or wiring.
- Reduced capacity: Batteries degrade over time. If the battery doesn't hold a charge as it used to, it may be time to replace it.
- Device not powering on: Verify the battery voltage with a multimeter. Check if the battery is properly connected and the polarity is correct.
FAQs
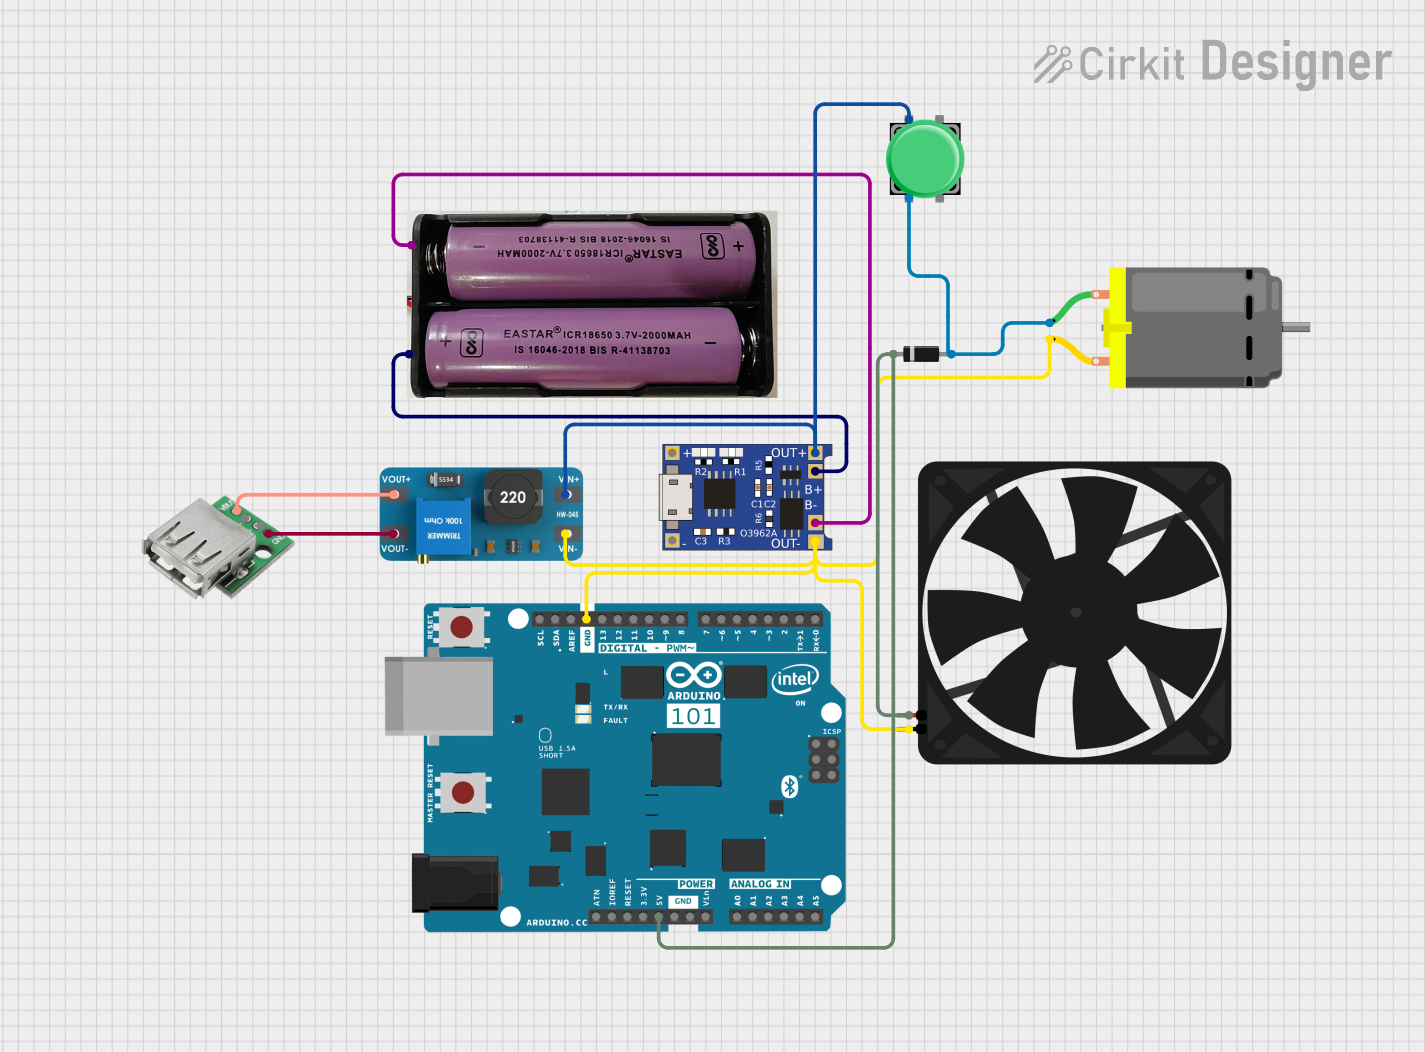
Q: Can I use this battery with an Arduino UNO? A: Yes, but you will need a voltage regulator as the Arduino UNO typically operates at 5V.
Q: How do I dispose of the battery? A: Follow local regulations for battery disposal. Do not throw it in the trash. Recycle if possible.
Q: Is it safe to leave the battery charging overnight? A: Only if the charger is designed to prevent overcharging. Otherwise, it's best to monitor the charging process.
Q: How long will the battery last in my project? A: This depends on the current draw of your project. Calculate the expected runtime by dividing the battery capacity by the current draw.
Example Code for Arduino UNO
// Example code to monitor battery voltage with an Arduino UNO
int batteryPin = A0; // Analog pin connected to battery voltage divider

void setup() {
  Serial.begin(9600);
}

void loop() {
  int sensorValue = analogRead(batteryPin); // Read the analog value
  float voltage = sensorValue * (7.0 / 1023.0); // Convert to battery voltage
  Serial.print("Battery Voltage: ");
  Serial.println(voltage);
  delay(1000); // Wait for 1 second before reading again
}
Note: The above code assumes a direct connection to the battery. If you use a voltage divider or a module to step down the voltage to a safe level for the Arduino's analog input, adjust the conversion factor (7.0 / 1023.0) accordingly.
Remember to follow all safety precautions when working with batteries, and always consult the datasheet for specific details related to the battery you are using.