How to Use 3.7v lipo 80mAh: Examples, Pinouts, and Specs
Introduction
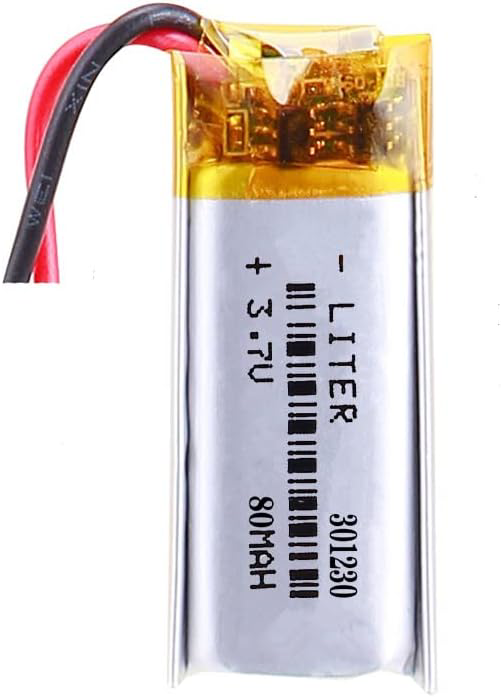
The Liter 301230 is a lithium polymer (LiPo) battery with a nominal voltage of 3.7V and a capacity of 80mAh. This compact and lightweight battery is ideal for powering small, portable electronic devices. Its high energy density and rechargeable nature make it a popular choice for applications requiring reliable and efficient energy storage.
Explore Projects Built with 3.7v lipo 80mAh


Explore Projects Built with 3.7v lipo 80mAh
Common Applications
- Wearable devices (e.g., fitness trackers, smartwatches)
- Small IoT (Internet of Things) devices
- Wireless sensors
- Miniature robotics
- Prototyping and DIY electronics projects
Technical Specifications
The following table outlines the key technical details of the Liter 301230 LiPo battery:
| Parameter | Value |
|---|---|
| Nominal Voltage | 3.7V |
| Capacity | 80mAh |
| Maximum Charging Voltage | 4.2V |
| Discharge Cutoff Voltage | 3.0V |
| Standard Charge Current | 0.5C (40mA) |
| Maximum Charge Current | 1C (80mA) |
| Standard Discharge Current | 0.5C (40mA) |
| Maximum Discharge Current | 1C (80mA) |
| Dimensions (L x W x H) | 30mm x 12mm x 3mm |
| Weight | ~2 grams |
| Connector Type | Bare wire leads (customizable) |
| Chemistry | Lithium Polymer (LiPo) |
Pin Configuration
The battery typically comes with two wire leads for connection. The pinout is as follows:
| Wire Color | Function | Description |
|---|---|---|
| Red | Positive (+) | Connect to the positive terminal of the circuit. |
| Black | Negative (-) | Connect to the ground (GND) of the circuit. |
Usage Instructions
How to Use the 3.7V LiPo Battery in a Circuit
- Connection:
- Connect the red wire to the positive terminal of your circuit.
- Connect the black wire to the ground (GND) terminal of your circuit.
- Charging:
- Use a LiPo-compatible charger with a constant current/constant voltage (CC/CV) charging profile.
- Ensure the charging voltage does not exceed 4.2V.
- Use a standard charge current of 0.5C (40mA) for optimal battery life.
- Discharging:
- Avoid discharging the battery below 3.0V to prevent damage.
- Use a load that does not exceed the maximum discharge current of 1C (80mA).
- Protection:
- Incorporate a battery protection circuit module (PCM) to prevent overcharging, over-discharging, and short circuits.
Important Considerations and Best Practices
- Storage: Store the battery at a voltage of approximately 3.8V in a cool, dry place when not in use for extended periods.
- Safety: Avoid puncturing, short-circuiting, or exposing the battery to high temperatures.
- Balancing: If using multiple batteries in series or parallel, ensure proper balancing to maintain consistent performance.
- Arduino Integration: When using this battery with an Arduino UNO or similar microcontroller, ensure the voltage is regulated to 5V or 3.3V as required by the board.
Example: Using the Battery with an Arduino UNO
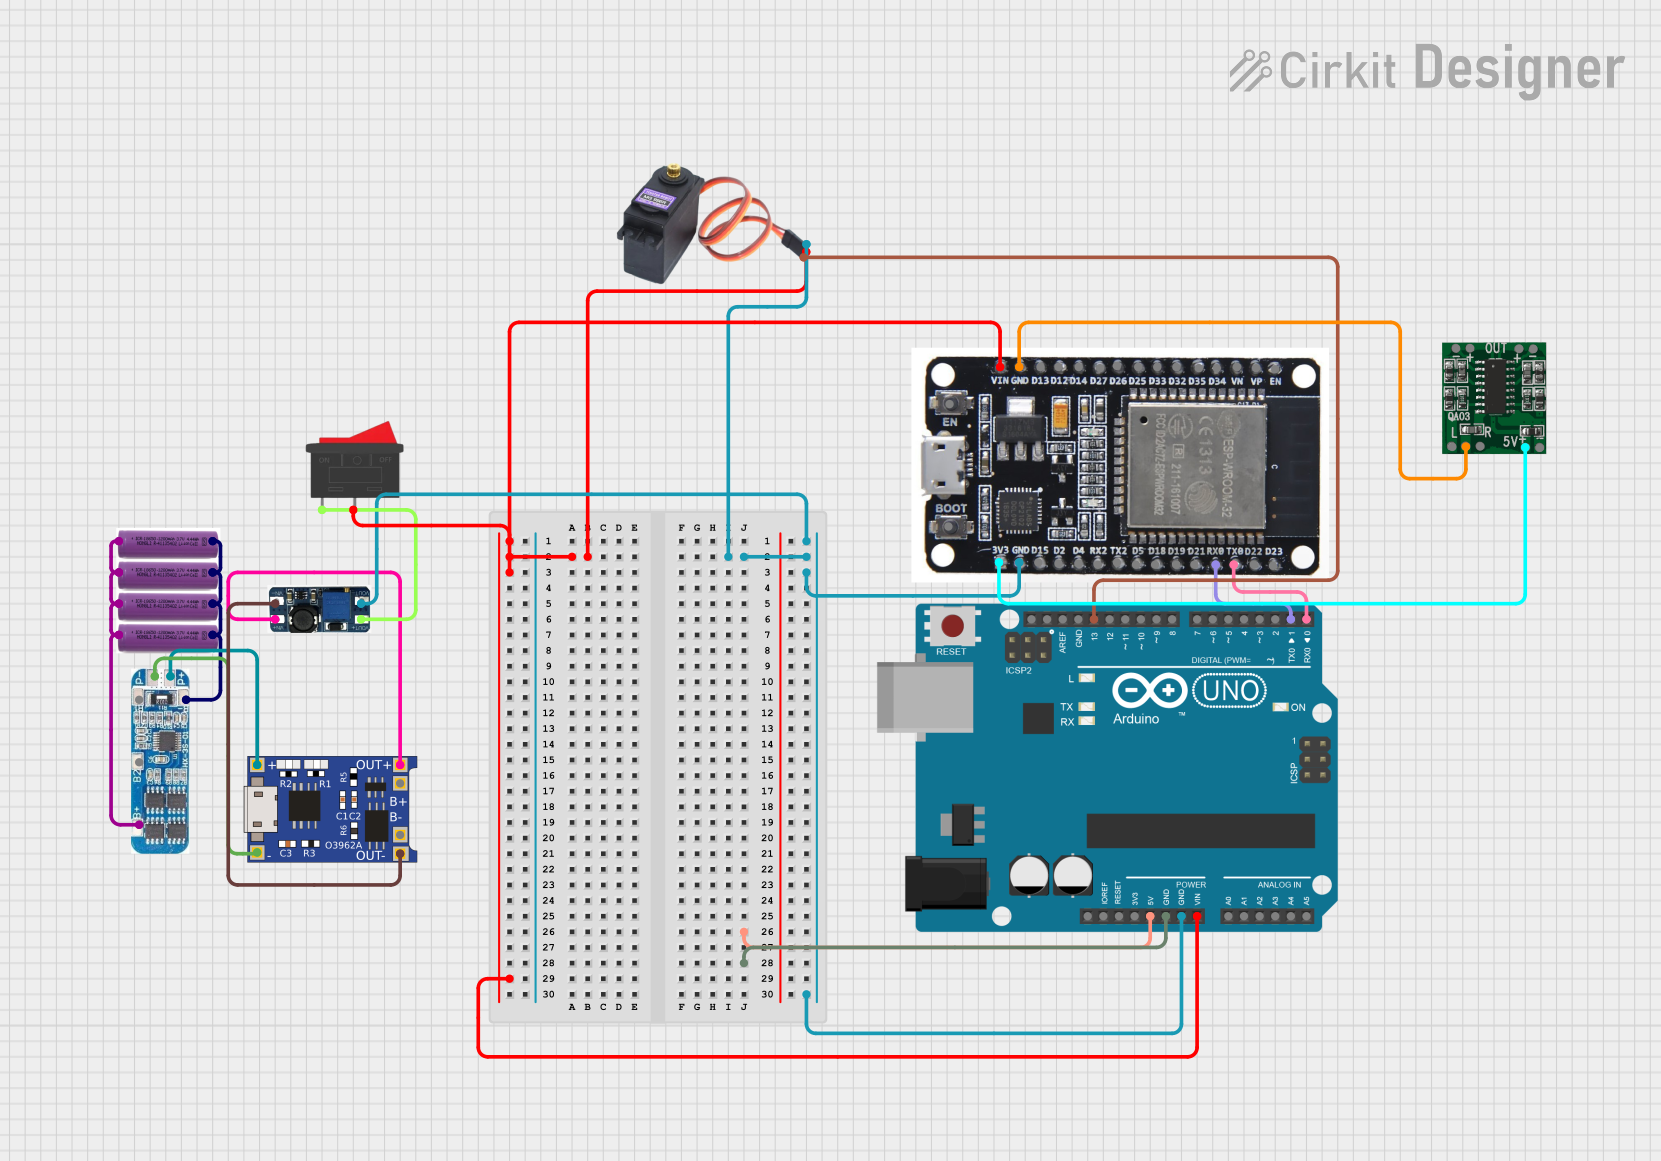
To power an Arduino UNO with the 3.7V LiPo battery, you can use a step-up voltage regulator to boost the voltage to 5V. Below is an example circuit and code for reading the battery voltage using the Arduino's analog input:
Circuit Setup:
- Connect the battery's red wire to the input of the step-up regulator.
- Connect the regulator's output to the Arduino's VIN pin.
- Use a voltage divider circuit to measure the battery voltage and connect it to an analog pin (e.g., A0).
Arduino Code:
// Define the analog pin for battery voltage measurement
const int batteryPin = A0;

// Voltage divider resistor values (in ohms)
const float R1 = 10000.0; // Resistor connected to battery positive
const float R2 = 10000.0; // Resistor connected to ground

void setup() {
  Serial.begin(9600); // Initialize serial communication
}

void loop() {
  int rawValue = analogRead(batteryPin); // Read the analog value
  float voltage = (rawValue / 1023.0) * 5.0; // Convert to voltage (Arduino 5V ADC)

  // Adjust for voltage divider
  float batteryVoltage = voltage * (R1 + R2) / R2;

  // Print the battery voltage to the Serial Monitor
  Serial.print("Battery Voltage: ");
  Serial.print(batteryVoltage);
  Serial.println(" V");

  delay(1000); // Wait for 1 second before the next reading
}
Notes:
- Ensure the voltage divider resistors are chosen to keep the analog input voltage below 5V.
- Use a step-up regulator with sufficient current capacity for the Arduino and connected peripherals.
Troubleshooting and FAQs
Common Issues
Battery Not Charging:
- Cause: Charger not compatible or incorrect charging voltage.
- Solution: Use a LiPo-specific charger with a 4.2V output and appropriate current rating.
Battery Drains Quickly:
- Cause: Excessive load or degraded battery capacity.
- Solution: Ensure the load does not exceed the maximum discharge current. Replace the battery if it has reached the end of its lifecycle.
Battery Swells or Overheats:
- Cause: Overcharging, over-discharging, or physical damage.
- Solution: Stop using the battery immediately. Dispose of it safely according to local regulations.
Arduino Not Powering On:
- Cause: Insufficient voltage or current from the battery.
- Solution: Use a step-up regulator to boost the voltage to 5V. Ensure the battery is fully charged.
FAQs
Q1: Can I connect this battery directly to a 5V device?
A1: No, the battery's nominal voltage is 3.7V, which is insufficient for most 5V devices. Use a step-up regulator to boost the voltage.
Q2: How long will the battery last on a single charge?
A2: Battery life depends on the load current. For example, at a 40mA load, the battery will last approximately 2 hours (80mAh ÷ 40mA).
Q3: Is it safe to use this battery in series or parallel configurations?
A3: Yes, but ensure proper balancing and use a protection circuit to prevent overcharging or over-discharging.
Q4: How do I safely dispose of the battery?
A4: Take the battery to a certified e-waste recycling facility. Do not dispose of it in regular trash.