How to Use Baterai: Examples, Pinouts, and Specs
Introduction
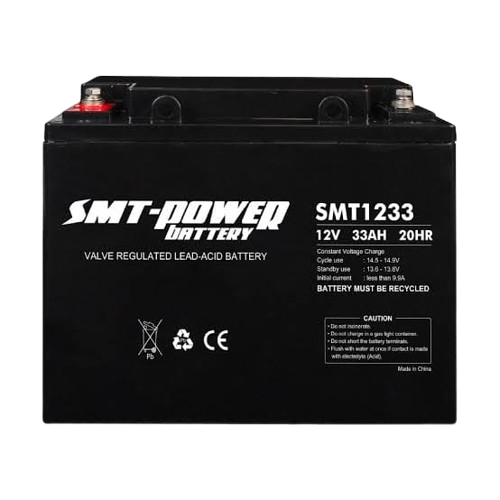
- A battery is a device that stores electrical energy in chemical form and converts it into electrical energy when needed. It serves as a portable and reliable power source for a wide range of electronic devices and systems.
- Common applications include powering portable electronics (e.g., smartphones, laptops), remote controls, flashlights, electric vehicles, and backup power systems.
Explore Projects Built with Baterai
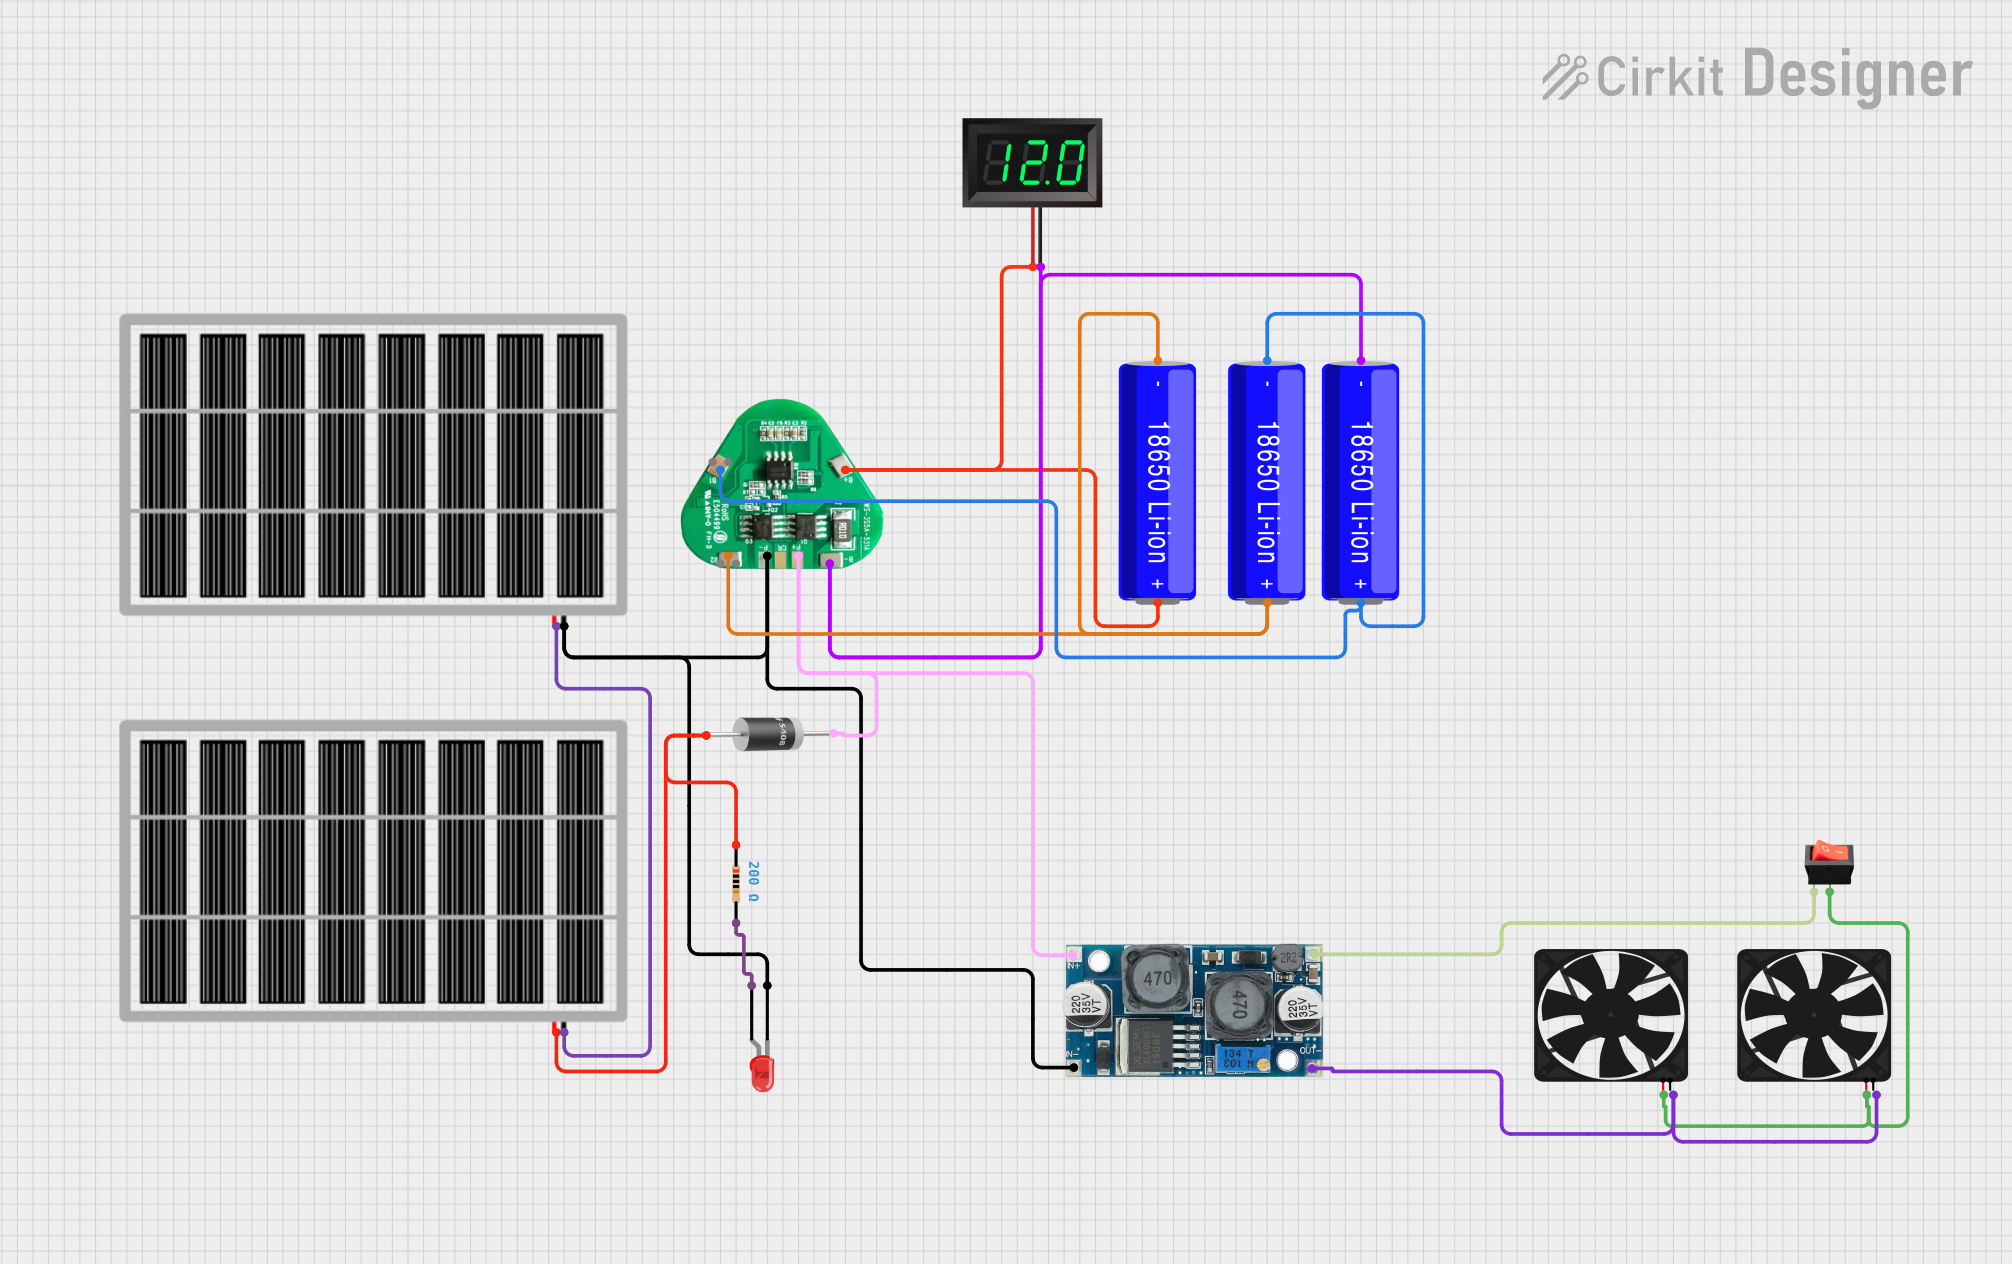


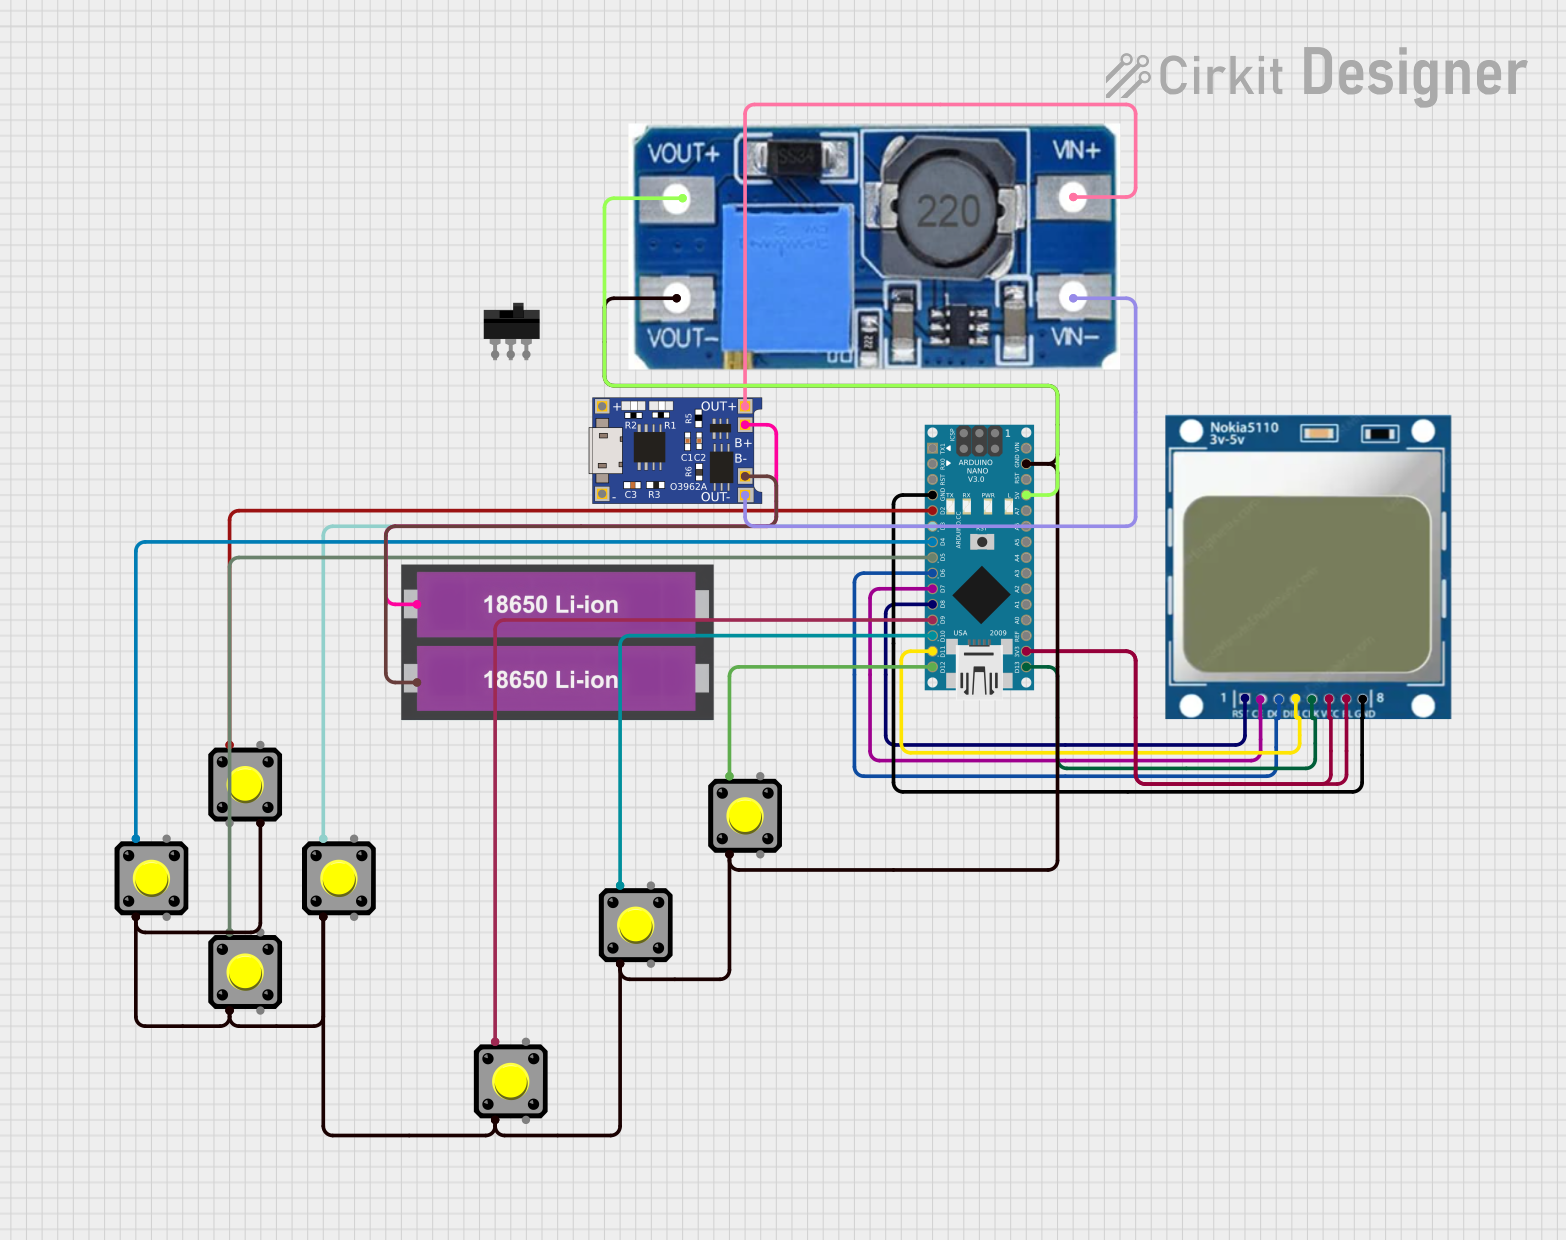
Explore Projects Built with Baterai
Technical Specifications
Batteries come in various types, sizes, and chemistries. Below are general specifications for common battery types:
General Specifications
| Parameter | Description |
|---|---|
| Voltage Range | Typically 1.2V to 12V (depending on type and size) |
| Capacity | Measured in milliampere-hours (mAh) or ampere-hours (Ah) |
| Chemistry | Alkaline, Lithium-ion (Li-ion), Nickel-Metal Hydride (NiMH), Lead-Acid, etc. |
| Rechargeability | Rechargeable (e.g., Li-ion, NiMH) or Non-rechargeable (e.g., Alkaline) |
| Operating Temperature | Typically -20°C to 60°C (varies by type) |
| Shelf Life | 2 to 10 years (depending on type and storage conditions) |
Pin Configuration and Descriptions
Batteries typically have two terminals: positive (+) and negative (-). Below is a table describing these terminals:
| Pin/Terminal | Symbol | Description |
|---|---|---|
| Positive | (+) | The positive terminal (anode in discharge mode) where current flows out. |
| Negative | (-) | The negative terminal (cathode in discharge mode) where current flows in. |
Usage Instructions
How to Use a Battery in a Circuit
- Identify the Terminals: Ensure you correctly identify the positive (+) and negative (-) terminals of the battery.
- Connect to the Circuit:
- Connect the positive terminal of the battery to the positive rail or input of your circuit.
- Connect the negative terminal to the ground (GND) or negative rail of your circuit.
- Check Voltage and Current Requirements:
- Ensure the battery voltage matches the requirements of your circuit.
- Verify that the battery can supply sufficient current for your application.
- Use a Battery Holder: For safety and convenience, use a battery holder or clip to secure the battery in place.
- Add Protection:
- Use a fuse or current-limiting resistor to prevent overcurrent.
- For rechargeable batteries, use a proper charging circuit to avoid overcharging or overheating.
Important Considerations and Best Practices
- Polarity: Always connect the battery with the correct polarity to avoid damaging your circuit.
- Storage: Store batteries in a cool, dry place to extend their shelf life.
- Disposal: Dispose of used batteries properly according to local regulations to prevent environmental harm.
- Rechargeable Batteries: Use a compatible charger and avoid overcharging to prolong battery life.
- Avoid Short Circuits: Never short the terminals of a battery, as this can cause overheating, leakage, or even explosion.
Example: Connecting a Battery to an Arduino UNO
Below is an example of powering an Arduino UNO using a 9V battery:
- Connect the positive terminal of the 9V battery to the VIN pin on the Arduino UNO.
- Connect the negative terminal of the battery to the GND pin on the Arduino UNO.
// Example code for Arduino UNO powered by a 9V battery
// This code blinks an LED connected to pin 13

void setup() {
  pinMode(13, OUTPUT); // Set pin 13 as an output
}

void loop() {
  digitalWrite(13, HIGH); // Turn the LED on
  delay(1000);            // Wait for 1 second
  digitalWrite(13, LOW);  // Turn the LED off
  delay(1000);            // Wait for 1 second
}
Troubleshooting and FAQs
Common Issues
Battery Drains Quickly:
- Cause: High current draw or a faulty circuit.
- Solution: Check for short circuits and ensure the battery capacity matches the load requirements.
Device Does Not Power On:
- Cause: Incorrect polarity or insufficient voltage.
- Solution: Verify the battery is connected correctly and meets the voltage requirements.
Battery Overheats:
- Cause: Overcurrent or short circuit.
- Solution: Disconnect the battery immediately and inspect the circuit for faults.
Rechargeable Battery Does Not Charge:
- Cause: Faulty charger or damaged battery.
- Solution: Test the charger with another battery or replace the battery if necessary.
FAQs
Q: Can I use a higher voltage battery than specified for my device?
A: No, using a higher voltage battery can damage your device. Always use a battery with the recommended voltage.Q: How do I know when to replace a battery?
A: Replace the battery when the device shows signs of low power (e.g., dim lights, slow operation) or when the battery voltage drops significantly below its nominal value.Q: Can I mix different types of batteries in the same device?
A: No, mixing different types or brands of batteries can cause uneven discharge and leakage.Q: How do I safely dispose of a battery?
A: Take the battery to a recycling center or follow local disposal guidelines for hazardous materials.