Cirkit Designer Logo
Cirkit Designer
Your all-in-one circuit design IDE
Home / 
Component Documentation

How to Use SparkFun_Heating_Pad: Examples, Pinouts, and Specs

Image of SparkFun_Heating_Pad
Cirkit Designer LogoDesign with SparkFun_Heating_Pad in Cirkit Designer

Introduction

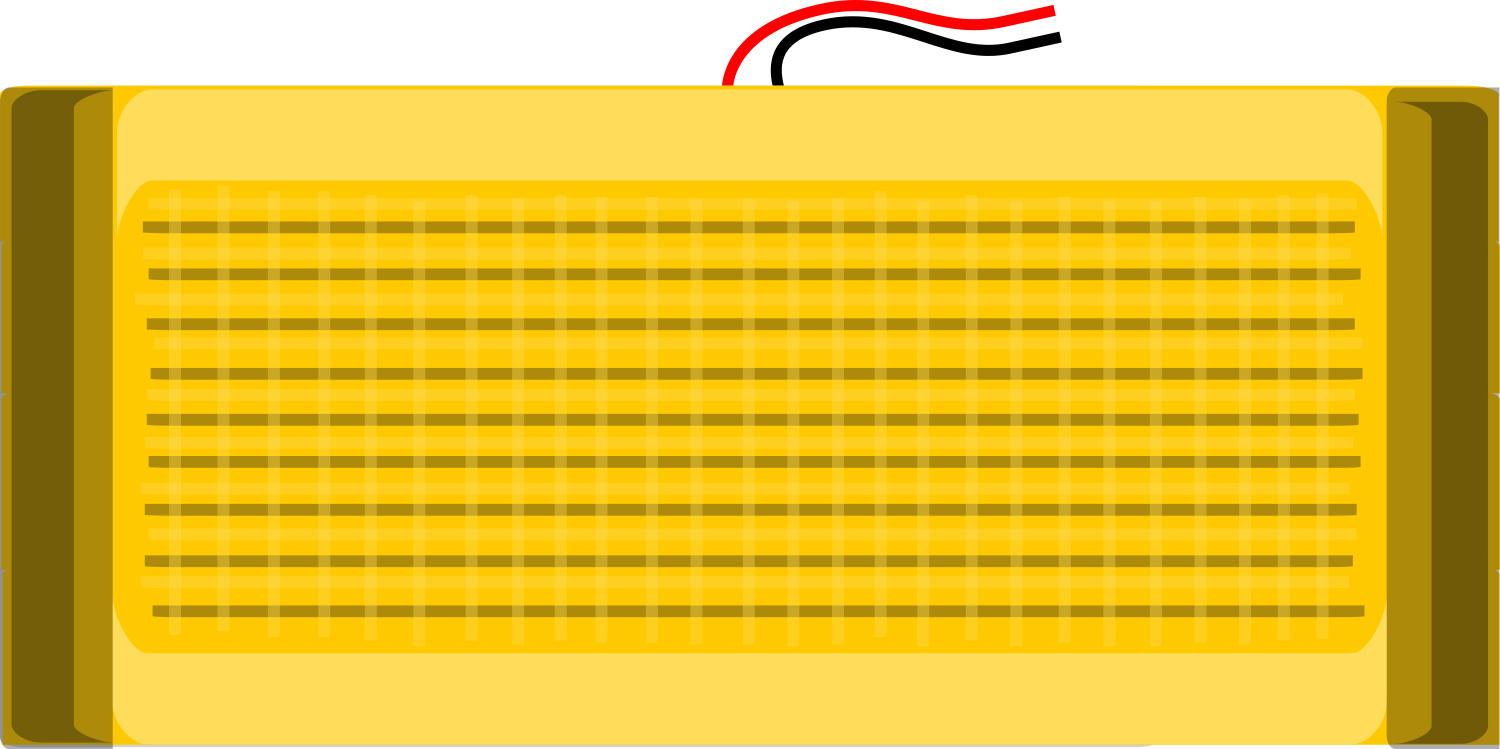
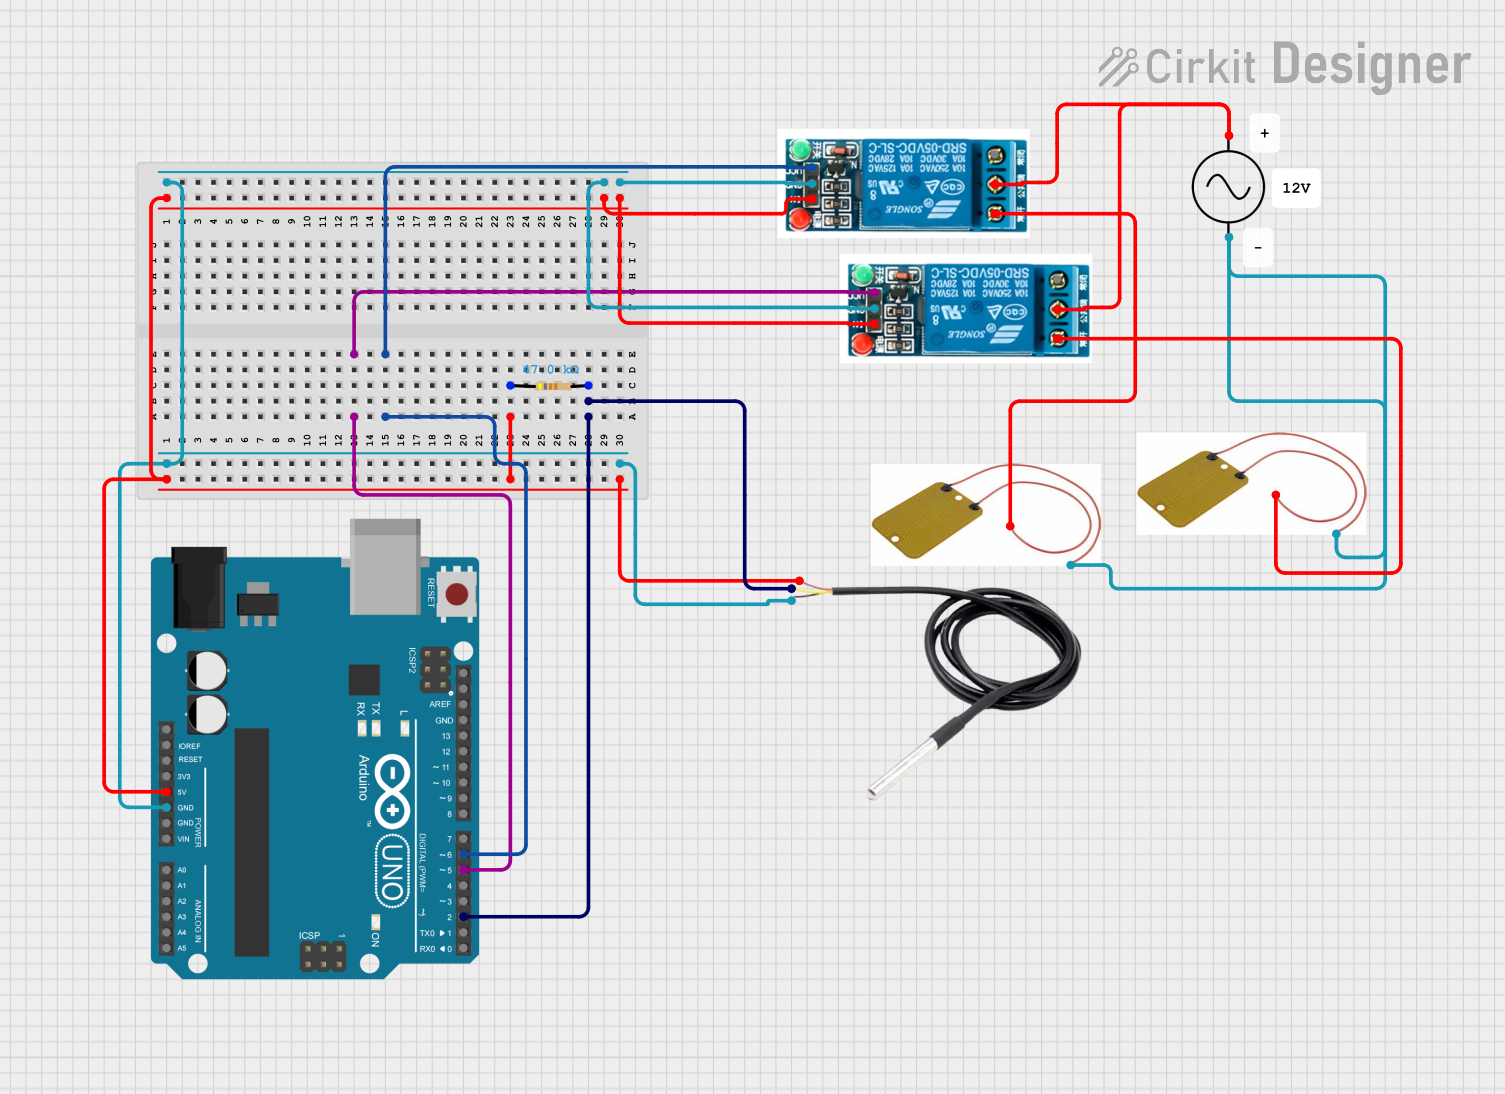
The SparkFun Heating Pad is a versatile and flexible electric heating element that can be integrated into a wide range of projects. It is particularly useful for applications requiring a controlled heat source, such as DIY heated clothing, warming devices for pets, or for maintaining temperature in sensitive electronics enclosures. The heating pad is designed for ease of use and can be powered by low-voltage sources, making it compatible with common DIY electronics platforms like Arduino.

Explore Projects Built with SparkFun_Heating_Pad

Use Cirkit Designer to design, explore, and prototype these projects online. Some projects support real-time simulation. Click "Open Project" to start designing instantly!
Battery-Powered Arduino Nano Controlled Heating Pad with Relay
Image of X: A project utilizing SparkFun_Heating_Pad in a practical application
This circuit is designed to control a heating pad using an Arduino Nano and a 1-channel relay. The Arduino Nano is powered by a 2000mAh battery and can switch the relay to control the heating pad. The circuit also includes a fast charging module for the battery.
Cirkit Designer LogoOpen Project in Cirkit Designer
Arduino-Controlled Dual Relay Heating System with Temperature Sensing
Image of bidet: A project utilizing SparkFun_Heating_Pad in a practical application
This circuit features an Arduino UNO microcontroller interfaced with a 74HC595 shift register to control a 2-channel relay module. The relays are used to switch two separate SparkFun Heating Pads on and off, which are powered by a 12V battery. Additionally, an NTC thermistor, in conjunction with a resistor, is connected to the Arduino for temperature sensing, likely for controlling the heating pads based on temperature feedback.
Cirkit Designer LogoOpen Project in Cirkit Designer
Arduino Nano Temperature-Controlled Heating System with OLED Display
Image of Temp and Heat: A project utilizing SparkFun_Heating_Pad in a practical application
This circuit uses an Arduino Nano to read temperature data from an LM35 sensor and control a heating element via an IRFZ44N MOSFET. The temperature and heating status are displayed on a 0.96" OLED screen, with the heating element being activated when the temperature falls below 20°C.
Cirkit Designer LogoOpen Project in Cirkit Designer
Arduino UNO Temperature-Controlled Heating System with DS18B20 and Relays
Image of heating bath : A project utilizing SparkFun_Heating_Pad in a practical application
This circuit is a temperature-controlled heating system using an Arduino UNO, a DS18B20 temperature sensor, and two 5V relays to control two heating mats. The Arduino reads the temperature from the DS18B20 sensor and activates the relays to power the heating mats if the temperature falls below a specified threshold.
Cirkit Designer LogoOpen Project in Cirkit Designer

Explore Projects Built with SparkFun_Heating_Pad

Use Cirkit Designer to design, explore, and prototype these projects online. Some projects support real-time simulation. Click "Open Project" to start designing instantly!
Image of X: A project utilizing SparkFun_Heating_Pad in a practical application
Battery-Powered Arduino Nano Controlled Heating Pad with Relay
This circuit is designed to control a heating pad using an Arduino Nano and a 1-channel relay. The Arduino Nano is powered by a 2000mAh battery and can switch the relay to control the heating pad. The circuit also includes a fast charging module for the battery.
Cirkit Designer LogoOpen Project in Cirkit Designer
Image of bidet: A project utilizing SparkFun_Heating_Pad in a practical application
Arduino-Controlled Dual Relay Heating System with Temperature Sensing
This circuit features an Arduino UNO microcontroller interfaced with a 74HC595 shift register to control a 2-channel relay module. The relays are used to switch two separate SparkFun Heating Pads on and off, which are powered by a 12V battery. Additionally, an NTC thermistor, in conjunction with a resistor, is connected to the Arduino for temperature sensing, likely for controlling the heating pads based on temperature feedback.
Cirkit Designer LogoOpen Project in Cirkit Designer
Image of Temp and Heat: A project utilizing SparkFun_Heating_Pad in a practical application
Arduino Nano Temperature-Controlled Heating System with OLED Display
This circuit uses an Arduino Nano to read temperature data from an LM35 sensor and control a heating element via an IRFZ44N MOSFET. The temperature and heating status are displayed on a 0.96" OLED screen, with the heating element being activated when the temperature falls below 20°C.
Cirkit Designer LogoOpen Project in Cirkit Designer
Image of heating bath : A project utilizing SparkFun_Heating_Pad in a practical application
Arduino UNO Temperature-Controlled Heating System with DS18B20 and Relays
This circuit is a temperature-controlled heating system using an Arduino UNO, a DS18B20 temperature sensor, and two 5V relays to control two heating mats. The Arduino reads the temperature from the DS18B20 sensor and activates the relays to power the heating mats if the temperature falls below a specified threshold.
Cirkit Designer LogoOpen Project in Cirkit Designer

Technical Specifications

General Specifications

  • Operating Voltage: 5V DC
  • Power Consumption: Up to 5W
  • Maximum Temperature: Approximately 40°C to 45°C at 5V
  • Dimensions: Varies by model (e.g., 5cm x 10cm)
  • Heating Element Material: Polyester fabric impregnated with conductive carbon particles
  • Flexibility: Bendable up to a certain radius without damaging the heating elements

Pin Configuration and Descriptions

Pin Number Description
1 Positive Voltage (V+)
2 Ground (GND)

Usage Instructions

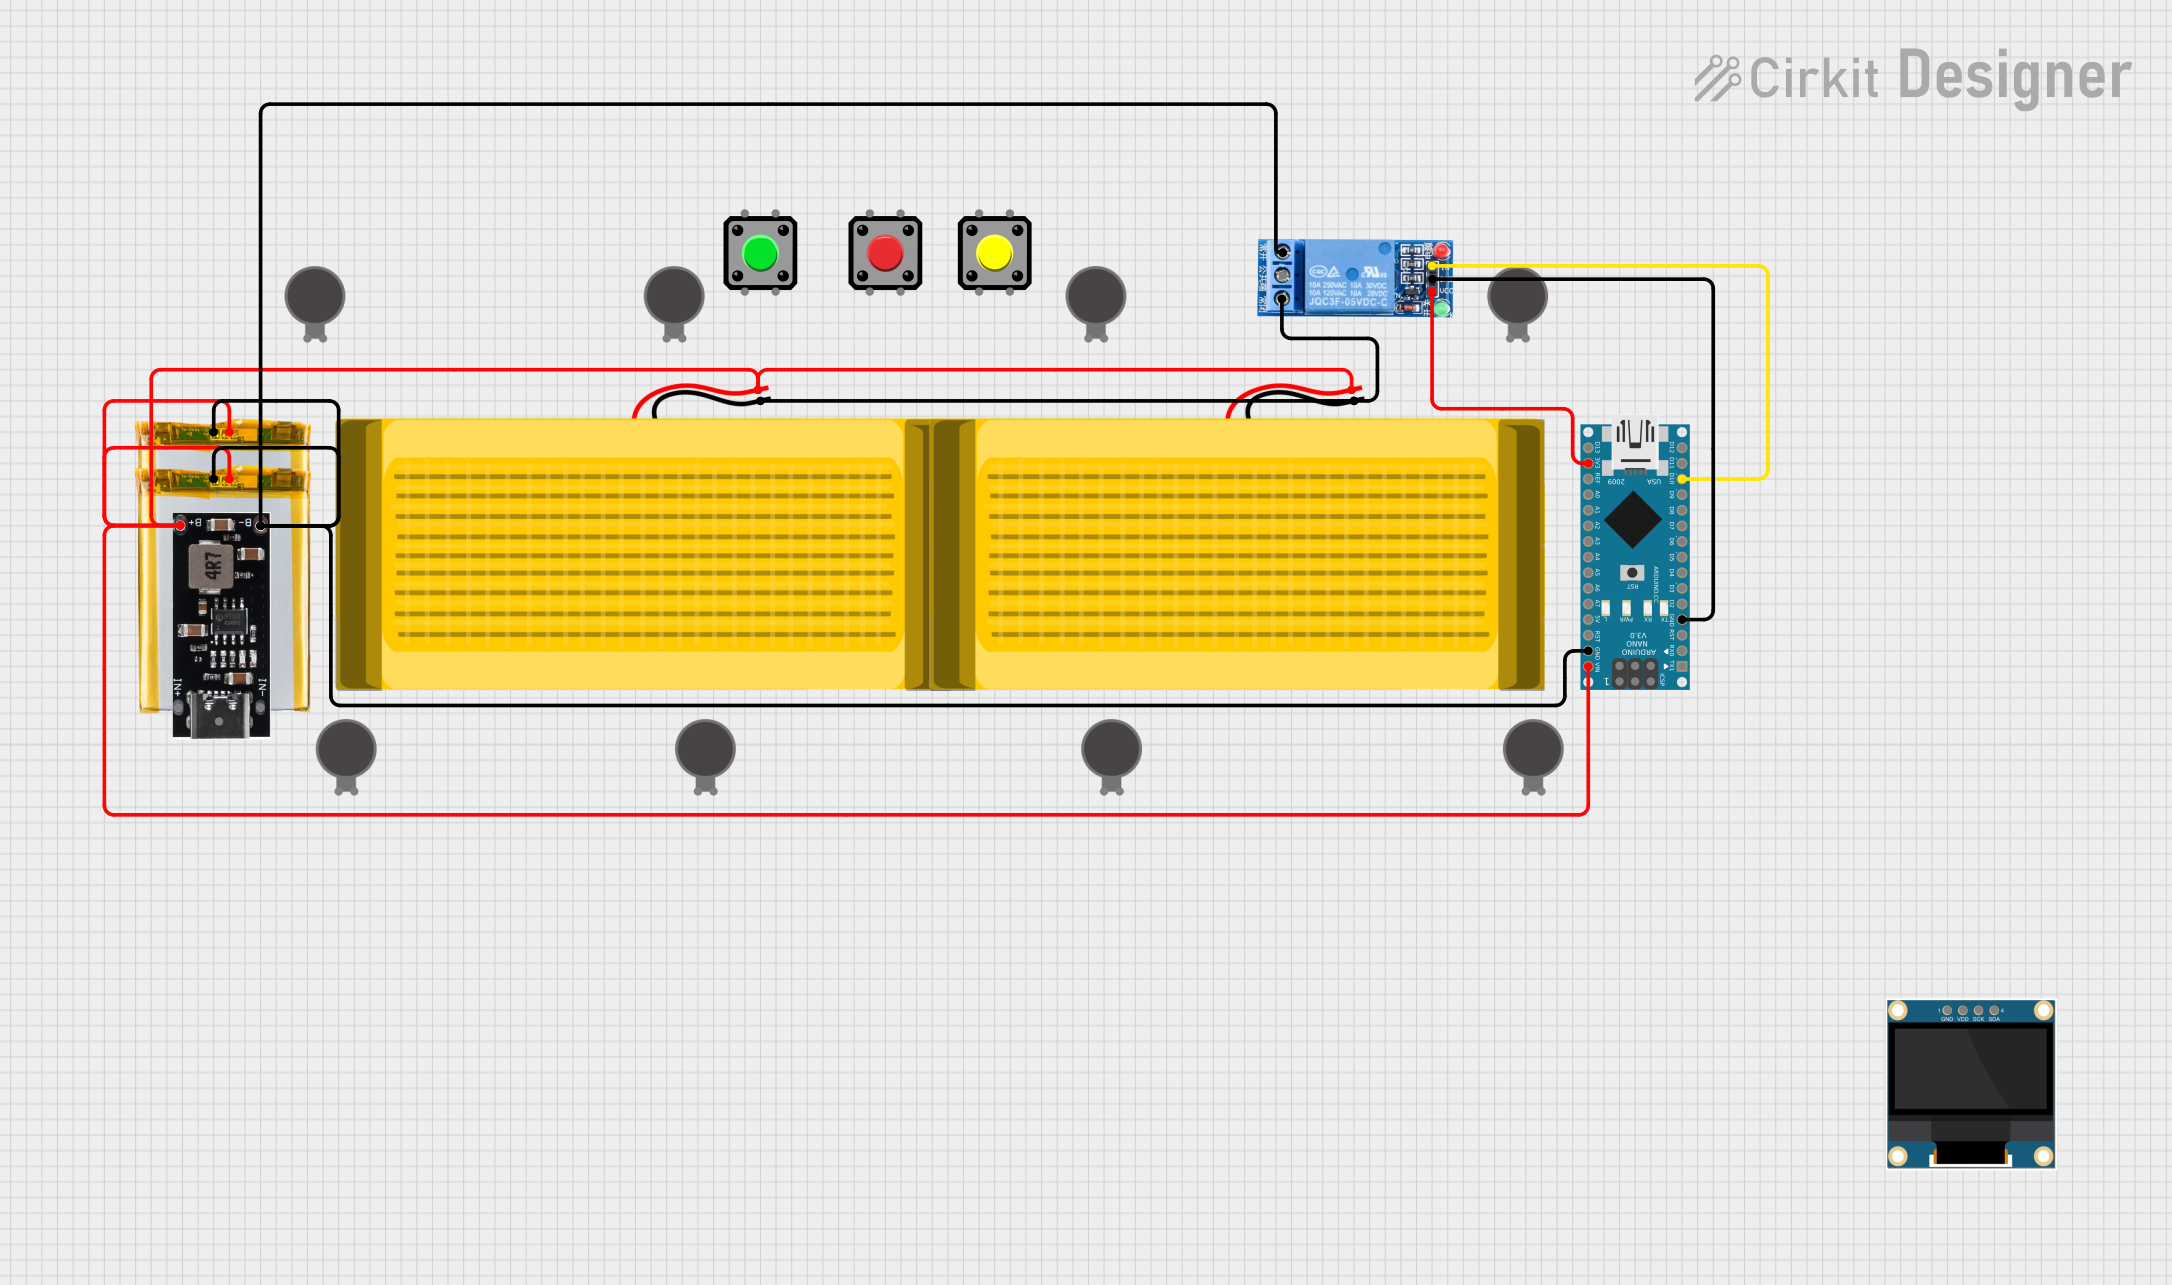
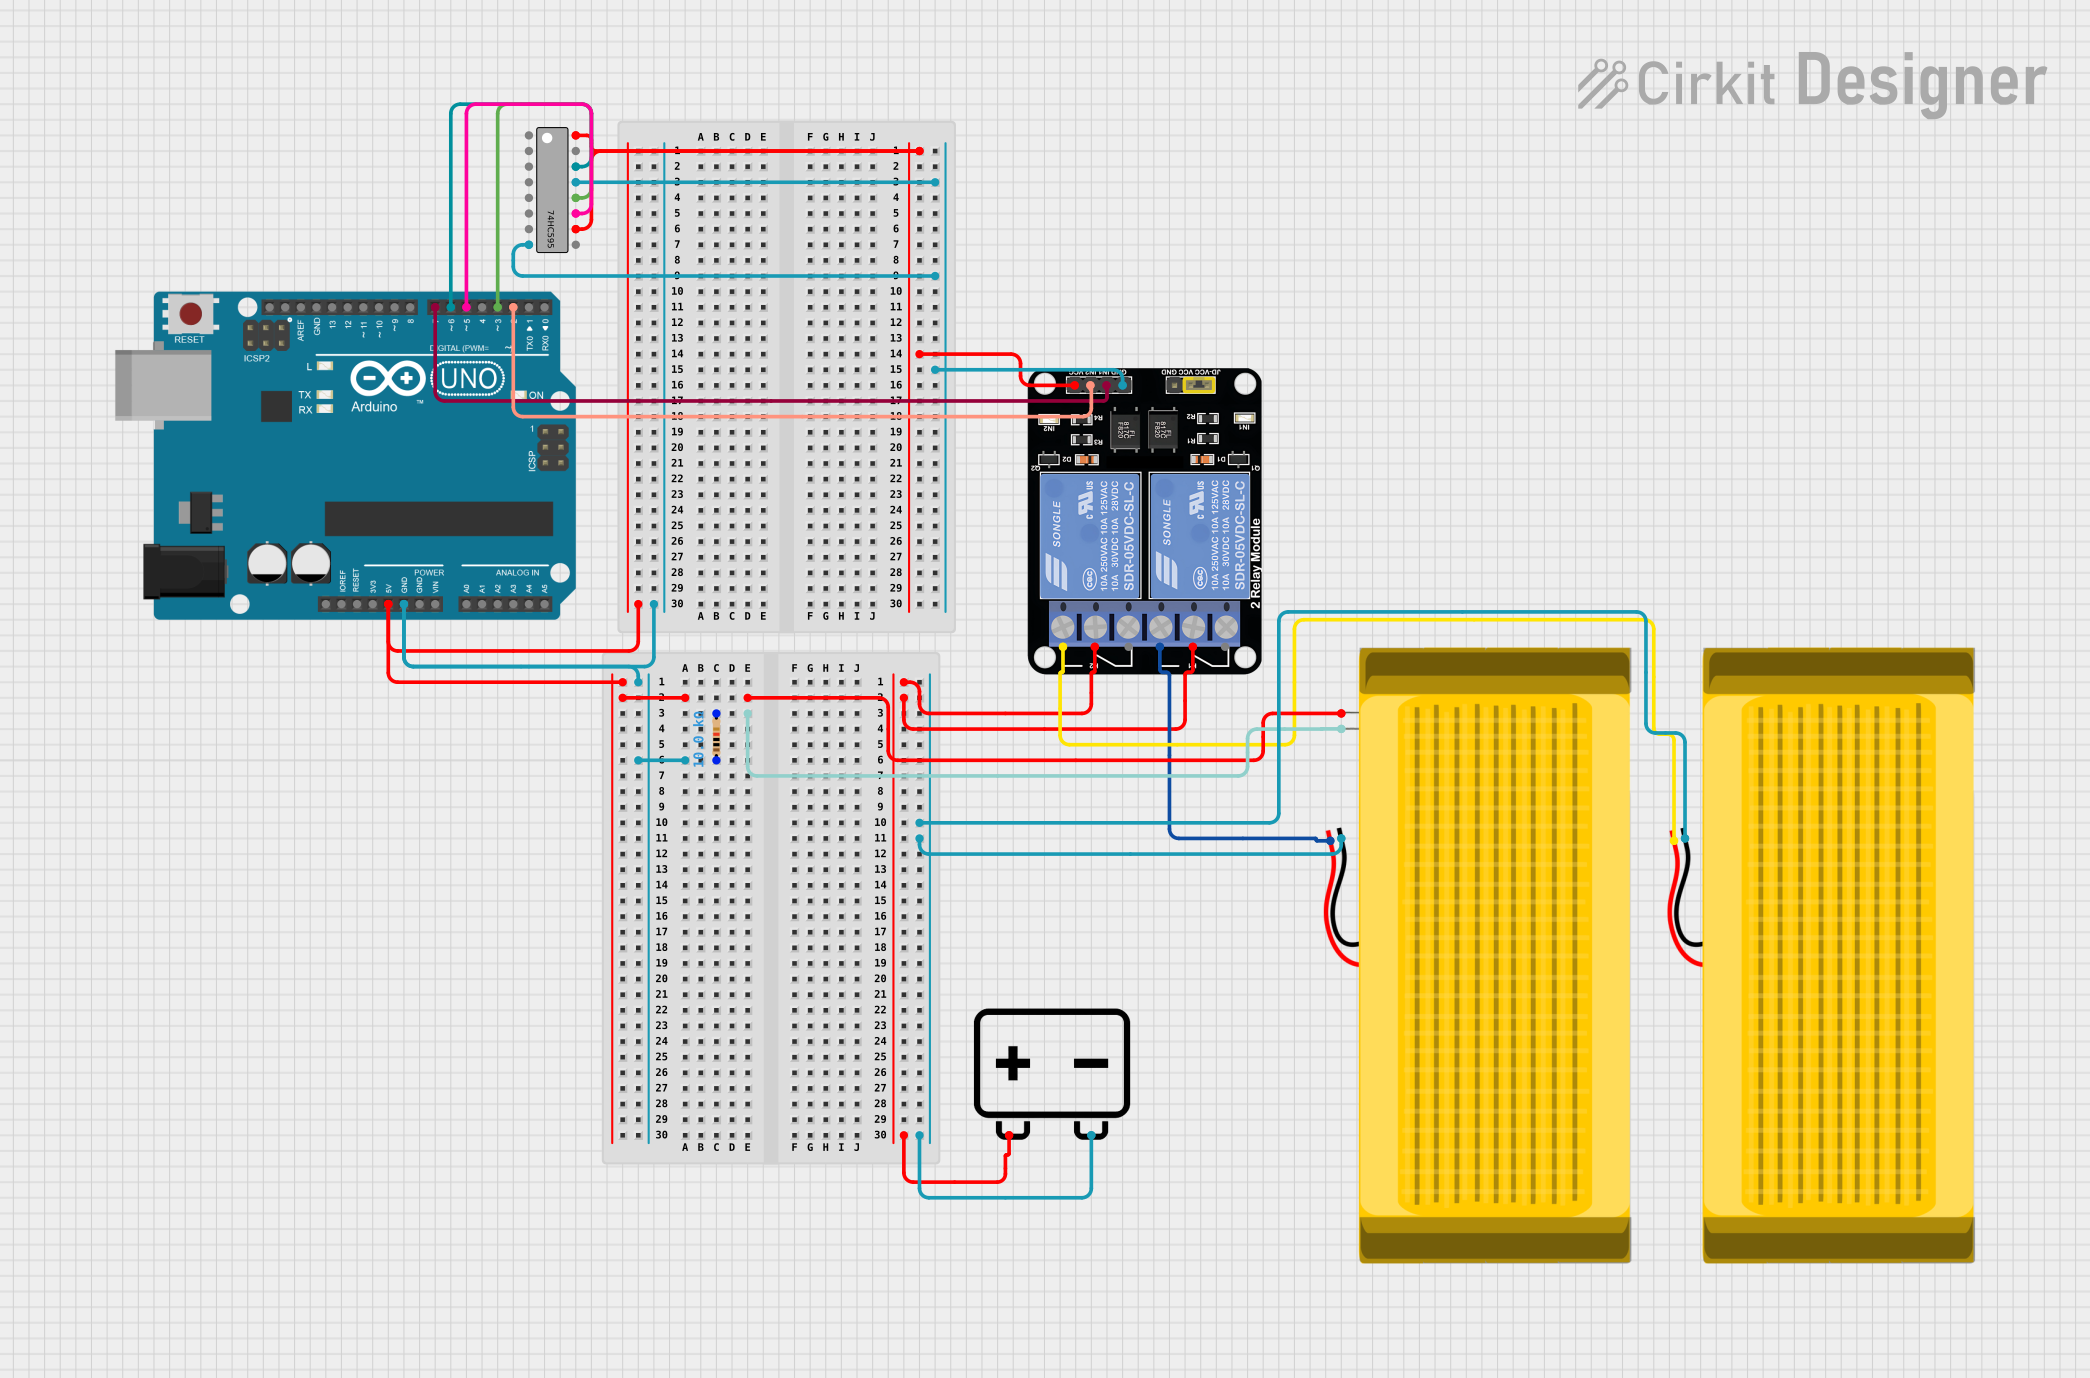
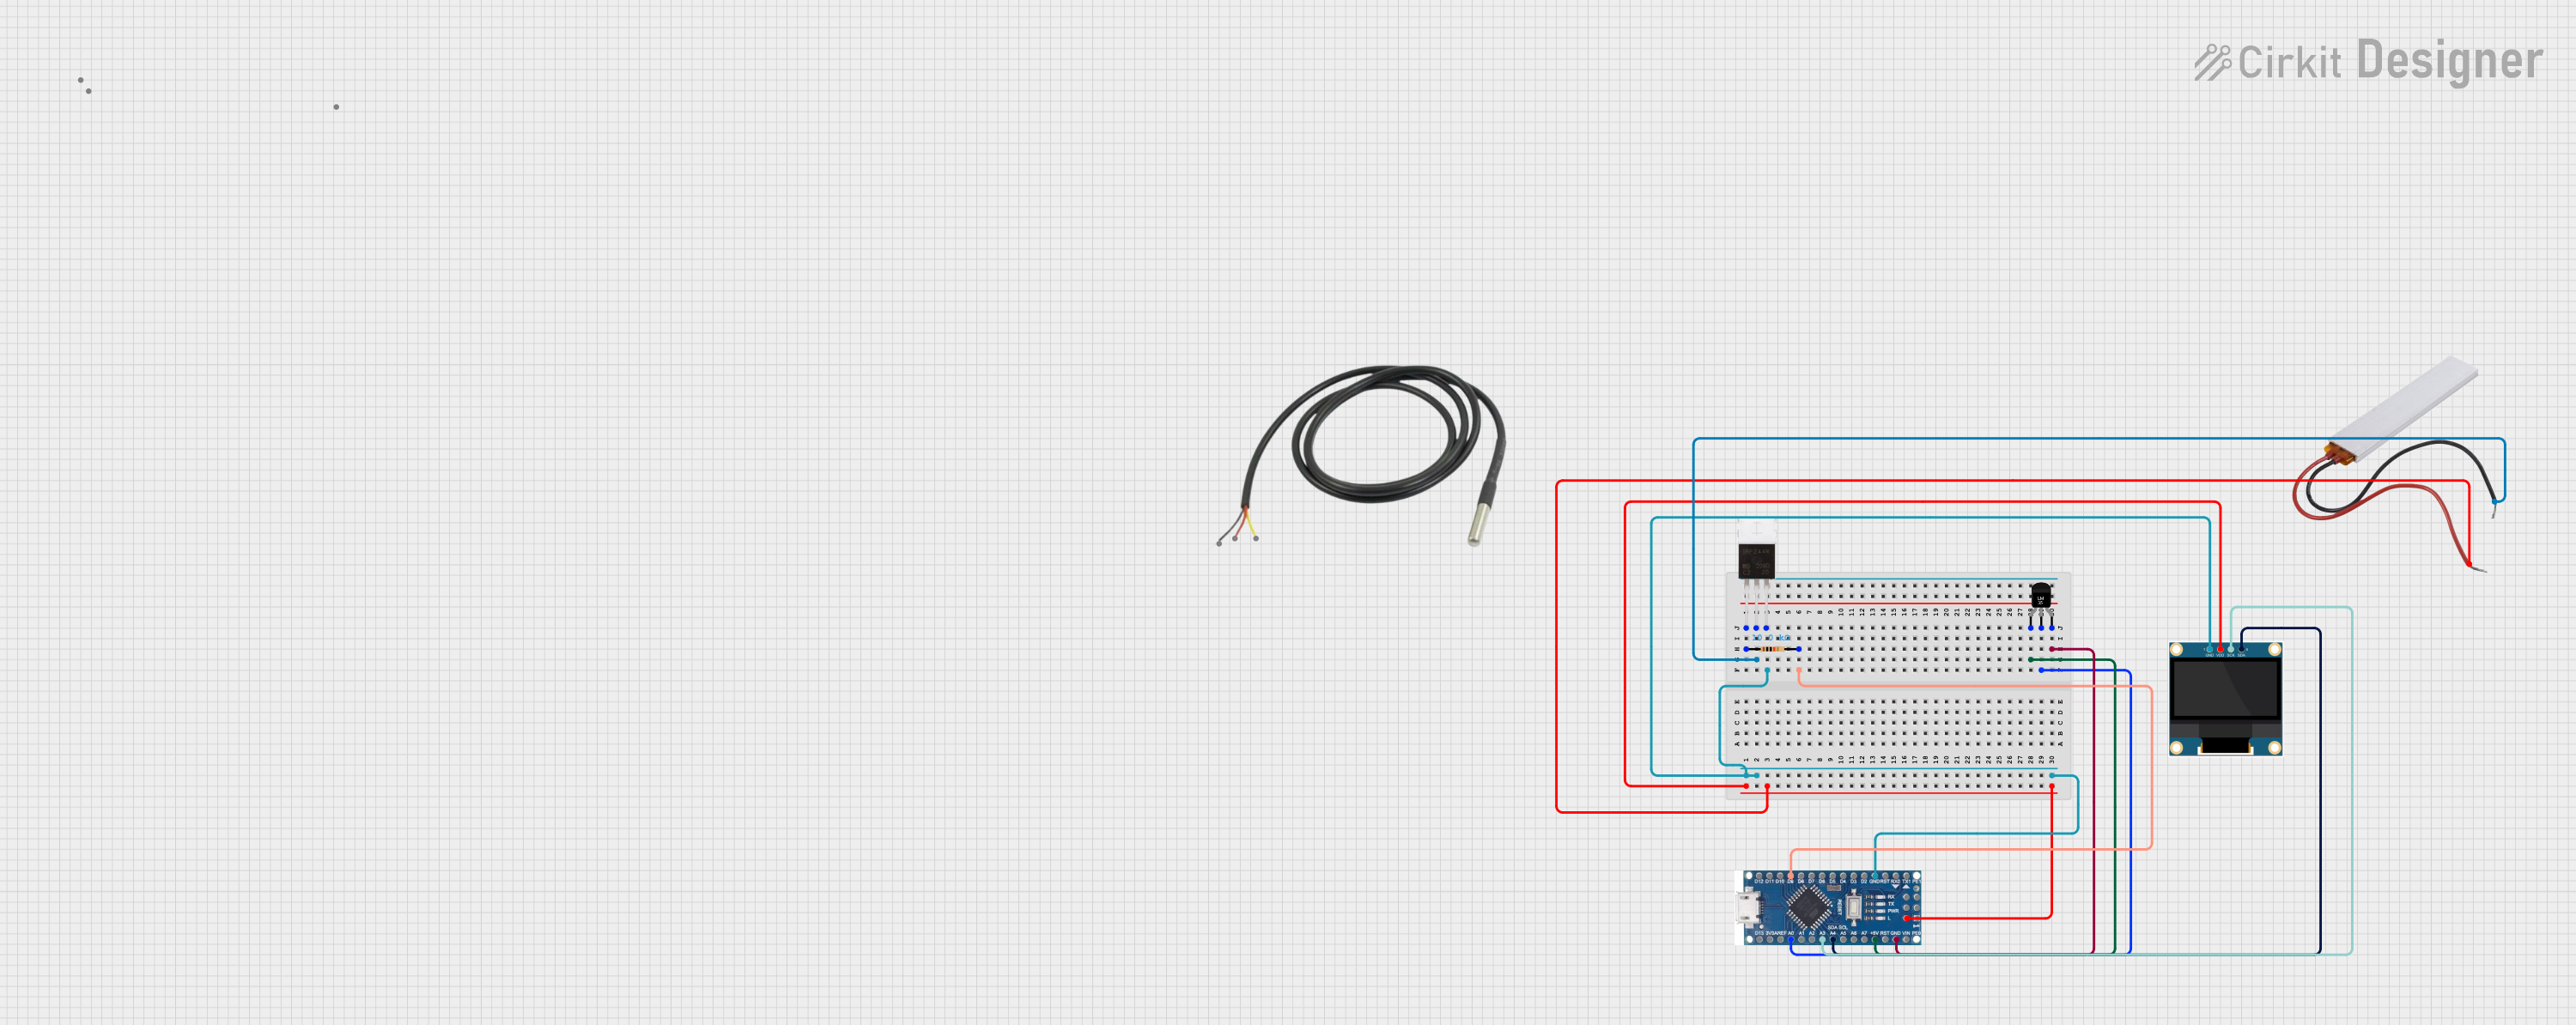
Integration into a Circuit

To use the SparkFun Heating Pad in a circuit, follow these steps:

  1. Power Connection: Connect the positive voltage pin to a 5V power supply and the ground pin to the common ground of your power source.
  2. Current Limiting: Ensure that your power source can supply the necessary current for the heating pad (up to 1A).
  3. Control Mechanism: For controlling the heating pad, you can use a microcontroller in conjunction with a transistor or a relay module to switch the heating pad on and off.

Best Practices

  • Avoid Sharp Bends: Do not bend the heating pad sharply as this may damage the internal heating elements.
  • Heat Distribution: Ensure that the heating pad is in contact with a surface or material that allows for even distribution of heat.
  • Safety Precautions: Do not leave the heating pad unattended while powered, and ensure it is not in contact with flammable materials.

Example Arduino Code

// Define the control pin for the heating pad
const int heatingPadPin = 2;

void setup() {
  // Set the heating pad control pin as an output
  pinMode(heatingPadPin, OUTPUT);
}

void loop() {
  // Turn on the heating pad
  digitalWrite(heatingPadPin, HIGH);
  delay(5000); // Keep the heating pad on for 5 seconds

  // Turn off the heating pad
  digitalWrite(heatingPadPin, LOW);
  delay(10000); // Keep the heating pad off for 10 seconds
}

Troubleshooting and FAQs

Common Issues

  • Heating Pad Not Heating: Ensure that the power supply is correctly connected and is providing the required voltage and current.
  • Uneven Heating: Check that the heating pad is laid out flat and is in full contact with the surface or material intended for heating.
  • Overheating: If the heating pad gets too hot, ensure that it is not powered continuously at high voltage and that there is adequate thermal distribution.

FAQs

Q: Can I power the heating pad with a battery? A: Yes, you can use a 5V battery pack, but ensure it can supply the necessary current.

Q: Is it safe to wash the heating pad? A: Washing is not recommended as it may damage the heating elements. If necessary, clean it gently with a damp cloth and ensure it is completely dry before use.

Q: Can I cut the heating pad to size? A: No, cutting the heating pad may damage the heating elements and cause it to stop working.

Q: How do I control the temperature of the heating pad? A: The temperature can be controlled by switching the heating pad on and off using a microcontroller or by using a pulse-width modulation (PWM) signal to vary the power applied to the pad.

For further assistance or inquiries, please contact SparkFun customer support.