The ESP32 S3 Zero, manufactured by Waveshare (Part ID: ESP32S3Zero), is a low-power, dual-core microcontroller designed for IoT applications. It integrates Wi-Fi and Bluetooth capabilities, making it ideal for wireless communication projects. With a rich set of peripherals, including GPIO, ADC, SPI, and more, the ESP32 S3 Zero is suitable for a wide range of applications, from smart home devices to industrial automation.
Explore Projects Built with Esp32 S3 Zero
Use Cirkit Designer to design, explore, and prototype these projects online. Some projects support real-time simulation. Click "Open Project" to start designing instantly!
This circuit features an ESP32-S3 microcontroller interfaced with various sensors and modules, including a DHT22 temperature and humidity sensor, an HC-SR04 ultrasonic sensor, an SGP41 VOC and NOx sensor, and an Adafruit INA260 current and power sensor. The ESP32-S3 also controls a DC motor via a relay and communicates with an SD card and an OLED display. An Arduino UNO is used to read inputs from a rotary encoder, and a step-down buck converter is used to regulate voltage from a 12V battery to power the components.
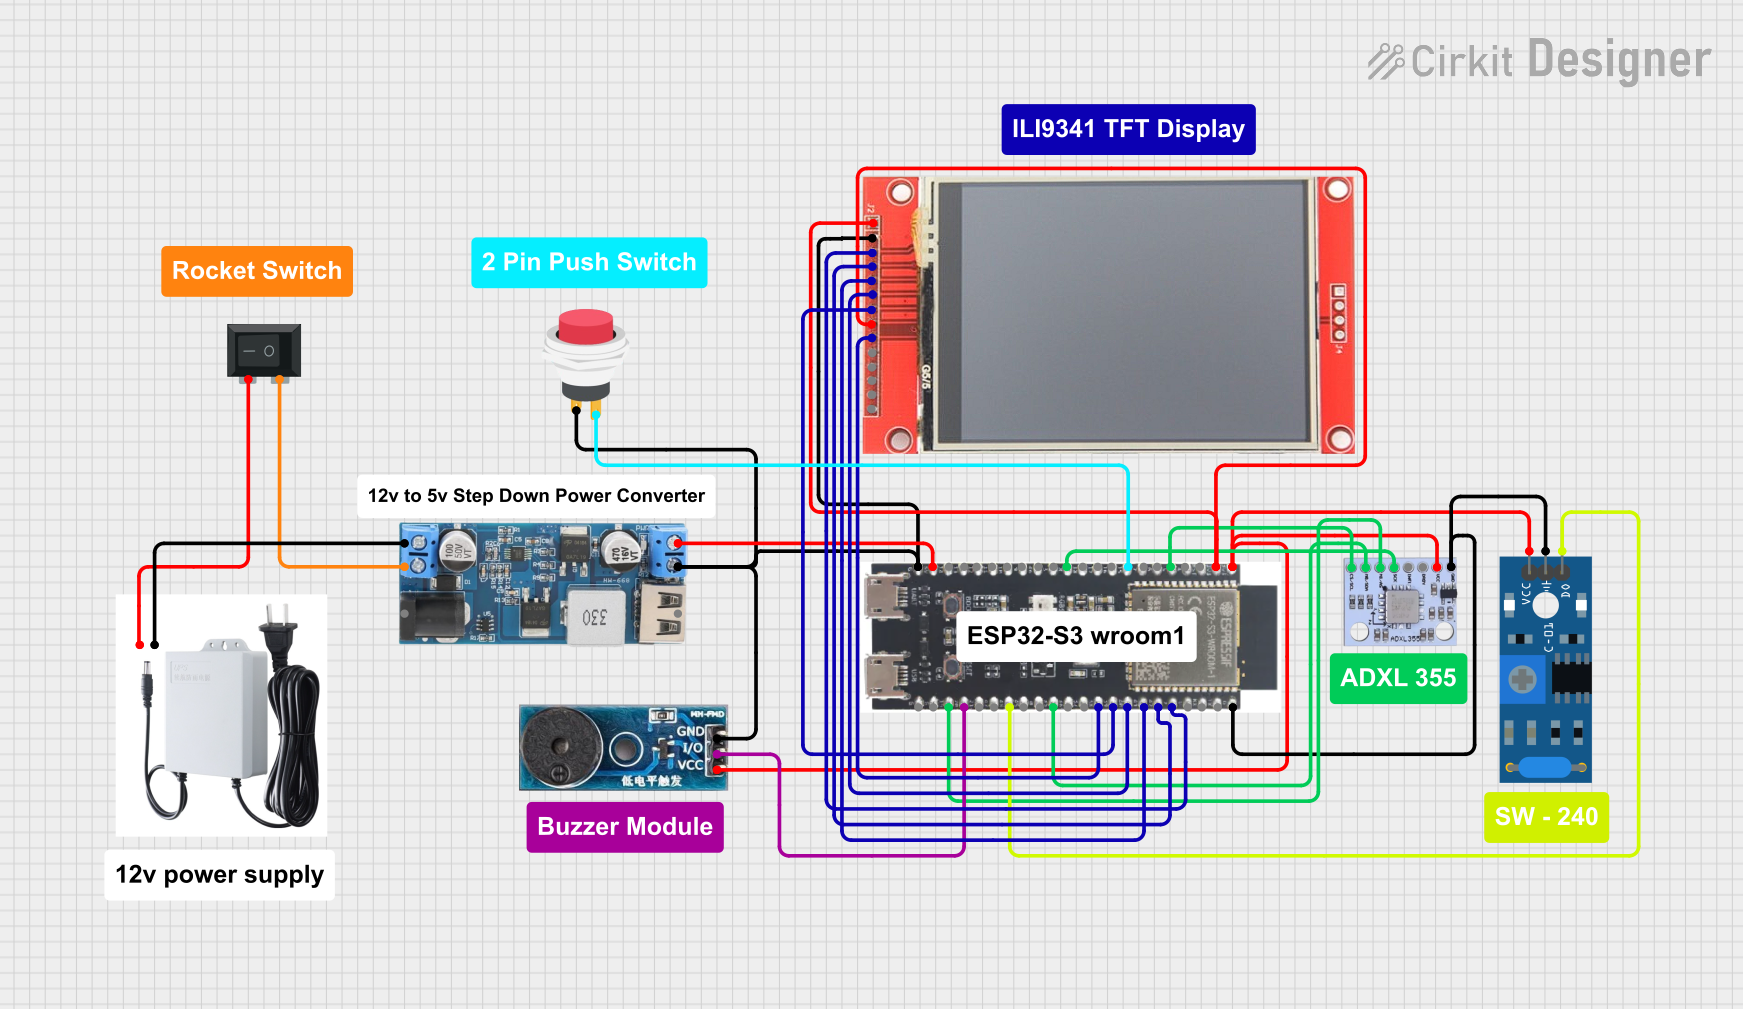
This circuit features an ESP32-S3 microcontroller connected to various peripherals including an ADXL355 accelerometer, an SW-420 vibration sensor, a buzzer module, and an ILI9341 TFT display. The ESP32-S3 manages sensor inputs and provides output to the display and buzzer. Power management is handled by a 12V to 5V step-down converter, and a UPS ensures uninterrupted power supply, with a rocker switch to control the power flow.
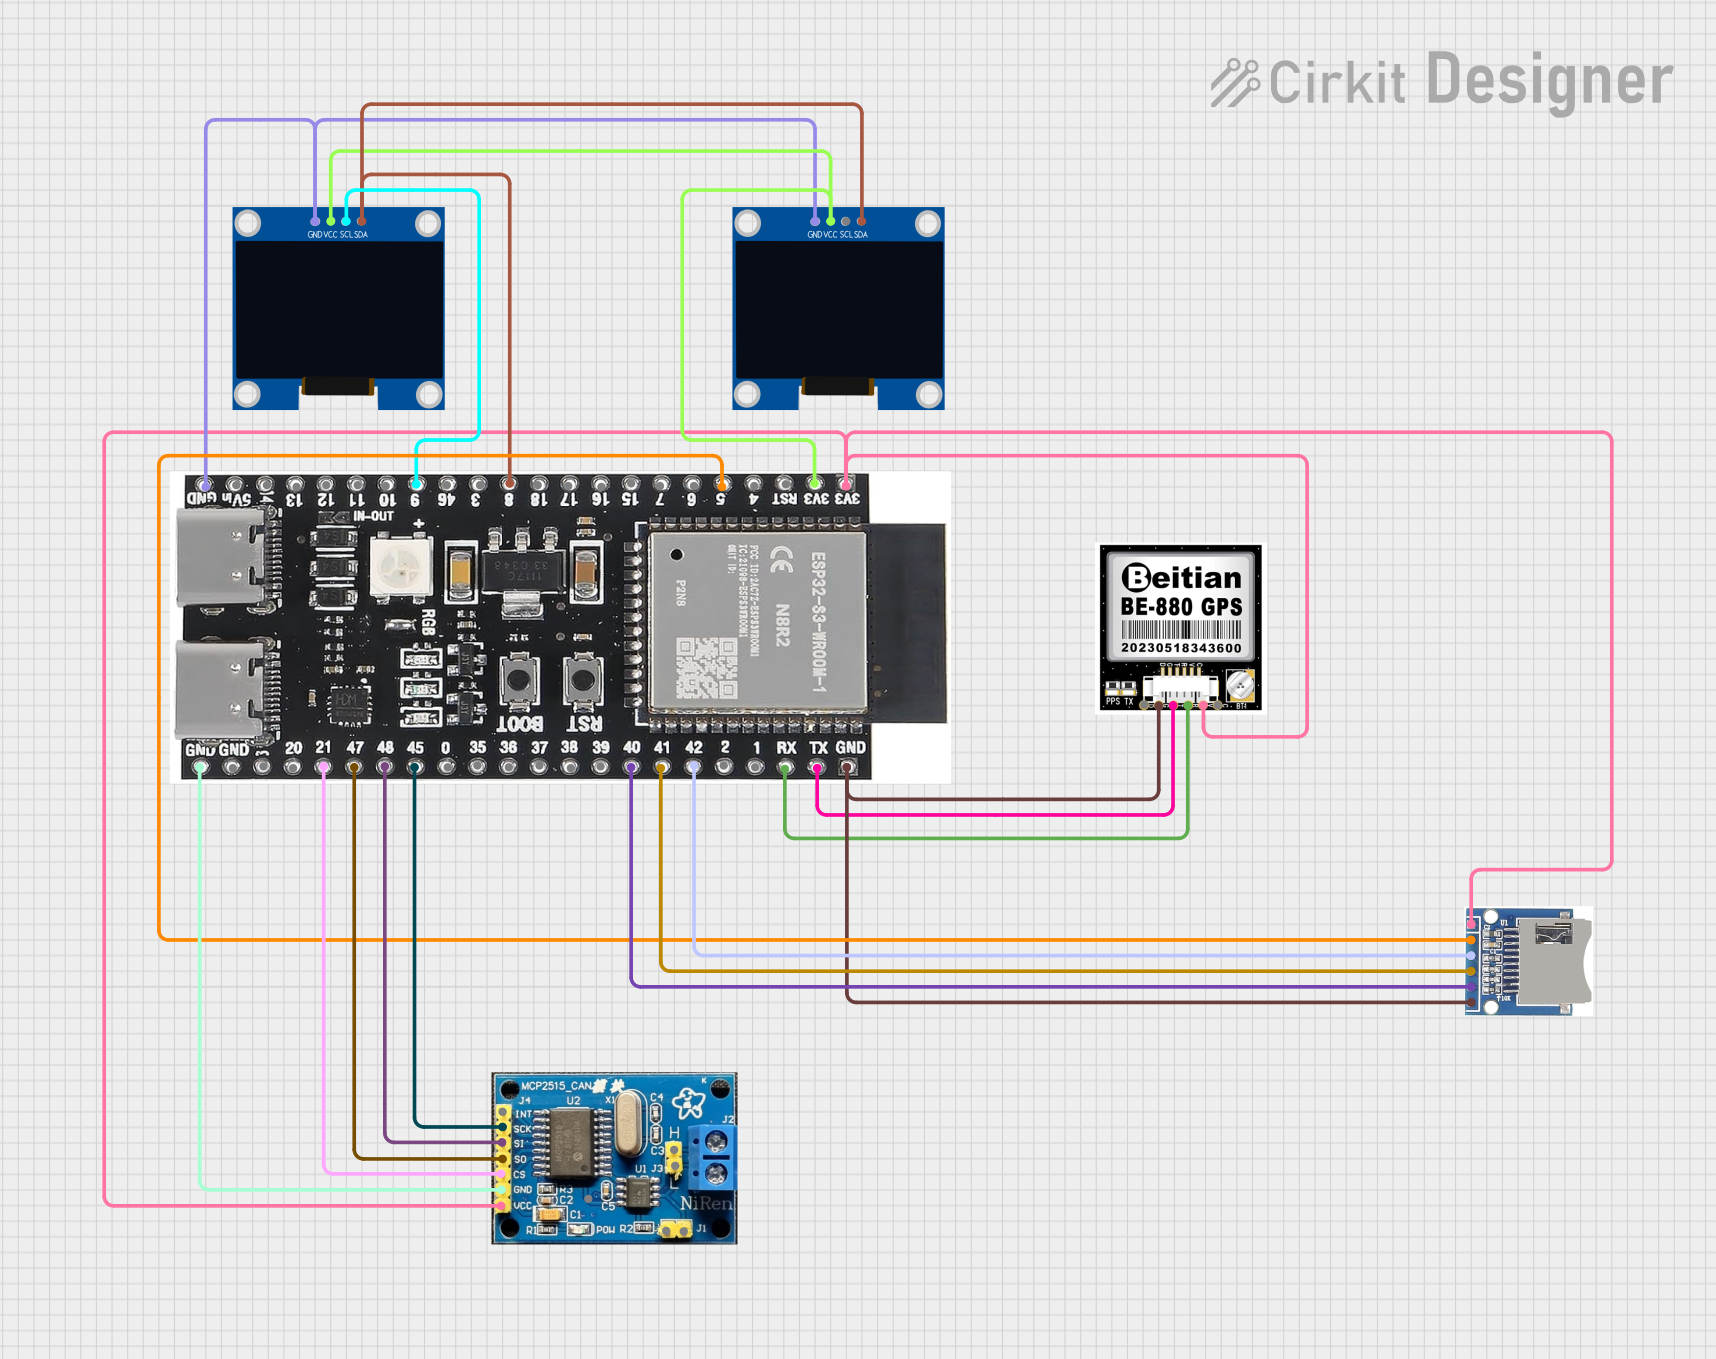
This circuit features an ESP32-S3 microcontroller interfaced with an SD card module, two OLED displays, a GPS module, and a CAN bus module. The ESP32-S3 records GPS data to the SD card, displays speed on one OLED, and shows wind speed from the CAN bus on the other OLED, providing a comprehensive data logging and display system.
This circuit features an ESP32-C6 Zero microcontroller that controls a servo motor via one of its GPIO pins (pin 22). The microcontroller is powered by a 3.3V regulator (ams1117 3.3), which in turn is supplied by a 2x 18650 battery pack. Electrolytic capacitors are used for voltage smoothing on both the input and output of the voltage regulator, ensuring stable operation of the microcontroller and servo.
Memory: 512 KB SRAM, 384 KB ROM, and external flash support
Wireless Connectivity:
Wi-Fi: 802.11 b/g/n (2.4 GHz)
Bluetooth: BLE 5.0 and Bluetooth Classic
GPIO Pins: 45 (configurable for various functions)
ADC: 12-bit, up to 20 channels
DAC: 2 channels
Communication Interfaces: SPI, I2C, UART, I2S, CAN, and more
Operating Voltage: 3.3V
Power Consumption: Ultra-low power in deep sleep mode (~10 µA)
Dimensions: 25 mm x 50 mm
Operating Temperature: -40°C to 85°C
Pin Configuration and Descriptions
The ESP32 S3 Zero features a 2.54 mm pitch header with the following pinout:
Pin Number
Pin Name
Description
1
3V3
3.3V Power Supply
2
GND
Ground
3
GPIO0
General Purpose I/O, Boot Mode Select
4
GPIO1
General Purpose I/O
5
GPIO2
General Purpose I/O
6
GPIO3
General Purpose I/O
7
TXD0
UART0 Transmit
8
RXD0
UART0 Receive
9
ADC1_CH0
Analog Input Channel 0
10
ADC1_CH1
Analog Input Channel 1
11
DAC1
Digital-to-Analog Converter Channel 1
12
DAC2
Digital-to-Analog Converter Channel 2
13
EN
Enable Pin (Active High)
14
IOREF
Reference Voltage for I/O
15
RESET
Reset Pin
Note: The ESP32 S3 Zero has additional GPIO pins and peripherals not listed here. Refer to the full datasheet for a complete pinout.
Usage Instructions
How to Use the ESP32 S3 Zero in a Circuit
Powering the Board:
Supply 3.3V to the 3V3 pin and connect GND to ground.
Alternatively, use the onboard USB-C connector for power and programming.
Connecting Peripherals:
Use GPIO pins for digital input/output.
Connect sensors to ADC pins for analog input.
Use UART, SPI, or I2C for communication with external devices.
Programming:
The ESP32 S3 Zero can be programmed using the Arduino IDE, ESP-IDF, or MicroPython.
Install the necessary drivers and libraries for your development environment.
Important Considerations and Best Practices
Voltage Levels: Ensure all connected peripherals operate at 3.3V logic levels to avoid damage.
Boot Mode: To enter bootloader mode, hold the BOOT button while pressing the RESET button.
Power Consumption: Use deep sleep mode for battery-powered applications to minimize power usage.
Antenna Placement: Ensure the onboard antenna has a clear path for optimal Wi-Fi and Bluetooth performance.
Example: Using the ESP32 S3 Zero with Arduino UNO
The following example demonstrates how to blink an LED connected to GPIO2 using the Arduino IDE:
// Blink an LED connected to GPIO2 on the ESP32 S3 Zero

#define LED_PIN 2  // Define the GPIO pin for the LED

void setup() {
  pinMode(LED_PIN, OUTPUT);  // Set GPIO2 as an output
}

void loop() {
  digitalWrite(LED_PIN, HIGH);  // Turn the LED on
  delay(1000);                  // Wait for 1 second
  digitalWrite(LED_PIN, LOW);   // Turn the LED off
  delay(1000);                  // Wait for 1 second
}
Tip: Install the ESP32 board package in the Arduino IDE before uploading the code.
Troubleshooting and FAQs
Common Issues and Solutions
The board is not detected by the computer:
Ensure the USB cable is functional and supports data transfer.
Install the correct USB-to-serial driver for the ESP32 S3 Zero.
Wi-Fi or Bluetooth is not working:
Check the antenna placement and ensure no obstructions are nearby.
Verify that the correct Wi-Fi credentials or Bluetooth pairing settings are used.
Program upload fails:
Ensure the board is in bootloader mode by holding the BOOT button during upload.
Check the selected COM port and board type in the Arduino IDE or ESP-IDF.
FAQs
Q: Can I power the ESP32 S3 Zero with a battery?
A: Yes, you can use a 3.7V LiPo battery with a suitable voltage regulator to provide 3.3V.
Q: Does the ESP32 S3 Zero support OTA updates?
A: Yes, the ESP32 S3 Zero supports Over-The-Air (OTA) firmware updates.
Q: Can I use the ESP32 S3 Zero with MicroPython?
A: Yes, the ESP32 S3 Zero is compatible with MicroPython. Flash the MicroPython firmware to get started.
For additional support, refer to the official Waveshare documentation or community forums.



 Open Project in Cirkit Designer