How to Use Power LED 12V 10W 0.8-0.9A: Examples, Pinouts, and Specs
Introduction
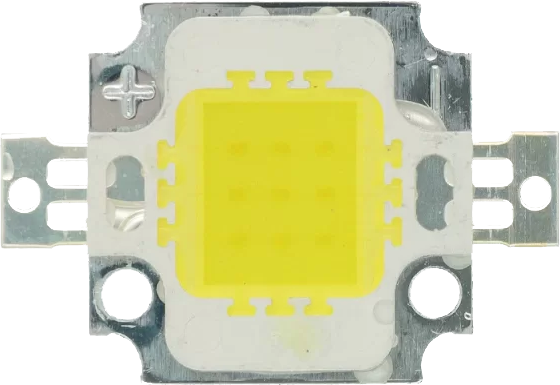
The Power LED 12V 10W 0.8-0.9A is a high-brightness light-emitting diode designed for high-power applications. This component is ideal for use in spotlights, decorative lighting, DIY projects, and as a part of larger lighting solutions. Its high power output makes it suitable for applications requiring intense illumination while maintaining the energy efficiency characteristic of LED technology.
Explore Projects Built with Power LED 12V 10W 0.8-0.9A

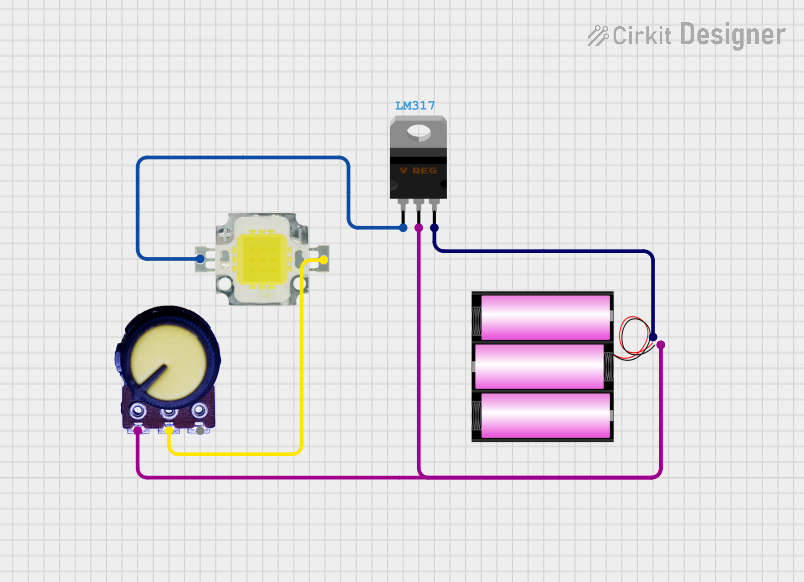

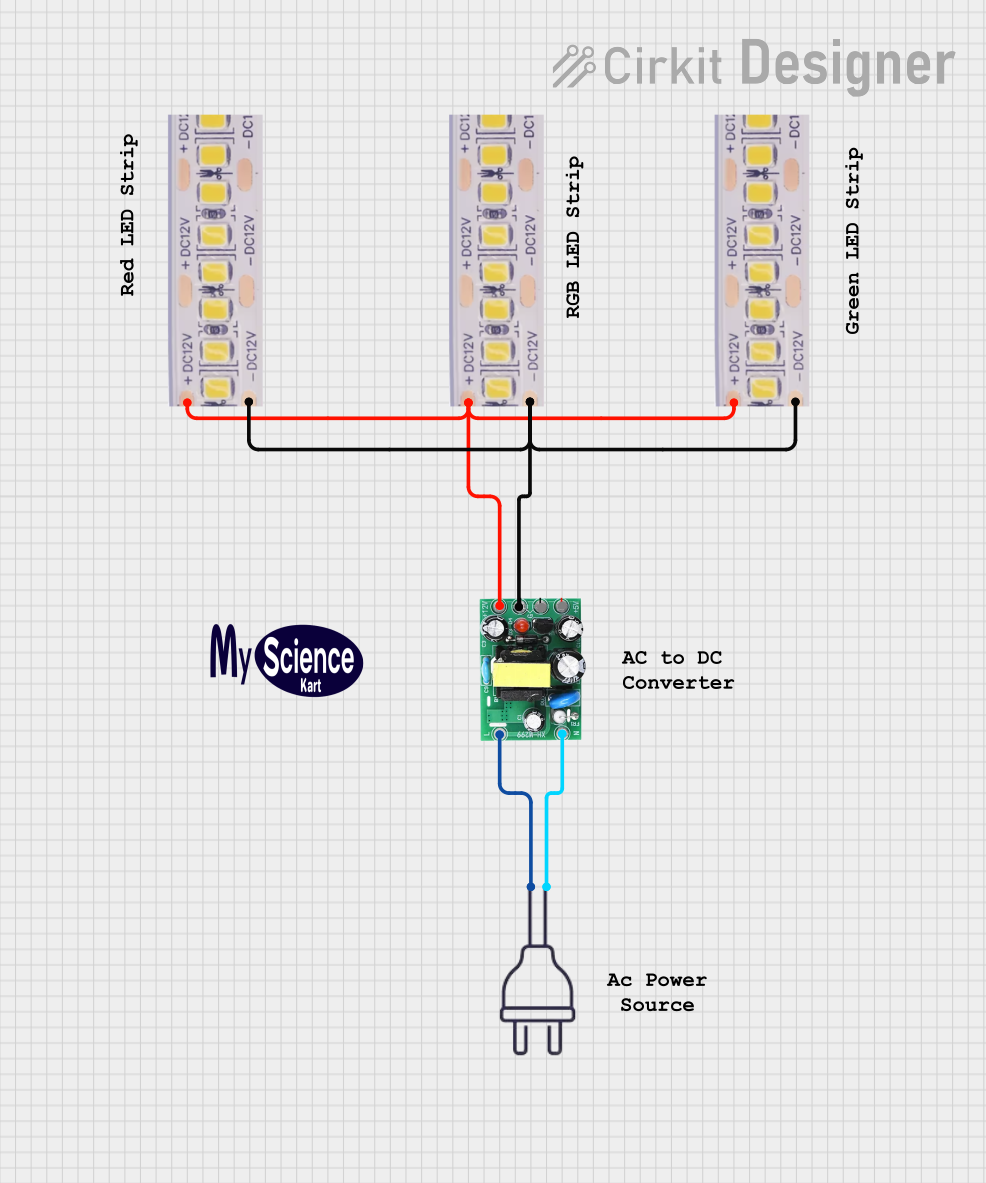
Explore Projects Built with Power LED 12V 10W 0.8-0.9A
Technical Specifications
Key Technical Details
- Rated Voltage: 12V DC
- Power Consumption: 10W
- Rated Current: 0.8 - 0.9A
- Luminous Flux: Typically around 900-1000 lumens (depending on specific model)
- Color Temperature: Varies (commonly 3000K - 6500K)
- Beam Angle: Varies (commonly 120 degrees)
- Operating Temperature: -20°C to +60°C
Pin Configuration and Descriptions
| Pin Number | Description | Notes |
|---|---|---|
| 1 | Anode (+) | Connect to positive voltage |
| 2 | Cathode (-) | Connect to ground/negative side |
Usage Instructions
Connecting to a Circuit
- Power Supply: Ensure you have a 12V DC power supply that can deliver between 0.8 to 0.9A of current.
- Current Regulation: To prevent damage to the LED, use a current-limiting resistor or a constant current LED driver.
- Heat Management: Due to the high power consumption, adequate heat sinking is necessary to dissipate heat and maintain the longevity of the LED.
- Wiring: Connect the anode (positive) pin to the positive terminal of the power supply and the cathode (negative) pin to the negative terminal.
Best Practices
- Always verify polarity before powering up the LED to prevent reverse bias, which can damage the component.
- Use thermal paste between the LED and the heatsink for better heat conduction.
- Avoid looking directly at the LED while it is powered to prevent eye damage.
Troubleshooting and FAQs
Common Issues
- LED Not Lighting Up: Check the polarity of the connections and the power supply voltage.
- LED Overheating: Ensure that the heatsink is properly attached and that there is adequate airflow.
- Dim Light Output: Confirm that the power supply is providing sufficient current.
Solutions and Tips
- If the LED does not light up, double-check the wiring and ensure that the power supply is turned on and functioning correctly.
- In case of overheating, improve heat dissipation by enhancing the heatsink or adding a fan.
- For dim light output, measure the current with a multimeter to ensure it falls within the specified range.
Example Arduino UNO Code
The following example demonstrates how to use the Power LED with an Arduino UNO for simple on/off control using a MOSFET as a switch.
// Define the pin connected to the MOSFET gate
const int mosfetPin = 3;

void setup() {
  // Set the MOSFET pin as an output
  pinMode(mosfetPin, OUTPUT);
}

void loop() {
  // Turn on the LED
  digitalWrite(mosfetPin, HIGH);
  delay(1000); // Keep the LED on for 1 second

  // Turn off the LED
  digitalWrite(mosfetPin, LOW);
  delay(1000); // Keep the LED off for 1 second
}
Note: This code assumes the use of a MOSFET compatible with the 5V logic level of the Arduino UNO and that the MOSFET is capable of handling the current required by the LED. The actual connection to the LED must include a current-limiting solution as per the usage instructions.
This documentation provides a comprehensive guide to using the Power LED 12V 10W 0.8-0.9A. For further assistance or advanced applications, consult with an electronics professional.