How to Use Connection Node 1pin: Examples, Pinouts, and Specs

Introduction
The Connection Node 1pin is a simple yet essential electronic component designed to establish a single-point electrical connection in a circuit. It serves as a versatile interface for integrating various components, enabling seamless connectivity in both prototyping and permanent circuit designs. Its compact design and ease of use make it a staple in electronics projects.
Explore Projects Built with Connection Node 1pin


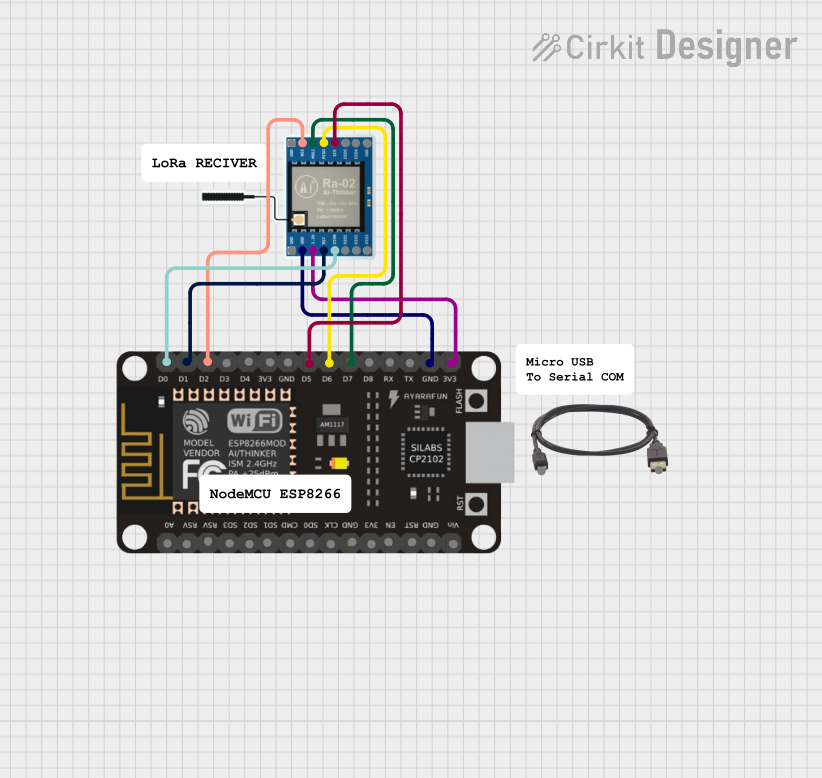
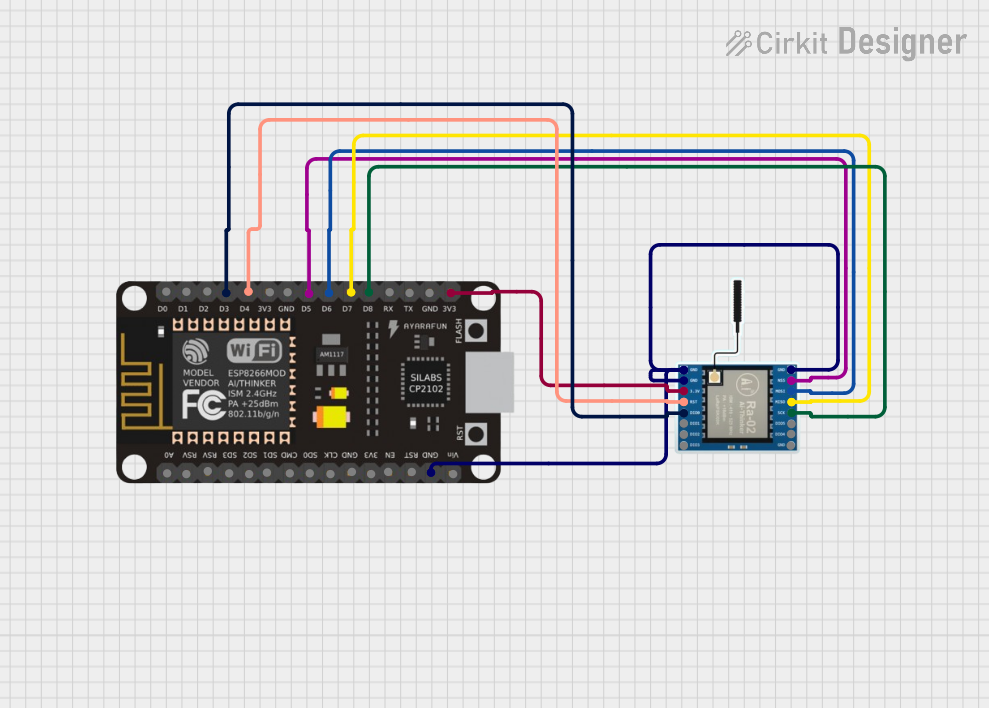
Explore Projects Built with Connection Node 1pin
Common Applications and Use Cases
- Prototyping circuits on breadboards or perfboards
- Establishing single-point connections for sensors, actuators, or other components
- Creating test points in circuits for debugging and measurement
- Connecting wires in low-power applications
Technical Specifications
The Connection Node 1pin is a passive component with no active electrical properties. Below are its key specifications:
| Parameter | Value |
|---|---|
| Material | Copper (plated with tin or gold) |
| Maximum Current Rating | 3A |
| Maximum Voltage Rating | 50V |
| Pin Diameter | 0.64 mm (standard) |
| Mounting Type | Through-hole or solderable |
| Operating Temperature | -40°C to 85°C |
Pin Configuration and Descriptions
The Connection Node 1pin has a single pin for electrical connection. Below is the pin description:
| Pin Number | Description |
|---|---|
| 1 | Electrical connection point (input/output) |
Usage Instructions
How to Use the Component in a Circuit
Mounting the Node:
- For breadboard use, insert the pin into the desired hole on the breadboard.
- For soldering, place the pin through the hole on a PCB or perfboard and solder it securely.
Connecting Wires:
- Attach wires to the pin using solder or a connector. Ensure a firm connection to avoid loose contacts.
Integration with Components:
- Use the node to connect components such as resistors, capacitors, or sensors.
- Ensure the current and voltage ratings of the node are not exceeded.
Important Considerations and Best Practices
- Avoid Overloading: Ensure the current passing through the node does not exceed 3A, as this may cause overheating or damage.
- Secure Connections: Always check that wires or components are firmly connected to avoid intermittent connections.
- Corrosion Prevention: If the node is exposed to a humid environment, consider using a gold-plated version to prevent corrosion.
- Testing: Use a multimeter to verify continuity after installation.
Example: Using with an Arduino UNO
The Connection Node 1pin can be used to connect a sensor to an Arduino UNO. Below is an example of connecting a temperature sensor (e.g., LM35) using the node:
Circuit Setup
- Insert the Connection Node 1pin into the breadboard.
- Connect the LM35 sensor's output pin to the node.
- Use a jumper wire to connect the node to the Arduino's analog input pin (e.g., A0).
Arduino Code
// Example code to read temperature from an LM35 sensor connected via Connection Node 1pin
const int sensorPin = A0; // Analog pin connected to the Connection Node 1pin
float voltage;            // Variable to store sensor voltage
float temperatureC;       // Variable to store temperature in Celsius

void setup() {
  Serial.begin(9600); // Initialize serial communication for debugging
}

void loop() {
  int sensorValue = analogRead(sensorPin); // Read analog value from the sensor
  voltage = sensorValue * (5.0 / 1023.0);  // Convert analog value to voltage
  temperatureC = voltage * 100.0;         // Convert voltage to temperature (LM35: 10mV/°C)

  // Print the temperature to the Serial Monitor
  Serial.print("Temperature: ");
  Serial.print(temperatureC);
  Serial.println(" °C");

  delay(1000); // Wait 1 second before the next reading
}
Troubleshooting and FAQs
Common Issues Users Might Face
Loose Connections:
- Problem: The node is not securely connected, causing intermittent signals.
- Solution: Ensure the pin is firmly inserted into the breadboard or soldered properly.
Overheating:
- Problem: The node becomes hot during operation.
- Solution: Check that the current does not exceed the 3A rating. Use thicker wires if necessary.
Corrosion:
- Problem: The pin shows signs of corrosion, leading to poor conductivity.
- Solution: Use a gold-plated version or apply a protective coating to the pin.
Signal Interference:
- Problem: Noise or interference in the circuit.
- Solution: Ensure proper grounding and minimize the length of wires connected to the node.
FAQs
Q: Can the Connection Node 1pin handle AC signals?
A: Yes, it can handle both AC and DC signals, provided the voltage and current ratings are not exceeded.
Q: Is the node reusable?
A: Yes, the node can be reused if it is not permanently soldered or damaged.
Q: Can I use this node for high-frequency signals?
A: While it can be used for high-frequency signals, ensure that the connection quality is high to minimize signal loss or interference.
Q: What tools are needed to solder the node?
A: A soldering iron, solder wire, and flux are typically required for soldering the node onto a PCB or perfboard.