
How to Use SS-12D03 Miniature SPDT Slide Switch: Examples, Pinouts, and Specs
 Design with SS-12D03 Miniature SPDT Slide Switch in Cirkit Designer
Introduction
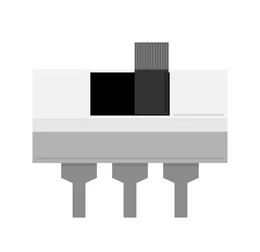
The SS-12D03 Miniature SPDT Slide Switch is a compact, single-pole double-throw (SPDT) switch designed for controlling electrical circuits. It features a sliding lever mechanism that allows users to toggle between two electrical paths. This versatile switch is widely used in low-power electronic applications due to its small size, reliability, and ease of use.
Explore Projects Built with SS-12D03 Miniature SPDT Slide Switch
 Open Project in Cirkit Designer
 Open Project in Cirkit Designer
 Open Project in Cirkit Designer
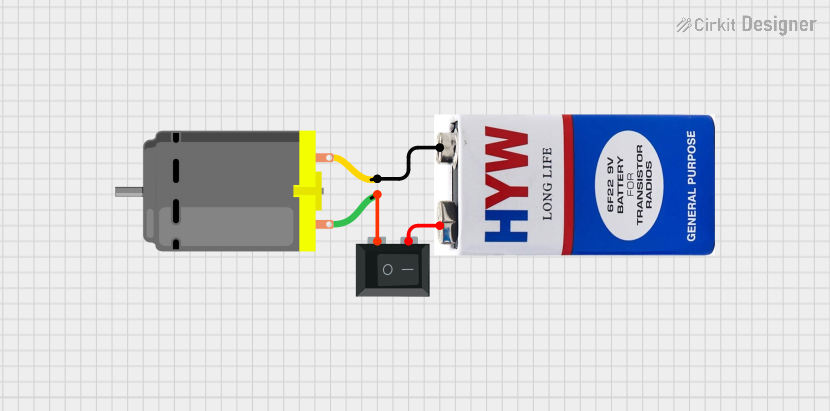 Open Project in Cirkit Designer
Explore Projects Built with SS-12D03 Miniature SPDT Slide Switch
Open Project in Cirkit DesignerOpen Project in Cirkit DesignerOpen Project in Cirkit DesignerOpen Project in Cirkit DesignerCommon Applications and Use Cases
- Power control in small electronic devices
- Mode selection in circuits (e.g., switching between operational modes)
- Signal routing in audio, communication, or control systems
- DIY electronics and prototyping projects
- Embedded systems and Arduino-based projects
Technical Specifications
Below are the key technical details for the SS-12D03 slide switch:
| Parameter | Specification |
|---|---|
| Manufacturer Part ID | SS-12D03 1P2T, 3-Pin Slide Switch |
| Switch Type | SPDT (Single Pole Double Throw) |
| Number of Pins | 3 |
| Rated Voltage | 12V DC |
| Rated Current | 0.5A (500mA) |
| Contact Resistance | ≤ 30 mΩ |
| Insulation Resistance | ≥ 100 MΩ |
| Operating Temperature | -20°C to +70°C |
| Mechanical Life | 10,000 cycles |
| Dimensions | 12mm x 5mm x 3.5mm |
| Mounting Style | Through-hole |
Pin Configuration and Descriptions
The SS-12D03 has three pins, which are configured as follows:
| Pin Number | Name | Description |
|---|---|---|
| 1 | Common (C) | The central pin that connects to either Pin 2 or Pin 3 depending on the lever position. |
| 2 | Normally Open (NO) | Connected to the Common pin when the switch lever is in Position 1. |
| 3 | Normally Closed (NC) | Connected to the Common pin when the switch lever is in Position 2. |
Usage Instructions
How to Use the SS-12D03 in a Circuit
- Identify the Pins: Locate the three pins on the switch. The middle pin is the Common (C), while the two outer pins are the Normally Open (NO) and Normally Closed (NC) terminals.
- Connect the Circuit:
- Connect the Common (C) pin to the input signal or power source.
- Connect the NO and NC pins to the two output paths or devices you want to toggle between.
- Mount the Switch: Secure the switch onto a PCB using its through-hole pins. Solder the pins to ensure a stable connection.
- Operate the Switch: Slide the lever to toggle between the two positions:
- Position 1: Connects the Common pin to the NO pin.
- Position 2: Connects the Common pin to the NC pin.
Important Considerations and Best Practices
- Voltage and Current Ratings: Ensure the connected circuit does not exceed the switch's rated voltage (12V DC) and current (0.5A).
- Debouncing: When used in digital circuits, consider implementing software or hardware debouncing to avoid false triggering due to mechanical bounce.
- Mounting: Avoid excessive force when soldering or mounting the switch to prevent damage to the pins or housing.
- Environmental Conditions: Operate the switch within the specified temperature range (-20°C to +70°C) for optimal performance.
Example: Using the SS-12D03 with an Arduino UNO
The SS-12D03 can be used to toggle between two LEDs using an Arduino UNO. Below is an example circuit and code:
Circuit Connections
- Connect the Common (C) pin of the switch to Arduino pin
2. - Connect the NO pin to a 220Ω resistor and then to the positive terminal of LED1.
- Connect the NC pin to a 220Ω resistor and then to the positive terminal of LED2.
- Connect the negative terminals of both LEDs to the Arduino GND.
Arduino Code
// Define pin connections
const int switchPin = 2;  // Pin connected to the Common (C) pin of the switch
const int led1Pin = 3;    // Pin connected to LED1 (NO path)
const int led2Pin = 4;    // Pin connected to LED2 (NC path)

void setup() {
  pinMode(switchPin, INPUT_PULLUP); // Set switch pin as input with pull-up resistor
  pinMode(led1Pin, OUTPUT);         // Set LED1 pin as output
  pinMode(led2Pin, OUTPUT);         // Set LED2 pin as output
}

void loop() {
  int switchState = digitalRead(switchPin); // Read the state of the switch

  if (switchState == LOW) {
    // Switch is in Position 1 (NO connected to Common)
    digitalWrite(led1Pin, HIGH);  // Turn on LED1
    digitalWrite(led2Pin, LOW);   // Turn off LED2
  } else {
    // Switch is in Position 2 (NC connected to Common)
    digitalWrite(led1Pin, LOW);   // Turn off LED1
    digitalWrite(led2Pin, HIGH);  // Turn on LED2
  }
}
Troubleshooting and FAQs
Common Issues and Solutions
Switch Not Working:
- Cause: Poor soldering or loose connections.
- Solution: Inspect and re-solder the connections to ensure proper contact.
Intermittent Operation:
- Cause: Mechanical wear or dirt inside the switch.
- Solution: Clean the switch contacts with isopropyl alcohol or replace the switch if worn out.
LEDs Not Responding in Arduino Circuit:
- Cause: Incorrect wiring or code logic.
- Solution: Double-check the circuit connections and ensure the code matches the wiring.
Switch Feels Stiff or Hard to Slide:
- Cause: Dust or debris in the sliding mechanism.
- Solution: Gently clean the switch with compressed air or a soft brush.
FAQs
Q1: Can the SS-12D03 handle AC voltage?
A1: No, the SS-12D03 is designed for low-voltage DC applications only. Using it with AC voltage may damage the switch or cause unsafe operation.
Q2: Can I use this switch for high-power applications?
A2: No, the switch is rated for a maximum of 12V DC and 0.5A. Exceeding these ratings may result in overheating or failure.
Q3: How do I implement debouncing in software?
A3: You can use a delay or a state-checking algorithm in your code to filter out false triggers caused by mechanical bounce.
Q4: Is the SS-12D03 suitable for breadboard prototyping?
A4: Yes, the through-hole pins make it easy to use with breadboards and prototyping boards.
This concludes the documentation for the SS-12D03 Miniature SPDT Slide Switch.