Cirkit Designer Logo
Cirkit Designer
Your all-in-one circuit design IDE
Home / 
Component Documentation

How to Use Sensor_SO2-NO2: Examples, Pinouts, and Specs

Image of Sensor_SO2-NO2
Cirkit Designer LogoDesign with Sensor_SO2-NO2 in Cirkit Designer

Introduction

The Sensor_SO2-NO2 is a highly sensitive and reliable electronic component designed to detect and measure the concentrations of sulfur dioxide (SO2) and nitrogen dioxide (NO2) in the air. It is widely used in environmental monitoring systems, air quality assessment devices, and industrial safety applications. This sensor provides accurate readings of harmful gases, making it an essential tool for ensuring public health and environmental safety.

Explore Projects Built with Sensor_SO2-NO2

Use Cirkit Designer to design, explore, and prototype these projects online. Some projects support real-time simulation. Click "Open Project" to start designing instantly!
Arduino UNO Gas Detection System with MICS2714 and MQ-7 Sensors and SD Card Logging
Image of Esquema_dos_sensores: A project utilizing Sensor_SO2-NO2 in a practical application
This circuit uses an Arduino UNO to interface with an MICS2714 NO2 sensor and an MQ-7 CO sensor to measure gas concentrations. The data from these sensors is read by the Arduino and can be stored on an SD card for logging purposes.
Cirkit Designer LogoOpen Project in Cirkit Designer
ESP32-Based Air Quality Monitoring Station with BMP280, SGP41, and PMS5003 Sensors
Image of indoor-sensors-v6: A project utilizing Sensor_SO2-NO2 in a practical application
This circuit is designed for environmental sensing and monitoring, featuring multiple sensors including a BMP280 for barometric pressure and temperature, a SenseAir S8 for CO2 levels, a PMS5003 for particulate matter, and an SGP41 for VOC and NOx levels. These sensors are interfaced with an ESP32 microcontroller, which likely serves as the central processing unit to collect, process, and possibly transmit sensor data. The ESP32 is connected to the sensors using I2C (SDA/SCL lines) and serial communication (RX/TX lines), and it provides power to the sensors (3V3/VIN lines).
Cirkit Designer LogoOpen Project in Cirkit Designer
Arduino UNO Based Multi-Gas Detector
Image of AIRMS: A project utilizing Sensor_SO2-NO2 in a practical application
This circuit is designed for environmental monitoring, featuring an Arduino UNO microcontroller interfaced with three different gas sensors: MQ-7 for carbon monoxide (CO) detection, MQ131 for ozone (O3) measurement, and MQ-135 for general air quality assessment. The sensors are powered by the Arduino's 5V output and their analog signals are read through the Arduino's analog input pins A0, A1, and A2 respectively. The embedded code reads the analog values from the sensors and outputs the readings via the serial interface, allowing for real-time monitoring of the gases.
Cirkit Designer LogoOpen Project in Cirkit Designer
Arduino Nano-Based Air Quality Monitor with OLED Display and Alert Buzzer
Image of Luftkvalitetsmätare: A project utilizing Sensor_SO2-NO2 in a practical application
This circuit features an Arduino Nano microcontroller interfaced with an Adafruit SGP30 air quality sensor, an Adafruit SHTC3 temperature and humidity sensor, and a 0.96" OLED display for real-time environmental monitoring. The sensors communicate with the Arduino via I2C, with the SGP30 and SHTC3 sensors providing air quality readings (CO2 and TVOC) and temperature/humidity data, respectively, which are then displayed on the OLED. Additionally, a buzzer is connected to the Arduino and is programmed to activate when CO2 levels exceed a certain threshold, serving as an alert system.
Cirkit Designer LogoOpen Project in Cirkit Designer

Explore Projects Built with Sensor_SO2-NO2

Use Cirkit Designer to design, explore, and prototype these projects online. Some projects support real-time simulation. Click "Open Project" to start designing instantly!
Image of Esquema_dos_sensores: A project utilizing Sensor_SO2-NO2 in a practical application
Arduino UNO Gas Detection System with MICS2714 and MQ-7 Sensors and SD Card Logging
This circuit uses an Arduino UNO to interface with an MICS2714 NO2 sensor and an MQ-7 CO sensor to measure gas concentrations. The data from these sensors is read by the Arduino and can be stored on an SD card for logging purposes.
Cirkit Designer LogoOpen Project in Cirkit Designer
Image of indoor-sensors-v6: A project utilizing Sensor_SO2-NO2 in a practical application
ESP32-Based Air Quality Monitoring Station with BMP280, SGP41, and PMS5003 Sensors
This circuit is designed for environmental sensing and monitoring, featuring multiple sensors including a BMP280 for barometric pressure and temperature, a SenseAir S8 for CO2 levels, a PMS5003 for particulate matter, and an SGP41 for VOC and NOx levels. These sensors are interfaced with an ESP32 microcontroller, which likely serves as the central processing unit to collect, process, and possibly transmit sensor data. The ESP32 is connected to the sensors using I2C (SDA/SCL lines) and serial communication (RX/TX lines), and it provides power to the sensors (3V3/VIN lines).
Cirkit Designer LogoOpen Project in Cirkit Designer
Image of AIRMS: A project utilizing Sensor_SO2-NO2 in a practical application
Arduino UNO Based Multi-Gas Detector
This circuit is designed for environmental monitoring, featuring an Arduino UNO microcontroller interfaced with three different gas sensors: MQ-7 for carbon monoxide (CO) detection, MQ131 for ozone (O3) measurement, and MQ-135 for general air quality assessment. The sensors are powered by the Arduino's 5V output and their analog signals are read through the Arduino's analog input pins A0, A1, and A2 respectively. The embedded code reads the analog values from the sensors and outputs the readings via the serial interface, allowing for real-time monitoring of the gases.
Cirkit Designer LogoOpen Project in Cirkit Designer
Image of Luftkvalitetsmätare: A project utilizing Sensor_SO2-NO2 in a practical application
Arduino Nano-Based Air Quality Monitor with OLED Display and Alert Buzzer
This circuit features an Arduino Nano microcontroller interfaced with an Adafruit SGP30 air quality sensor, an Adafruit SHTC3 temperature and humidity sensor, and a 0.96" OLED display for real-time environmental monitoring. The sensors communicate with the Arduino via I2C, with the SGP30 and SHTC3 sensors providing air quality readings (CO2 and TVOC) and temperature/humidity data, respectively, which are then displayed on the OLED. Additionally, a buzzer is connected to the Arduino and is programmed to activate when CO2 levels exceed a certain threshold, serving as an alert system.
Cirkit Designer LogoOpen Project in Cirkit Designer

Common Applications and Use Cases

  • Air quality monitoring stations
  • Industrial emission control systems
  • Smart city environmental monitoring
  • Personal air quality monitoring devices
  • Research and development in environmental sciences

Technical Specifications

The Sensor_SO2-NO2 is designed to operate efficiently in a variety of environments. Below are its key technical details:

General Specifications

Parameter Value
Target Gases Sulfur Dioxide (SO2), Nitrogen Dioxide (NO2)
Measurement Range SO2: 0–20 ppm, NO2: 0–10 ppm
Sensitivity SO2: 0.5–1.5 µA/ppm, NO2: 0.2–0.8 µA/ppm
Operating Voltage 3.3V–5V
Operating Temperature -20°C to 50°C
Operating Humidity 15%–90% RH (non-condensing)
Response Time < 30 seconds
Lifetime > 2 years
Output Signal Analog

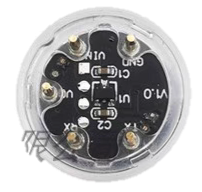
Pin Configuration and Descriptions

The Sensor_SO2-NO2 typically comes with a 4-pin interface. The pin configuration is as follows:

Pin Number Pin Name Description
1 VCC Power supply input (3.3V–5V)
2 GND Ground connection
3 AOUT_SO2 Analog output for SO2 concentration
4 AOUT_NO2 Analog output for NO2 concentration

Usage Instructions

How to Use the Sensor in a Circuit

  1. Power the Sensor: Connect the VCC pin to a 3.3V or 5V power source and the GND pin to the ground of your circuit.
  2. Read Analog Outputs:
    • Connect the AOUT_SO2 pin to an analog input pin of your microcontroller to measure SO2 concentration.
    • Similarly, connect the AOUT_NO2 pin to another analog input pin to measure NO2 concentration.
  3. Calibrate the Sensor: Allow the sensor to warm up for 5–10 minutes after powering it on to ensure accurate readings.
  4. Process the Data: Use the microcontroller to convert the analog signals into meaningful gas concentration values using the sensor's sensitivity specifications.

Important Considerations and Best Practices

  • Avoid Condensation: Ensure the sensor is not exposed to high humidity or condensation, as this may affect its performance.
  • Placement: Install the sensor in a location with good airflow for accurate gas detection.
  • Calibration: Periodically calibrate the sensor using a known gas concentration to maintain accuracy.
  • Power Supply: Use a stable power source to avoid fluctuations in the sensor's output.

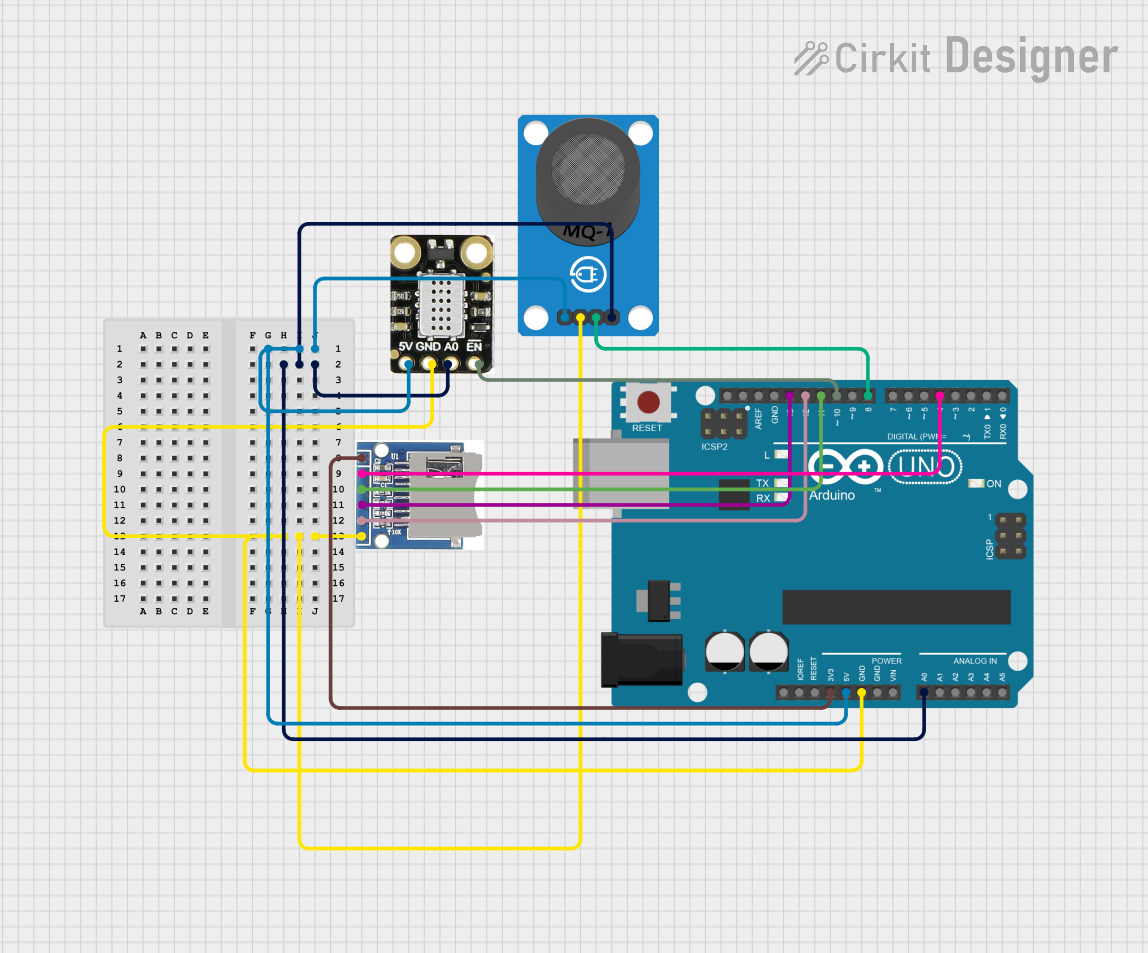
Example: Connecting to an Arduino UNO

Below is an example of how to connect and read data from the Sensor_SO2-NO2 using an Arduino UNO:

Circuit Connections

  • Connect VCC to the 5V pin on the Arduino.
  • Connect GND to the GND pin on the Arduino.
  • Connect AOUT_SO2 to the A0 pin on the Arduino.
  • Connect AOUT_NO2 to the A1 pin on the Arduino.

Arduino Code

// Define the analog input pins for the sensor outputs
const int SO2_Pin = A0;  // Pin connected to AOUT_SO2
const int NO2_Pin = A1;  // Pin connected to AOUT_NO2

void setup() {
  Serial.begin(9600);  // Initialize serial communication
  Serial.println("Sensor_SO2-NO2 Initialization...");
}

void loop() {
  // Read analog values from the sensor
  int SO2_Value = analogRead(SO2_Pin);
  int NO2_Value = analogRead(NO2_Pin);

  // Convert analog values to voltage (assuming 5V reference)
  float SO2_Voltage = SO2_Value * (5.0 / 1023.0);
  float NO2_Voltage = NO2_Value * (5.0 / 1023.0);

  // Display the readings on the serial monitor
  Serial.print("SO2 Voltage: ");
  Serial.print(SO2_Voltage);
  Serial.println(" V");

  Serial.print("NO2 Voltage: ");
  Serial.print(NO2_Voltage);
  Serial.println(" V");

  delay(1000);  // Wait for 1 second before the next reading
}

Troubleshooting and FAQs

Common Issues and Solutions

  1. No Output Signal:

    • Cause: Incorrect wiring or insufficient power supply.
    • Solution: Double-check the connections and ensure the power supply is stable.
  2. Inaccurate Readings:

    • Cause: Sensor not warmed up or requires calibration.
    • Solution: Allow the sensor to warm up for 5–10 minutes and perform calibration.
  3. Fluctuating Output:

    • Cause: Electrical noise or unstable power supply.
    • Solution: Use decoupling capacitors near the sensor's power pins to reduce noise.
  4. Sensor Not Responding:

    • Cause: Sensor may have reached the end of its lifetime.
    • Solution: Replace the sensor if it has been in use for over 2 years.

FAQs

Q1: Can the Sensor_SO2-NO2 detect other gases?
A1: No, this sensor is specifically designed to detect SO2 and NO2. It may not provide accurate readings for other gases.

Q2: How often should I calibrate the sensor?
A2: Calibration frequency depends on usage, but it is recommended to calibrate every 3–6 months for optimal accuracy.

Q3: Can I use this sensor outdoors?
A3: Yes, but ensure it is protected from direct exposure to rain or extreme humidity.

Q4: What is the warm-up time for the sensor?
A4: The sensor requires 5–10 minutes of warm-up time after powering on to provide accurate readings.