Cirkit Designer Logo
Cirkit Designer
Your all-in-one circuit design IDE
Home / 
Component Documentation

How to Use JST SH1 x3 Male: Examples, Pinouts, and Specs

Image of JST SH1 x3 Male
Cirkit Designer LogoDesign with JST SH1 x3 Male in Cirkit Designer

Introduction

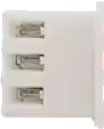
The JST SH1 x3 Male is a compact, 1.0mm pitch connector designed for secure and reliable wire-to-board or wire-to-wire connections in electronic circuits. It features three male pins, making it ideal for applications requiring a small form factor and robust connectivity. This connector is widely used in consumer electronics, robotics, drones, and other compact devices where space-saving and dependable connections are critical.

Explore Projects Built with JST SH1 x3 Male

Use Cirkit Designer to design, explore, and prototype these projects online. Some projects support real-time simulation. Click "Open Project" to start designing instantly!
FTDI to UART Adapter with J26 Connector
Image of J26 CLOSEUP: A project utilizing JST SH1 x3 Male in a practical application
This circuit connects an FTDI USB-to-serial converter to a standard serial interface via a J26 connector. It facilitates serial communication by linking the ground, transmit, receive, data terminal ready, and request to send signals between the FTDI chip and the J26 connector.
Cirkit Designer LogoOpen Project in Cirkit Designer
Battery-Powered UPS System with Waveshare UPS 3S and Solar Charger
Image of Copy of s: A project utilizing JST SH1 x3 Male in a practical application
This circuit is a power management system that integrates a 12V power supply, a solar charger power bank, and multiple Li-ion batteries to provide a stable power output. The Waveshare UPS 3S manages the input from the power sources and batteries, ensuring continuous power delivery. The MRB045 module is used to interface the solar charger with the rest of the system.
Cirkit Designer LogoOpen Project in Cirkit Designer
Solar-Powered GSM/GPRS+GPS Tracker with Seeeduino XIAO
Image of SOS System : A project utilizing JST SH1 x3 Male in a practical application
This circuit features an Ai Thinker A9G development board for GSM/GPRS and GPS/BDS connectivity, interfaced with a Seeeduino XIAO microcontroller for control and data processing. A solar cell, coupled with a TP4056 charging module, charges a 3.3V battery, which powers the system through a 3.3V regulator ensuring stable operation. The circuit likely serves for remote data communication and location tracking, with the capability to be powered by renewable energy and interfaced with additional sensors or input devices via the Seeeduino XIAO.
Cirkit Designer LogoOpen Project in Cirkit Designer
Battery-Powered 18650 Li-ion Charger with USB Output and Adjustable Voltage Regulator
Image of Breadboard: A project utilizing JST SH1 x3 Male in a practical application
This circuit is a battery management and power supply system that uses three 3.7V batteries connected to a 3S 10A Li-ion 18650 Charger Protection Board Module for balanced charging and protection. The system includes a TP4056 Battery Charging Protection Module for additional charging safety, a Step Up Boost Power Converter to regulate and boost the voltage, and a USB regulator to provide a stable 5V output, controlled by a push switch.
Cirkit Designer LogoOpen Project in Cirkit Designer

Explore Projects Built with JST SH1 x3 Male

Use Cirkit Designer to design, explore, and prototype these projects online. Some projects support real-time simulation. Click "Open Project" to start designing instantly!
Image of J26 CLOSEUP: A project utilizing JST SH1 x3 Male in a practical application
FTDI to UART Adapter with J26 Connector
This circuit connects an FTDI USB-to-serial converter to a standard serial interface via a J26 connector. It facilitates serial communication by linking the ground, transmit, receive, data terminal ready, and request to send signals between the FTDI chip and the J26 connector.
Cirkit Designer LogoOpen Project in Cirkit Designer
Image of Copy of s: A project utilizing JST SH1 x3 Male in a practical application
Battery-Powered UPS System with Waveshare UPS 3S and Solar Charger
This circuit is a power management system that integrates a 12V power supply, a solar charger power bank, and multiple Li-ion batteries to provide a stable power output. The Waveshare UPS 3S manages the input from the power sources and batteries, ensuring continuous power delivery. The MRB045 module is used to interface the solar charger with the rest of the system.
Cirkit Designer LogoOpen Project in Cirkit Designer
Image of SOS System : A project utilizing JST SH1 x3 Male in a practical application
Solar-Powered GSM/GPRS+GPS Tracker with Seeeduino XIAO
This circuit features an Ai Thinker A9G development board for GSM/GPRS and GPS/BDS connectivity, interfaced with a Seeeduino XIAO microcontroller for control and data processing. A solar cell, coupled with a TP4056 charging module, charges a 3.3V battery, which powers the system through a 3.3V regulator ensuring stable operation. The circuit likely serves for remote data communication and location tracking, with the capability to be powered by renewable energy and interfaced with additional sensors or input devices via the Seeeduino XIAO.
Cirkit Designer LogoOpen Project in Cirkit Designer
Image of Breadboard: A project utilizing JST SH1 x3 Male in a practical application
Battery-Powered 18650 Li-ion Charger with USB Output and Adjustable Voltage Regulator
This circuit is a battery management and power supply system that uses three 3.7V batteries connected to a 3S 10A Li-ion 18650 Charger Protection Board Module for balanced charging and protection. The system includes a TP4056 Battery Charging Protection Module for additional charging safety, a Step Up Boost Power Converter to regulate and boost the voltage, and a USB regulator to provide a stable 5V output, controlled by a push switch.
Cirkit Designer LogoOpen Project in Cirkit Designer

Common Applications

  • Connecting sensors, actuators, or modules in compact devices
  • Power and signal transmission in drones and robotics
  • Wearable electronics and IoT devices
  • PCB-to-wire connections in small electronic projects

Technical Specifications

The following table outlines the key technical details of the JST SH1 x3 Male connector:

Parameter Specification
Pitch 1.0mm
Number of Pins 3
Connector Type Male
Current Rating 1A (maximum)
Voltage Rating 50V (maximum)
Operating Temperature -25°C to +85°C
Contact Resistance ≤ 20mΩ
Insulation Resistance ≥ 500MΩ
Material Housing: Nylon, Contacts: Phosphor Bronze (tin-plated)

Pin Configuration and Descriptions

The JST SH1 x3 Male connector has three pins, typically used for power, ground, and signal connections. The pinout is as follows:

Pin Number Description Typical Use
1 VCC (Power) Positive voltage input
2 GND (Ground) Ground connection
3 Signal Data or control signal

Usage Instructions

How to Use the JST SH1 x3 Male in a Circuit

  1. Connector Mating: Pair the JST SH1 x3 Male connector with a compatible JST SH1 x3 Female connector. Ensure proper alignment to avoid damaging the pins.
  2. Soldering: If soldering the connector to a PCB, use a fine-tipped soldering iron and ensure the solder joints are clean and secure.
  3. Wire Crimping: For wire-to-wire connections, use a crimping tool to attach wires to the female counterpart before mating with the male connector.
  4. Pin Assignment: Verify the pinout (VCC, GND, Signal) to ensure proper connections in your circuit.

Important Considerations and Best Practices

  • Avoid Overcurrent: Do not exceed the 1A current rating to prevent overheating or damage.
  • Secure Connections: Ensure the connector is fully mated with its counterpart to avoid intermittent connections.
  • Cable Strain Relief: Use strain relief mechanisms to prevent stress on the wires and connector.
  • Polarity Check: Double-check the polarity of the VCC and GND pins before powering the circuit.

Example: Connecting to an Arduino UNO

The JST SH1 x3 Male connector can be used to connect a sensor or module to an Arduino UNO. Below is an example of wiring and code for reading data from a sensor:

Wiring

  • Pin 1 (VCC) → Arduino 5V
  • Pin 2 (GND) → Arduino GND
  • Pin 3 (Signal) → Arduino Digital Pin 2

Code Example

// Example code for reading a digital signal from a sensor connected via JST SH1 x3

const int signalPin = 2; // Pin connected to the Signal pin of the JST SH1 x3

void setup() {
  pinMode(signalPin, INPUT); // Set the signal pin as input
  Serial.begin(9600);       // Initialize serial communication at 9600 baud
}

void loop() {
  int sensorValue = digitalRead(signalPin); // Read the digital signal
  Serial.print("Sensor Value: ");
  Serial.println(sensorValue); // Print the sensor value to the Serial Monitor
  delay(500);                  // Wait for 500ms before the next reading
}

Troubleshooting and FAQs

Common Issues and Solutions

  1. Loose Connections

    • Issue: The connector is not securely mated, causing intermittent signals.
    • Solution: Ensure the male and female connectors are fully inserted and aligned.
  2. Incorrect Pinout

    • Issue: The circuit does not work due to incorrect wiring of VCC, GND, or Signal.
    • Solution: Double-check the pinout and wiring before powering the circuit.
  3. Overheating

    • Issue: The connector or wires become hot during operation.
    • Solution: Verify that the current does not exceed the 1A rating. Use thicker wires if necessary.
  4. Signal Noise

    • Issue: The signal pin picks up noise or interference.
    • Solution: Use shielded cables or add a pull-up/pull-down resistor to stabilize the signal.

FAQs

Q: Can the JST SH1 x3 Male connector handle analog signals?
A: Yes, it can handle both analog and digital signals, provided the voltage and current ratings are not exceeded.

Q: Is the JST SH1 x3 Male connector suitable for high-vibration environments?
A: Yes, its secure mating design makes it suitable for environments with moderate vibration, such as drones or robotics.

Q: What tools are recommended for crimping wires for this connector?
A: Use a precision crimping tool designed for 1.0mm pitch connectors to ensure reliable wire connections.

Q: Can I use this connector for high-power applications?
A: No, the connector is rated for a maximum current of 1A and voltage of 50V. For high-power applications, consider using connectors with higher ratings.