
Cirkit Designer
Your all-in-one circuit design IDE
Home /
Component Documentation
How to Use motor and wheels: Examples, Pinouts, and Specs
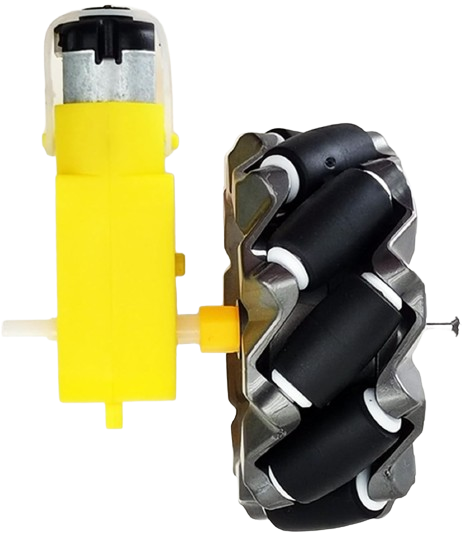
 Design with motor and wheels in Cirkit Designer
Introduction
- The motor and wheels assembly is a fundamental component for building mobile robotic systems. It typically consists of a DC motor or stepper motor attached to wheels, enabling movement and navigation. This setup is widely used in robotics, remote-controlled vehicles, and automation projects.
- Common applications include robotic cars, conveyor systems, automated guided vehicles (AGVs), and educational robotics kits.
Explore Projects Built with motor and wheels
Battery-Powered Dual Gearmotor Drive System

This circuit consists of a 6V battery pack connected in parallel to two DC gearmotors, one for the left wheel and one for the right wheel of a vehicle. The battery provides power directly to both motors, enabling them to run simultaneously. As there is no control circuitry or microcontroller code provided, the motors will run continuously when the circuit is powered.
Open Project in Cirkit DesignerArduino-Controlled Robotic Vehicle with IR Sensors and L298N Motor Driver
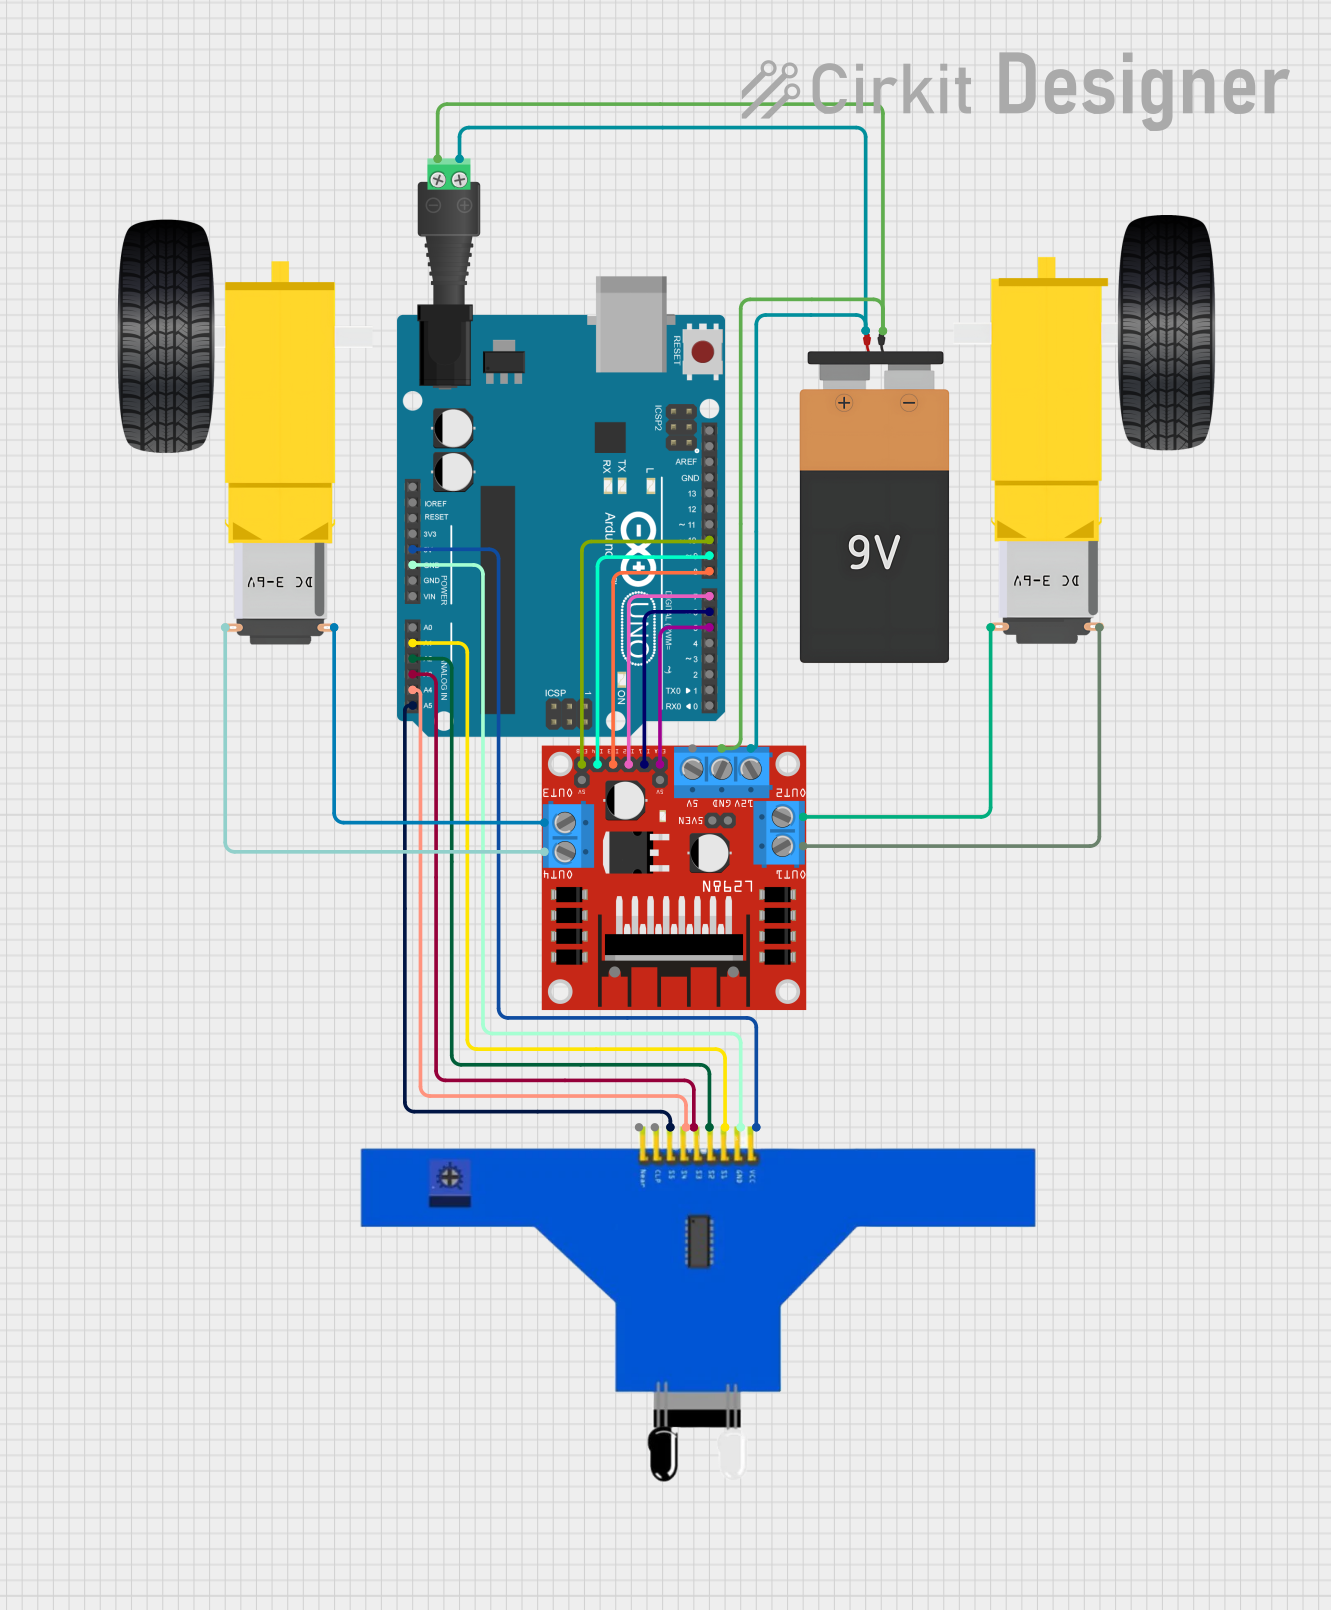
This circuit is designed to control a pair of DC gearmotors using an L298N motor driver module, which is interfaced with an Arduino UNO microcontroller. The Arduino is also connected to a 5-channel IR sensor for input, which may be used for line tracking or obstacle detection. Power is supplied by a 9V battery connected through a 2.1mm barrel jack, and the motor driver module regulates this power to drive the left and right gearmotors for a mobile robot platform.
Open Project in Cirkit DesignerESP32-CAM Controlled Wi-Fi Robot Car
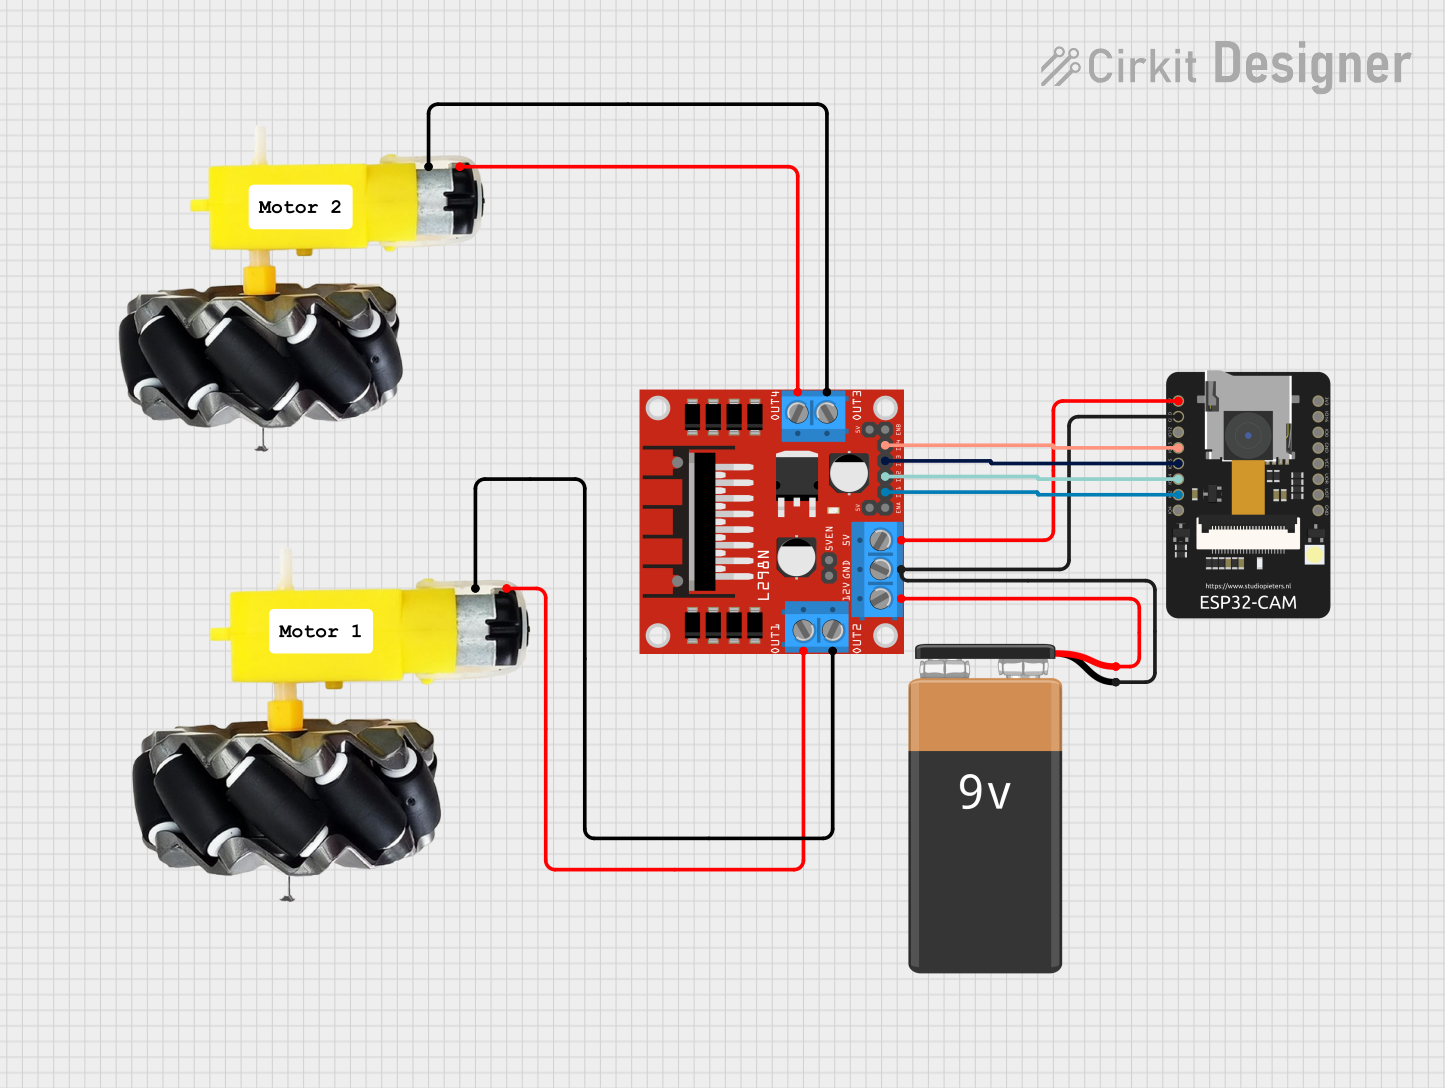
This circuit is designed to control a two-wheel motorized vehicle using an ESP32-CAM microcontroller. The ESP32-CAM is interfaced with an L298N DC motor driver to control the direction and speed of the motors attached to the wheels. Additionally, the ESP32-CAM is configured to capture images and provide WiFi connectivity for remote control via a web server with a user interface for driving commands.
Open Project in Cirkit DesignerESP32 and L298N Motor Driver-Based Wi-Fi Controlled Robotic Vehicle with GPS and Metal Detection
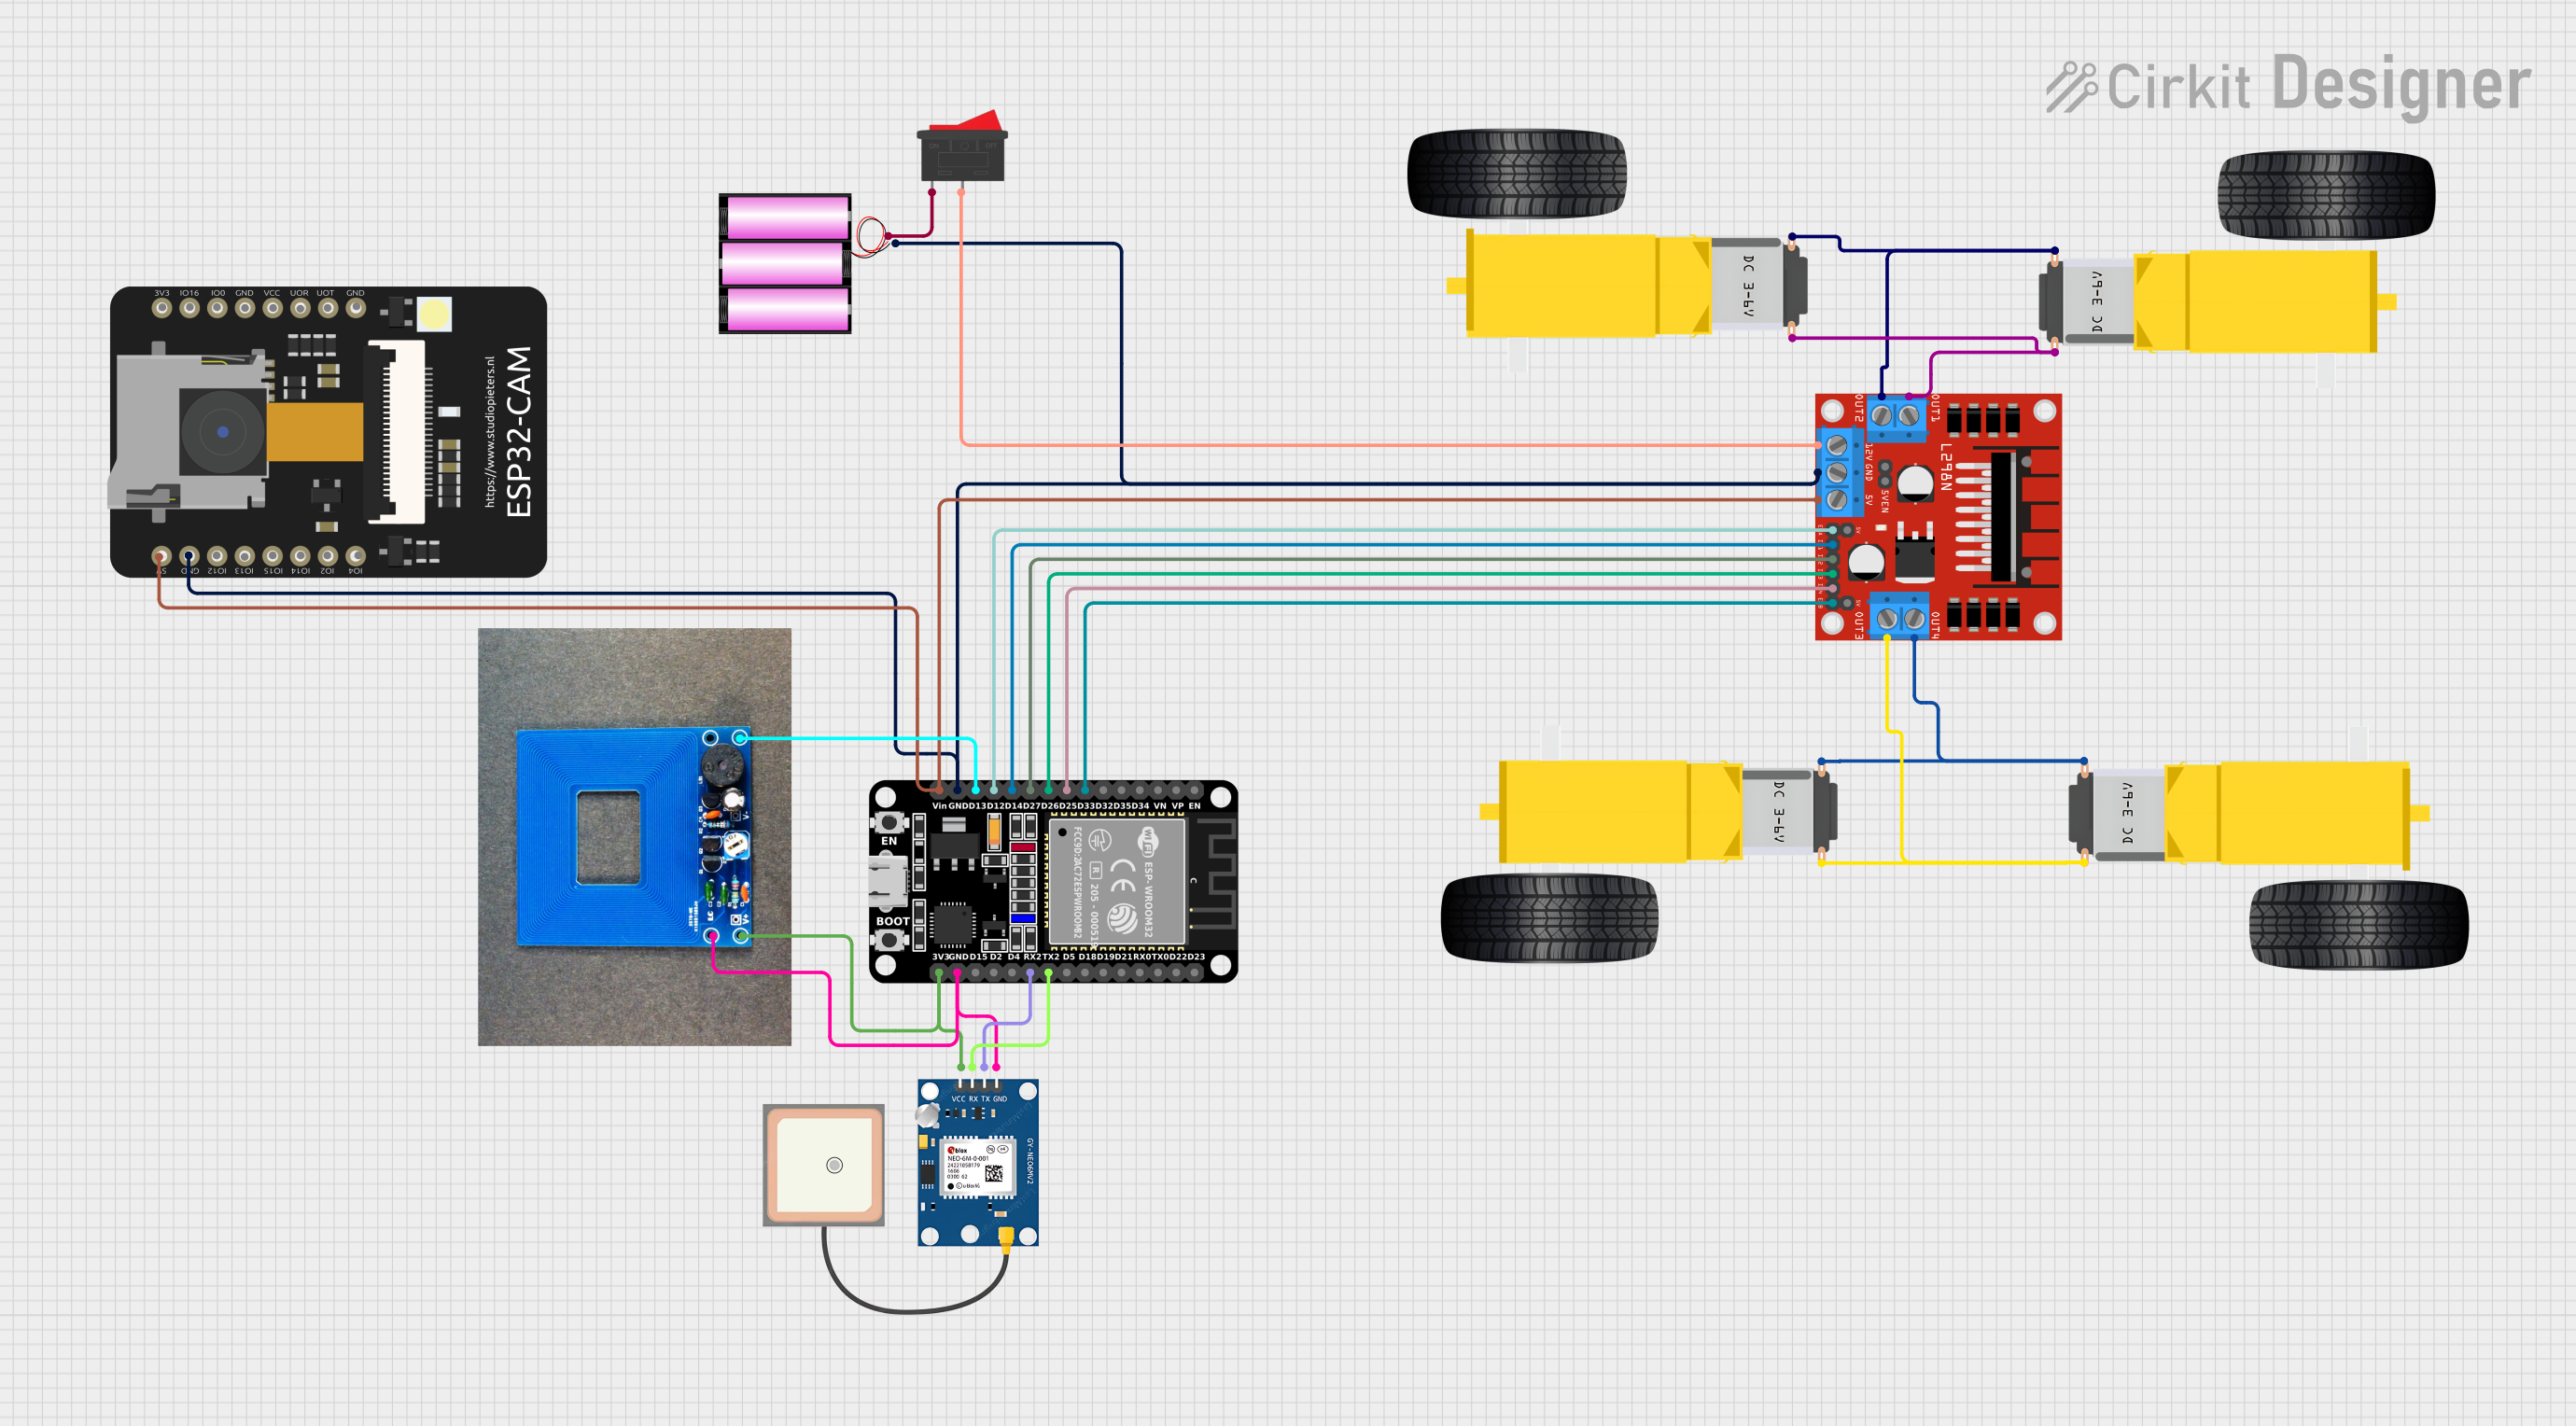
This circuit is a robotic vehicle control system that uses an ESP32 microcontroller to drive four DC gear motors via an L298N motor driver. It also includes a GPS module for location tracking, a metal detector for object detection, and an ESP32 CAM for capturing images or video, all powered by a 12V battery.
Open Project in Cirkit DesignerExplore Projects Built with motor and wheels
Battery-Powered Dual Gearmotor Drive System
This circuit consists of a 6V battery pack connected in parallel to two DC gearmotors, one for the left wheel and one for the right wheel of a vehicle. The battery provides power directly to both motors, enabling them to run simultaneously. As there is no control circuitry or microcontroller code provided, the motors will run continuously when the circuit is powered.
Open Project in Cirkit DesignerArduino-Controlled Robotic Vehicle with IR Sensors and L298N Motor Driver
This circuit is designed to control a pair of DC gearmotors using an L298N motor driver module, which is interfaced with an Arduino UNO microcontroller. The Arduino is also connected to a 5-channel IR sensor for input, which may be used for line tracking or obstacle detection. Power is supplied by a 9V battery connected through a 2.1mm barrel jack, and the motor driver module regulates this power to drive the left and right gearmotors for a mobile robot platform.
Open Project in Cirkit DesignerESP32-CAM Controlled Wi-Fi Robot Car
This circuit is designed to control a two-wheel motorized vehicle using an ESP32-CAM microcontroller. The ESP32-CAM is interfaced with an L298N DC motor driver to control the direction and speed of the motors attached to the wheels. Additionally, the ESP32-CAM is configured to capture images and provide WiFi connectivity for remote control via a web server with a user interface for driving commands.
Open Project in Cirkit DesignerESP32 and L298N Motor Driver-Based Wi-Fi Controlled Robotic Vehicle with GPS and Metal Detection
This circuit is a robotic vehicle control system that uses an ESP32 microcontroller to drive four DC gear motors via an L298N motor driver. It also includes a GPS module for location tracking, a metal detector for object detection, and an ESP32 CAM for capturing images or video, all powered by a 12V battery.
Open Project in Cirkit DesignerTechnical Specifications
Motor Specifications
| Parameter | Value |
|---|---|
| Motor Type | DC Motor / Stepper Motor |
| Operating Voltage | 3V - 12V (varies by motor model) |
| Rated Current | 100mA - 2A (depending on load) |
| Stall Current | Up to 3A (varies by motor model) |
| Torque | 0.1 Nm - 1 Nm (model-dependent) |
| Speed | 50 RPM - 300 RPM (no load) |
Wheel Specifications
| Parameter | Value |
|---|---|
| Wheel Diameter | 65mm - 100mm |
| Wheel Material | Rubber or Plastic |
| Hub Type | Compatible with motor shaft |
| Traction | High-grip surface for stability |
Pin Configuration (for DC Motor)
| Pin Name | Description |
|---|---|
| Motor Terminal 1 | Connects to motor driver output A |
| Motor Terminal 2 | Connects to motor driver output B |
Pin Configuration (for Stepper Motor)
| Pin Name | Description |
|---|---|
| Coil A+ | Positive terminal of coil A |
| Coil A- | Negative terminal of coil A |
| Coil B+ | Positive terminal of coil B |
| Coil B- | Negative terminal of coil B |
Usage Instructions
How to Use the Component in a Circuit
DC Motor with Wheels:
- Connect the motor terminals to a motor driver (e.g., L298N or L293D) to control speed and direction.
- Use a power supply that matches the motor's operating voltage.
- Attach the wheels securely to the motor shaft using the provided hub or adapter.
Stepper Motor with Wheels:
- Connect the stepper motor to a stepper motor driver (e.g., A4988 or DRV8825).
- Ensure the driver is powered with the correct voltage and current settings.
- Attach the wheels to the motor shaft, ensuring proper alignment.
Arduino UNO Example for DC Motor:
- Below is an example code to control a DC motor with wheels using an L298N motor driver.
// Arduino code to control a DC motor with wheels using L298N motor driver

// Define motor driver pins
const int motorPin1 = 9; // IN1 on L298N
const int motorPin2 = 10; // IN2 on L298N
const int enablePin = 11; // ENA on L298N

void setup() {
  // Set motor pins as outputs
  pinMode(motorPin1, OUTPUT);
  pinMode(motorPin2, OUTPUT);
  pinMode(enablePin, OUTPUT);

  // Start motor at full speed
  analogWrite(enablePin, 255); // Set speed (0-255)
}

void loop() {
  // Move forward
  digitalWrite(motorPin1, HIGH);
  digitalWrite(motorPin2, LOW);
  delay(2000); // Run for 2 seconds

  // Move backward
  digitalWrite(motorPin1, LOW);
  digitalWrite(motorPin2, HIGH);
  delay(2000); // Run for 2 seconds

  // Stop motor
  digitalWrite(motorPin1, LOW);
  digitalWrite(motorPin2, LOW);
  delay(1000); // Pause for 1 second
}
Important Considerations and Best Practices
- Always use a motor driver to control the motor, as direct connection to a microcontroller can damage it.
- Ensure the power supply matches the motor's voltage and current requirements.
- Use proper mounting hardware to secure the wheels and prevent wobbling.
- Avoid overloading the motor to prevent overheating or damage.
Troubleshooting and FAQs
Common Issues
Motor not spinning:
- Check the power supply and ensure it matches the motor's voltage requirements.
- Verify the connections between the motor, driver, and microcontroller.
- Ensure the motor driver is enabled and receiving control signals.
Motor spins in the wrong direction:
- Reverse the connections of the motor terminals on the driver.
- Adjust the control signals in the code.
Motor overheating:
- Reduce the load on the motor or use a motor with a higher torque rating.
- Ensure proper ventilation and avoid prolonged operation at high currents.
Wheels slipping or wobbling:
- Check the wheel alignment and ensure they are securely attached to the motor shaft.
- Use wheels with better traction for smoother operation.
FAQs
Can I use this motor and wheels with a battery pack?
- Yes, ensure the battery pack provides the required voltage and current for the motor.
What type of motor driver should I use?
- For DC motors, use drivers like L298N or L293D. For stepper motors, use drivers like A4988 or DRV8825.
Can I control the motor speed?
- Yes, use PWM (Pulse Width Modulation) signals to control the motor speed via the motor driver.
How do I calculate the torque required for my project?
- Consider the weight of the load, wheel diameter, and desired acceleration. Use torque calculators or formulas to estimate the required torque.
By following this documentation, you can effectively integrate motor and wheels into your projects for smooth and reliable operation.