Cirkit Designer Logo
Cirkit Designer
Your all-in-one circuit design IDE
Home / 
Component Documentation

How to Use round TFT display: Examples, Pinouts, and Specs

Image of round TFT display
Cirkit Designer LogoDesign with round TFT display in Cirkit Designer

Introduction

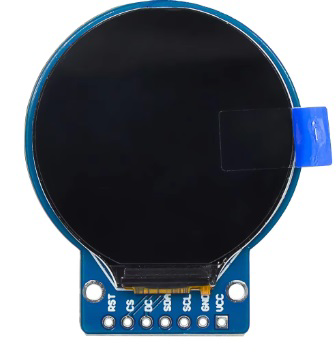
The 240 GC9A01 is a round Thin-Film-Transistor (TFT) display manufactured by Arduino, designed to provide high-quality visual output with rich colors and high resolution. This display is commonly used in wearable devices, smart home applications, and any project where a compact and aesthetically pleasing visual interface is required.

Explore Projects Built with round TFT display

Use Cirkit Designer to design, explore, and prototype these projects online. Some projects support real-time simulation. Click "Open Project" to start designing instantly!
Arduino Mega 2560 Controlled TFT Touchscreen Interface
Image of Tablero Moto: A project utilizing round TFT display in a practical application
This circuit connects an Arduino Mega 2560 microcontroller to a 3.5-inch 480x320 TFT LCD display. The Arduino provides power, ground, and digital signals to control the display, including data lines for pixel information and control lines for reset, write, and command/data selection. The embedded code initializes the display and configures the Arduino's pins for communication, likely to create a user interface or visual output for a project.
Cirkit Designer LogoOpen Project in Cirkit Designer
RTL8720DN-Based Interactive Button-Controlled TFT Display
Image of coba-coba: A project utilizing round TFT display in a practical application
This circuit features an RTL8720DN microcontroller interfaced with a China ST7735S 160x128 TFT LCD display and four pushbuttons. The microcontroller reads the states of the pushbuttons and displays their statuses on the TFT LCD, providing a visual feedback system for button presses.
Cirkit Designer LogoOpen Project in Cirkit Designer
ESP32-Powered 1.3 inch TFT Display Module for Visual Data Output
Image of ESP32+ST7789: A project utilizing round TFT display in a practical application
This circuit connects an ESP32 microcontroller to a 1.3 inch TFT display module (ST7789). The ESP32 provides power and control signals to the display, enabling it to show graphical data.
Cirkit Designer LogoOpen Project in Cirkit Designer
ESP32-C6 and ST7735S Display: Wi-Fi Controlled TFT Display Module
Image of ESP32-C6sm-ST7735: A project utilizing round TFT display in a practical application
This circuit features an ESP32-C6 microcontroller interfaced with a China ST7735S 160x128 TFT display. The ESP32-C6 controls the display via SPI communication, providing power, ground, and control signals to render graphics and text on the screen.
Cirkit Designer LogoOpen Project in Cirkit Designer

Explore Projects Built with round TFT display

Use Cirkit Designer to design, explore, and prototype these projects online. Some projects support real-time simulation. Click "Open Project" to start designing instantly!
Image of Tablero Moto: A project utilizing round TFT display in a practical application
Arduino Mega 2560 Controlled TFT Touchscreen Interface
This circuit connects an Arduino Mega 2560 microcontroller to a 3.5-inch 480x320 TFT LCD display. The Arduino provides power, ground, and digital signals to control the display, including data lines for pixel information and control lines for reset, write, and command/data selection. The embedded code initializes the display and configures the Arduino's pins for communication, likely to create a user interface or visual output for a project.
Cirkit Designer LogoOpen Project in Cirkit Designer
Image of coba-coba: A project utilizing round TFT display in a practical application
RTL8720DN-Based Interactive Button-Controlled TFT Display
This circuit features an RTL8720DN microcontroller interfaced with a China ST7735S 160x128 TFT LCD display and four pushbuttons. The microcontroller reads the states of the pushbuttons and displays their statuses on the TFT LCD, providing a visual feedback system for button presses.
Cirkit Designer LogoOpen Project in Cirkit Designer
Image of ESP32+ST7789: A project utilizing round TFT display in a practical application
ESP32-Powered 1.3 inch TFT Display Module for Visual Data Output
This circuit connects an ESP32 microcontroller to a 1.3 inch TFT display module (ST7789). The ESP32 provides power and control signals to the display, enabling it to show graphical data.
Cirkit Designer LogoOpen Project in Cirkit Designer
Image of ESP32-C6sm-ST7735: A project utilizing round TFT display in a practical application
ESP32-C6 and ST7735S Display: Wi-Fi Controlled TFT Display Module
This circuit features an ESP32-C6 microcontroller interfaced with a China ST7735S 160x128 TFT display. The ESP32-C6 controls the display via SPI communication, providing power, ground, and control signals to render graphics and text on the screen.
Cirkit Designer LogoOpen Project in Cirkit Designer

Technical Specifications

General Features

  • Display Type: Round TFT
  • Resolution: 240 x 240 pixels
  • Display Colors: 16-bit, 65K colors
  • Interface: SPI/I2C
  • Supply Voltage: 3.3V - 5V
  • Operating Temperature: -20°C to 70°C

Pin Configuration and Descriptions

Pin Number Pin Name Description
1 VCC Power supply (3.3V - 5V)
2 GND Ground
3 SCL Serial Clock for SPI/I2C
4 SDA Serial Data for SPI/I2C
5 RES Reset pin
6 DC Data/Command control pin (SPI only)
7 CS Chip Select (SPI only)
8 BLK Backlight control (PWM capable)

Usage Instructions

Connecting to an Arduino UNO

  1. Connect the display VCC to the Arduino 5V pin.
  2. Connect the display GND to the Arduino GND pin.
  3. Connect the display SCL to the Arduino pin A5 (SCL).
  4. Connect the display SDA to the Arduino pin A4 (SDA).
  5. Connect the display RES to a digital pin (e.g., D9).
  6. Connect the display DC to another digital pin (e.g., D8).
  7. Connect the display CS to another digital pin (e.g., D10).
  8. Connect the display BLK to a PWM-capable pin (e.g., D6) for backlight control.

Programming the Display

To control the 240 GC9A01 display with an Arduino UNO, you will need to use a library that supports this display, such as the Adafruit_GFX library, along with a library specific to the display's driver chip.

Here is a basic example of how to initialize the display and draw a simple shape:

#include <Adafruit_GFX.h>    // Core graphics library
#include <Adafruit_GC9A01.h> // Hardware-specific library

#define TFT_CS     10
#define TFT_RST    9
#define TFT_DC     8
#define TFT_BL     6

Adafruit_GC9A01 tft = Adafruit_GC9A01(TFT_CS, TFT_DC, TFT_RST);

void setup() {
  pinMode(TFT_BL, OUTPUT);
  analogWrite(TFT_BL, 128); // Set backlight to half brightness
  tft.begin();
  tft.fillScreen(GC9A01_BLACK); // Clear the screen to black
}

void loop() {
  tft.drawCircle(tft.width() / 2, tft.height() / 2, 50, GC9A01_WHITE);
}

Important Considerations and Best Practices

  • Always ensure that the power supply voltage matches the requirements of the display.
  • Use a level shifter if necessary when interfacing with a 5V microcontroller.
  • Avoid exposing the display to extreme temperatures or humidity.
  • Handle the display with care to prevent damage to the screen or the flex cable.

Troubleshooting and FAQs

Common Issues

  • Display Not Powering On: Check the connections to VCC and GND, and ensure that the power supply is within the specified voltage range.
  • No Image or Incorrect Colors: Verify that the SPI/I2C connections are correct and that the correct driver library is being used.
  • Dim or Flickering Backlight: Ensure that the BLK pin is connected and that the PWM signal is within the correct range.

FAQs

Q: Can I use this display with a 5V Arduino? A: Yes, but ensure that the logic levels are compatible. Use a level shifter if necessary.

Q: How can I adjust the brightness of the display? A: The brightness can be adjusted by sending a PWM signal to the BLK pin.

Q: What libraries are required to use this display with an Arduino? A: You will need the Adafruit_GFX library for core graphics functions and a library specific to the display's driver chip, such as Adafruit_GC9A01.

Q: Can I use this display in outdoor environments? A: The display is not specifically designed for outdoor use and may not be visible in direct sunlight. Additionally, it should be protected from extreme weather conditions.

For further assistance, consult the manufacturer's datasheet and the community forums dedicated to Arduino and display technologies.