How to Use Adafruit MLX90640 Thermal Camera: Examples, Pinouts, and Specs
Introduction
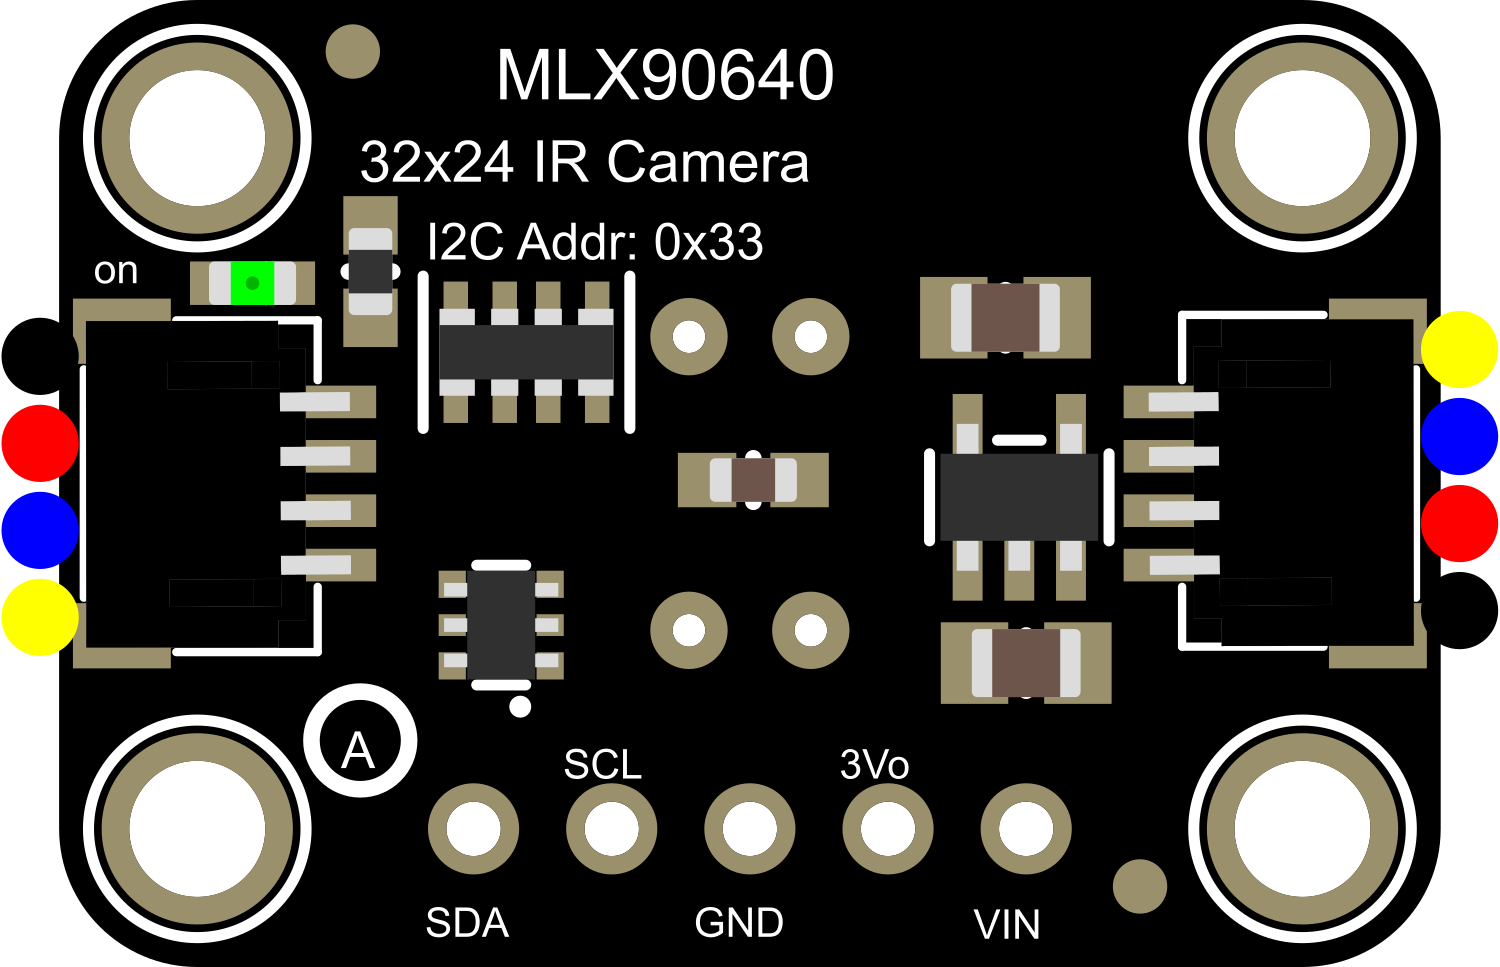
The Adafruit MLX90640 Thermal Camera is a sophisticated infrared thermal imaging module that offers a 32x24 array of temperature readings, translating to 768 individual temperature measurements. This module is capable of detecting temperatures ranging from -40°C to 300°C, making it suitable for a wide array of applications including human presence detection, HVAC control, medical imaging, and more. Its I2C interface facilitates easy integration with microcontrollers such as the Arduino UNO.
Explore Projects Built with Adafruit MLX90640 Thermal Camera
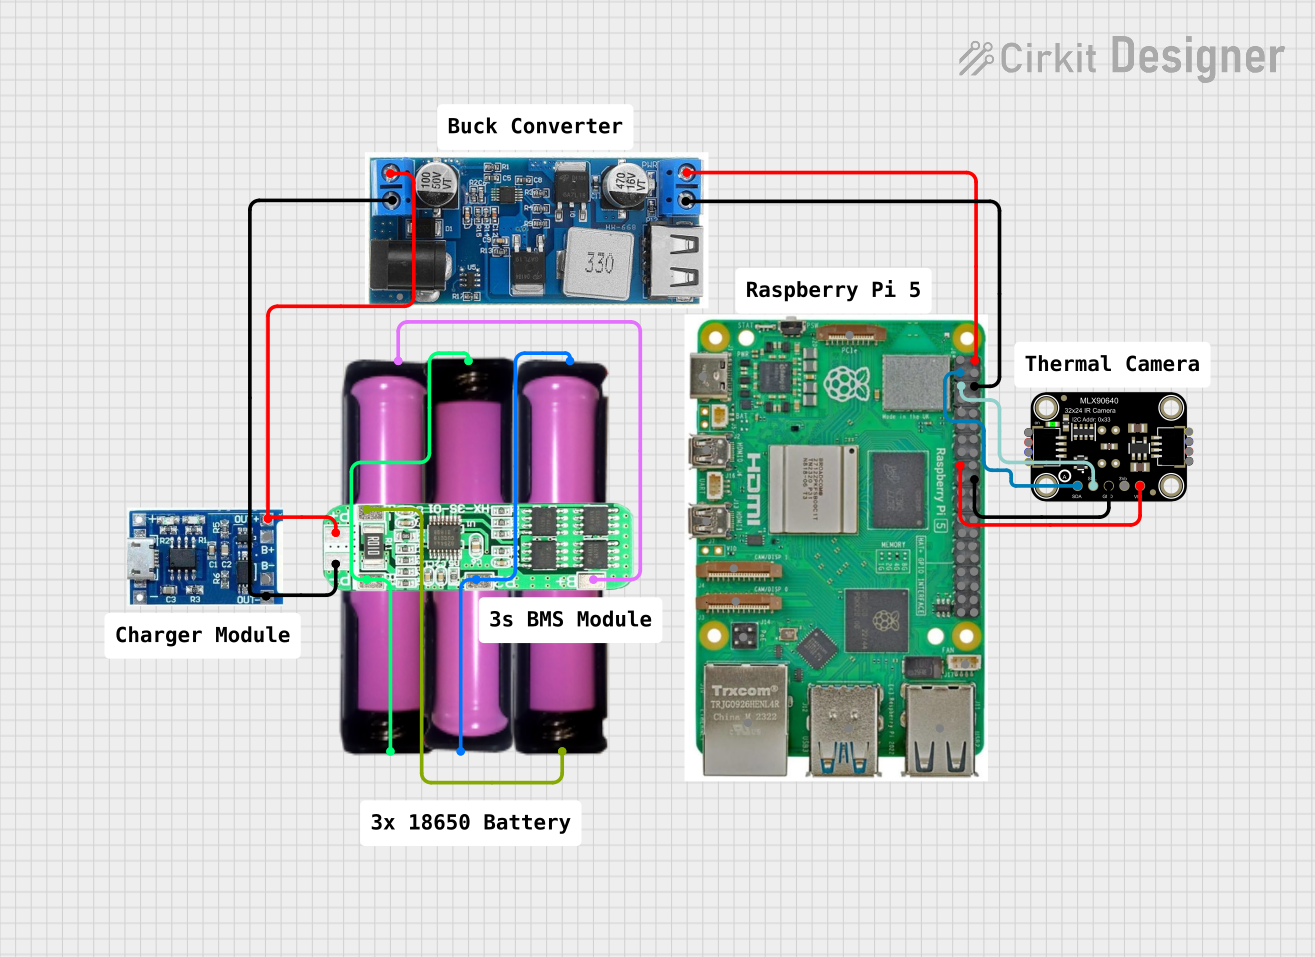

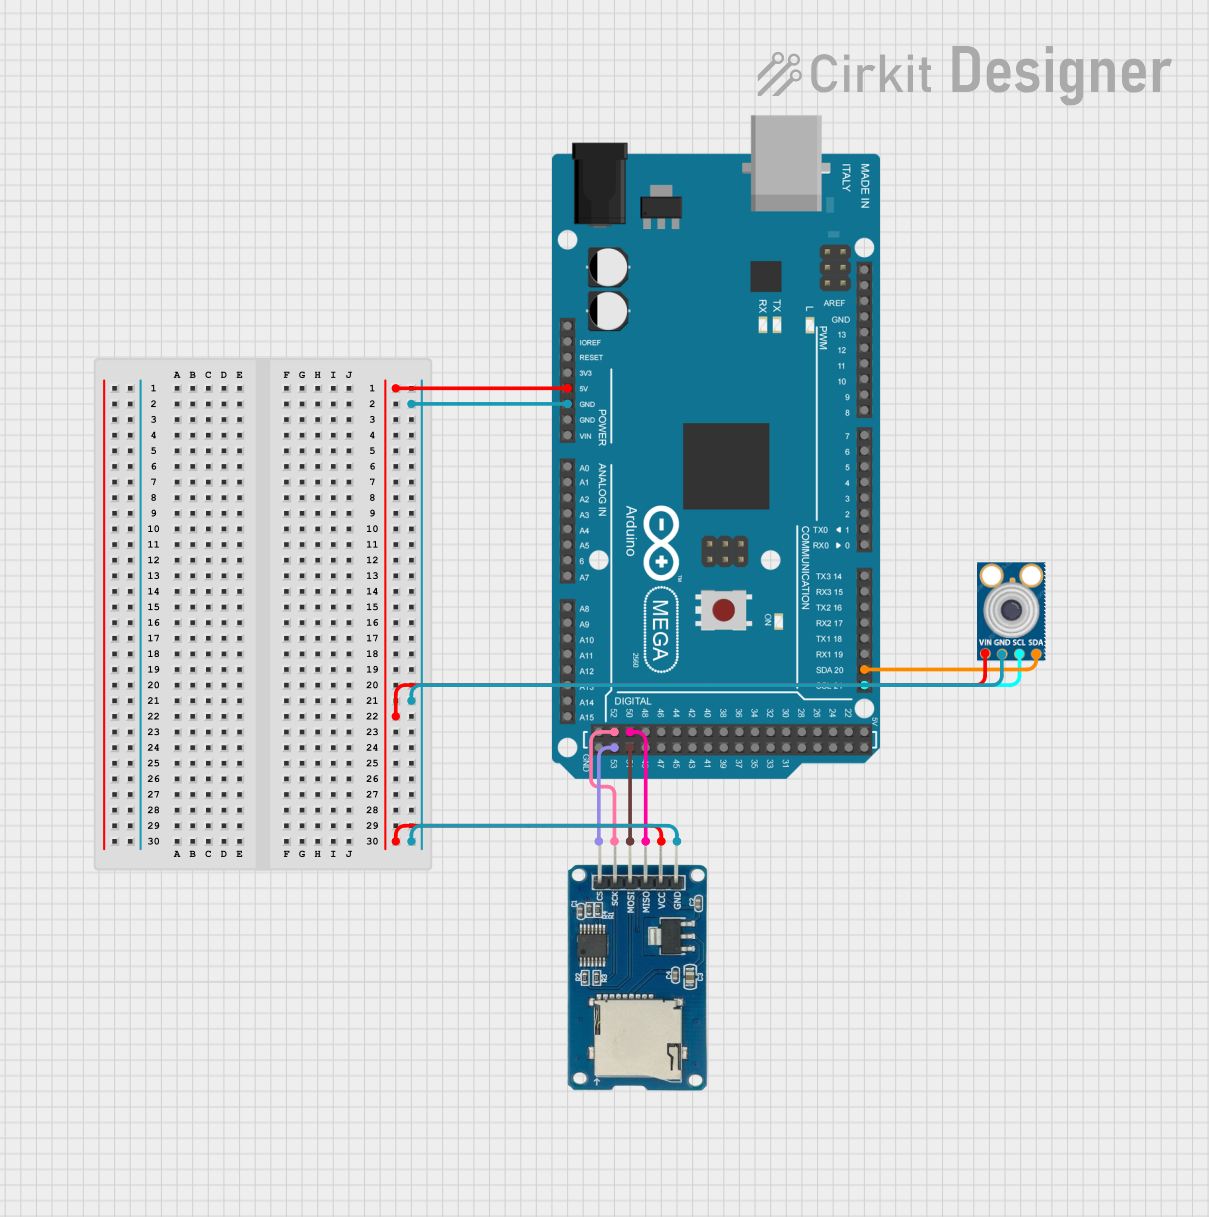
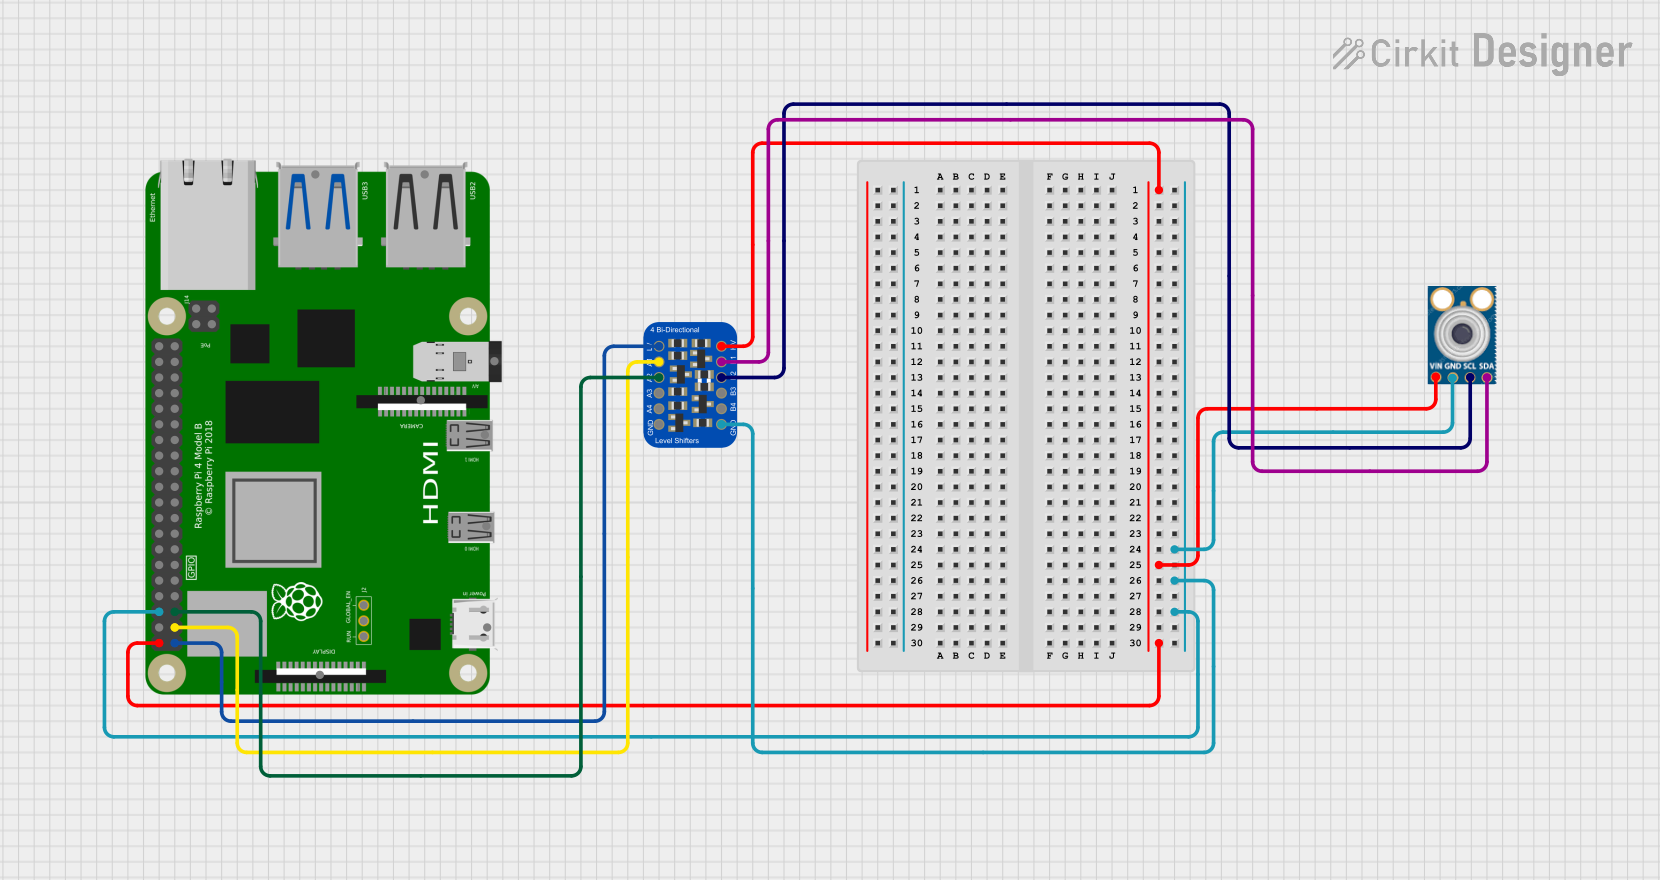
Explore Projects Built with Adafruit MLX90640 Thermal Camera
Technical Specifications
Key Technical Details
- Sensor Array: 32x24 IR sensor
- Measurement Range: -40°C to 300°C
- Interface: I2C
- Field of View (FoV): 55° x 35° (typical)
- Refresh Rate: 0.5Hz to 64Hz
- Supply Voltage: 3.3V to 5V
- Current Consumption: 23mA (typical)
- Operating Temperature: -40°C to 85°C
Pin Configuration and Descriptions
| Pin Number | Name | Description |
|---|---|---|
| 1 | VDD | Power supply (3.3V to 5V) |
| 2 | SDA | I2C Data Line |
| 3 | SCL | I2C Clock Line |
| 4 | GND | Ground |
Usage Instructions
Integration with a Circuit
- Power Supply: Connect the VDD pin to a 3.3V or 5V power supply from your microcontroller board.
- Data Line: Connect the SDA pin to the I2C data line (SDA) on your microcontroller.
- Clock Line: Connect the SCL pin to the I2C clock line (SCL) on your microcontroller.
- Ground: Connect the GND pin to the ground on your microcontroller.
Important Considerations and Best Practices
- Ensure that the power supply is stable and within the specified voltage range.
- Use pull-up resistors on the I2C data and clock lines if they are not already present on your microcontroller board.
- Avoid exposing the sensor to direct sunlight or high reflective surfaces to prevent inaccurate readings.
- For accurate temperature measurements, calibrate the sensor according to the manufacturer's guidelines.
Example Code for Arduino UNO
#include <Wire.h>
#include <Adafruit_MLX90640.h>

Adafruit_MLX90640 mlx;

void setup() {
  Serial.begin(9600);
  while (!Serial); // Wait for Serial to be ready
  Serial.println("MLX90640 test");

  if (!mlx.begin()) {
    Serial.println("Failed to initialize MLX90640!");
    while (1);
  }
  Serial.println("MLX90640 initialized successfully");
}

void loop() {
  float mlx90640Frame[32 * 24]; // Buffer to store temperature readings

  // Capture the frame at the lowest resolution to increase the frame rate
  mlx.setMode(MLX90640_INTERLEAVED);

  // Request a frame capture
  if (mlx.getFrame(mlx90640Frame) == 0) {
    for (int i = 0; i < 24; i++) {
      for (int j = 0; j < 32; j++) {
        float temp = mlx90640Frame[i * 32 + j];
        Serial.print(temp);
        Serial.print(",");
      }
      Serial.println();
    }
  } else {
    Serial.println("Failed to read frame");
  }
  delay(1000); // Wait for 1 second before capturing next frame
}
Troubleshooting and FAQs
Common Issues
- No Data on Serial Monitor: Ensure that the SDA and SCL connections are secure and that the correct I2C address is being used.
- Inaccurate Temperature Readings: Check for any sources of heat or reflection that could be affecting the sensor. Calibrate the sensor if necessary.
- Sensor Not Initializing: Make sure the power supply is within the specified range and that the sensor is not exposed to extreme temperatures.
Solutions and Tips
- I2C Communication Issues: Use a logic analyzer to check the integrity of the I2C signals. Ensure pull-up resistors are correctly sized.
- Calibration: Follow the calibration procedure outlined in the sensor's datasheet to adjust for emissivity and ambient temperature.
- Updating Firmware: Keep the sensor's firmware updated to the latest version to ensure optimal performance.
FAQs
Q: Can the MLX90640 be used to measure human body temperature? A: Yes, the MLX90640 can be used for human temperature detection, but it requires proper calibration and possibly additional optics for accurate measurements.
Q: What is the maximum distance at which the MLX90640 can accurately measure temperature? A: The maximum distance depends on the object size and the sensor's field of view. For small objects, the sensor should be closer to ensure accuracy.
Q: How can I increase the frame rate of the thermal camera? A: You can increase the frame rate by reducing the resolution or changing the refresh rate settings in the library, but this may affect the temperature accuracy and range.