Cirkit Designer Logo
Cirkit Designer
Your all-in-one circuit design IDE
Home / 
Component Documentation

How to Use Battery AAx2 3V: Examples, Pinouts, and Specs

Image of Battery AAx2 3V
Cirkit Designer LogoDesign with Battery AAx2 3V in Cirkit Designer

Introduction

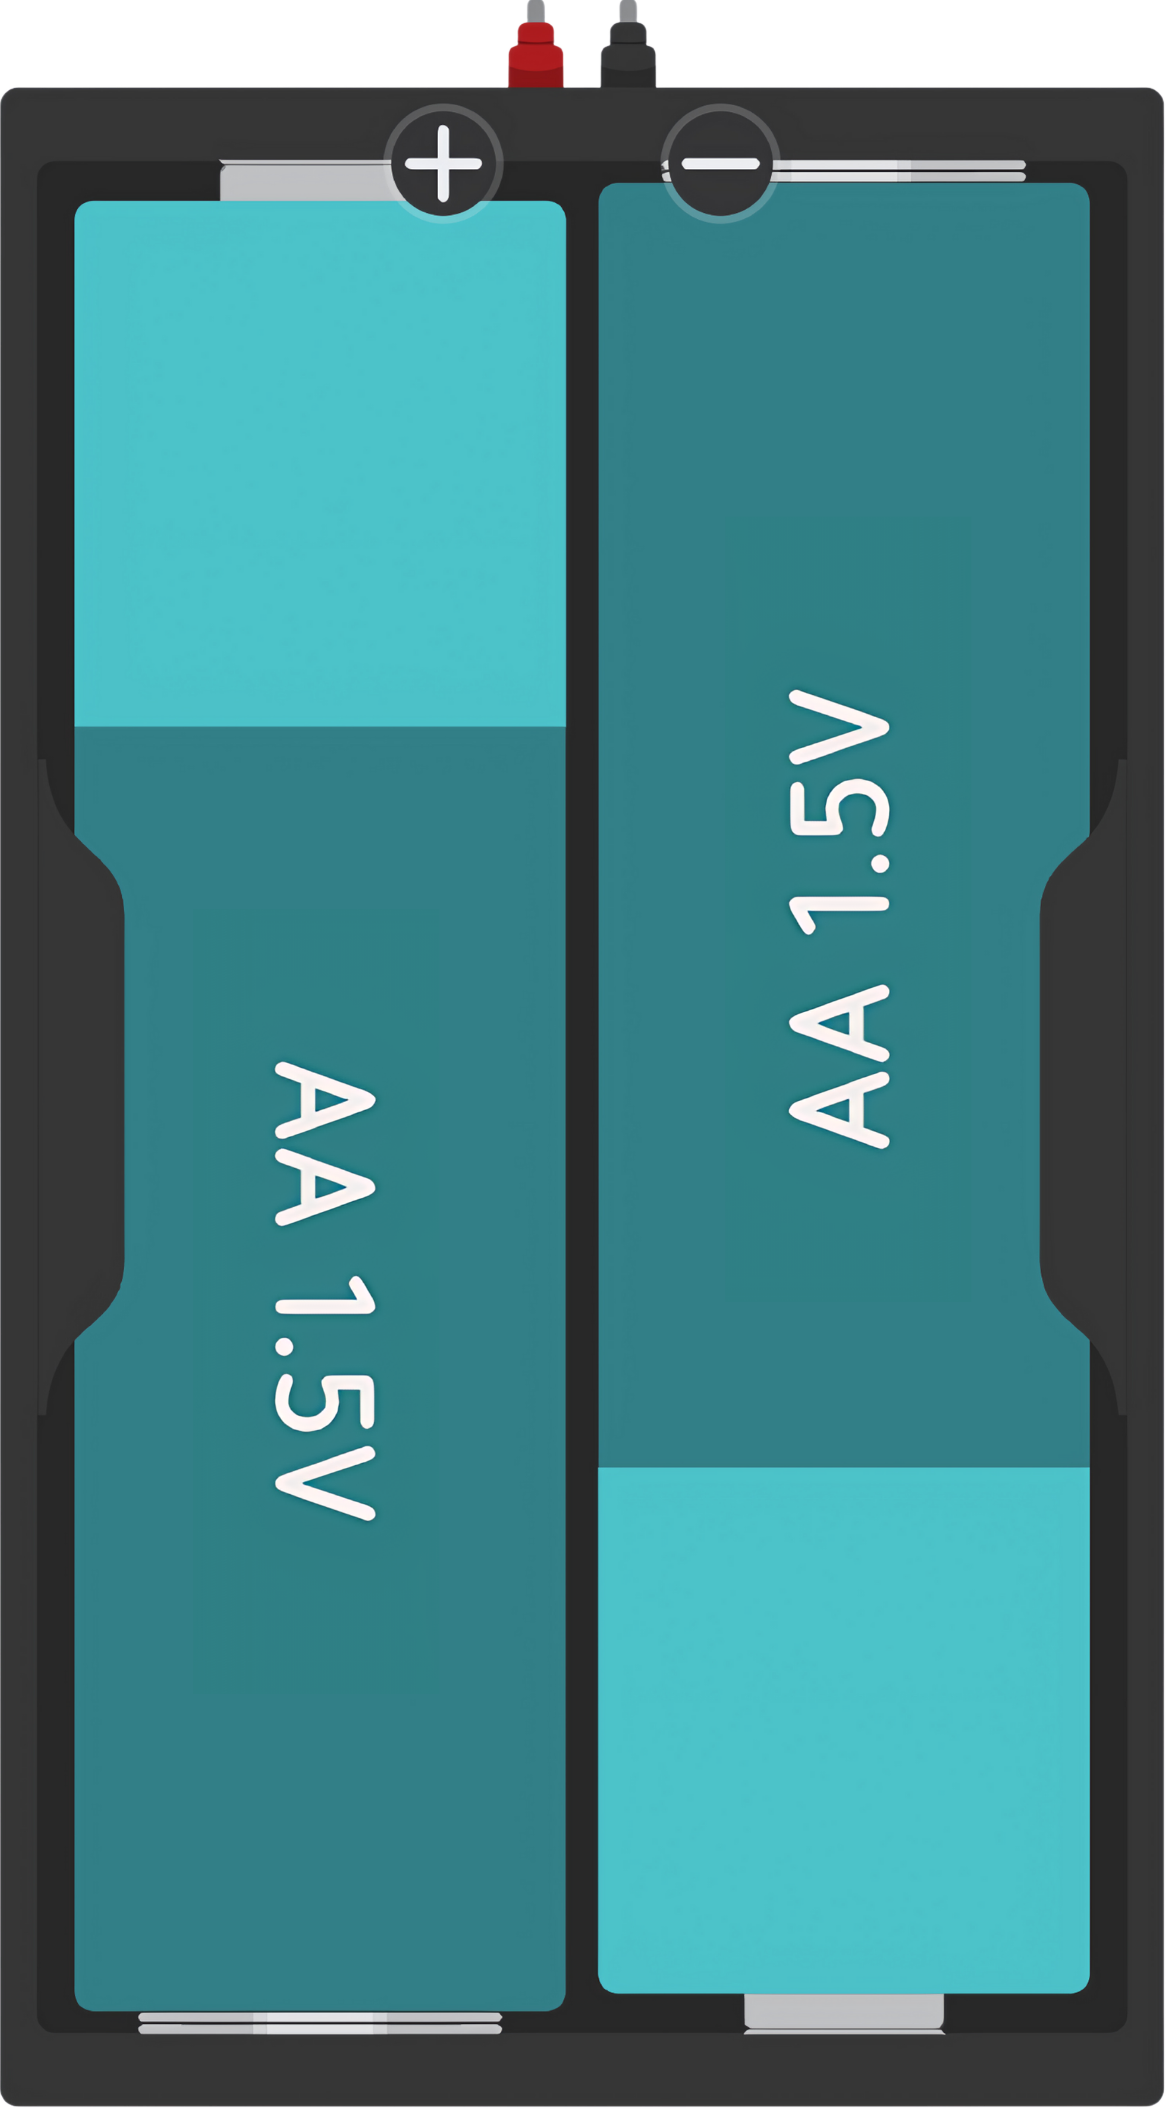
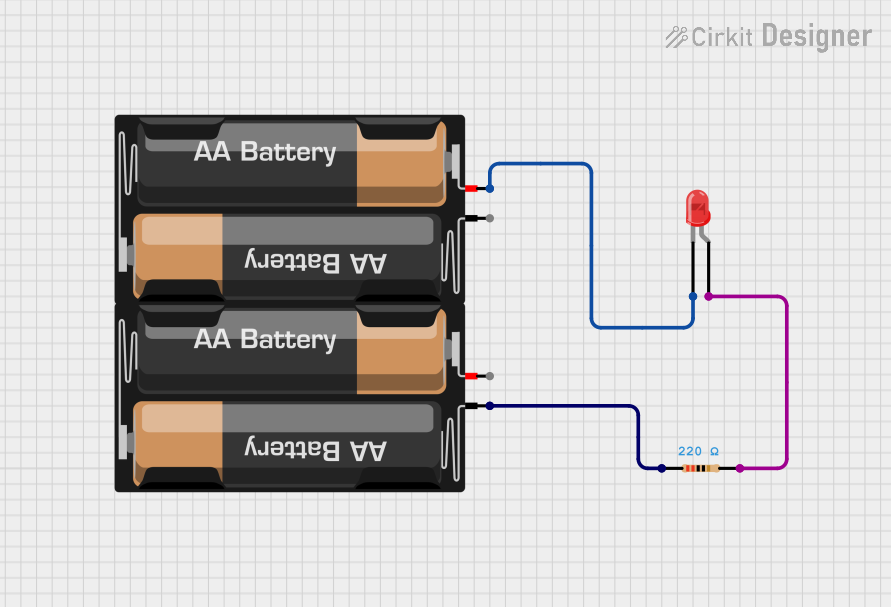
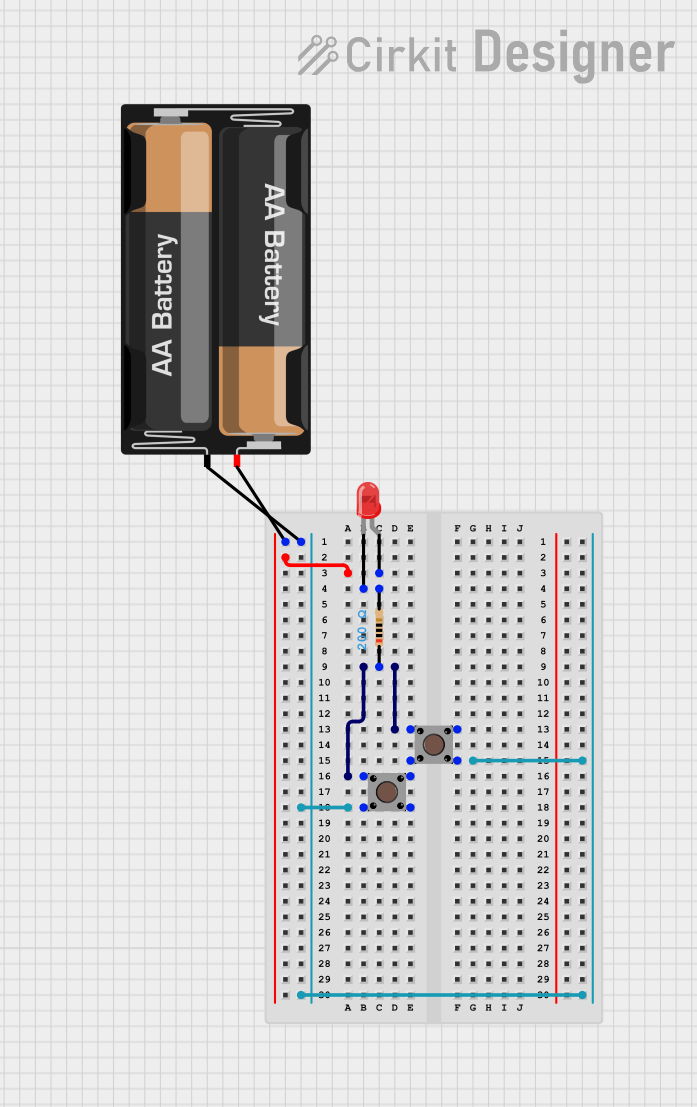
The Battery AAx2 3V is a compact power source consisting of two AA batteries connected in series. This configuration doubles the voltage of a single AA battery, providing a total output of 3 volts. This type of battery pack is commonly used in portable electronic devices, toys, remote controls, and small DIY projects. Its popularity stems from its availability, ease of use, and sufficient energy capacity for low-power applications.

Explore Projects Built with Battery AAx2 3V

Use Cirkit Designer to design, explore, and prototype these projects online. Some projects support real-time simulation. Click "Open Project" to start designing instantly!
Simple Battery-Powered Red LED Circuit
Image of project 2: A project utilizing Battery AAx2 3V in a practical application
This circuit is a simple LED lighting circuit powered by two AA batteries. The LED's anode is connected through a 220 Ohm resistor to the positive terminal of one battery mount, and its cathode is directly connected to the negative terminal of the other battery mount. The resistor limits the current to protect the LED from excessive current that could damage it.
Cirkit Designer LogoOpen Project in Cirkit Designer
Battery-Powered Multi-Voltage Supply with Barrel Jack Connectors
Image of Battery Setup: A project utilizing Battery AAx2 3V in a practical application
This circuit consists of multiple 9V batteries connected in series and parallel configurations to provide power to three separate 2.1mm barrel jacks. Each barrel jack receives a different combination of series and parallel battery connections to achieve the desired voltage and current levels.
Cirkit Designer LogoOpen Project in Cirkit Designer
Battery-Powered LED Circuit with Pushbutton Control
Image of simple parallel LED: A project utilizing Battery AAx2 3V in a practical application
This circuit is a simple LED control system powered by a 2 x AA battery pack. It includes a red LED, a 200-ohm resistor, and two pushbuttons that control the LED's state by completing or breaking the circuit.
Cirkit Designer LogoOpen Project in Cirkit Designer
Battery-Powered 18650 Li-ion Charger with USB Output and Adjustable Voltage Regulator
Image of Breadboard: A project utilizing Battery AAx2 3V in a practical application
This circuit is a battery management and power supply system that uses three 3.7V batteries connected to a 3S 10A Li-ion 18650 Charger Protection Board Module for balanced charging and protection. The system includes a TP4056 Battery Charging Protection Module for additional charging safety, a Step Up Boost Power Converter to regulate and boost the voltage, and a USB regulator to provide a stable 5V output, controlled by a push switch.
Cirkit Designer LogoOpen Project in Cirkit Designer

Explore Projects Built with Battery AAx2 3V

Use Cirkit Designer to design, explore, and prototype these projects online. Some projects support real-time simulation. Click "Open Project" to start designing instantly!
Image of project 2: A project utilizing Battery AAx2 3V in a practical application
Simple Battery-Powered Red LED Circuit
This circuit is a simple LED lighting circuit powered by two AA batteries. The LED's anode is connected through a 220 Ohm resistor to the positive terminal of one battery mount, and its cathode is directly connected to the negative terminal of the other battery mount. The resistor limits the current to protect the LED from excessive current that could damage it.
Cirkit Designer LogoOpen Project in Cirkit Designer
Image of Battery Setup: A project utilizing Battery AAx2 3V in a practical application
Battery-Powered Multi-Voltage Supply with Barrel Jack Connectors
This circuit consists of multiple 9V batteries connected in series and parallel configurations to provide power to three separate 2.1mm barrel jacks. Each barrel jack receives a different combination of series and parallel battery connections to achieve the desired voltage and current levels.
Cirkit Designer LogoOpen Project in Cirkit Designer
Image of simple parallel LED: A project utilizing Battery AAx2 3V in a practical application
Battery-Powered LED Circuit with Pushbutton Control
This circuit is a simple LED control system powered by a 2 x AA battery pack. It includes a red LED, a 200-ohm resistor, and two pushbuttons that control the LED's state by completing or breaking the circuit.
Cirkit Designer LogoOpen Project in Cirkit Designer
Image of Breadboard: A project utilizing Battery AAx2 3V in a practical application
Battery-Powered 18650 Li-ion Charger with USB Output and Adjustable Voltage Regulator
This circuit is a battery management and power supply system that uses three 3.7V batteries connected to a 3S 10A Li-ion 18650 Charger Protection Board Module for balanced charging and protection. The system includes a TP4056 Battery Charging Protection Module for additional charging safety, a Step Up Boost Power Converter to regulate and boost the voltage, and a USB regulator to provide a stable 5V output, controlled by a push switch.
Cirkit Designer LogoOpen Project in Cirkit Designer

Technical Specifications

General Characteristics

  • Nominal Voltage: 3V (1.5V per AA battery)
  • Chemistry: Alkaline, NiMH, or Lithium (depending on AA battery type)
  • Capacity: Varies by AA battery type and manufacturer (typically 1200-3000 mAh for Alkaline)
  • Shelf Life: Varies by AA battery type (up to 10 years for Alkaline)
  • Operating Temperature Range: Typically -20°C to 60°C

Physical Attributes

  • Dimensions: Standard AA size (Diameter: 14.5 mm, Height: 50.5 mm per battery)
  • Weight: Varies by AA battery type (approximately 23g per Alkaline AA battery)
  • Connector Type: Typically snap connectors, battery holder, or solder tabs

Pin Configuration and Descriptions

Pin Description
+ Positive terminal connected to the positive end of the battery series
- Negative terminal connected to the negative end of the battery series

Usage Instructions

Integrating with a Circuit

  1. Identify Polarity: Ensure the correct orientation of the batteries within the holder, matching the + and - symbols.
  2. Connect to Circuit: Use the snap connectors, battery holder terminals, or solder tabs to connect the Battery AAx2 3V to your circuit.
  3. Power Management: To maximize battery life, design your circuit to operate efficiently, using low-power components where possible.

Best Practices

  • Battery Selection: Choose the appropriate AA battery type (Alkaline, NiMH, Lithium) based on your application's power requirements and expected battery life.
  • Storage: Store batteries at room temperature in a dry environment to prevent capacity loss or leakage.
  • Disposal: Follow local regulations for battery disposal or recycling.
  • Safety: Do not attempt to recharge non-rechargeable batteries, as this can lead to leakage or explosion.

Troubleshooting and FAQs

Common Issues

  • Device Not Powering On: Check battery orientation and ensure proper contact with terminals.
  • Short Battery Life: Verify that the batteries are fresh and that the circuit is not drawing excessive current.
  • Intermittent Power: Inspect connections for looseness or corrosion.

FAQs

Q: Can I use rechargeable AA batteries in this battery pack? A: Yes, as long as they are AA-sized and the correct chemistry (e.g., NiMH).

Q: What is the expected runtime for this battery pack? A: Runtime depends on the capacity of the AA batteries used and the current draw of the device. Calculate by dividing the battery capacity (mAh) by the device's current draw (mA).

Q: How can I extend the life of my batteries? A: Use power-saving techniques, such as reducing the operating current of your device, using sleep modes, and turning off the device when not in use.

Q: Is it safe to mix different brands or types of AA batteries? A: It is not recommended to mix batteries of different brands, capacities, or chemistries, as this can lead to reduced performance and potential leakage.

Example Code for Arduino UNO

The following example demonstrates how to power an Arduino UNO with the Battery AAx2 3V and read the battery voltage using an analog input.

// Define the analog pin connected to the battery voltage
const int batteryPin = A0;

void setup() {
  // Initialize serial communication at 9600 baud rate
  Serial.begin(9600);
}

void loop() {
  // Read the battery voltage
  int sensorValue = analogRead(batteryPin);
  // Convert the analog reading to voltage (3.3V reference)
  float voltage = sensorValue * (3.3 / 1023.0);
  // Print the voltage to the Serial Monitor
  Serial.print("Battery Voltage: ");
  Serial.println(voltage);
  // Wait for a second before reading again
  delay(1000);
}

Note: The Arduino UNO typically requires at least 5V to operate correctly. Using a 3V battery pack may not be sufficient to power the UNO and its peripherals. This example is for illustrative purposes to demonstrate reading battery voltage and may require a step-up converter to boost the voltage for proper operation.