How to Use MKE-M07 LCD1602 I2C: Examples, Pinouts, and Specs
Introduction
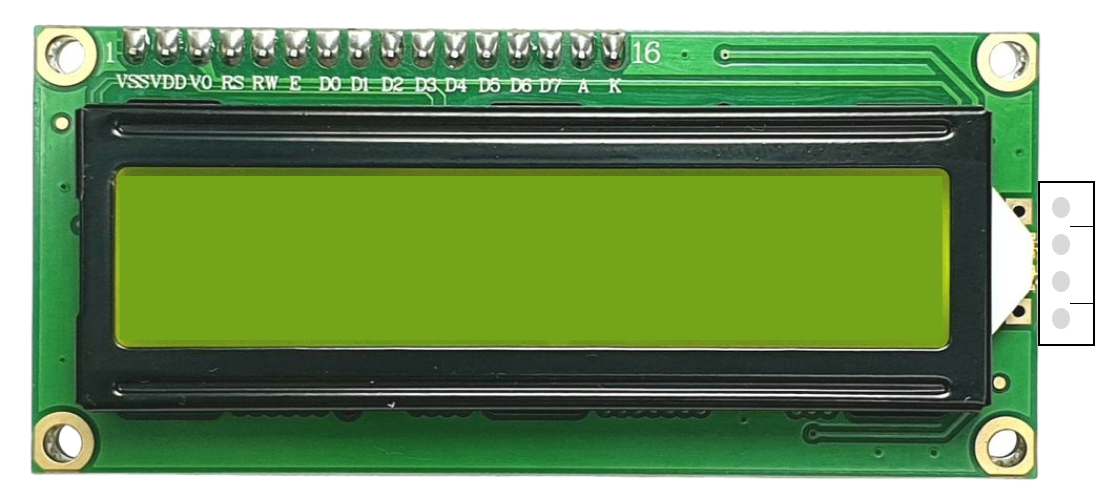
The MKE-M07 LCD1602 I2C module is a compact alphanumeric display panel commonly used in electronics projects for displaying text and simple graphics. It features a 16x2 character layout, meaning it can display up to 16 characters per line across 2 lines. The integration of an I2C interface simplifies the connection to microcontrollers, such as Arduino boards, by using just two data lines for communication. This module is ideal for user interfaces, status message displays, and readouts in various applications like home automation systems, DIY electronics, and hobbyist projects.
Explore Projects Built with MKE-M07 LCD1602 I2C


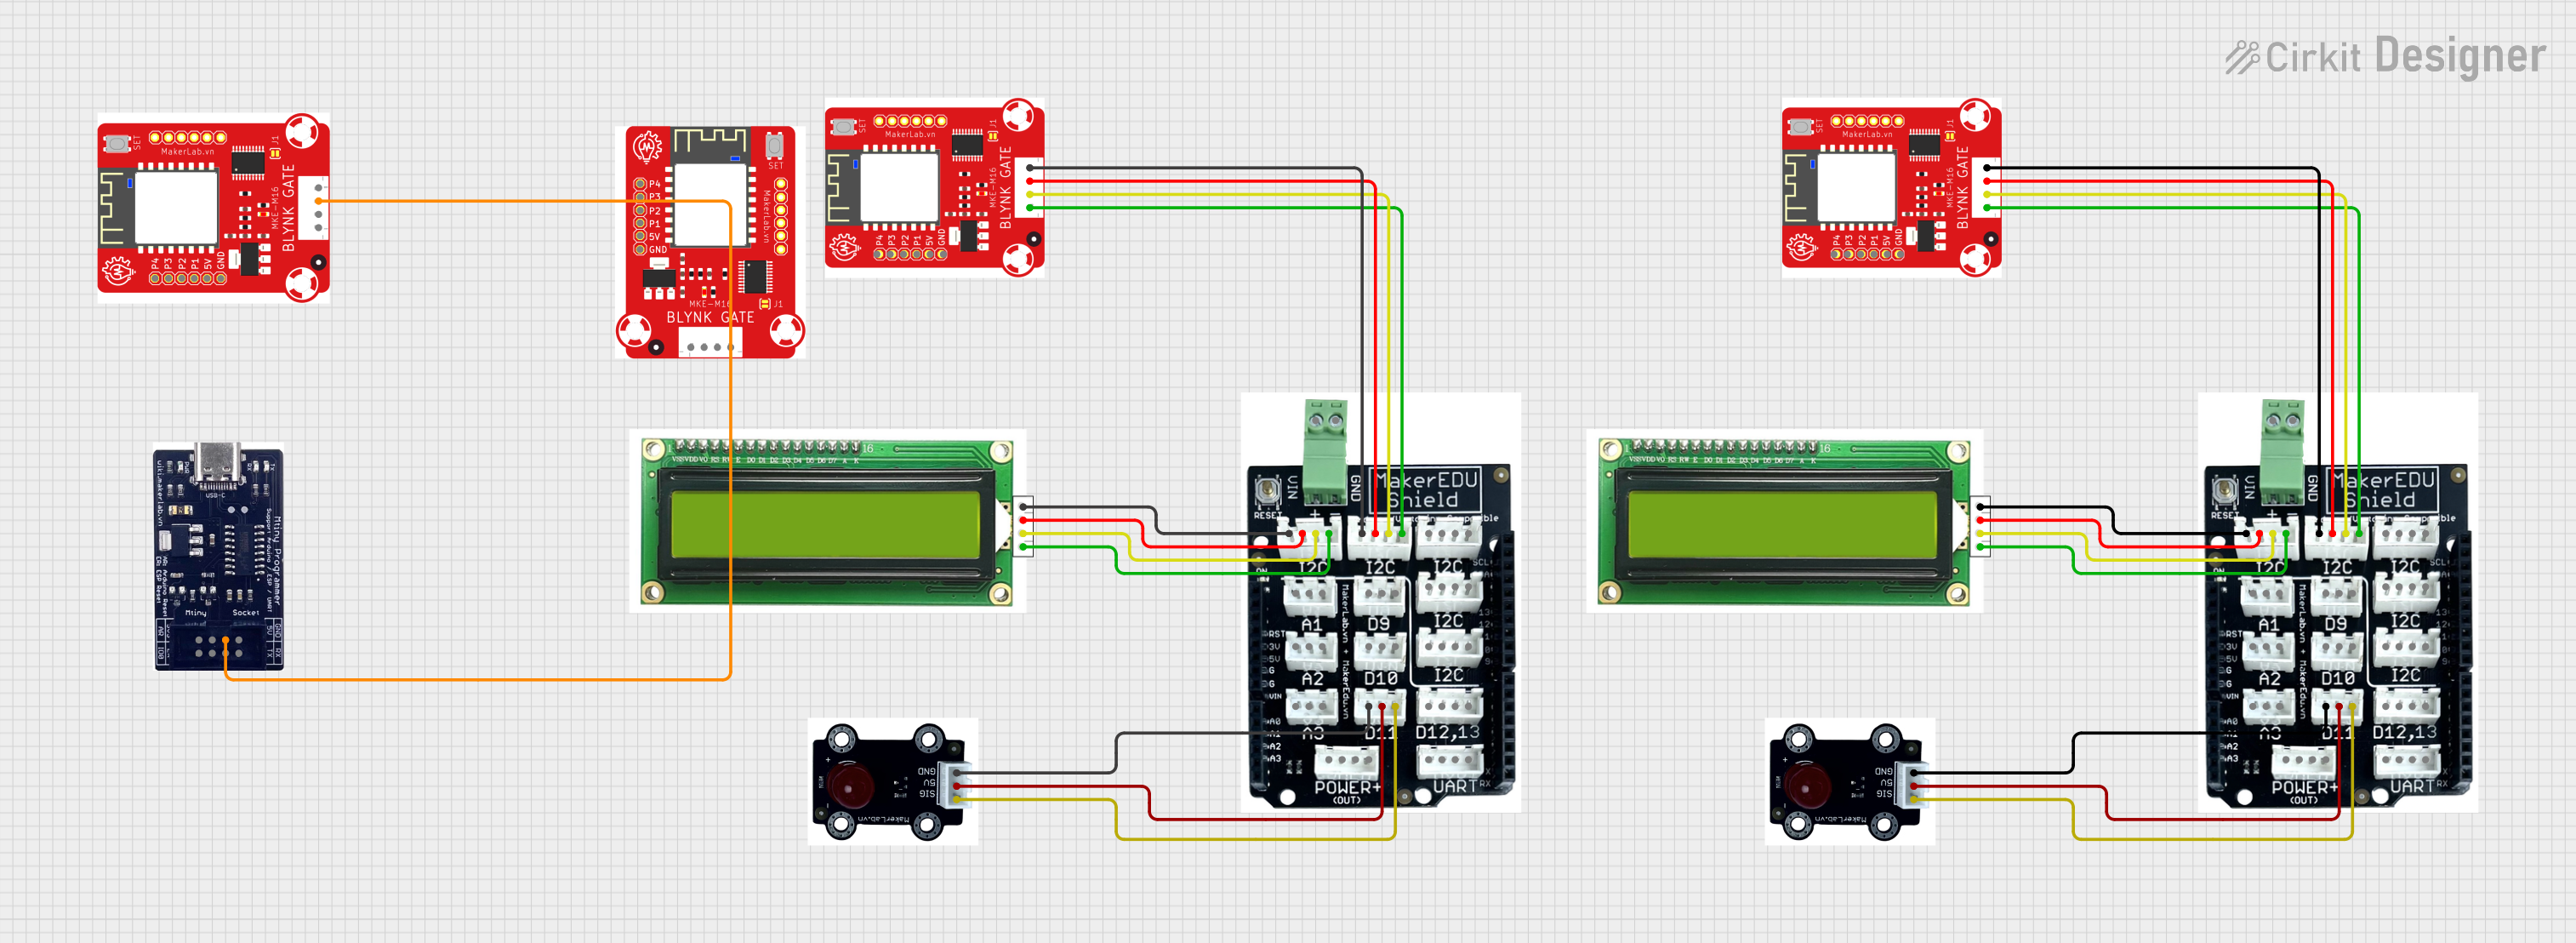
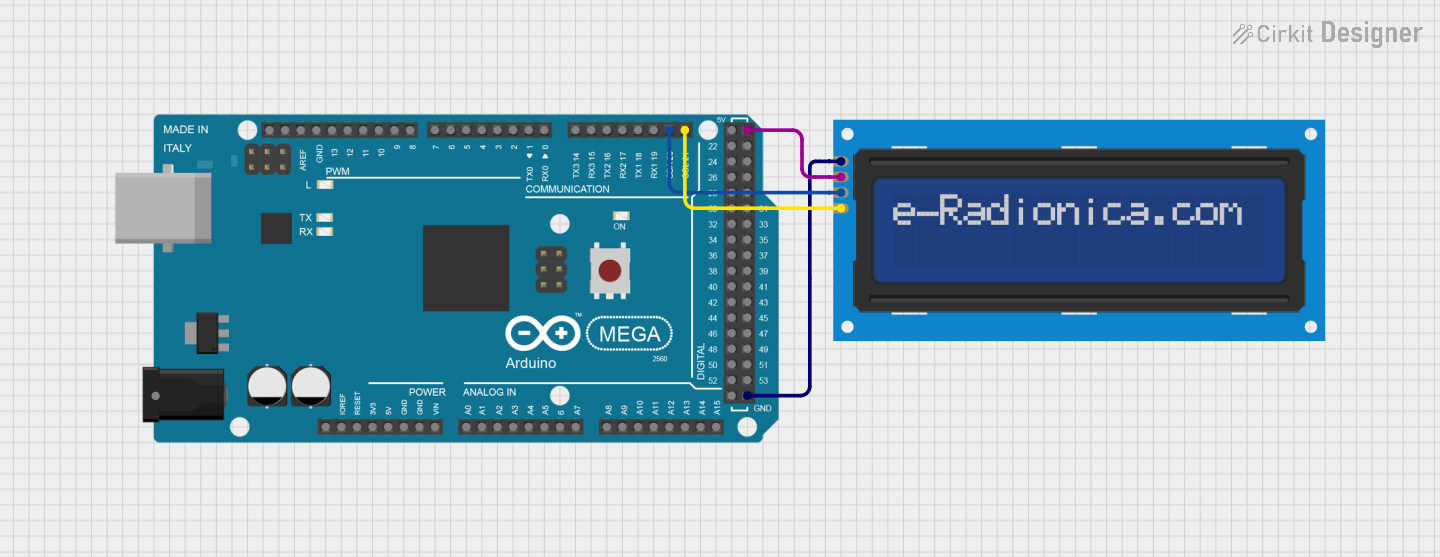
Explore Projects Built with MKE-M07 LCD1602 I2C
Technical Specifications
Key Technical Details
- Display: 16 characters x 2 lines
- Character Size: 5 x 8 pixels
- Backlight: LED, Yellow-Green
- I2C Address: 0x27 (default, can vary based on hardware)
- Supply Voltage: 5V DC
- Operating Current (without backlight): 1.5mA
- Backlight Current: 20mA (max)
Pin Configuration and Descriptions
| Pin | Description |
|---|---|
| GND | Ground connection |
| VCC | Power supply (5V DC) |
| SDA | I2C data line |
| SCL | I2C clock line |
Usage Instructions
Interfacing with a Microcontroller
- Connect the GND pin to the ground of the microcontroller.
- Connect the VCC pin to a 5V power supply from the microcontroller.
- Connect the SDA pin to the I2C data line (A4 on Arduino UNO).
- Connect the SCL pin to the I2C clock line (A5 on Arduino UNO).
Initializing the Display
To use the MKE-M07 LCD1602 I2C with an Arduino, you will need the LiquidCrystal_I2C library. Install this library through the Arduino IDE's Library Manager.
Sample Arduino Code
#include <Wire.h>
#include <LiquidCrystal_I2C.h>

// Initialize the library with the I2C address (0x27 for the MKE-M07)
LiquidCrystal_I2C lcd(0x27, 16, 2);

void setup() {
  // Initialize the LCD and turn on the backlight
  lcd.init();
  lcd.backlight();

  // Print a message on the first line
  lcd.setCursor(0, 0);
  lcd.print("Hello, World!");

  // Print a message on the second line
  lcd.setCursor(0, 1);
  lcd.print("MKE-M07 LCD1602");
}

void loop() {
  // Main loop does nothing
}
Important Considerations and Best Practices
- Always ensure that the power supply is 5V; higher voltages may damage the module.
- When connecting to a 3.3V microcontroller, use level shifters for the I2C lines.
- Avoid exposing the display to direct sunlight or high temperatures to prevent damage.
- Handle the module with care to avoid static discharge or mechanical stress.
Troubleshooting and FAQs
Common Issues
- Display not powering on: Check the wiring, especially the VCC and GND connections.
- Garbled or no text: Verify the I2C address and ensure proper initialization in the code.
- Dim backlight or no backlight: Check the backlight connections and ensure the current is within the specified limit.
Solutions and Tips
- Use the
i2c_scannerArduino sketch to confirm the I2C address of the module. - If the text appears faint, adjust the contrast potentiometer on the back of the module.
- Ensure that the
LiquidCrystal_I2Clibrary is up to date and correctly installed.
FAQs
Q: How do I change the I2C address of the module? A: The I2C address is usually set by the manufacturer. If it's configurable, it will involve hardware adjustments or firmware changes.
Q: Can I use this module with a Raspberry Pi? A: Yes, but you will need to use the appropriate libraries and configure the I2C interface on the Raspberry Pi.
Q: Is it possible to display custom characters? A: Yes, the module supports custom characters. You can create and store custom characters in the module's CGRAM (Character Generator RAM).
For further assistance, consult the community forums or the manufacturer's support resources.