How to Use mini vacuum pump: Examples, Pinouts, and Specs
Introduction
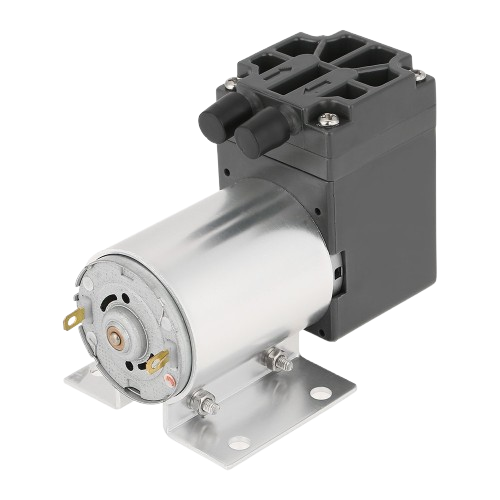
A mini vacuum pump is a compact device designed to evacuate air or other gases from a sealed volume to create a partial vacuum. This is achieved by the mechanical action of the pump, which systematically reduces the pressure within the volume until a vacuum is formed. Mini vacuum pumps are widely used in various applications, including medical devices, laboratory equipment, robotics, HVAC systems, and consumer electronics where space is limited and a vacuum is required.
Explore Projects Built with mini vacuum pump
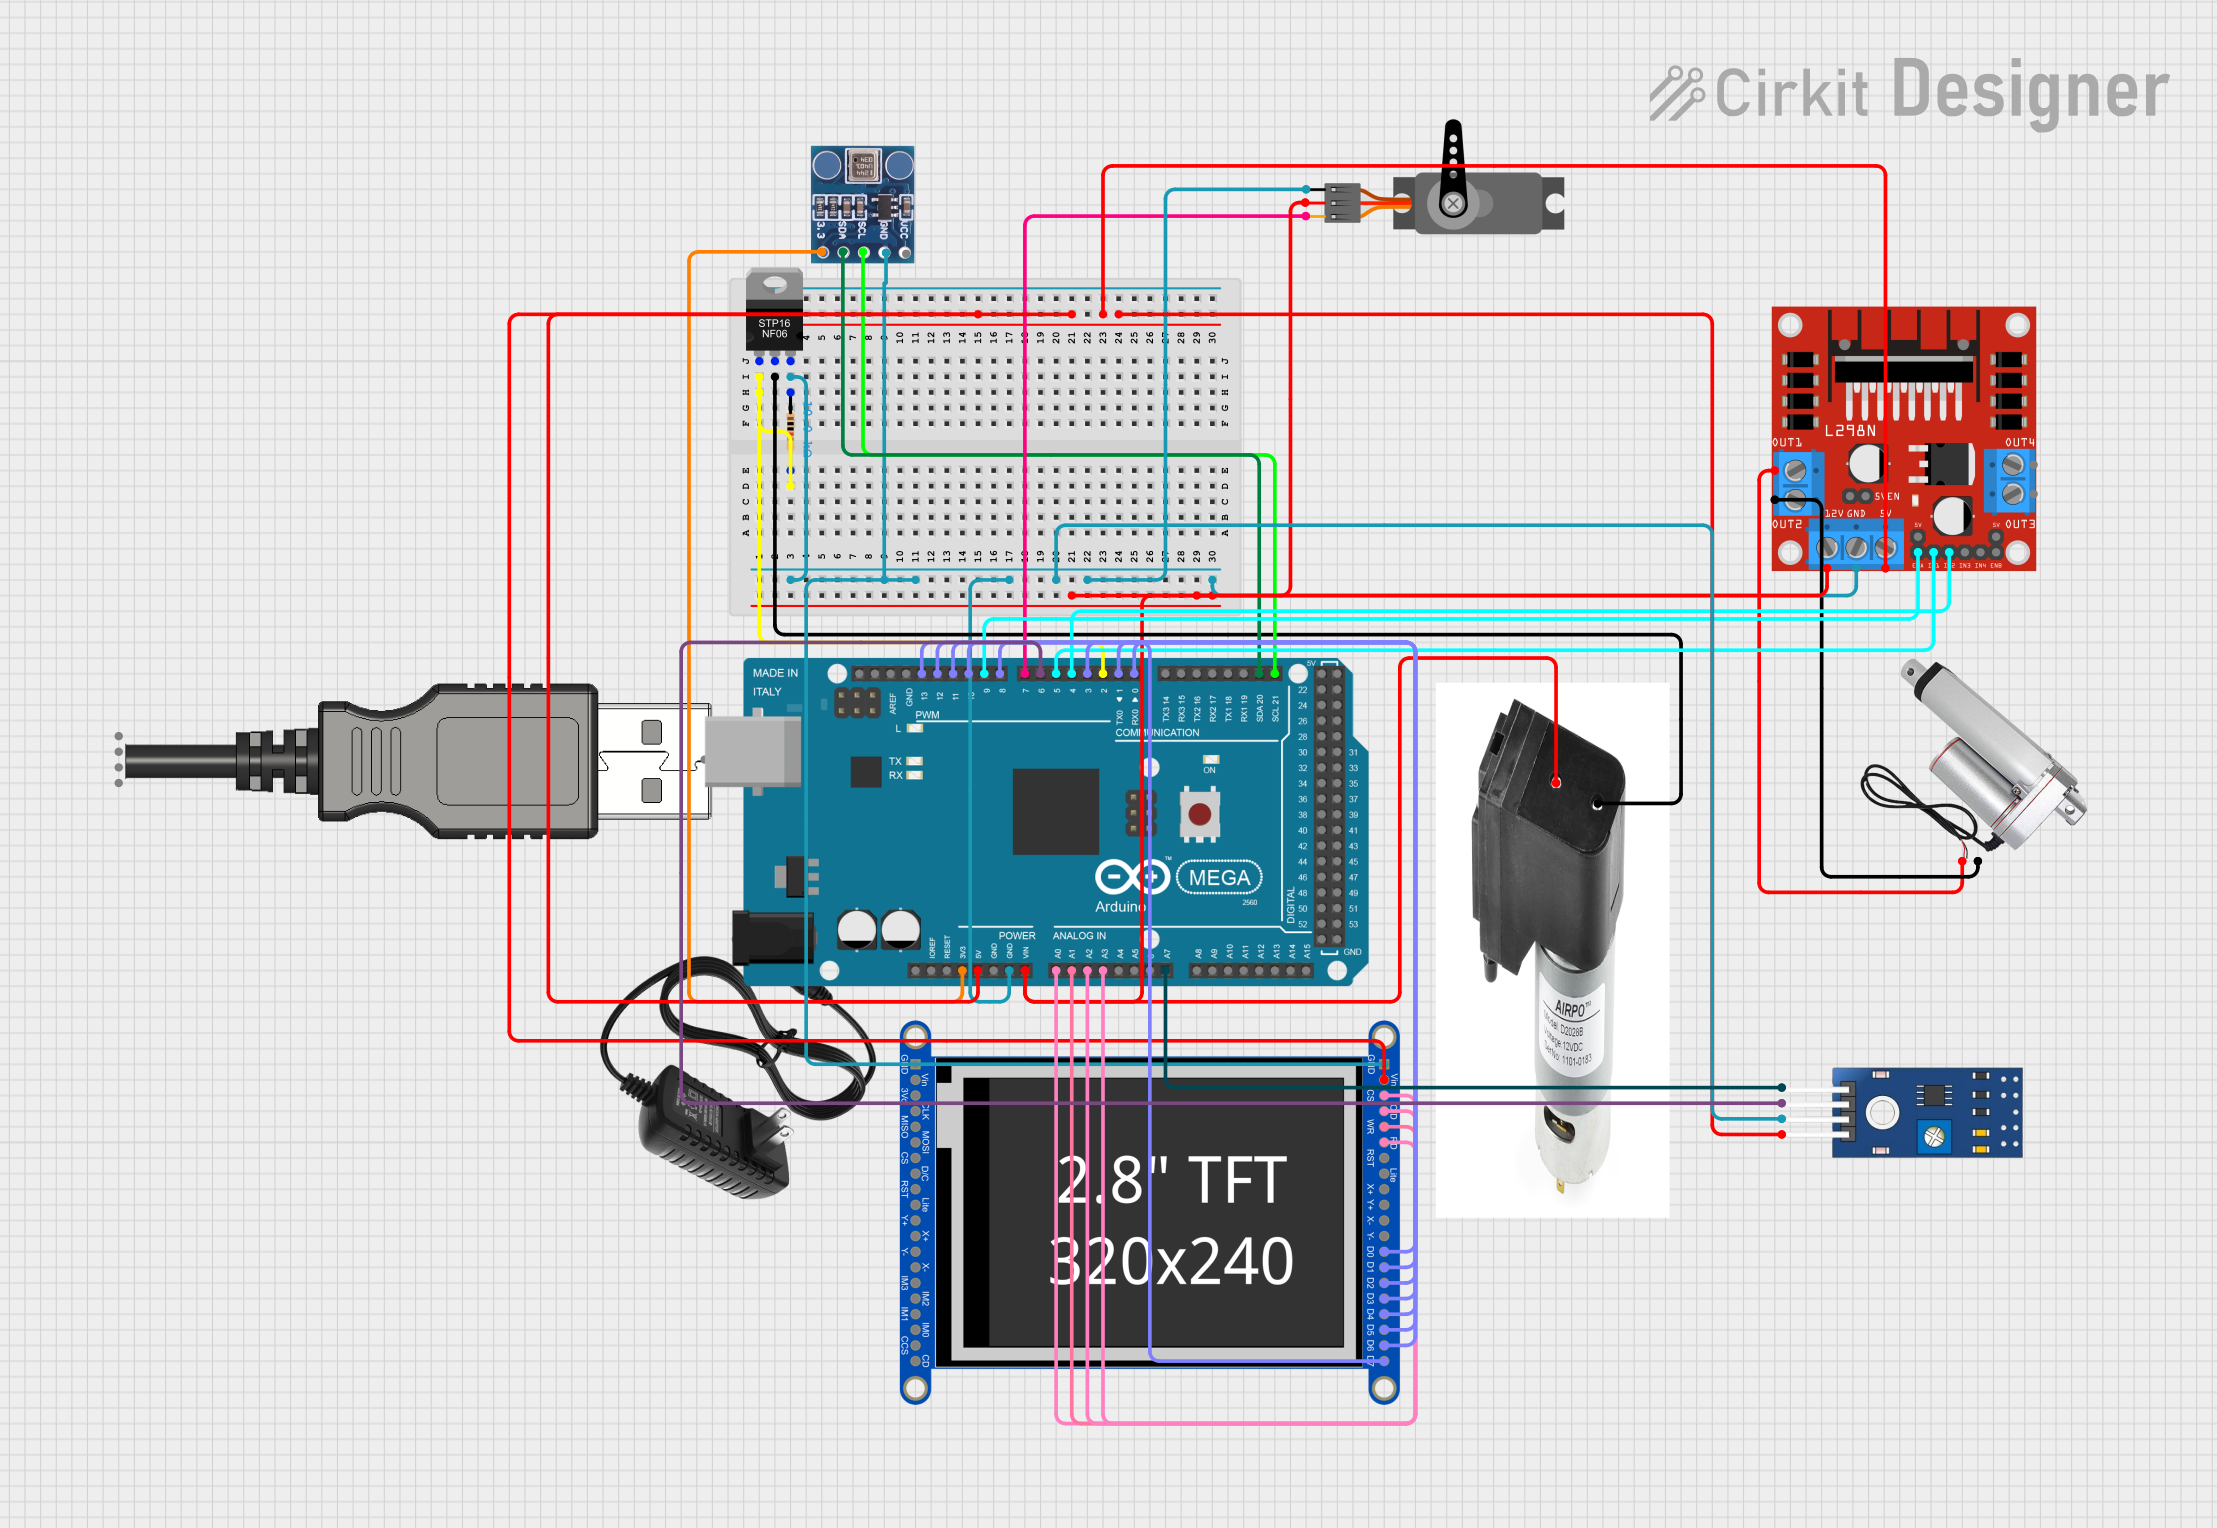
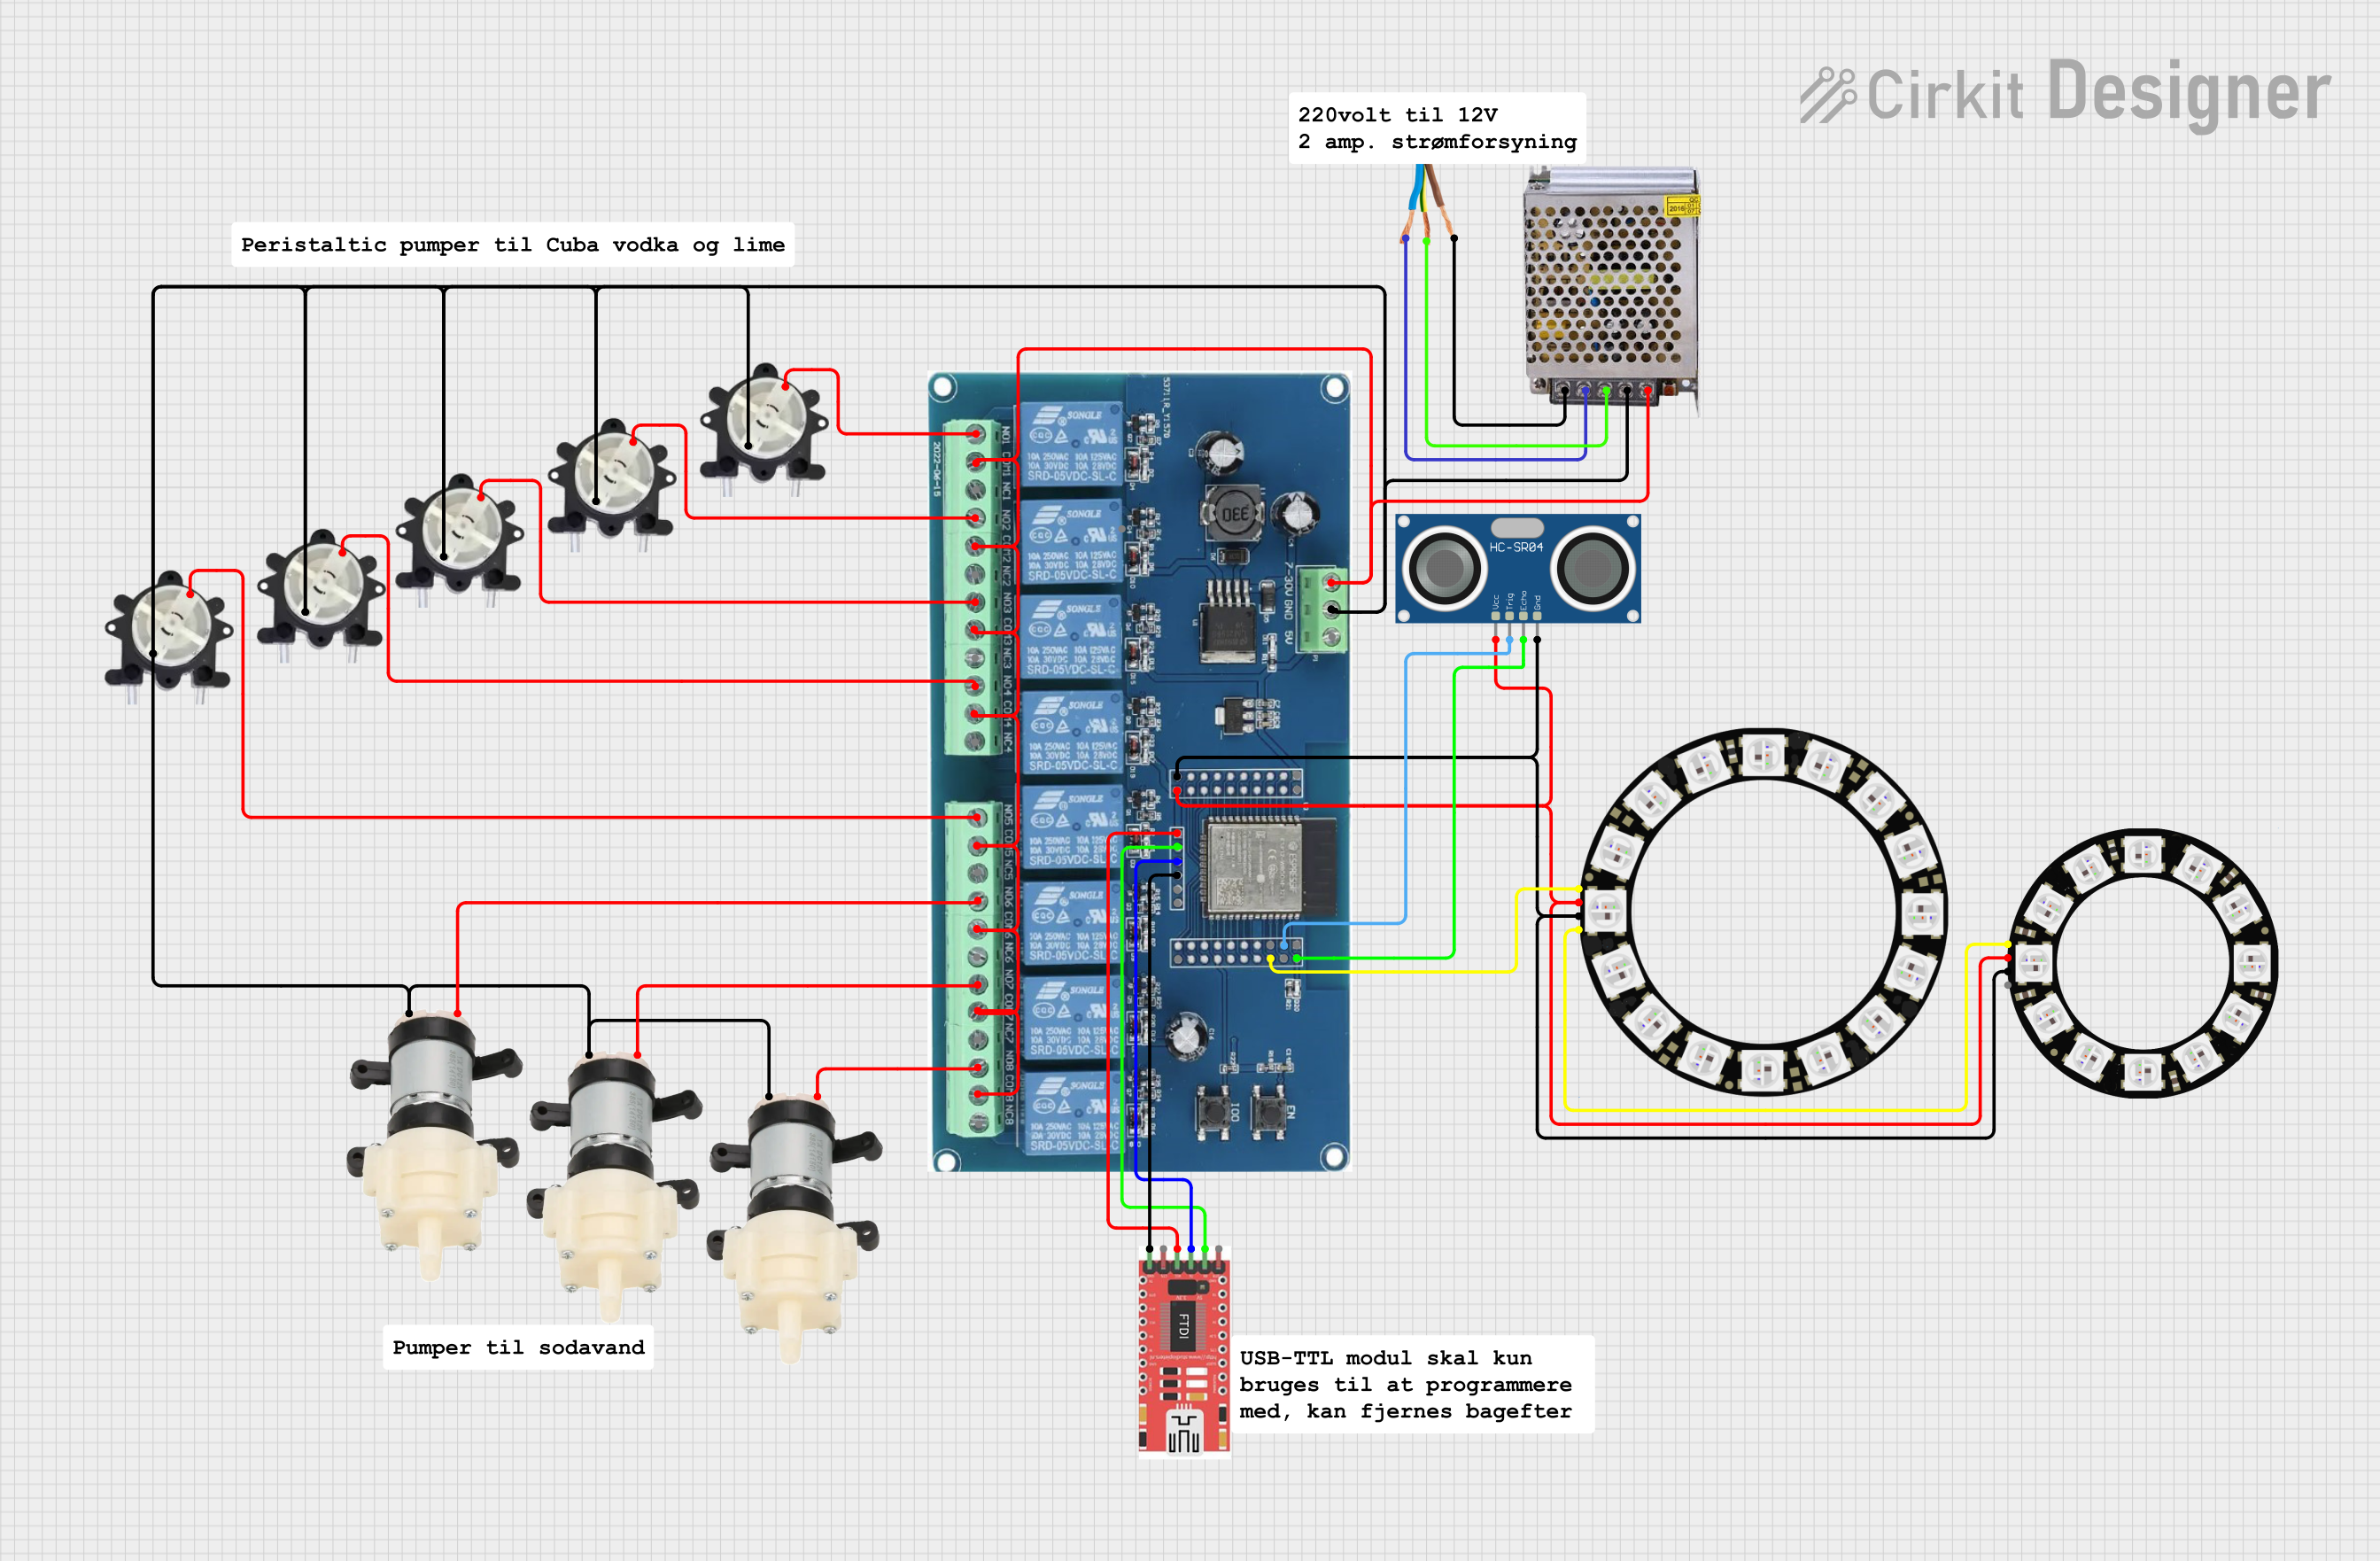
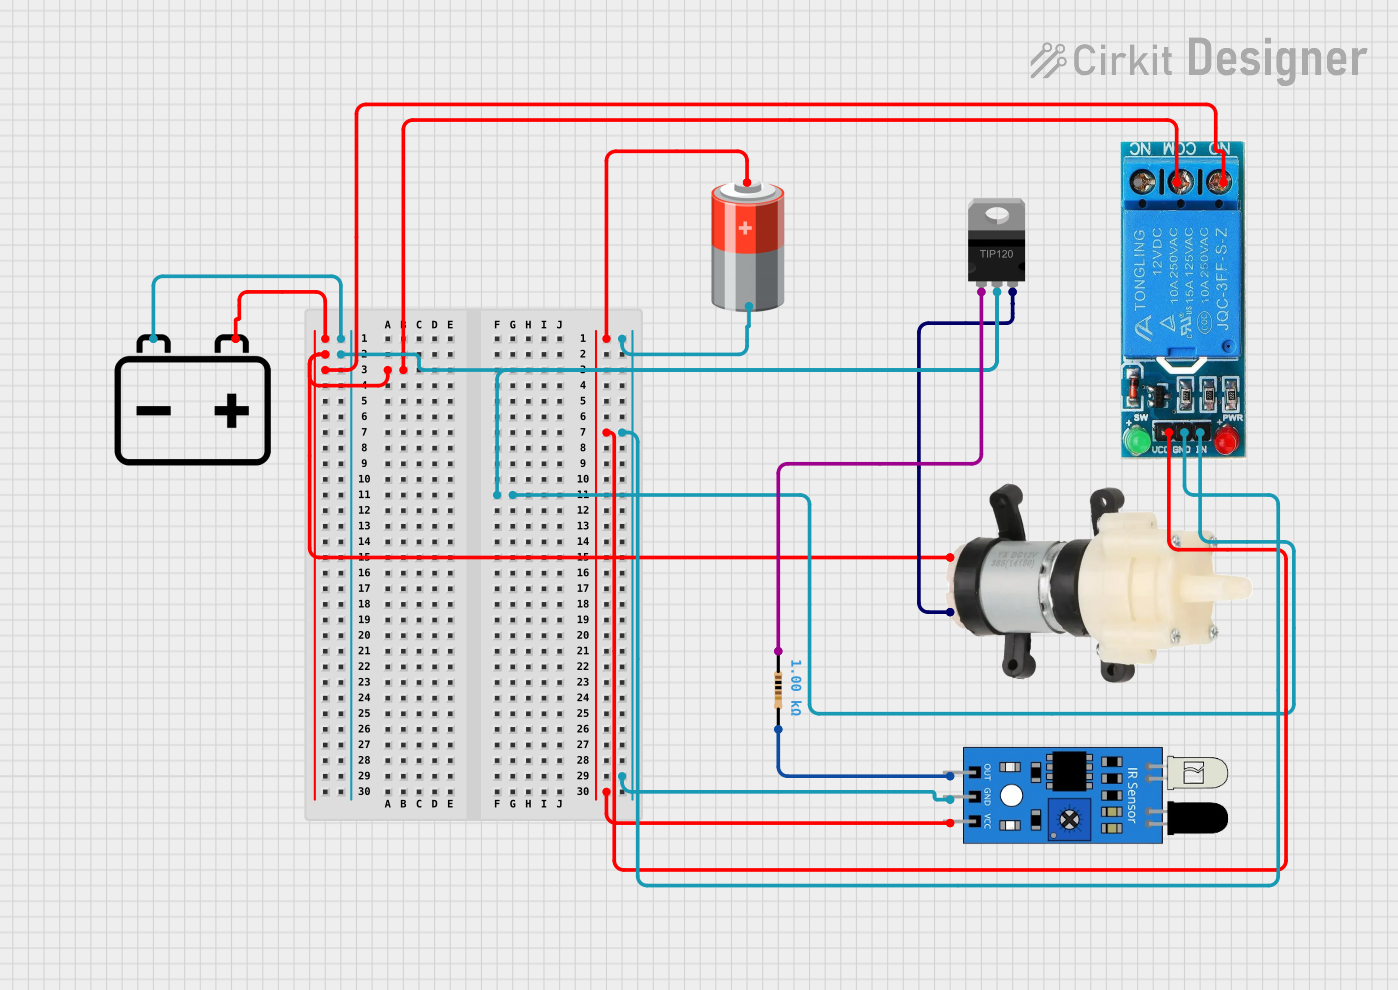
Explore Projects Built with mini vacuum pump
Common Applications and Use Cases
- Medical Devices: Vacuum pumps are used in medical applications such as suction devices and air purifiers.
- Laboratory Equipment: Creating vacuums for experiments or for operating certain types of analytical instruments.
- Robotics: Providing suction for gripping mechanisms in robotic arms.
- HVAC Systems: Removing air and moisture from refrigeration systems during maintenance.
- Consumer Electronics: Used in electronic gadgets that require cooling or air circulation through vacuum creation.
Technical Specifications
Key Technical Details
| Specification | Value/Description |
|---|---|
| Operating Voltage | Typically 3V to 12V DC |
| Current Consumption | Varies with model, e.g., 500mA to 1A |
| Power Ratings | Depends on size and application, e.g., 3W to 10W |
| Maximum Pressure | Often in the range of 40-60 kPa |
| Maximum Vacuum | Typically around -50 kPa |
| Flow Rate | Varies, e.g., 2-10 L/min |
| Noise Level | Usually less than 60 dB |
| Lifespan | Operational cycles can range from 500 to 3000 hours |
Pin Configuration and Descriptions
| Pin Number | Description |
|---|---|
| 1 | Vcc (Power Supply) |
| 2 | Ground (GND) |
Usage Instructions
How to Use the Component in a Circuit
- Power Supply: Connect the Vcc pin to a DC power supply that matches the operating voltage of the pump. Ensure that the power supply can handle the current the pump will draw.
- Ground Connection: Connect the GND pin to the ground of your power supply and circuit.
- Activation: Use a switch, relay, or transistor to control the power to the pump. For microcontroller applications, such as with an Arduino, you can use a digital output pin to control a relay or transistor that switches the pump on and off.
Important Considerations and Best Practices
- Voltage Matching: Ensure that the power supply voltage matches the pump's requirements to prevent damage.
- Current Capacity: The power supply should be capable of supplying sufficient current for the pump's operation.
- Heat Dissipation: Mini vacuum pumps can generate heat during operation; provide adequate ventilation.
- Mounting: Secure the pump to prevent vibrations and noise.
- Check Valves: Use check valves to maintain the vacuum when the pump is off.
- Safety: Do not obstruct the pump's inlet or outlet, as this can cause overheating and damage.
Troubleshooting and FAQs
Common Issues
- Pump Not Starting: Check power supply connections, voltage levels, and current availability.
- Insufficient Vacuum: Ensure there are no leaks in the system and that the pump is properly sized for the application.
- Overheating: Verify that the pump is not running continuously beyond its duty cycle and that there is adequate ventilation.
Solutions and Tips for Troubleshooting
- Power Supply Issues: Use a multimeter to check the voltage and current being supplied to the pump.
- Leak Testing: Use soapy water to check for leaks at connections.
- Duty Cycle Management: Allow the pump to rest and cool down to prevent overheating.
FAQs
Q: Can I control the mini vacuum pump with an Arduino? A: Yes, you can control the pump using an Arduino by employing a relay or a transistor to handle the current required by the pump.
Q: How do I know if the pump is creating enough vacuum? A: You can measure the vacuum pressure using a vacuum gauge connected to your system.
Q: What should I do if the pump is too noisy? A: Ensure the pump is securely mounted and consider using sound-dampening materials around it.
Example Arduino Code
Below is an example of how to control a mini vacuum pump using an Arduino UNO and a relay module:
// Define the relay control pin
const int relayPin = 7;

void setup() {
  // Set the relay control pin as an output
  pinMode(relayPin, OUTPUT);
  // Start with the pump turned off
  digitalWrite(relayPin, HIGH);
}

void loop() {
  // Turn on the vacuum pump
  digitalWrite(relayPin, LOW); // Relay is activated
  delay(5000); // Pump runs for 5 seconds

  // Turn off the vacuum pump
  digitalWrite(relayPin, HIGH); // Relay is deactivated
  delay(10000); // Pump is off for 10 seconds
}
Note: The relay module used should be capable of handling the current required by the mini vacuum pump. The HIGH and LOW states for the relay may vary depending on the type of relay used. Always check the datasheet for your specific relay module.