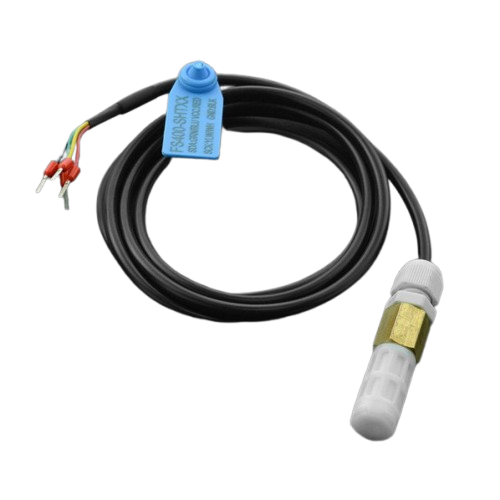
How to Use SHT31 WEATHER-PROOF TEMPERATURE: Examples, Pinouts, and Specs
Introduction
The SHT31 is a digital temperature and humidity sensor designed to deliver precise environmental measurements. Encased in a weather-proof package, it is ideal for outdoor applications where durability and reliability are critical. The sensor communicates via an I2C interface, making it easy to integrate into a wide range of microcontroller-based systems.
Explore Projects Built with SHT31 WEATHER-PROOF TEMPERATURE
Explore Projects Built with SHT31 WEATHER-PROOF TEMPERATURE
Common Applications and Use Cases
- Weather monitoring stations
- Greenhouse climate control
- HVAC systems
- Industrial environmental monitoring
- IoT-based outdoor sensing projects
Technical Specifications
The SHT31 sensor offers high accuracy and robust performance in challenging environments. Below are its key technical details:
| Parameter | Value |
|---|---|
| Supply Voltage | 2.4V to 5.5V |
| Average Current | 2 µA (at 1 measurement per second) |
| Temperature Range | -40°C to +125°C |
| Temperature Accuracy | ±0.3°C (typical) |
| Humidity Range | 0% to 100% RH |
| Humidity Accuracy | ±2% RH (typical) |
| Communication Interface | I2C |
| I2C Address (Default) | 0x44 |
| Weather-Proof Rating | IP67 |
Pin Configuration and Descriptions
The SHT31 sensor typically comes with four pins for easy integration:
| Pin | Name | Description |
|---|---|---|
| 1 | VCC | Power supply input (2.4V to 5.5V) |
| 2 | GND | Ground connection |
| 3 | SDA | I2C data line |
| 4 | SCL | I2C clock line |
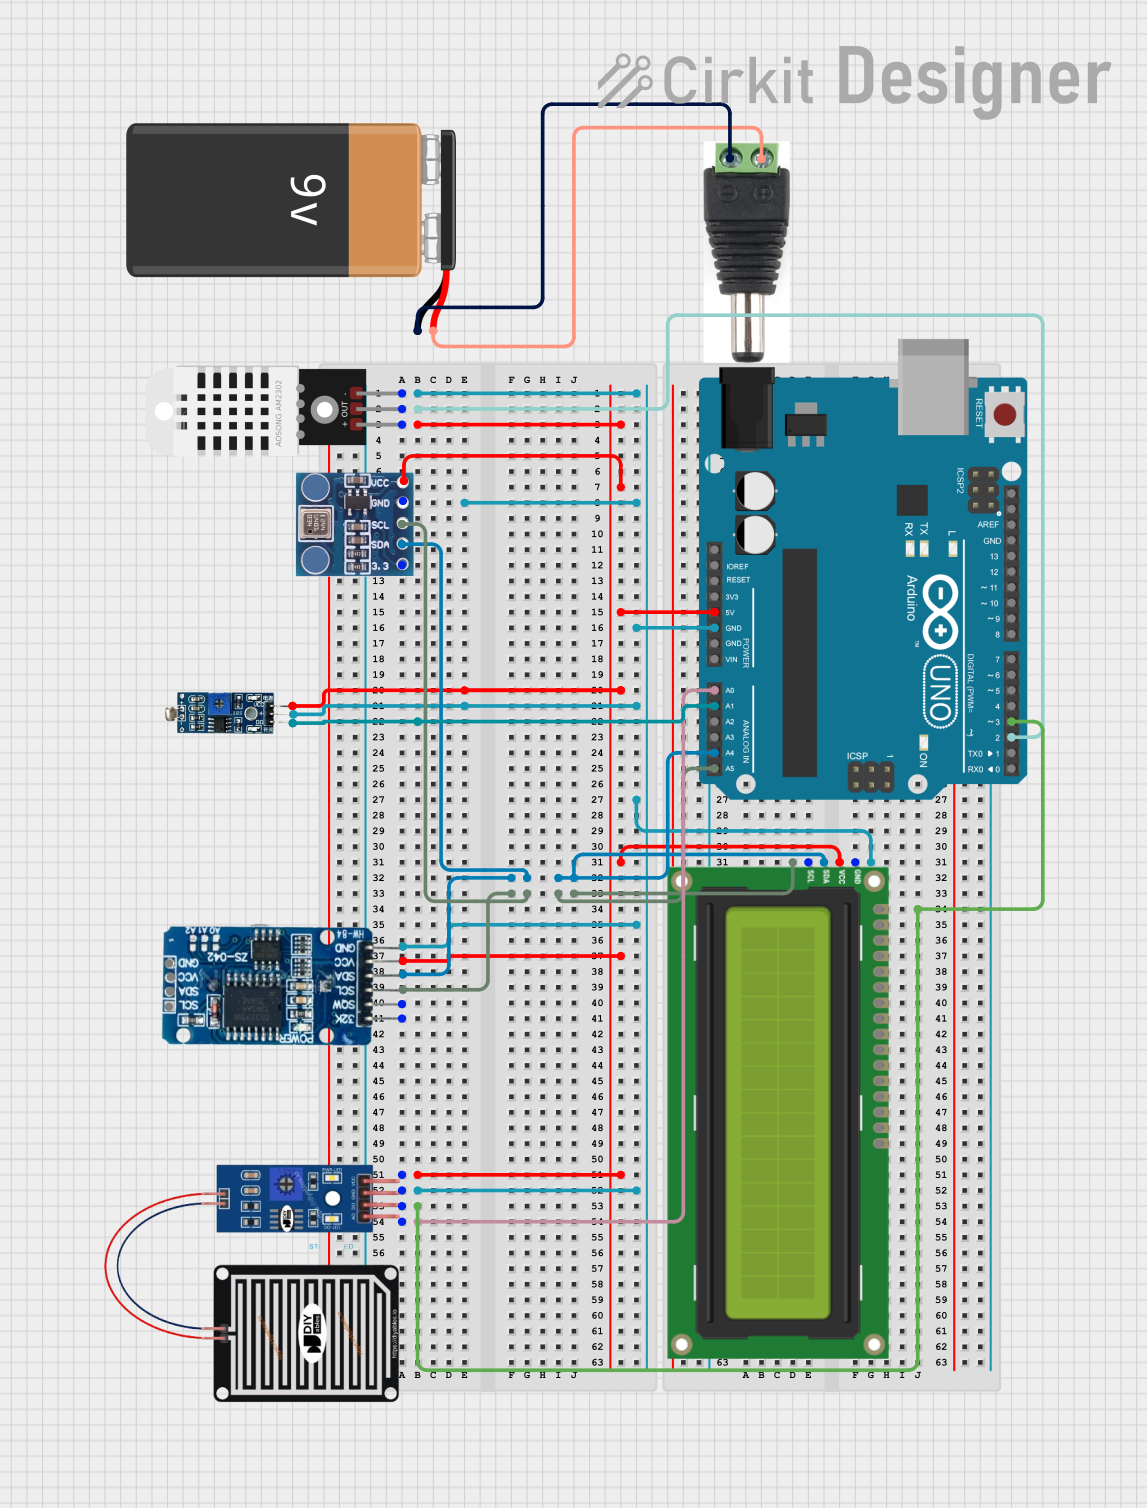
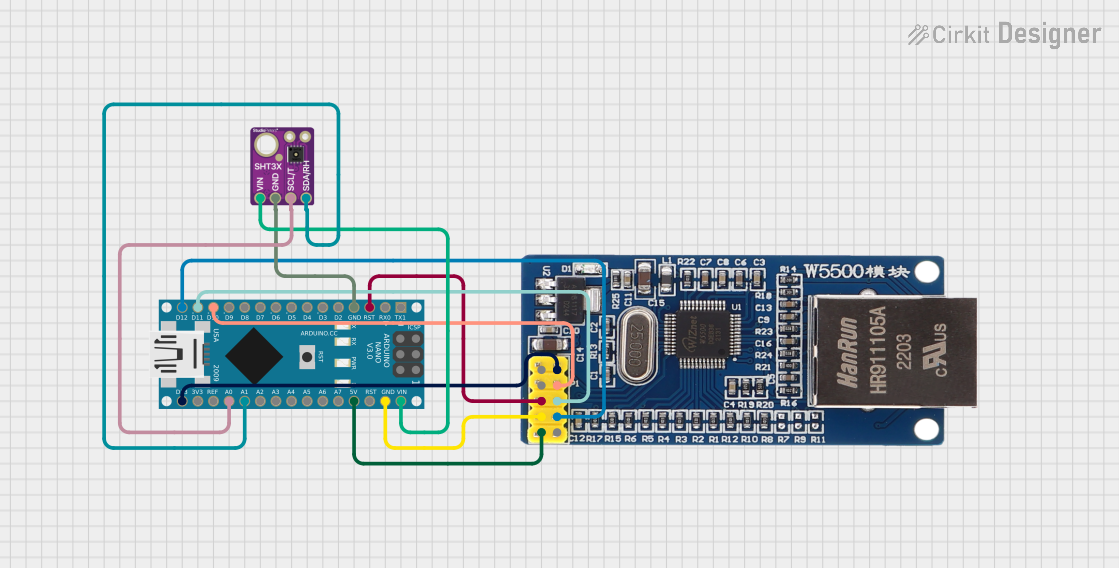
Usage Instructions
How to Use the SHT31 in a Circuit
- Power Supply: Connect the VCC pin to a 3.3V or 5V power source and the GND pin to ground.
- I2C Communication: Connect the SDA and SCL pins to the corresponding I2C pins on your microcontroller. Use pull-up resistors (typically 4.7kΩ) on the SDA and SCL lines if not already present.
- Weather-Proof Installation: Ensure the sensor is mounted in a location where it can measure environmental conditions accurately. Avoid obstructing the sensor's vent.
Important Considerations and Best Practices
- I2C Address: The default I2C address is 0x44. If you need to use multiple SHT31 sensors on the same I2C bus, consult the datasheet for address modification options.
- Cable Length: Keep the I2C cable length as short as possible to avoid signal degradation.
- Environmental Protection: While the sensor is weather-proof, ensure proper sealing of connections to maintain IP67 compliance.
Example Code for Arduino UNO
Below is an example of how to interface the SHT31 sensor with an Arduino UNO using the Adafruit SHT31 library:
#include <Wire.h>
#include "Adafruit_SHT31.h"

// Create an instance of the SHT31 sensor
Adafruit_SHT31 sht31 = Adafruit_SHT31();

void setup() {
  Serial.begin(9600); // Initialize serial communication at 9600 baud
  while (!Serial) delay(10); // Wait for Serial Monitor to open (if needed)

  // Initialize the SHT31 sensor
  if (!sht31.begin(0x44)) { // 0x44 is the default I2C address
    Serial.println("Couldn't find SHT31 sensor!");
    while (1) delay(1); // Halt execution if sensor is not found
  }
  Serial.println("SHT31 sensor initialized.");
}

void loop() {
  // Read temperature and humidity
  float temperature = sht31.readTemperature();
  float humidity = sht31.readHumidity();

  // Check if readings are valid
  if (!isnan(temperature) && !isnan(humidity)) {
    Serial.print("Temperature: ");
    Serial.print(temperature);
    Serial.println(" °C");

    Serial.print("Humidity: ");
    Serial.print(humidity);
    Serial.println(" %");
  } else {
    Serial.println("Failed to read from SHT31 sensor!");
  }

  delay(2000); // Wait 2 seconds before the next reading
}
Troubleshooting and FAQs
Common Issues and Solutions
Sensor Not Detected:
- Ensure the I2C connections (SDA, SCL) are correct and secure.
- Verify that the I2C address (default 0x44) matches the one in your code.
- Check for proper pull-up resistors on the I2C lines.
Incorrect Readings:
- Ensure the sensor is not exposed to direct sunlight or water droplets, as these can affect accuracy.
- Verify that the power supply voltage is within the specified range (2.4V to 5.5V).
Intermittent Communication Failures:
- Reduce the I2C bus speed if using long cables.
- Check for noise or interference on the I2C lines.
FAQs
Q: Can the SHT31 be used indoors?
A: Yes, the SHT31 is suitable for both indoor and outdoor applications.
Q: How do I clean the sensor?
A: Use a soft, dry cloth to clean the sensor. Avoid using liquids or solvents.
Q: Can I use the SHT31 with a 3.3V microcontroller?
A: Yes, the SHT31 operates within a voltage range of 2.4V to 5.5V, making it compatible with 3.3V systems.
Q: What is the maximum cable length for I2C communication?
A: The maximum cable length depends on the pull-up resistor values and the I2C bus speed. For reliable communication, keep the cable length as short as possible (typically less than 1 meter).