How to Use JBL GX428 Speaker: Examples, Pinouts, and Specs
Introduction
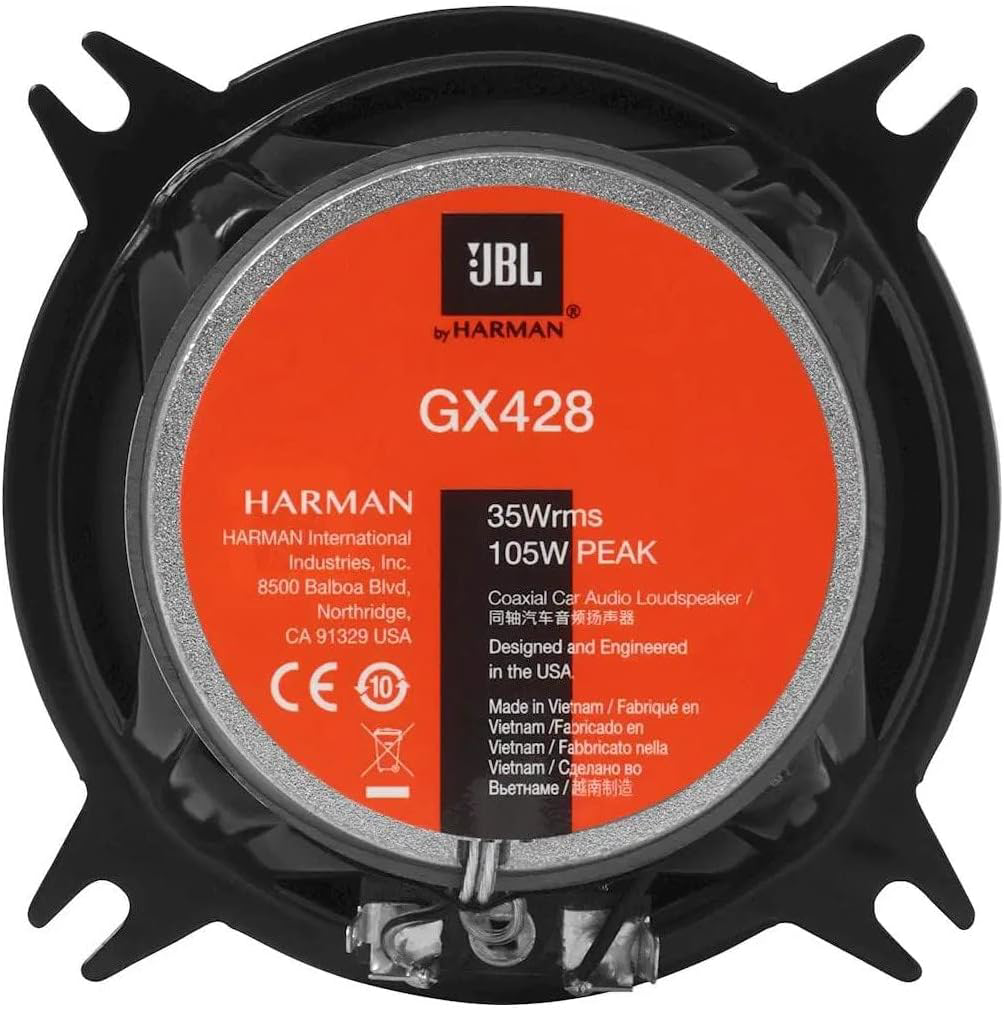
The JBL GX428 is a high-performance coaxial speaker designed to deliver exceptional audio quality in automotive sound systems. Featuring a 4-inch woofer and a 1-inch tweeter, this speaker provides clear sound reproduction with enhanced bass response. Its compact design makes it ideal for installation in a variety of vehicles, ensuring a premium listening experience for music enthusiasts.
Explore Projects Built with JBL GX428 Speaker


Explore Projects Built with JBL GX428 Speaker
Common Applications and Use Cases
- Automotive audio systems for cars, trucks, and SUVs
- Upgrading factory-installed speakers for improved sound quality
- Custom car audio installations
- Use in compact spaces requiring high-quality sound output
Technical Specifications
The JBL GX428 is engineered to provide superior sound performance while maintaining compatibility with most automotive audio systems. Below are the key technical details:
General Specifications
| Parameter | Value |
|---|---|
| Manufacturer | JBL |
| Part ID | GX428 |
| Speaker Type | Coaxial (2-way) |
| Woofer Size | 4 inches |
| Tweeter Size | 1 inch |
| Frequency Response | 75 Hz – 21 kHz |
| Sensitivity (2.83V/1m) | 90 dB |
| Impedance | 2.3 ohms |
| Peak Power Handling | 120 watts |
| RMS Power Handling | 35 watts |
| Mounting Depth | 2 inches (50 mm) |
| Weight | 0.9 kg (approx.) |
Pin Configuration and Descriptions
The JBL GX428 does not have traditional pins but instead uses standard speaker terminals for connection. Below is a description of the terminals:
| Terminal Name | Description |
|---|---|
| Positive (+) | Connects to the positive terminal of the amplifier or head unit. |
| Negative (-) | Connects to the negative terminal of the amplifier or head unit. |
Usage Instructions
How to Use the JBL GX428 in a Circuit
- Determine Compatibility: Ensure your car's audio system or amplifier is compatible with the speaker's impedance (2.3 ohms) and power handling (35W RMS, 120W peak).
- Prepare the Wiring: Use high-quality speaker wires to connect the GX428 to your audio system. Ensure the wires are properly insulated and of appropriate gauge (16-18 AWG is recommended).
- Connect the Terminals:
- Connect the positive terminal of the speaker to the positive output of the amplifier or head unit.
- Connect the negative terminal of the speaker to the negative output of the amplifier or head unit.
- Secure the Speaker: Mount the GX428 in the designated speaker location using the provided screws or brackets. Ensure the speaker is securely fastened to avoid vibrations or movement during operation.
- Test the System: Power on the audio system and play audio to test the speaker. Adjust the equalizer settings for optimal sound quality.
Important Considerations and Best Practices
- Avoid Overpowering: Do not exceed the speaker's RMS power rating (35W) to prevent damage.
- Proper Polarity: Ensure correct polarity when connecting the speaker terminals to avoid phase issues, which can degrade sound quality.
- Sealed Installation: For optimal bass response, ensure the speaker is installed in a properly sealed enclosure or mounting location.
- Break-In Period: Allow the speaker to play at moderate volume for a few hours to achieve optimal performance.
Example: Connecting to an Arduino UNO
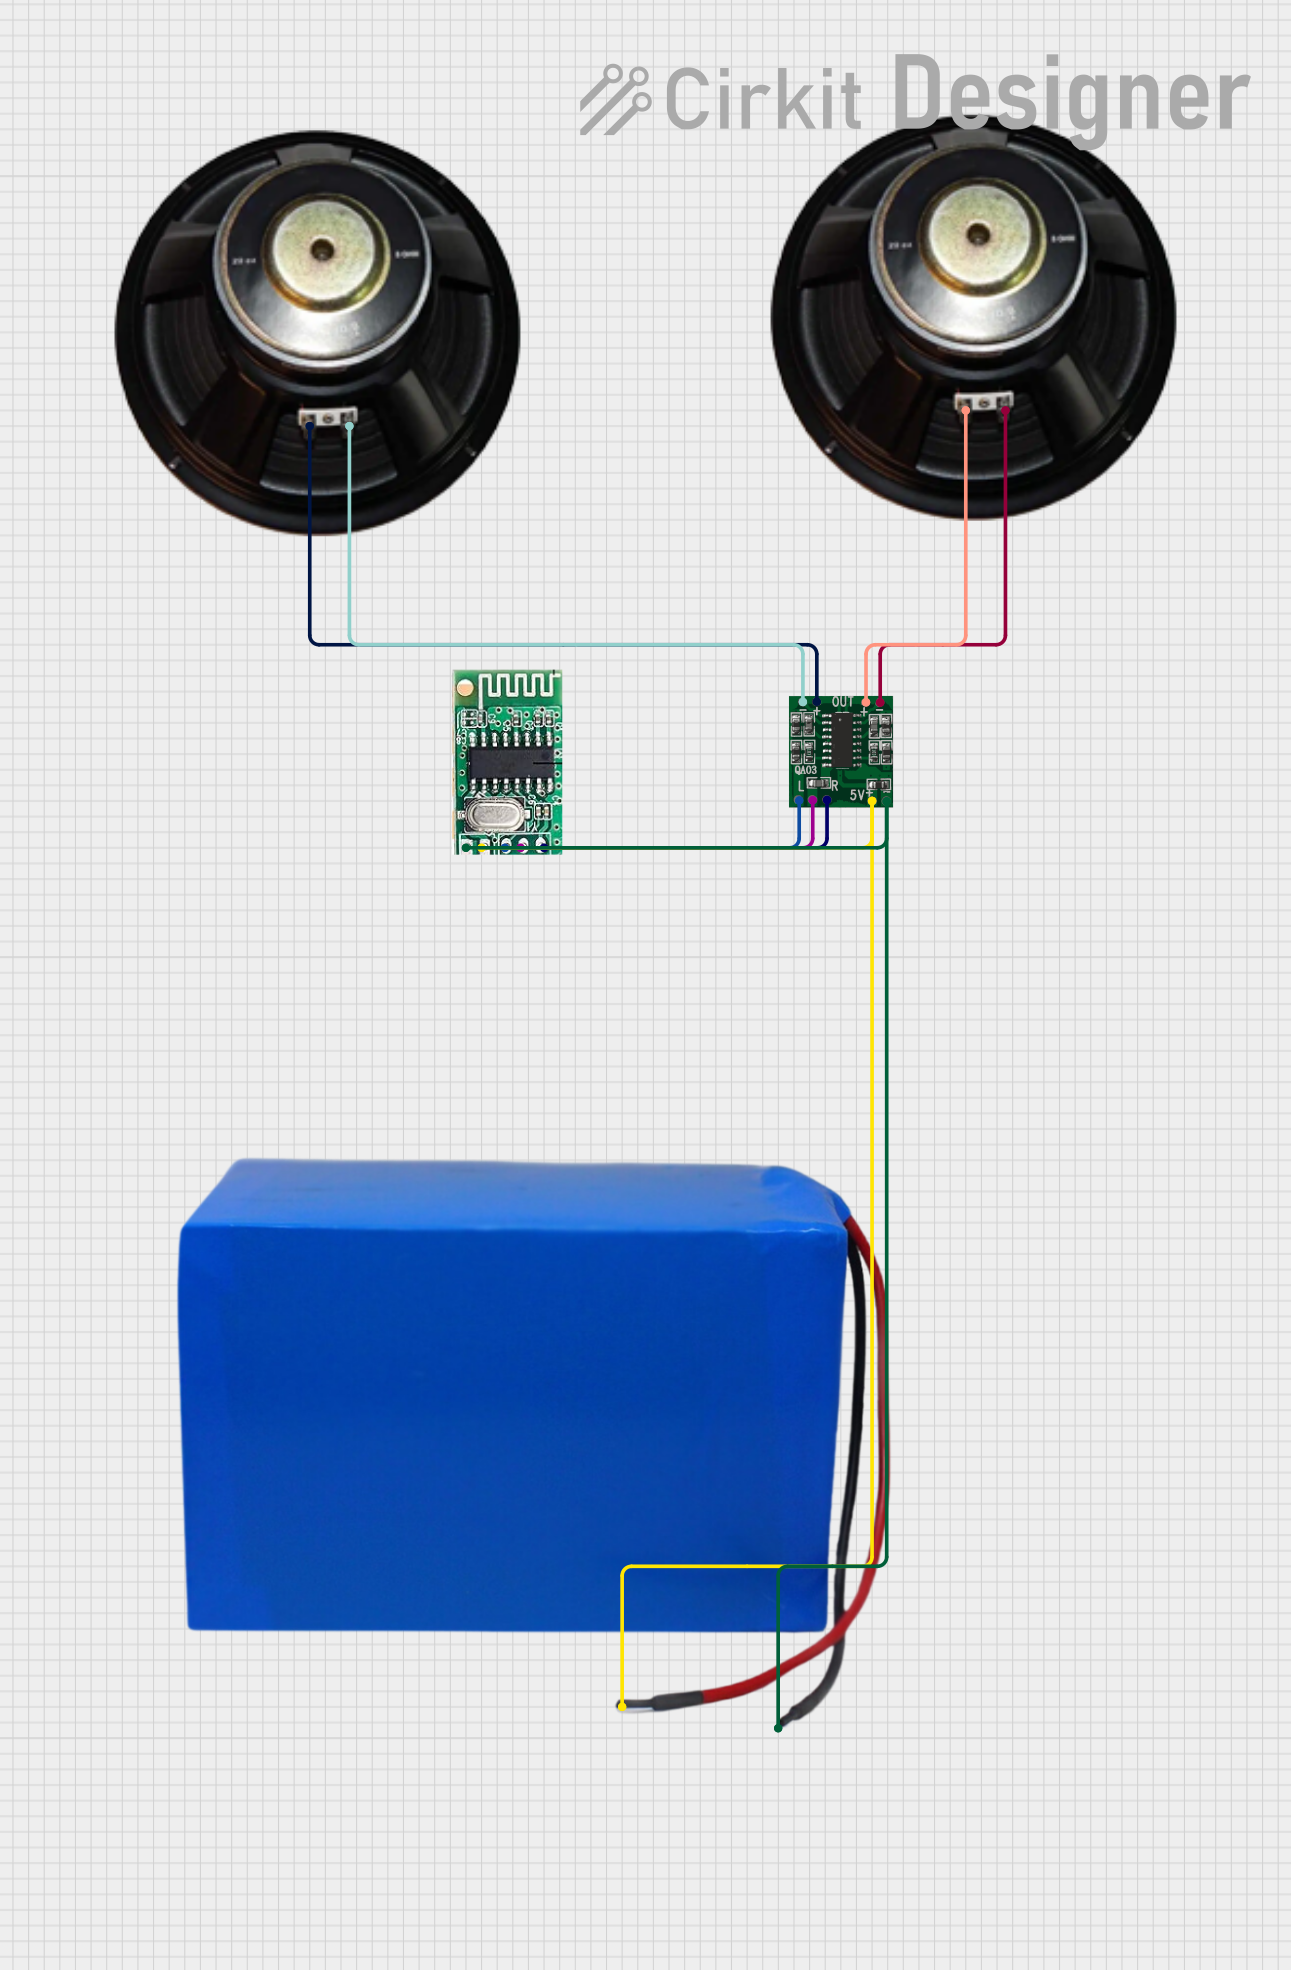
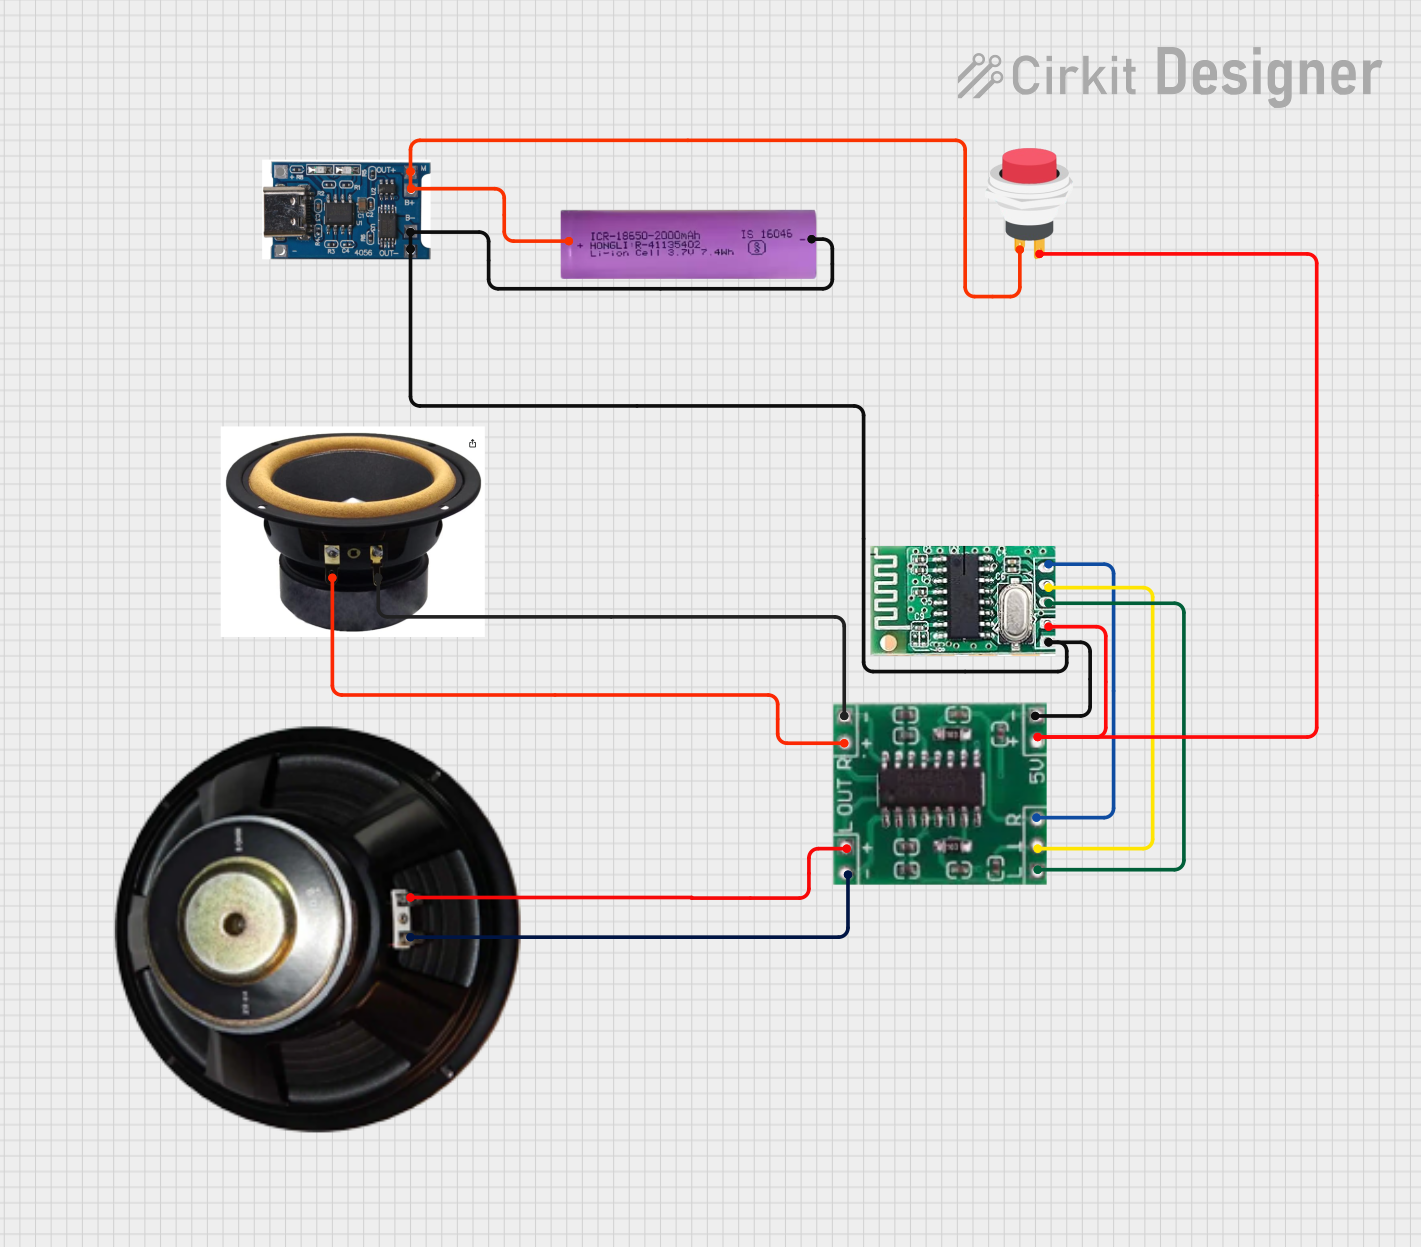
While the JBL GX428 is not directly compatible with an Arduino UNO due to its power and impedance requirements, you can use an external amplifier module to drive the speaker. Below is an example of how to control an amplifier module using an Arduino UNO:
// Example: Controlling an amplifier module with Arduino UNO
// This code uses PWM to control the volume of the amplifier module.
// Note: The amplifier module must be connected to the JBL GX428 speaker.

const int pwmPin = 9; // PWM output pin connected to the amplifier module

void setup() {
  pinMode(pwmPin, OUTPUT); // Set the PWM pin as an output
}

void loop() {
  // Generate a PWM signal to control the amplifier volume
  for (int dutyCycle = 0; dutyCycle <= 255; dutyCycle++) {
    analogWrite(pwmPin, dutyCycle); // Increase volume gradually
    delay(10); // Delay for smooth transition
  }
  for (int dutyCycle = 255; dutyCycle >= 0; dutyCycle--) {
    analogWrite(pwmPin, dutyCycle); // Decrease volume gradually
    delay(10); // Delay for smooth transition
  }
}
Note: Ensure the amplifier module is compatible with the Arduino UNO and the JBL GX428 speaker. The Arduino cannot directly drive the speaker due to its power limitations.
Troubleshooting and FAQs
Common Issues and Solutions
| Issue | Possible Cause | Solution |
|---|---|---|
| No sound from the speaker | Incorrect wiring or loose connections | Verify all connections and ensure proper polarity. |
| Distorted sound | Overpowering or underpowering the speaker | Ensure the amplifier's output matches the speaker's power rating. |
| Low bass response | Poor installation or unsealed enclosure | Check the mounting location and ensure a proper seal. |
| Speaker rattling or vibration | Loose mounting or screws | Tighten all screws and ensure the speaker is securely mounted. |
FAQs
Can I use the JBL GX428 with a factory-installed car audio system?
- Yes, the GX428 is compatible with most factory-installed systems. However, ensure the system can handle the speaker's impedance (2.3 ohms).
What type of amplifier should I use with the GX428?
- Use an amplifier that provides 35W RMS per channel at 2.3 ohms for optimal performance.
Do I need a crossover for the GX428?
- No, the GX428 has an integrated crossover for the woofer and tweeter.
Can I install the GX428 in a home audio system?
- While designed for automotive use, the GX428 can be used in home audio systems with appropriate enclosures and amplification.
By following this documentation, you can ensure proper installation and optimal performance of the JBL GX428 speaker in your audio system.