
How to Use 12v 4 pin socket relay: Examples, Pinouts, and Specs
 Design with 12v 4 pin socket relay in Cirkit Designer
Introduction
The 12V 4-pin socket relay is an electromechanical switch that allows a low-power control signal to operate high-power devices. It is widely used in applications where electrical isolation and high-current switching are required. This relay operates at a 12V DC input and features a 4-pin configuration, making it simple to integrate into various circuits.
Explore Projects Built with 12v 4 pin socket relay
 Open Project in Cirkit Designer
 Open Project in Cirkit Designer
 Open Project in Cirkit Designer
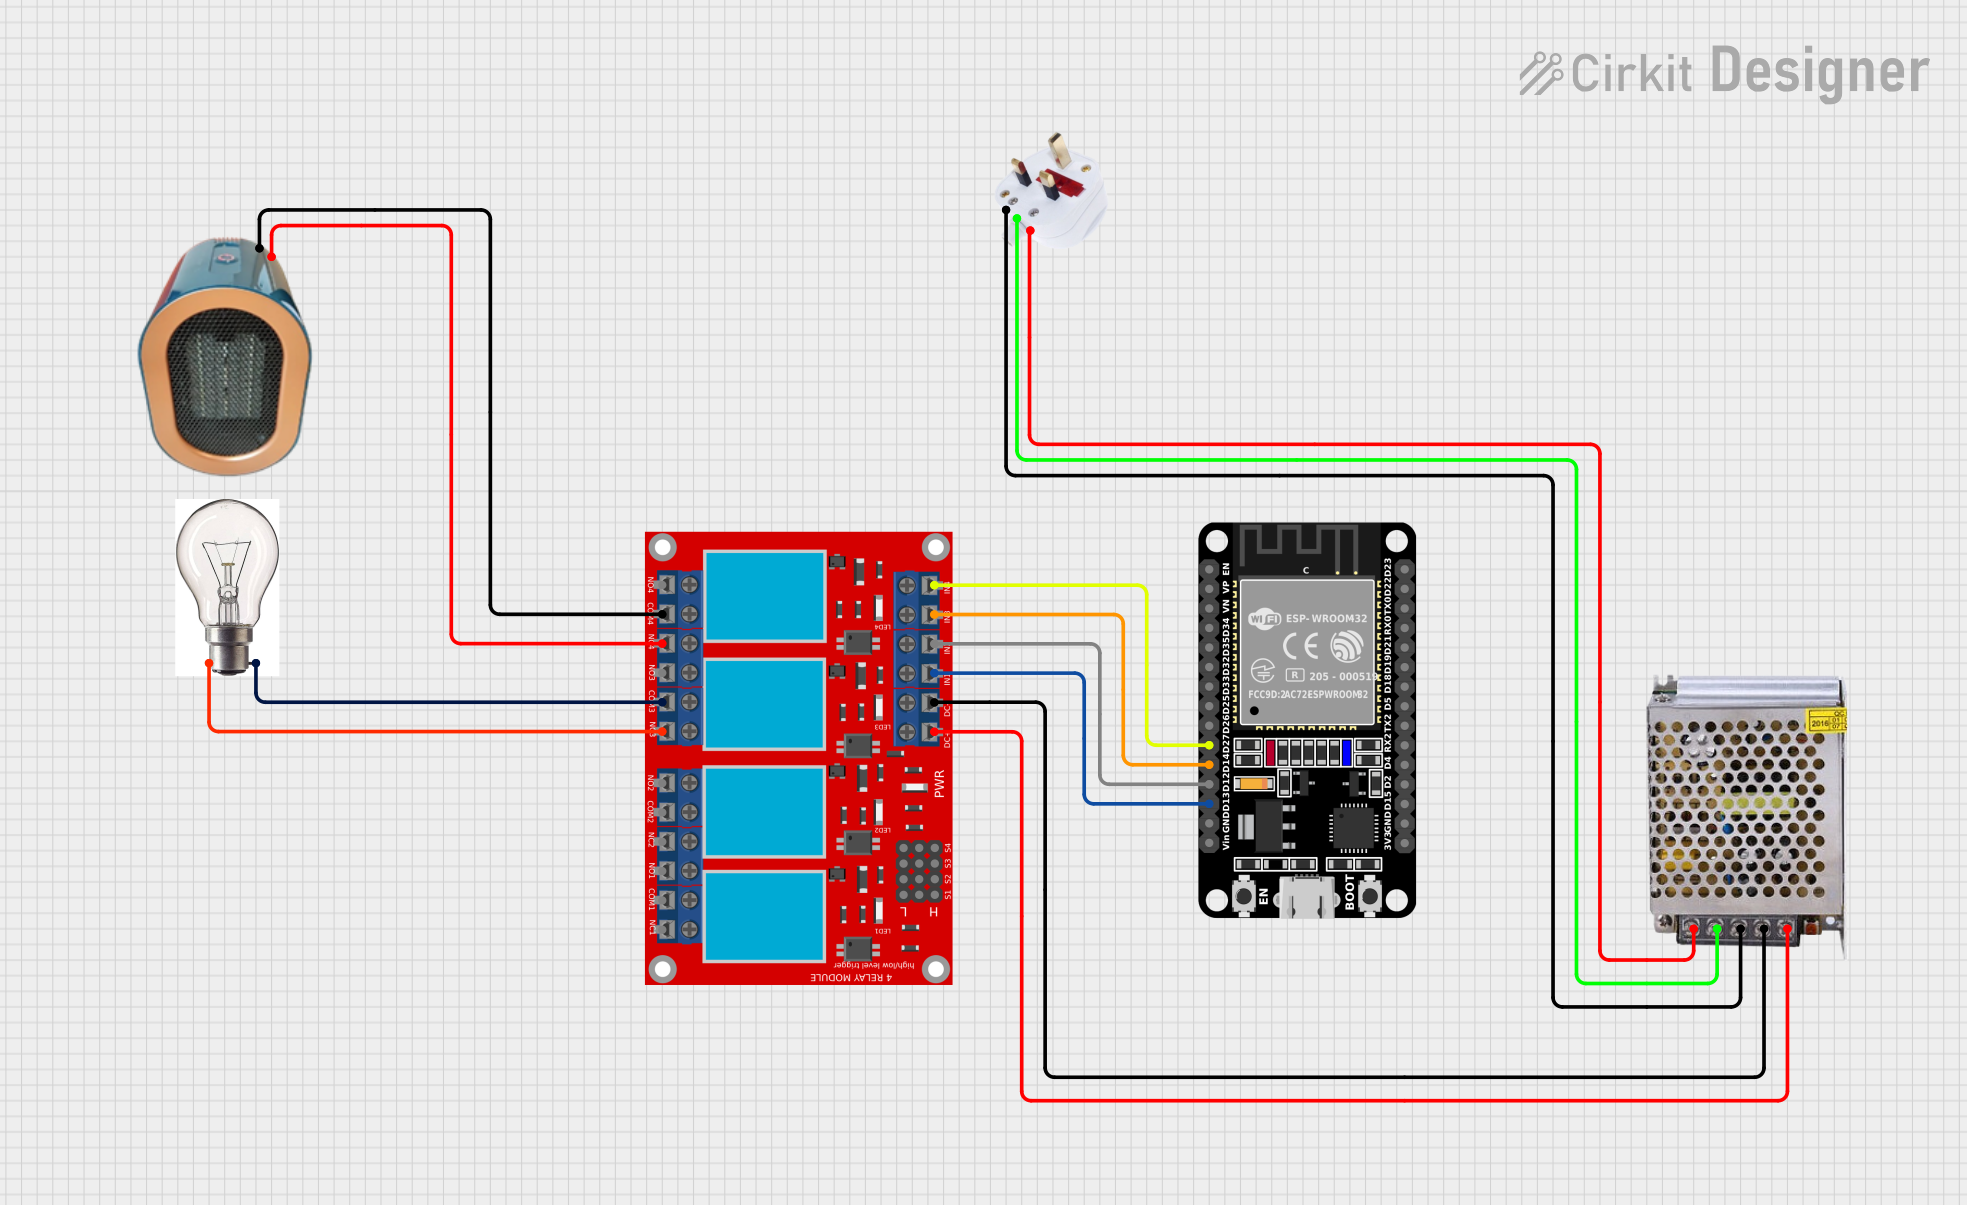 Open Project in Cirkit Designer
Explore Projects Built with 12v 4 pin socket relay
Open Project in Cirkit DesignerOpen Project in Cirkit DesignerOpen Project in Cirkit DesignerOpen Project in Cirkit DesignerCommon Applications
- Automotive systems (e.g., controlling headlights, horns, or fans)
- Home automation (e.g., switching appliances or lights)
- Industrial control systems
- Microcontroller-based projects (e.g., Arduino or Raspberry Pi)
Technical Specifications
Below are the key technical details of the 12V 4-pin socket relay:
| Parameter | Value |
|---|---|
| Operating Voltage | 12V DC |
| Coil Resistance | ~320 Ohms |
| Switching Voltage | Up to 250V AC / 30V DC |
| Switching Current | Up to 10A |
| Contact Type | SPST (Single Pole Single Throw) |
| Isolation | Electrical isolation between control and load sides |
| Dimensions | Varies by manufacturer, typically compact |
Pin Configuration
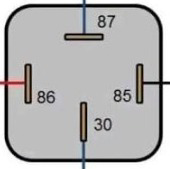
The 4-pin configuration of the relay is as follows:
| Pin Number | Name | Description |
|---|---|---|
| 1 | Coil (+) | Positive terminal of the relay coil (connect to 12V DC control signal). |
| 2 | Coil (-) | Negative terminal of the relay coil (connect to ground). |
| 3 | Common (COM) | Common terminal for the load circuit. |
| 4 | Normally Open (NO) | Load terminal that connects to COM when the relay is activated. |
Usage Instructions
How to Use the 12V 4-Pin Socket Relay in a Circuit
- Power the Relay Coil: Connect the coil pins (1 and 2) to a 12V DC power source. Pin 1 should be connected to the positive terminal, and Pin 2 to ground.
- Connect the Load:
- Attach the load's power source to the COM pin (Pin 3).
- Connect the load device (e.g., motor, light) to the NO pin (Pin 4).
- Control the Relay: Use a low-power control signal (e.g., from a microcontroller or switch) to energize the relay coil. When the coil is energized, the NO pin connects to the COM pin, completing the circuit and powering the load.
Important Considerations
- Diode Protection: Always place a flyback diode (e.g., 1N4007) across the relay coil terminals to protect the control circuit from voltage spikes caused by the collapsing magnetic field when the relay is deactivated.
- Current Ratings: Ensure the load's current does not exceed the relay's maximum switching current (10A).
- Isolation: The relay provides electrical isolation between the control and load circuits, making it safe for high-power applications.
Example: Connecting to an Arduino UNO
Below is an example of how to control the relay using an Arduino UNO:
Circuit Connections
- Connect Pin 1 (Coil +) to a digital output pin on the Arduino (e.g., Pin 7) through a 1kΩ resistor.
- Connect Pin 2 (Coil -) to the Arduino's GND.
- Connect the load circuit to Pins 3 (COM) and 4 (NO) as described above.
Arduino Code
// Define the relay control pin
const int relayPin = 7;

void setup() {
  pinMode(relayPin, OUTPUT); // Set the relay pin as an output
  digitalWrite(relayPin, LOW); // Ensure the relay is off at startup
}

void loop() {
  digitalWrite(relayPin, HIGH); // Activate the relay
  delay(5000); // Keep the relay on for 5 seconds
  digitalWrite(relayPin, LOW); // Deactivate the relay
  delay(5000); // Keep the relay off for 5 seconds
}
Best Practices
- Use a transistor (e.g., 2N2222) or a relay driver IC (e.g., ULN2003) to control the relay if the microcontroller cannot supply sufficient current.
- Avoid switching inductive loads (e.g., motors) without proper snubber circuits to prevent damage to the relay contacts.
Troubleshooting and FAQs
Common Issues
Relay Not Activating
- Cause: Insufficient voltage or current to the relay coil.
- Solution: Verify that the control signal provides 12V DC and sufficient current (typically ~37.5mA).
Load Not Powering On
- Cause: Incorrect wiring of the load circuit.
- Solution: Ensure the load is connected to the COM and NO pins, and the relay is activated.
Relay Buzzing Noise
- Cause: Unstable or insufficient power supply to the relay coil.
- Solution: Use a stable 12V DC power source and check for loose connections.
Burnt Relay Contacts
- Cause: Exceeding the relay's maximum current rating.
- Solution: Ensure the load's current is within the relay's 10A limit.
FAQs
Can I use this relay with a 5V control signal? No, this relay requires a 12V DC control signal. Use a 5V relay or a transistor circuit to step up the control voltage.
Is the relay suitable for AC loads? Yes, the relay can switch AC loads up to 250V, provided the current does not exceed 10A.
Do I need a heatsink for the relay? No, the relay does not require a heatsink. However, ensure proper ventilation if switching high-power loads continuously.
This concludes the documentation for the 12V 4-pin socket relay.