How to Use pt1000: Examples, Pinouts, and Specs
Introduction
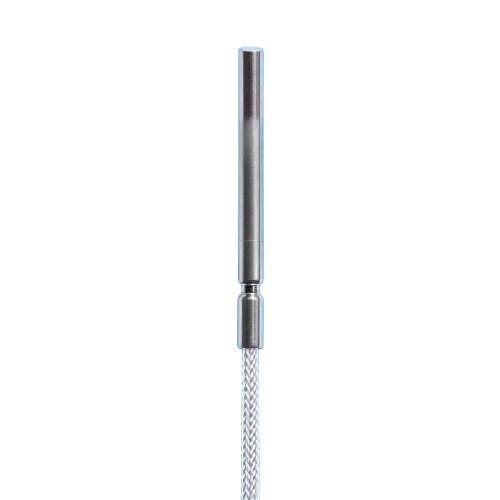
The PT1000 is a platinum resistance temperature sensor designed for precise temperature measurement. It operates based on the principle that the resistance of platinum changes predictably with temperature. At 0°C, the PT1000 has a resistance of 1000 ohms, making it highly accurate and stable across a wide temperature range. This sensor is commonly used in industrial, medical, and environmental monitoring applications due to its reliability and precision.
Explore Projects Built with pt1000


Explore Projects Built with pt1000
Common Applications:
- Industrial temperature monitoring and control
- HVAC systems
- Medical devices (e.g., incubators, sterilizers)
- Environmental monitoring systems
- Laboratory equipment
Technical Specifications
The PT1000 sensor is manufactured by ESP32 S3 and is identified by the part ID PT1000. Below are its key technical details:
Key Specifications:
| Parameter | Value |
|---|---|
| Resistance at 0°C | 1000 Ω |
| Temperature Range | -200°C to +850°C |
| Accuracy Class | Class A or Class B (varies) |
| Temperature Coefficient | ~0.00385 Ω/Ω/°C (IEC 60751) |
| Material | Platinum |
| Response Time | Typically 0.3 to 10 seconds |
Pin Configuration:
The PT1000 is typically a two-wire sensor, but it can also be configured as a three-wire or four-wire sensor for improved accuracy. Below is the pin configuration for the two-wire setup:
| Pin Number | Description |
|---|---|
| 1 | Platinum resistance element |
| 2 | Platinum resistance element |
For three-wire and four-wire configurations, additional wires are used to compensate for lead resistance.
Usage Instructions
How to Use the PT1000 in a Circuit:
Wiring the Sensor:
- Connect one end of the PT1000 to the positive terminal of the measurement circuit.
- Connect the other end to the negative terminal or ground.
- For three-wire or four-wire configurations, connect the additional wires to the appropriate terminals of the measurement device to compensate for lead resistance.
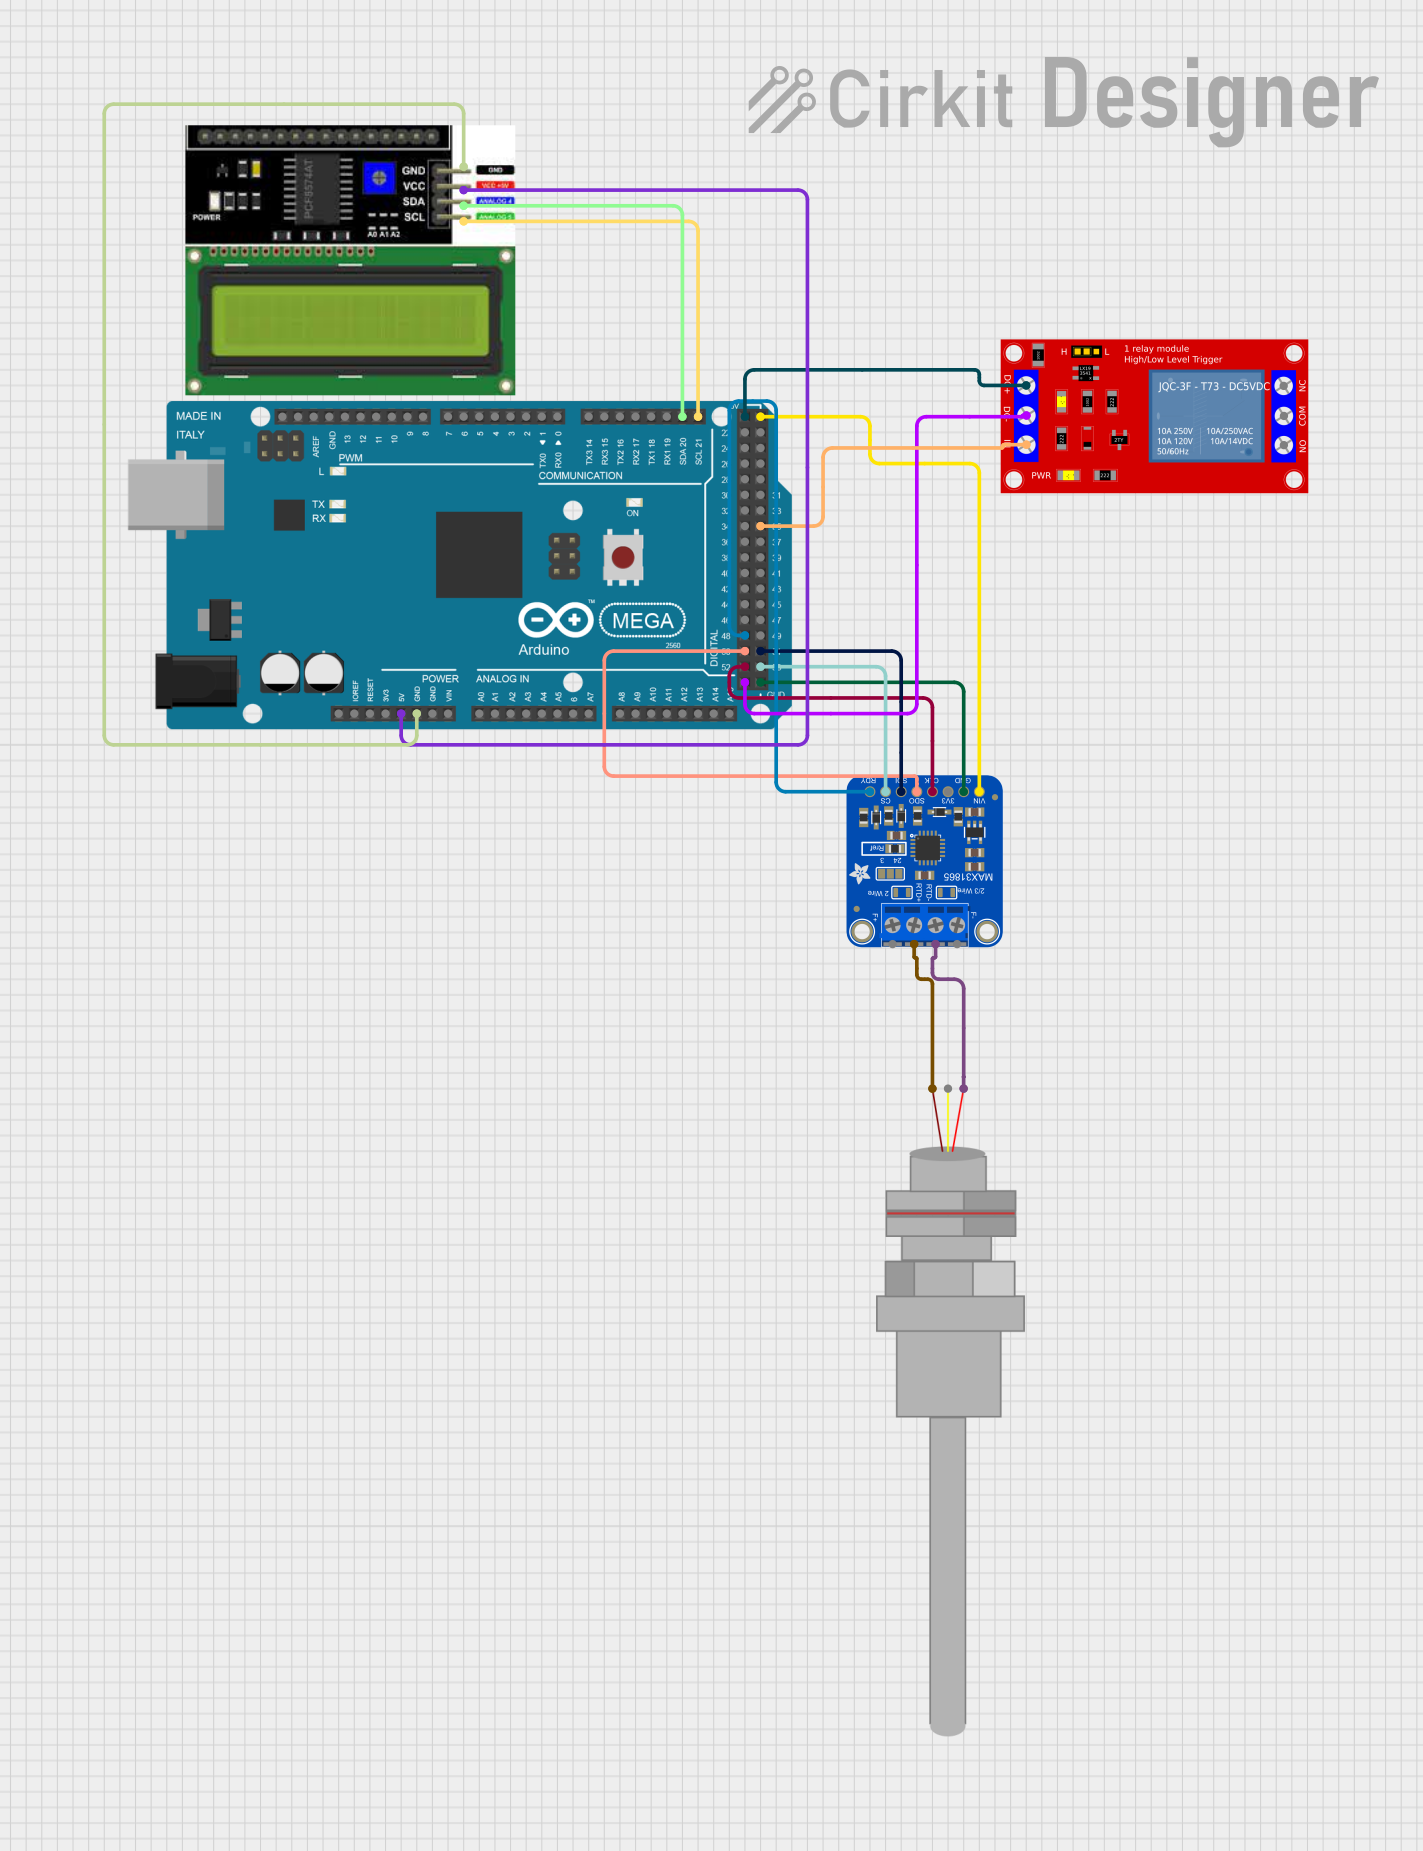
Interfacing with a Microcontroller:
- The PT1000 requires a signal conditioning circuit (e.g., a Wheatstone bridge or a dedicated RTD amplifier) to convert its resistance change into a voltage signal.
- Use an analog-to-digital converter (ADC) to read the voltage signal from the sensor.
- If using an Arduino or ESP32, ensure the ADC resolution is sufficient for accurate temperature readings.
Example Circuit:
- Use a precision resistor in series with the PT1000 to form a voltage divider.
- Connect the output of the voltage divider to the ADC pin of the microcontroller.
Example Code for ESP32 S3:
Below is an example of interfacing the PT1000 with an ESP32 S3 using an ADC pin:
// PT1000 Temperature Sensor Example with ESP32 S3
// This code reads the voltage from the PT1000 and calculates the temperature.

const int PT1000_PIN = 34; // ADC pin connected to the PT1000
const float REF_RESISTOR = 1000.0; // Reference resistor value in ohms
const float ADC_MAX_VOLTAGE = 3.3; // Maximum ADC voltage (ESP32 S3)
const int ADC_RESOLUTION = 4095; // 12-bit ADC resolution
const float ALPHA = 0.00385; // Temperature coefficient for PT1000

void setup() {
  Serial.begin(115200); // Initialize serial communication
  analogReadResolution(12); // Set ADC resolution to 12 bits
}

void loop() {
  int adcValue = analogRead(PT1000_PIN); // Read ADC value
  float voltage = (adcValue / (float)ADC_RESOLUTION) * ADC_MAX_VOLTAGE;

  // Calculate resistance of PT1000
  float resistance = (REF_RESISTOR * voltage) / (ADC_MAX_VOLTAGE - voltage);

  // Calculate temperature using the PT1000 formula
  float temperature = (resistance - 1000) / (1000 * ALPHA);

  // Print the temperature to the Serial Monitor
  Serial.print("Temperature: ");
  Serial.print(temperature);
  Serial.println(" °C");

  delay(1000); // Wait for 1 second before the next reading
}
Important Considerations:
- Signal Conditioning: Use a high-precision amplifier or ADC to minimize noise and improve accuracy.
- Lead Resistance Compensation: For long wires, use a three-wire or four-wire configuration to eliminate errors caused by lead resistance.
- Calibration: Periodically calibrate the sensor to maintain accuracy.
- Temperature Range: Ensure the sensor is used within its specified temperature range (-200°C to +850°C).
Troubleshooting and FAQs
Common Issues:
Inaccurate Temperature Readings:
- Cause: Lead resistance in long wires.
- Solution: Use a three-wire or four-wire configuration to compensate for lead resistance.
No Output Signal:
- Cause: Incorrect wiring or damaged sensor.
- Solution: Verify the wiring and check the sensor's resistance with a multimeter.
Fluctuating Readings:
- Cause: Electrical noise or unstable power supply.
- Solution: Use proper shielding and a stable power source.
ADC Saturation:
- Cause: Voltage exceeds the ADC input range.
- Solution: Adjust the voltage divider or use an external ADC with a higher input range.
FAQs:
Q: Can the PT1000 be used with any microcontroller?
A: Yes, but it requires a signal conditioning circuit and an ADC with sufficient resolution.
Q: How do I choose between Class A and Class B sensors?
A: Class A sensors offer higher accuracy but are more expensive. Choose based on your application's accuracy requirements.
Q: Can I use the PT1000 in extreme environments?
A: Yes, the PT1000 is designed to operate in a wide temperature range (-200°C to +850°C), but ensure the surrounding components can also withstand these conditions.
Q: How often should I calibrate the PT1000?
A: Calibration frequency depends on the application, but annual calibration is recommended for most use cases.